By Lisa Gutierrez on 10/08/2012 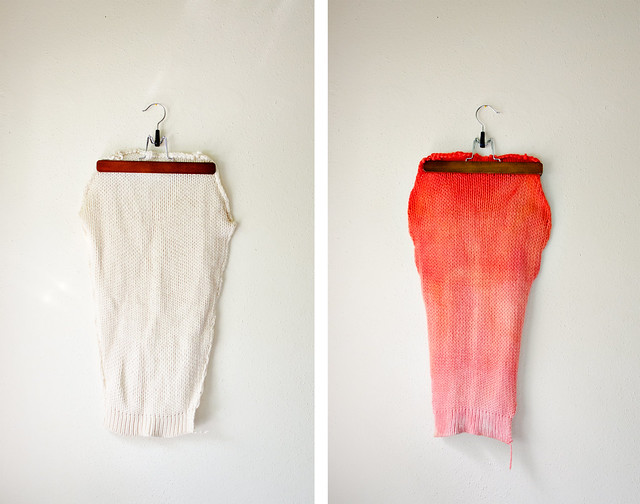
Last month, I got the urge to dye yarn. I didn’t have any bare skeins hanging around, but I did remember I had pieces of a white wool sweater in my closet. Waaay back in 2010, I thrifted a large white wool sweater. It had the perfect seams to unraveling, so I took it apart almost immediately. …Then we bought a house and moved. It got trapped in a box of random crafty shit and I just forgot about it for a year. Last year, I dyed one of the sleeves and then last month I finally dyed the other.
I like sleeve dyeing because it makes me feel like I have more control over where the dye goes. Last year, I used these directions from craftystylish, but this time I wanted to try something different.
I wanted a gradient/ombre look, so I thought about how people get that with shirts by putting small parts of the fabric in at a time. Would it work? YES! I probably made it a little more difficult than it needed to be, but I was working with what I had–2 packs of pineapple Kool-Aid and 1 pack of cherry.
I started by putting my sleeve in a bowl of water with a splash of vinegar. I made sure it was completely saturated, then I put it in the microwave for a minute to temper it. While it was heating up, I mixed the 2 packs of pineapple with 1 cup of vinegar and 1 cup of water and put it in a pot to heat up. I pulled my bowl out of the microwave and lifted the sleeve out (over the bowl, because it was dripping), gently squeezing a bit of the excess water out. I was able to handle it with my bare hands, but use caution if it feels too hot to you.
I started by dipping about 6-8 inches, counting to ten and dipping another 6 inches. I could see a lot of the dye getting absorbed pretty quickly and by the time I got to the last bit, there was hardly any yellow coming off my liquid. I quickly mixed the pack of cherry and 2 cups of water and then lifted my sleeve over the pot, mixed in the cherry and started dipping again. by the time I got to the top, the water was pink. Yay!
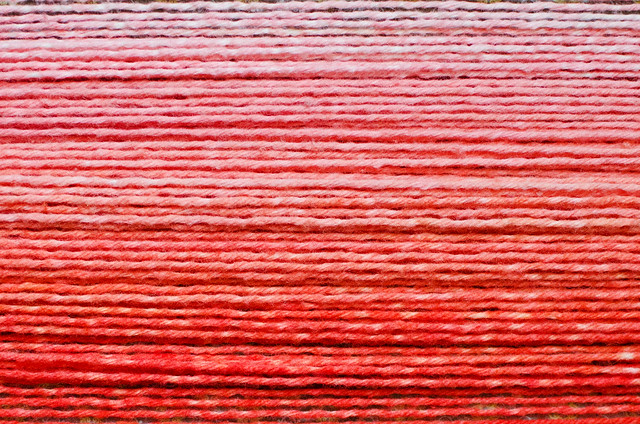
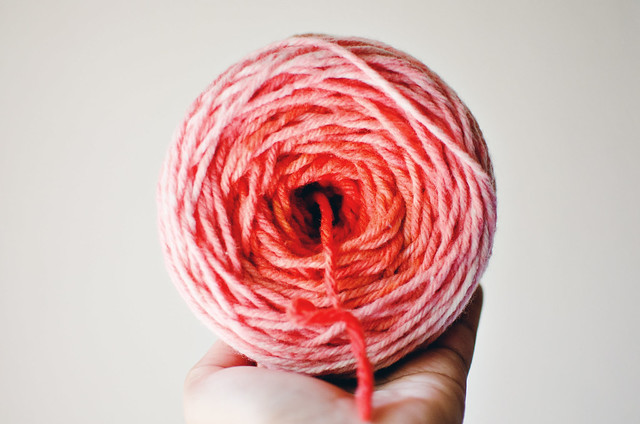
I let it sit in the warming water for a few quick minutes (no boiling!) and then I rinsed it with hot water, slowly getting the temperature down. When I could handle it, I put a dash of baby shampoo in to get any excess dye out. After it was done, I rolled it up in a towel and squeezed out most of the water, then let it hang in front of a fan for a few hours. Once dry, I went about the arduous task of unraveling and getting this yarn into a skein, which entailed ANOTHER bath (once unraveled). It was all worth it, as it looked so pretty wound into a ball.

I had various shades of coral and pink throughout. I was afraid the mix would be too orange, but it came out so lovely!
It took another week or two for me to finally knit something out of it, but here it is! A basic knit hat. The yarn was pretty chunky, so I was able to make a 60-st hat in a day.

It was big enough for me to tuck my hair into.
Do you like to dye your own yarn? Have you ever tried dyeing a sweater sleeve then re-purposing the yarn into something else? I’ve dyed with Kool-Aid before, but this is the first time I’ve actually tried to get the colors to look a certain way.
Pin It
By Lisa Gutierrez on 09/25/2012 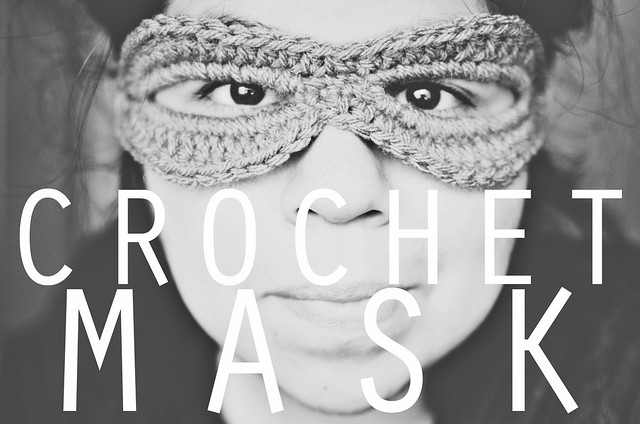
With October fast-approaching, I thought it was time to share this quick pattern.
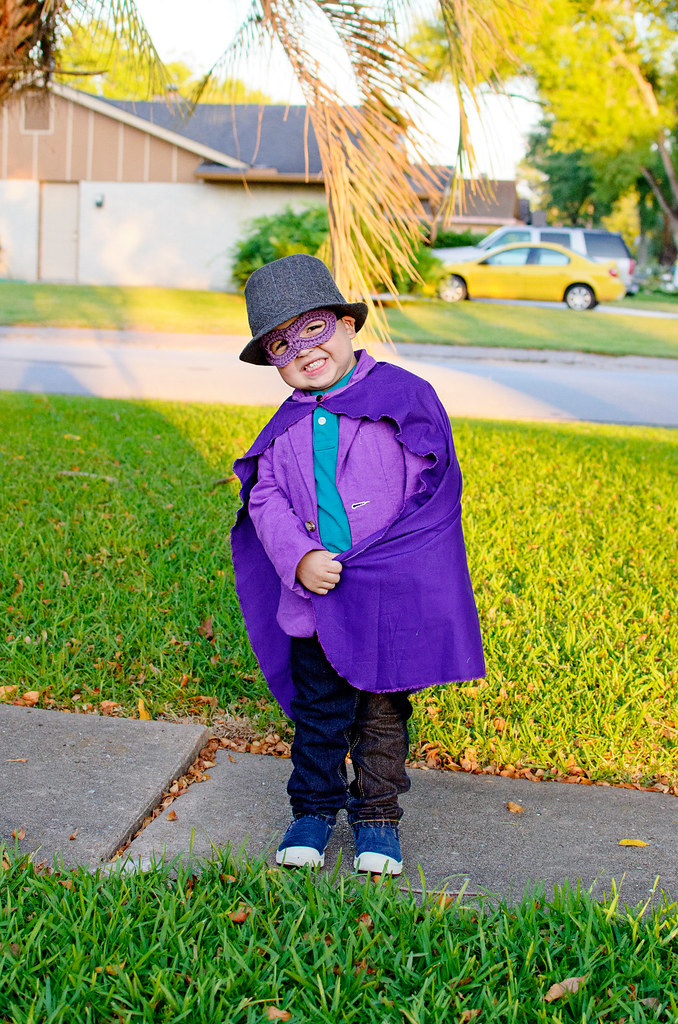
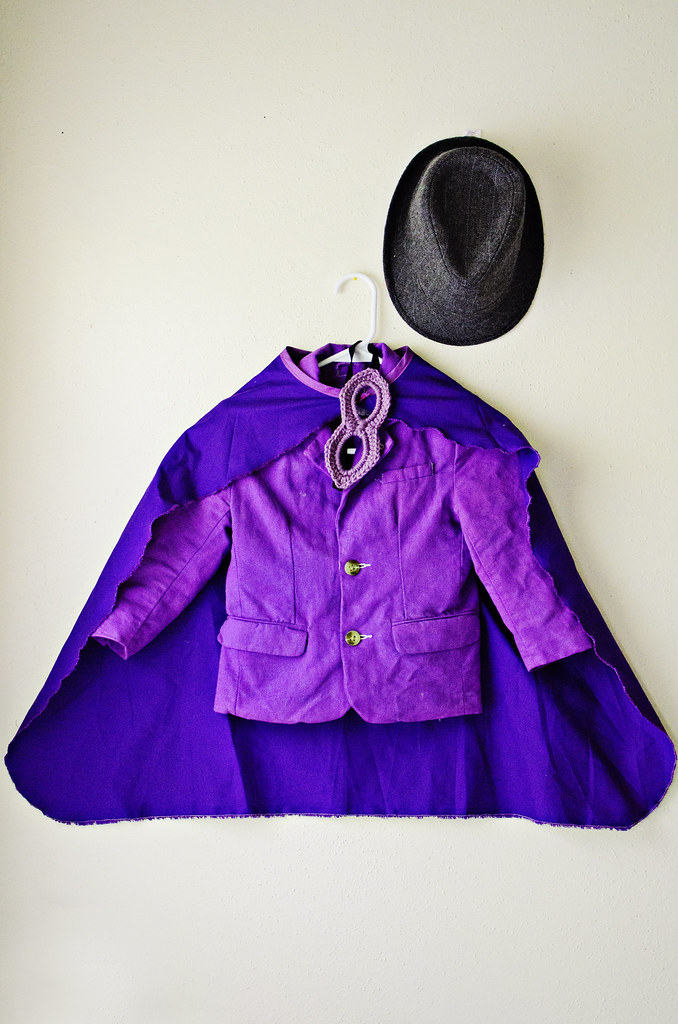
Andrew, who’s 4, has decided he wants to be Darkwing Duck for Halloween, this year. Yes, the cartoon character from the early 90s. I can thank my husband for introducing that one to the boys. He’s dressed in a purple double-breasted blazer, a cape, mask, and hat (no pants because cartoon ducks don’t wear pants). I searched a few thrift stores for a purple blazer, but couldn’t find one. I DID find a white linen/cotton blazer to dye, though. I also picked up some purple fabric to make a cape and he has a gray fedora that will do just fine. I only needed to figure out the mask situation (and find him some white pants, because no way he’s going pantless).
I know I could make one out of the same purple fabric, but I got the idea in my head that he needed a mask made of yarn. I wasn’t near my computer when I made this grand decision, so I whipped one up just winging it. The results were pretty damn cute.
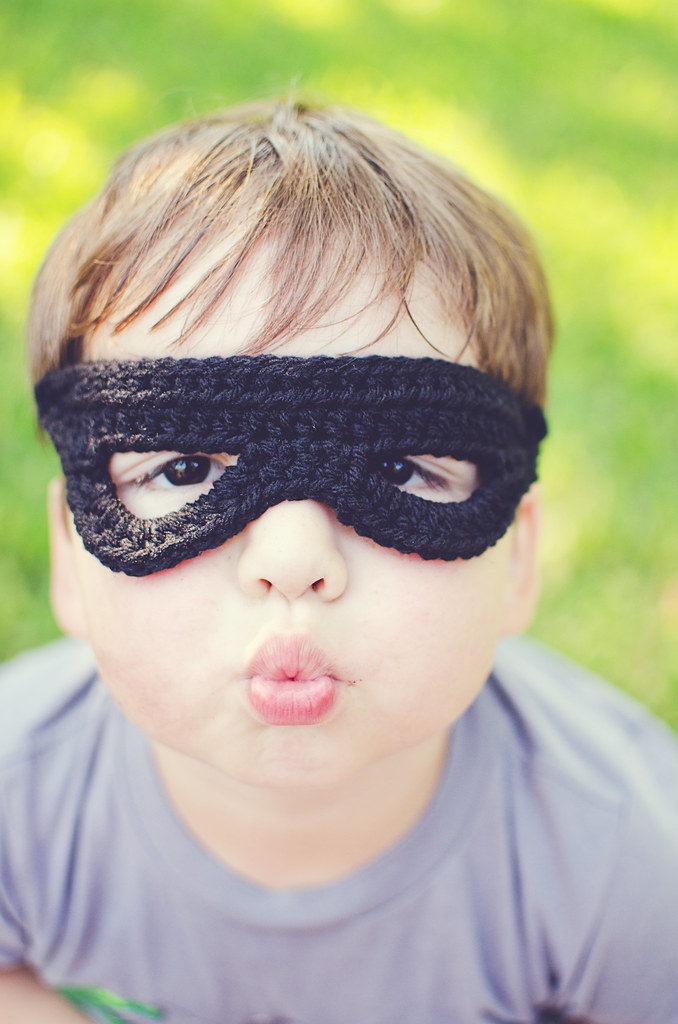
I would have just called it a day after that first try, but I soon realized the elastic was in the wrong place. I made it sort of cat-eye shaped, so the elastic is attached at the top corners. Since the top sits on his eyebrows, whenever he emoted, the mask shifted. Big boo! I spent the evening thinking about how else to make it and the next morning I crocheted and frogged and crocheted and frogged and finally got a simple shape that was also simple to crochet (2 rounds!!). Make a bunch and hand them out at Halloween!
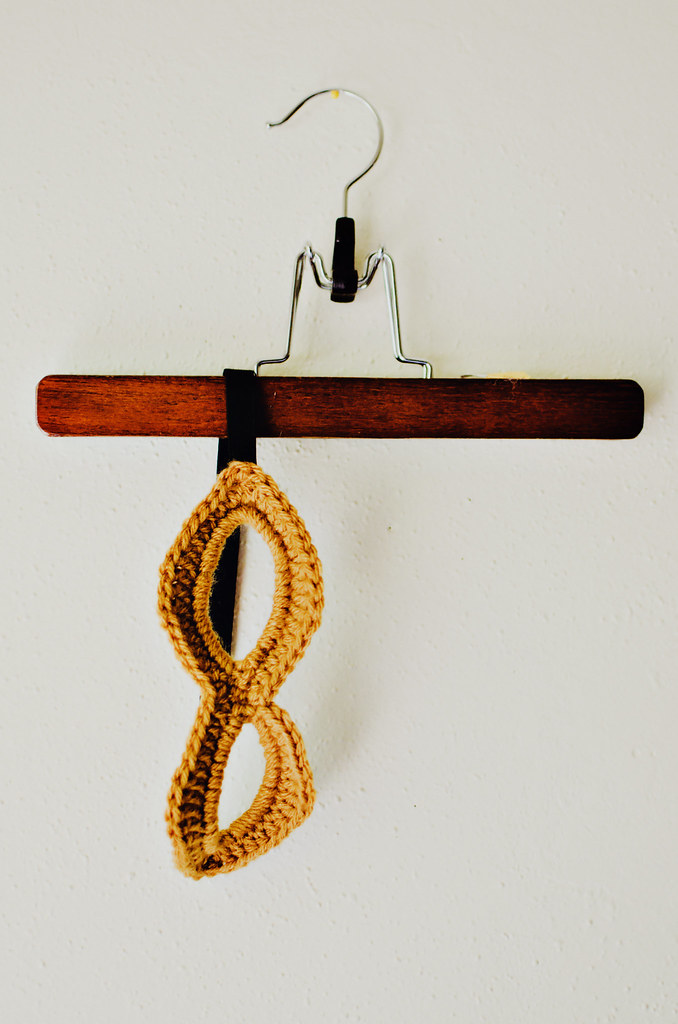
I’ve provided some photos to help aid in the construction. It might sound a little tricky, but after the first you’ll get ’em made in like 5 minutes, I bet!
You’ll need: worsted weight yarn (I used Vanna’s Choice), 5mm (H) hook, and some elastic.
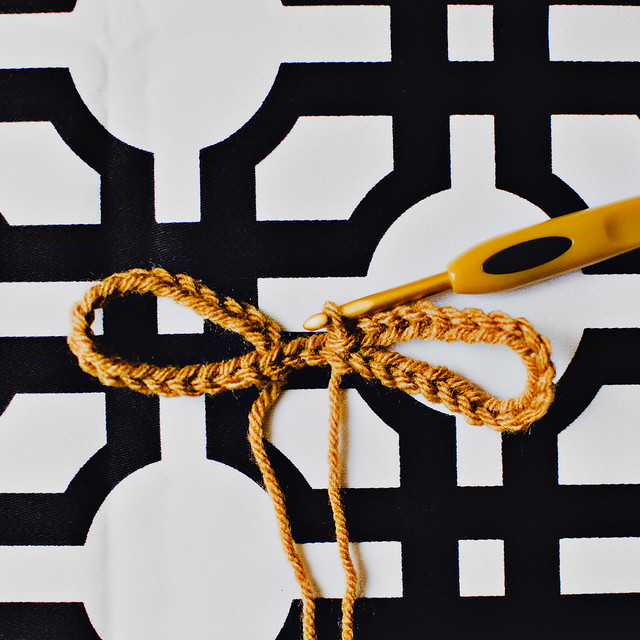
Ch 21, slst into first ch to make a loop (left in above photograph).
Ch 23, slst into 21st ch from hook to make second loop (right).
This leaves you with 2 loops connected by 2 chains.
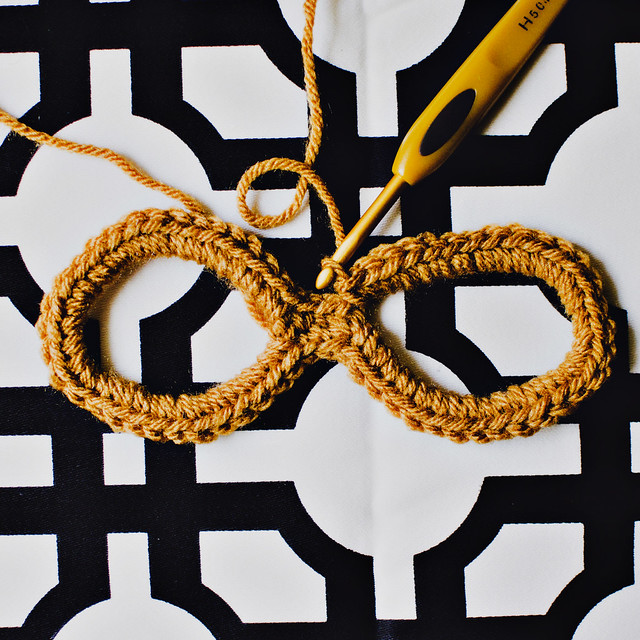
Ch 1, SC into next 2 chs, 30 SC into the loop. Shift them around so they’re evenly arranged around the loop. They’ll all fit!
SC into the back of the center 2 chs, 30 SC in next loop.
DO NOT JOIN.
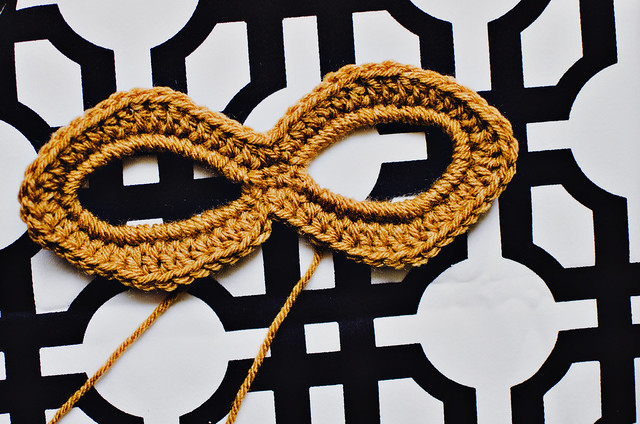
SC2tog across the center 2 sts, *[HDC in next 5 sts, DC in next 4 sts, HDC in next 5 sts] 2 DC in each of the next 2 sts, repeat from [ to ]*
SC2tog across center 2 sts; Rep from * to *, slst into first st. Finish off, weave in ends.
Cut an 11″ piece of elastic and attach each end to each side of your mask. I used 3/8″ black elastic. You can adjust the size to fit the head you’re making the mask for.
Put it on and enjoy! Feel free to adjust the pattern to fit your head. If the 30 stitches around the eye opening are too big or too small, change the size of the beginning chain loops! You’ll have to change the second row, too. To get the shape, I split the stitch count in half then added taller stitches to the top, bottom, and side.
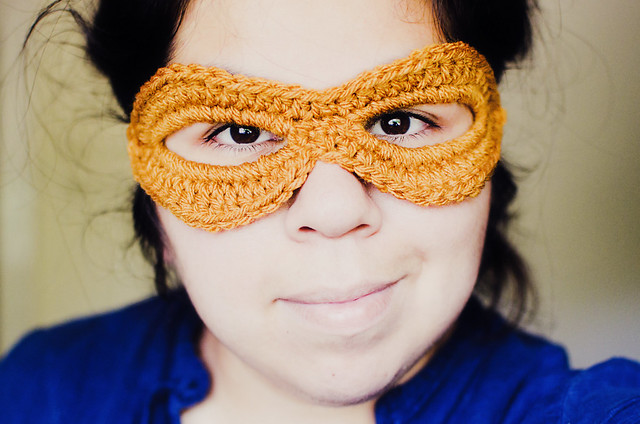
sorry, I’m not as cute as my kid, but he hasn’t been feeling well, so I’m not going to force him to pose for me.

As with all things things that can be made for children, please supervise them when they’re playing. The mask can knock out their peripheral vision and they could bump into things! Show your little one how to adjust the mask to fit around their eyes. It took a while for me to get used to having it on my face. It was pretty annoying at first, but I wore it for a bit!
[Text-only version of the pattern may be viewed HERE.]

ETA
Here is my little one wearing a purple mask with his Darkwing Duck costume! The only adjustment I made to the mask was to assemble the eyeholes with a pipe cleaner instead of a crochet chain, then worked the pattern from “30 SC into the loop…” It makes the eyeholes easier for kids to keep…umm…open? It keeps them from shifting into their eyes!
Pin It
By Lisa Gutierrez on 07/17/2012 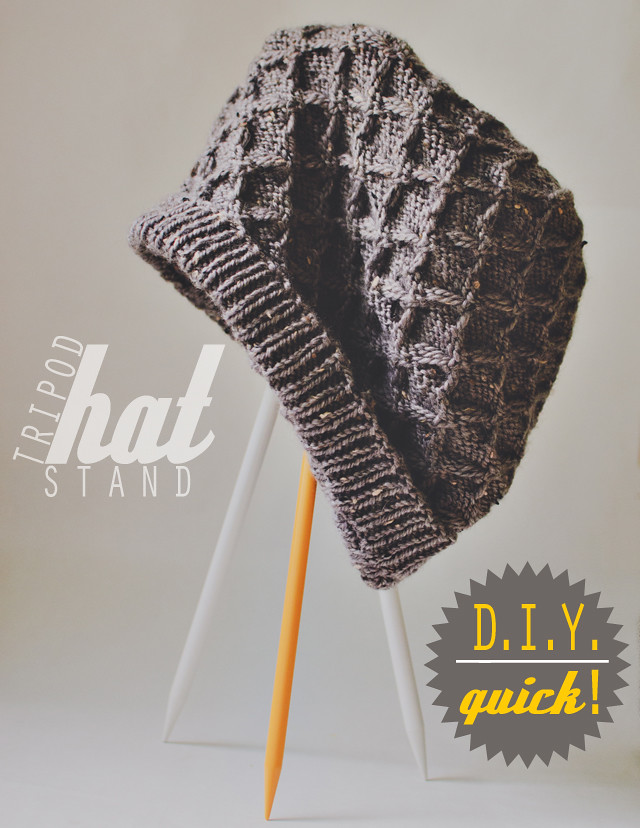
Hello, friends! I’m back with another (quick) D.I.Y. project.
I have seen some beautiful coat racks made with sticks, THIS ONE being my favorite. I wanted something on a smaller scale for me to throw hats on, so I rummaged through my most abundant supply of sticks–my knitting needle jar! I don’t know about you, but I almost never pass up a 50 cent set of needles at the thrift store. Especially the adorable plastic ones in a random assortment of colors! For this project, I used some of my repeat sizes, but don’t worry about your needles because we won’t be doing anything permanent to them.
ANYWAY–onward!
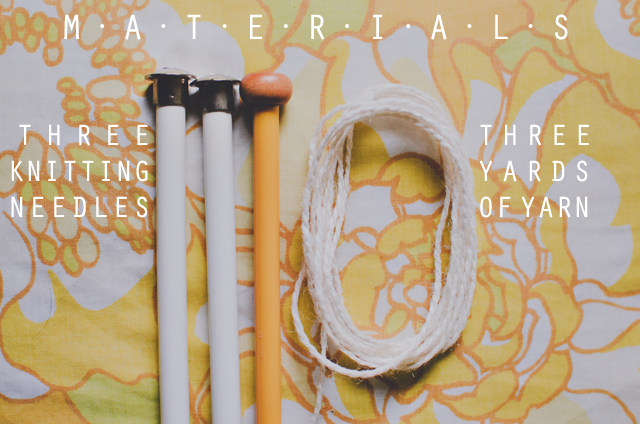
Materials:
3 [13″] knitting needles (OR cut a 3/8″ wooden dowel into 13″ pieces)
~3 yards of yarn
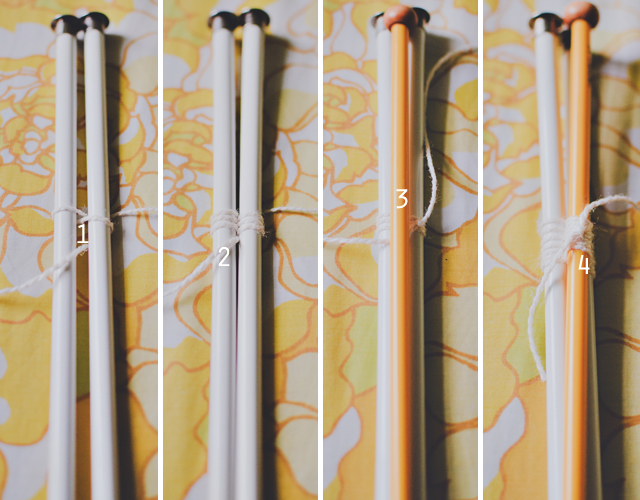
1. Leaving a 6″ tail, start weaving your yarn around two of the needles. Pull tightly with each wrap.
2. Weave in and out of the center and around each needle 3 times, then tie a tight knot with the tail.
3. Put the third needle on top of the stack and start weaving again.
4. Make the same weave in and out of the center around the new needle with each of the first two. Keep your yarn taught! I like to wrap around the new needle, then around one of the firsts, then back around the new, then around the OTHER first needle, then back around the new one…and so forth! You’re just trying to securely attach the needle to the stack while keeping your wraps even. Tie a knot to secure.

5. Open up the needles and make sure they can stand. If you wrapped tightly, you shouldn’t have any problem getting them to balance.
6. Use the remaining yarn to wrap around the whole set, securing your tripod in its open position. It won’t be permanently stuck open, but you’ll be able to put some pressure on top without it collapsing. Firm wraps are key!
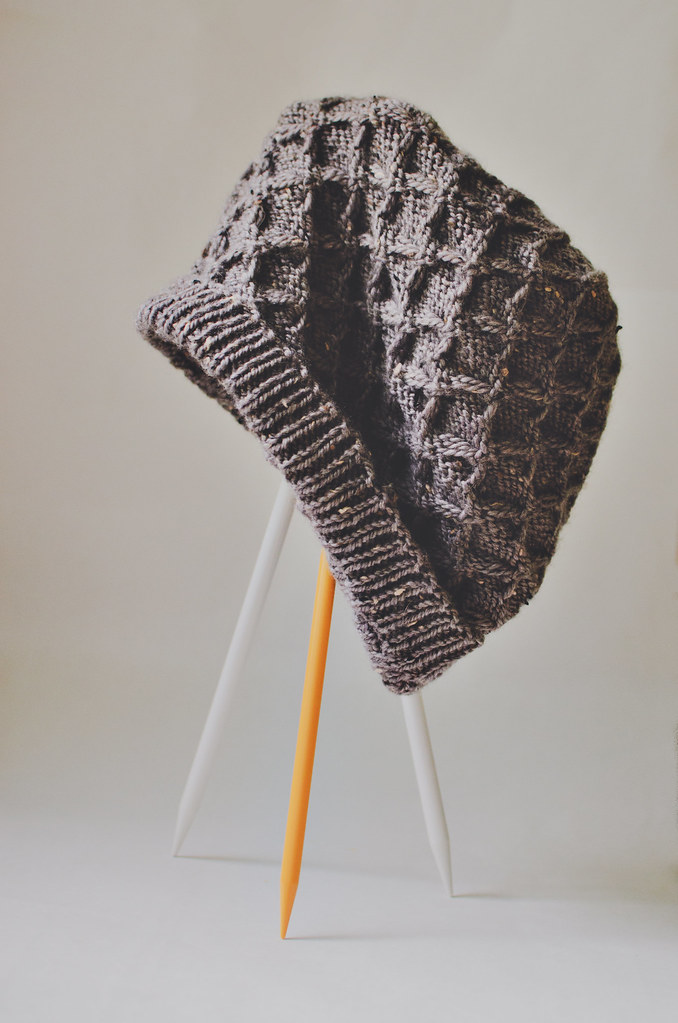
And done! Display your favorite hand-knits*. :)
The hat above is Honey knit with KnitPicks City Tweed DK.
Pin It
By Lisa Gutierrez on 06/27/2012 
I thought I would share a little series of quick D.I.Y. projects. I know sometimes we don’t have a lot of time to get crafty, so I hope to provide a few little bits of inspiration to help you get something done quick. First up is a painted pot, inspired by lacey scallops.
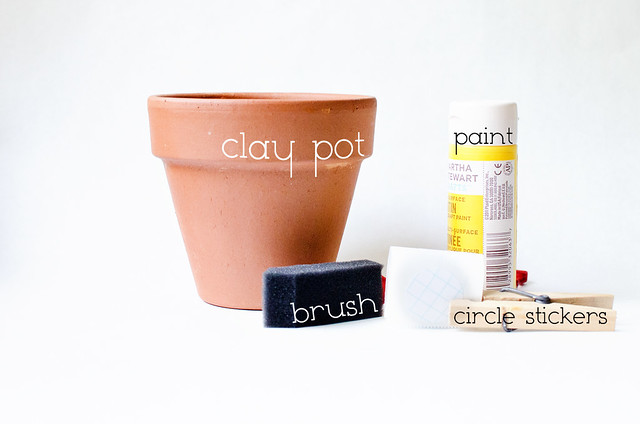
Supplies:
-clay pot
-1″ circle stickers (I made mine with my Xyron 150, but you can find circle labels at office supply stores)
-paint
-paint brush
-wooden skewer or thin paint brush (not shown)
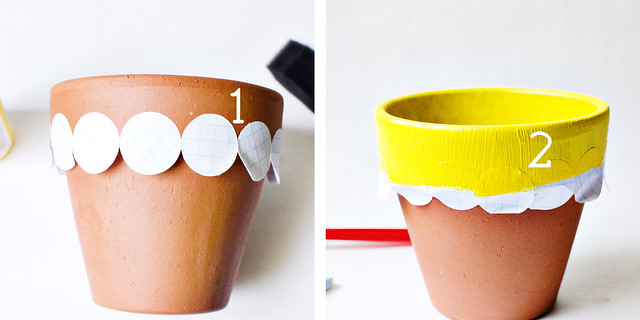
1. Place stickers along the rim of the planter, very slightly overlapped. I fit 14 on my 4.5″ pot.
2. Paint! I suggest about 3 thin coats. Let the pot dry for 2-3 minutes between coats. Optionally, you can also paint about an inch of the inside.
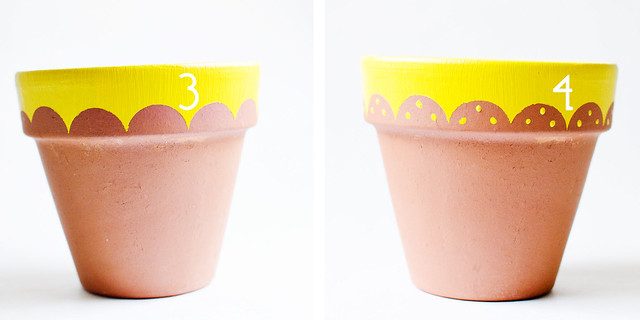
3. Remove the stickers before the final coat dries completely.
4. Use a wooden skewer or thin paintbrush to add 3 little dots on each scallop.
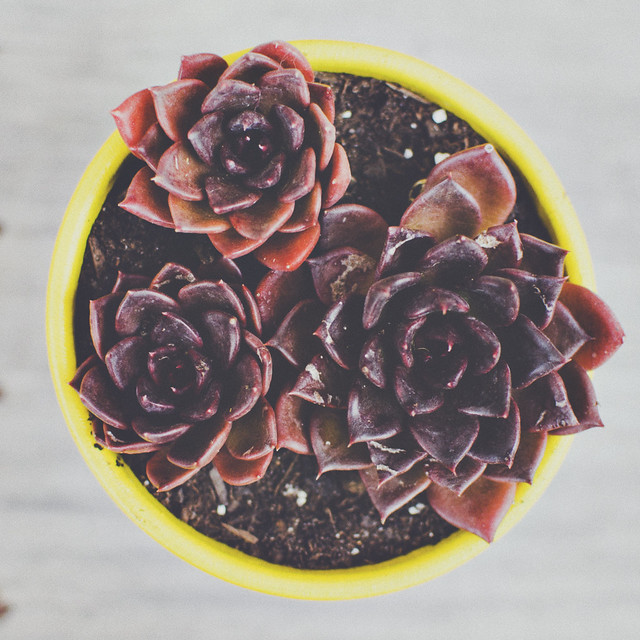
Let your pot dry, then fill it with your favorite little plant. I chose some of my ‘Black Prince’ echeverias. The most beautiful succulent around!
 Pin It
By Lisa Gutierrez on 05/25/2012 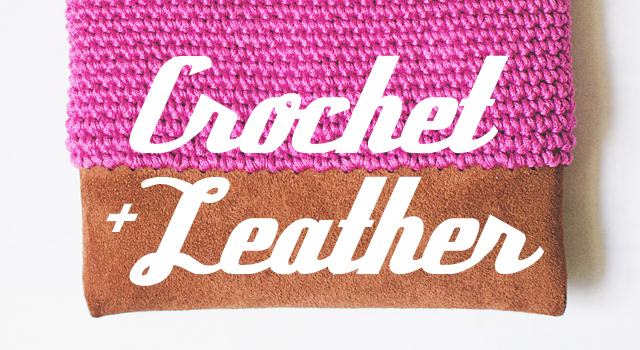
This is a quick tutorial showing the steps I took to crochet on to leather. If you use felt or other fabric, you can skip steps 1 & 2, because those are preparing the leather for stitching. I tried making this with just a needle and hammer and it killed my fingertips.
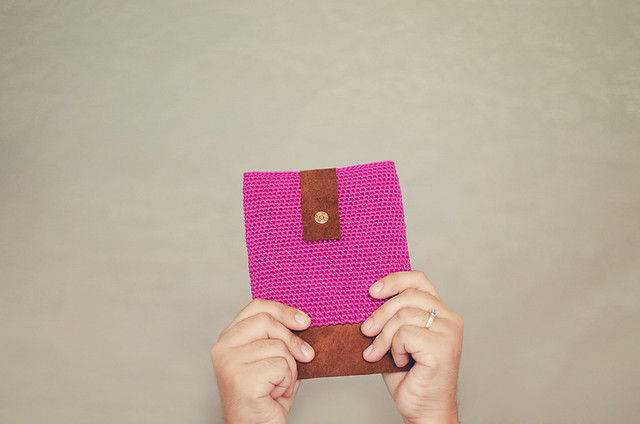
You can use this tutorial for general projects that you want to add some leather to the bottom. Perhaps a wallet or clutch or go big and make a sleeve for your tablet. For brevity’s sake, I’m going to use my Kindle as a guide.
The Kindle is about 4.5″ wide and 6.5″ tall with about a .5″ thickness. My case is 5.5″ wide and 7″ tall, measured flat. I used a piece of leather that was 4″ x 6″.
PREPARING LEATHER FOR STITCHES
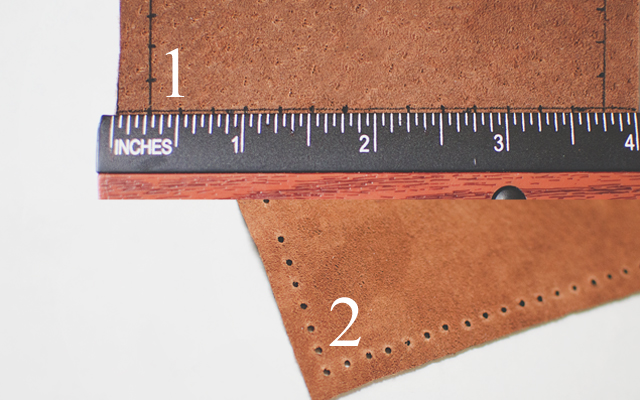
1. Using a fine tip Sharpie and a ruler, mark your stitch line straight across each side 1/4″ in from the edge. Make your stitch marks 1/4″ from each other, as well. On the short side, omit the very center mark (notice that the 2 on the ruler does not have a notch marked).
2. Make your stitch holes. My husband said when he worked with leather in the past, they would use a hammer + nail to make the holes. I tried using a thick needle and it made my fingertips raw. I looked up leather punches and almost purchased one online when I remembered this rarely used* tool in my crafty arsenal– my Martha Stewart screw punch ! I used the 1/8″ tip and punched my holes in just a few minutes.
SEW SIDE SEAMS
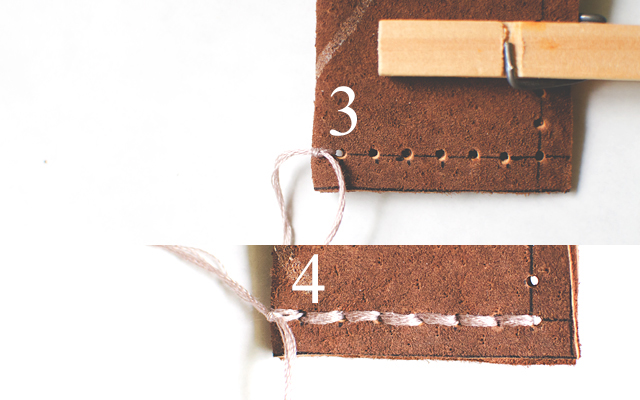
3. Fold your leather in half, right sides together. Attach some embroidery floss (or thread of choice) by pulling it through the hole closest to the fold. Leave a 2″ tail and tie a [tight] knot.
4. Sew up the small seam, making sure to pull tight. Don’t pull tight enough to warp the fabric, but you also don’t want your stitches to be THAT visible when you turn it right side out. I stitched up and then back down to the beginning and tied another knot with the beginning tail. Seam up the other short side.
PREPARE EDGE FOR CROCHET
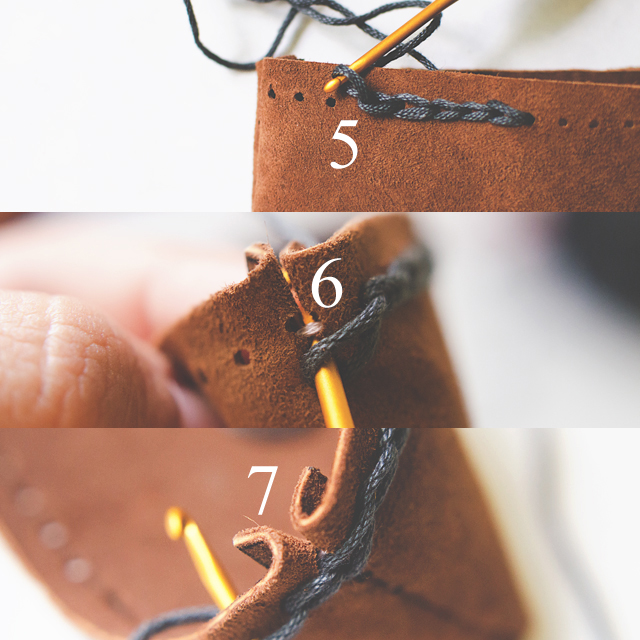
5. Using a 2.5mm hook (or smaller, if you’ve got it) and the yarn you plan to make the top out of (I used Sinfonia– a sport weight cotton), pull a loop through a hole along the long edge, leaving a 6″ tail. Slip-stitch around. Try to keep your stitches loose, so you don’t warp the fabric.
6. When you get to the first edge, make a slip stitch into the seam UNDER the first seam-stitch. Fold your seam flat as you work.
7. Keep going across to the other edge and do the same. When you get back to the very last hole, cut your yarn leaving about 6″ and pull it through. Using a yarn needle, make the last chain stitch through the first, then go back through the last hole again. Tie a knot with beginning tail.
Now your leather base is ready for stitches! Notice how the slip-stitches look like the tops of regular crochet stitches? Well, crochet into them!
I used a 3.5mm (US E-4) hook and my sport weight cotton to single crochet around. There were 44 slip-stitches, but my stitch count was 66 (*SC in first, 2 SC in next* around). I didn’t join at the end, instead I spiraled up for 35 rounds. For round 36, I slip-stitched around and then fastened off.
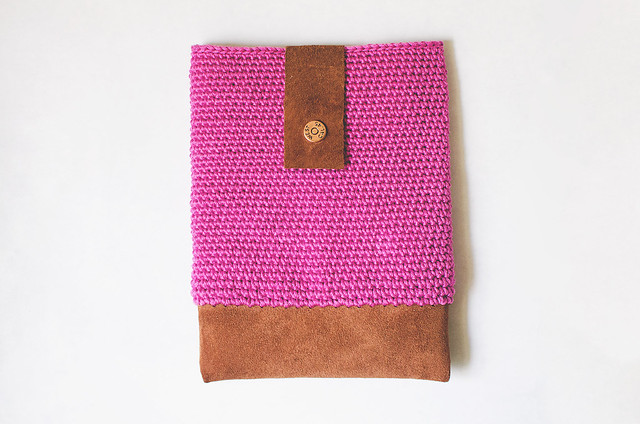
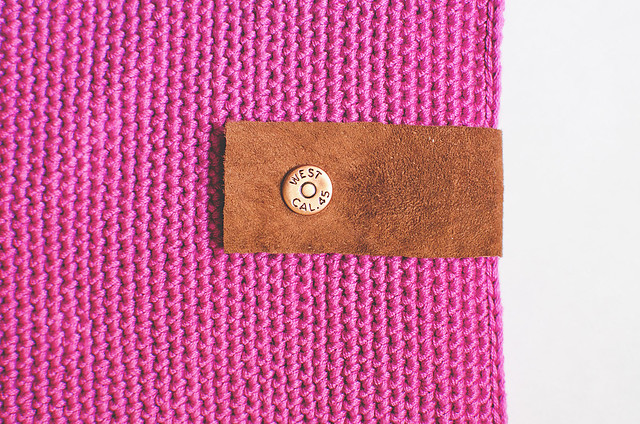
For the closure, I used a 4.75″ x 1.25″ piece of leather with a brass snap attached to the front. I was also thinking I could use a zipper instead. Maybe next time!
* I originally bought it to make notepads for myself and my kid who loves to doodle in my notebooks, but I used it a few times and put it away.
Pin It
|
Disclosure You may find affiliate links and banners throughout my blog. I earn a small commission from purchases made through these links. It helps pay for keeping this blog running! All reviews and products are items I have personally used and loved. |


