Crochet: camera strap slipcover

crochet a camera strap slipcover

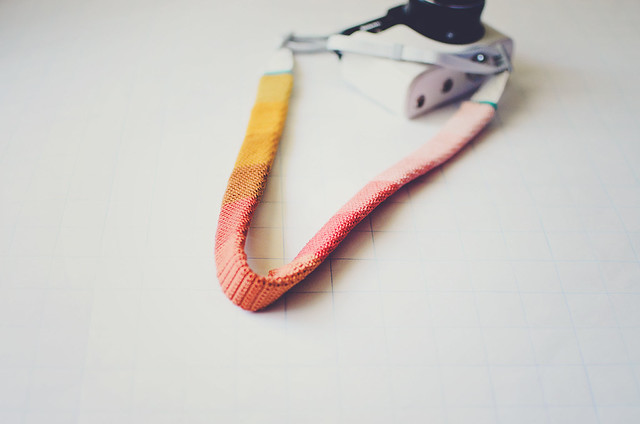
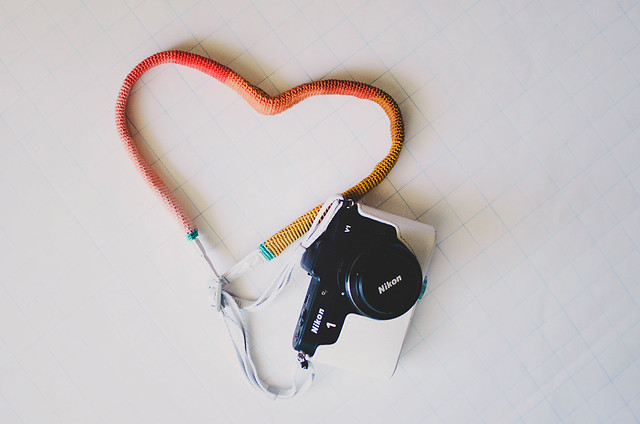
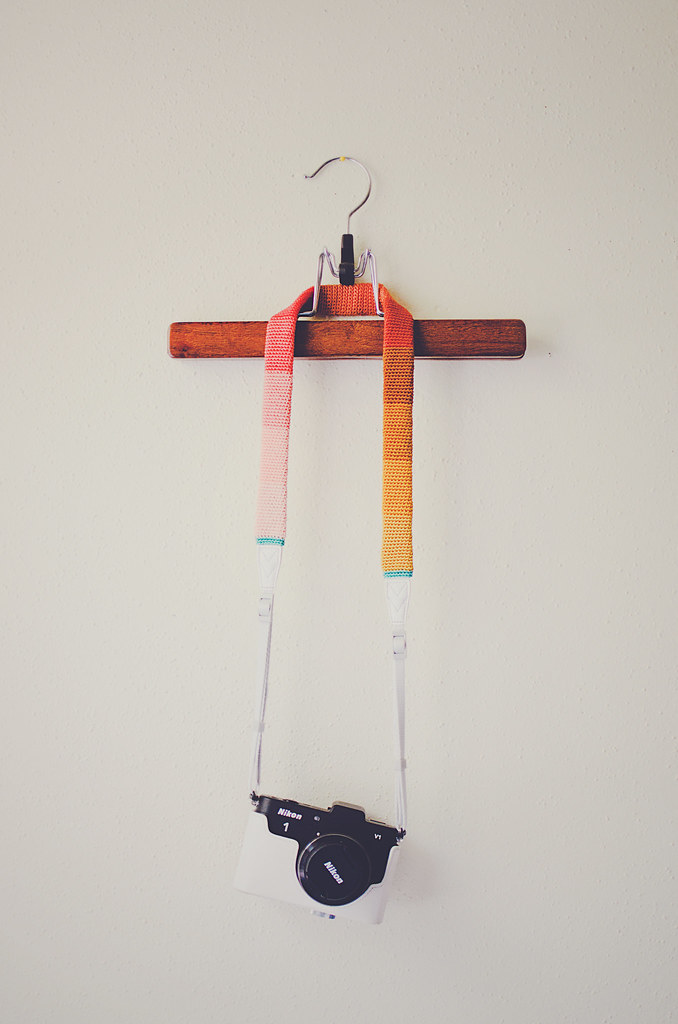
So, I’ve had my Nikon 1 for over 6 months and this is the first slipcover I’ve made for its strap. I have made slipcovers for my DSLR’s strap (see here), but the thought of having to turn a tiny, less-than-one-inch-wide, tube inside out was just not appealing.

I’ve been doing a lot of knitting and crochet the past couple weeks for other people and yesterday I decided I needed to make something for myself. I started to feel a little run down and uninspired, so I went to Michael’s and just stared at the yarn for a while. Eventually, I was standing in front of the embroidery floss and I don’t know why, but I thought of my camera. Maybe I wished I had it with me to take a photo of the floss? I don’t know, but I started grabbing colors and I knew I was going to make a cover for my camera strap. I knew I was going to crochet one.

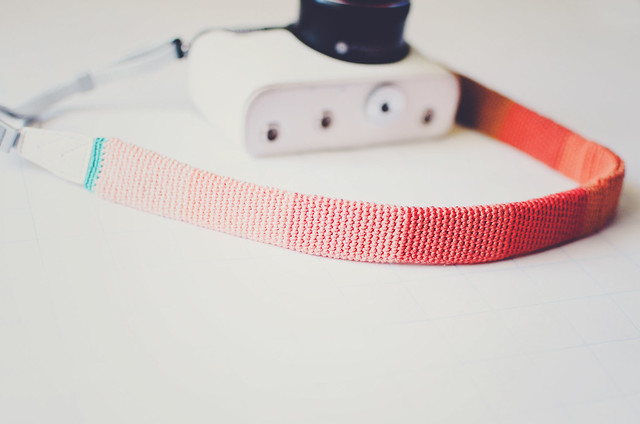
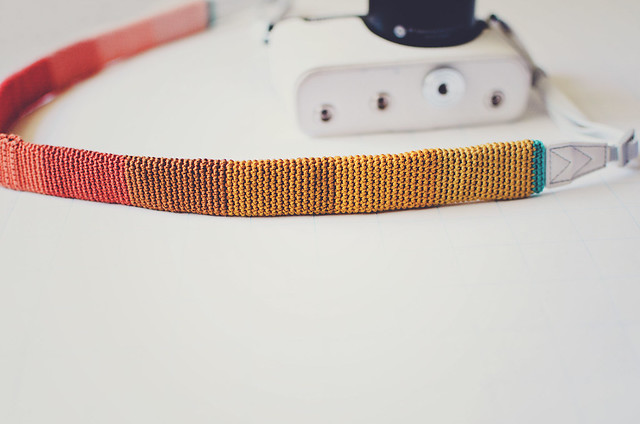
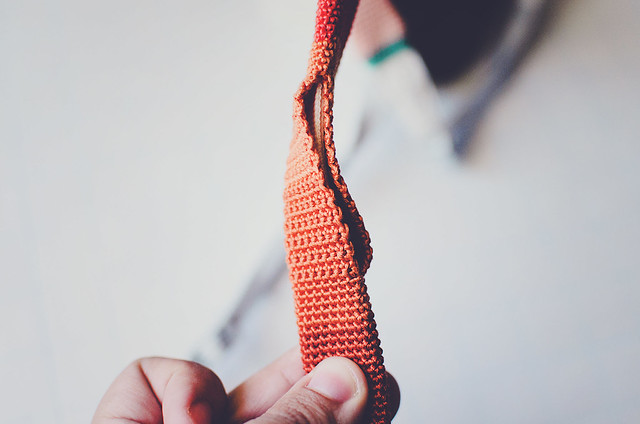
Here’s the thing– I would never crochet a camera strap. I just don’t think it would be strong enough to carry the camera’s (even my tiny V1’s) weight. I want something durable to hold my precious baby, so I trust what my camera came with. The good news is slipcovers don’t hold any weight! You can use whatever stitches you like. Heck, you could make a lace slipcover! I took a simpler approach, as I wanted the colors to shine. I made the entire thing in single crochet.

strap-materials
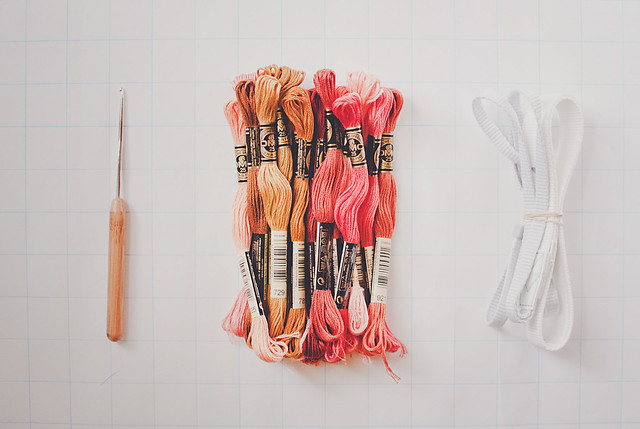
2.35mm (US 1) hook, 13 skeins of embroidery floss, and my camera strap

strap3

strap4

strap2

strap1

strapgap

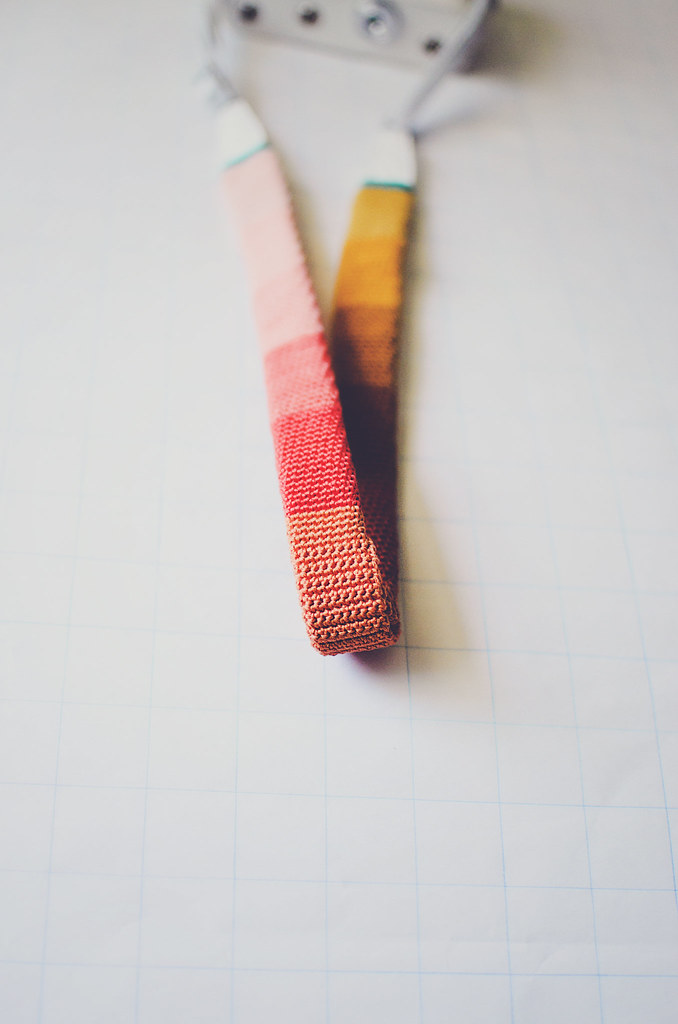
For the most part, I worked in a spiral. When I was about 1-1.5″ from the center, I started working in rows. I wanted a gap at the center to thread my strap through, so I wouldn’t have to thread it the entire length of the slipcover.

If you are making a slipcover for a Nikon 1 strap, I found 18-stitch rounds to be perfect. To figure out how many stitch you will need for a different size strap, I actually suggest swatching. I know it seems tedious, but you only need a few rows.

Work a chain to go around your strap plus a few more, then crochet 3 rows. Wrap it around your strap and then mark where it fits snugly, but still enough to move. When you have that magical stitch number, you can start your slipcover.

I chained 18, worked one ROW SC and at the end of it, I simply made my next SC into the first SC, starting my spiral (don’t join with a slst at the end of each round).

I worked each color until I ran out (I only had one of each), then I joined the next. I didn’t work to the very last inches of the color, instead I switched colors on the edge of the strap–I would lay the piece flat, pick a stitch on the edge, then work to that stitch, completing it with the new color. Working in a spiral means you won’t be changing colors in the same stitch. I crocheted over the new colors and didn’t have any ends to weave in at the end, except for the beginning and end colors. I worked 2 rows of SC in a contrasting color on each end.

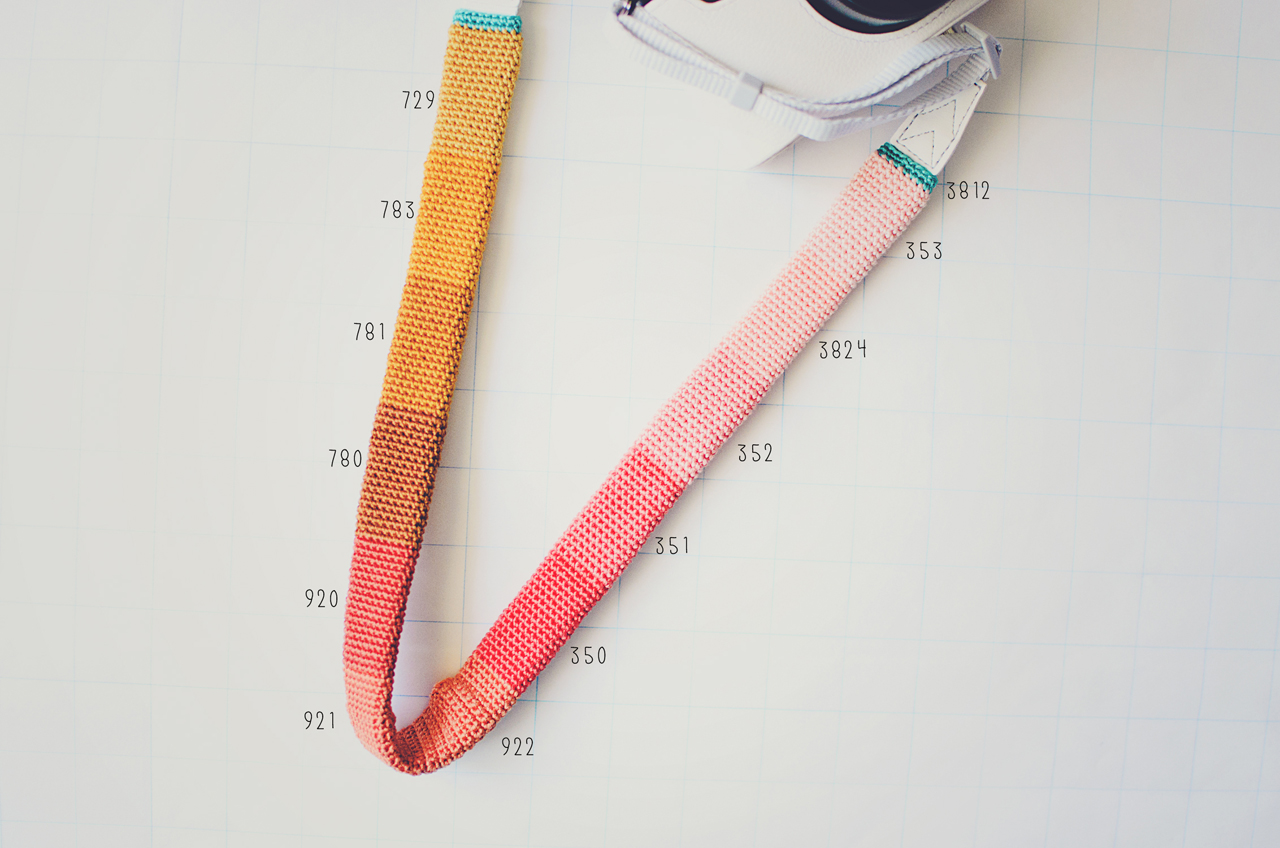
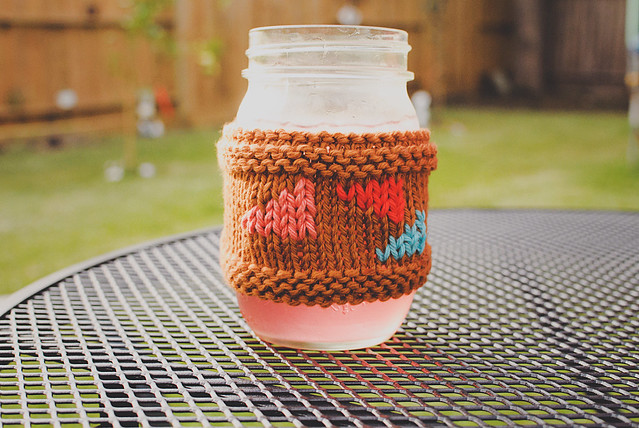
If you’re interested in what colors I used, here are the DMC (25) numbers:

embroidery floss colors

strap6

i heart my camera

strap7

Have you made or bought any pretty camera straps or slipcovers recently?

Pin It

Knitting: mason jar cozy

mason jar cozy on goodknits

This little jar has been getting a lot of use lately. I thought I would spruce it up a bit by knitting a little cozy. You can make this in under an hour, I’d imagine. It’s the perfect beginning knitter’s project! A giant swatch. No button holes and you don’t even have to add the duplicate stitch design, but why wouldn’t you? It’s cute as heck.

Download the free pattern from the Craftsy pattern page, here: Knit Mason Jar Cozy.

If you aren’t familiar with the duplicate stitch, check out this tutorial I wrote up for the Craftsy knitting blog– [HERE]

cozy01

cozy4

flat-front

flat-loop

cozy2

A word of caution: glass jars are pretty slippery. I made the cozy as snug as I could without distorting my stitches. I also made sure my fingers could still touch my glass when the cozy was in use. It just makes me feel more confident that the jar won’t slip out while I’m carrying it. I don’t think they’re too practical for children!

Pin It

Crochet: Vertical Heart Garland

tut0

Last year, I guest-posted this tutorial on a blog that no longer seems to be active. I thought I’d re-post it here for you guys. It utilizes the 5-minute crochet heart pattern I posted HERE, but you could sub any heart. This is just a simple Valentine’s Day decoration idea. I hope you like it!

tut01

First, the “anatomy” of the 5-minute heart. The spaces at points a-d will be where you will be inserting your hook for the garland.

tut02

Step 1: Inset your hook into space a and pull a loop through.
Step 2: Insert your hook into space b and pull a loop through the heart and the loop on your hook.
Step 3: Insert your hook into space c and pull a loop through the heart and the loop on your hook.
Step 4: Insert your hook into the stitch at point d and pull a loop through the heart and the loop on your hook.
Step 5: Chain 1, over the top of your heart.

tut03

Chain 5 (or however long you would like the spaces between your hearts) and then insert your hook into space a on your next heart and pull a loop through. Repeat the steps for this heart and each subsequent heart on your garland. Mine is only 4 hearts, but you can certainly make a longer one! I’ve even used a single heart with a long chain to wrap a gift. It was SUPER sweet.

window

This was hung in an open window. The cool breeze had it swaying. Whatever you decide to do, have fun with it!

Pin It

Crochet: Cupcake Containers (a proper tutorial)

18.365: cupcaking

9.365: plate of cupcakes

I’ve been making cupcake containers for years and never really got around to elaborating on the process. With Valentine’s Day only a few weeks away, I thought this would be a good time to share how I make them. It’s pretty straight-forward and essentially a permanent cozy over a used plastic container (yogurt, sour cream, etc). These steps will help guide you for whatever size you have on hand. I suggest using containers that are shorter, as they make the cutest cupcakes. The container used in the photos is 8 ounces.

Warning: This tutorial uses hot glue, so be careful! Keep an eye on your glue gun and take care of your fingers!

Materials
-Plastic Food Container With Lid (yogurt, sour cream, etc.)
-Worsted Weight Yarn in 2 colors
-5mm/ H Crochet Hook
-Worsted Weight Yarn in 2 colors
-Hot Glue Gun And Glue Sticks
-Yarn Needle
-Optional: -Small amount of Red Yarn

crochet-cupcake-bottom

First, we crochet the bottom of the cupcake. Start by making a chain that is as tall as the container + 1. I chained 8. Leave at least 12″ of tail yarn.

For the first row, single crochet in the second ch from your hook and in each chain after.
Row 2: SC in the front loop only across all stitches. Ch 1, turn.
Row 3: SC in the back loop only across all stitches. Ch 1, turn.

Repeat Row 2 & 3 until you have a rectangle long enough to stretch around your cozy. Do not fasten off. Seam the edges shut using your beginning yarn.

Single crochet around the edge your working yarn is at. Make one stitch into the side of each row. Slip-stitch into first stitch, then slip-stitch into each stitch, to tighten up the round.

Attach it to your container using hot glue along the top edge first, then you can add a line of hot glue along the bottom edge, stretching if you need to.

04

Now, we’re going to crochet the cupcake top. We crochet it amigurumi style. If you are going to add scallops later, work in the BACK LOOPS ONLY:

Single crochet 6 stitches into a magic loop. Cinch it shut. Do not join. Work the rest of the rounds in a spiral.

Round 2: 2 SC into each st. (12)
Round 3: *1 SC into next st, 2 SC into next; Rep from * around. (18)
Round 4: *1 SC into next two sts, 2 SC into next; Rep from * around. (24)
Round 5: *1 SC into next three sts, 2 SC into next; Rep from * around. (30)
Round 6: *1 SC into next four sts, 2 SC into next; Rep from * around. (36)

Continue increasing evenly until you have a circle that is just about as big as your lid. Make 2 or 3 rounds of 1 SC into each st (no increasing), depending on how tall you want the “frosting,” then fasten off. You should now have a dome shape to cover your top. I like to finish simple tops with a round of crab stitch.

FOR SCALLOPS:

Re-attach the yarn at the top/center of your work into the front loop of your first st. Chain 1, *skip two loops and make 5 DC into the next, skip 2 loops, and slst into the next; Rep from *, spiraling down the top into the front loops. Fasten off and weave in your ends.

05

Turn your cupcake top over and position the lid as above. If you did not add scallops to your top, position the lid at the edge of your top.

Cover about 2″ of the edge of your top with hot glue and then immediately attach the crocheted piece to it. Hold for at least 30 seconds for optimal adhesion.

To get the best positioning, glue the opposite point, then glue all of one side.

Add about a handful of poly-fil stuffing into your top. If you over-fill it, you will warp the container top, so be careful. You also don’t want to under-stuff it because the crochet part might collapse.

Once you are satisfied with your stuffing, carefully glue the rest of the lid on. After I finish gluing it all, I like to add extra glue along the edge of the crochet/plastic just to make sure it’s stuck on completely.

goldcake2

OPTIONAL: Cherry!
Using red yarn, crochet 4 SC into a loop, cinch it shut. Make sure this beginning tail gets crocheted inside the cherry.

Round 2: 2 SC in each st. (8)
Round 3: 1 SC in each st. (8)
Round 4: 1 SC in each st. (8)
Round 5: 2SCtog, around. (4)

Fasten off. Weave in this end, then have it come out the top of the cherry. Cut it, leaving about 1″ sticking out the top. Trim as needed to keep it sticking up.

ruffcake2

cupcake

Ta-da! You have a little cupcake container made from your recycled food containers. You can make them for loved ones on their birthdays! They make nifty little trinket boxes. Just sayin’.

Pin It

Christmas countdown!

the advent tree & tree

Or advent calendar. Whatever you want to call it, it’s hanging on my foyer wall.

I spent the past week browsing Pinterest and just becoming so overwhelmed with advent calendar ideas. I kept complaining, “we neeeeed a calendar. we neeeeed a countdown. blah, blah, blaaaaaaah.” Finally, yesterday, I stopped complaining and went to Hobby Lobby for supplies. While taking Andrew to the bathroom (OF COURSE), I noticed the shelf with wood sheets and my mind flashed to the few scrap wood trees I’d seen in my Pinterest perusing. Bingo!

I loved the look of the scrap trees, but I wanted something really quick and easy. You can see the exact materials I used, below:

I stamped the numbers using a set my MIL gave me a few years ago. Everything is hot glued together and it hangs with a small piece of yarn. I’m going to fill the tiny envelopes with activity prompts and/or chocolates (I’m thinking Andes!) for both boys. I’m glad I got it done on time. They are super excited for tomorrow! I’m just a little terrified that 2012 is already so close to being over. How’d it go by so quickly?!

Pin It