
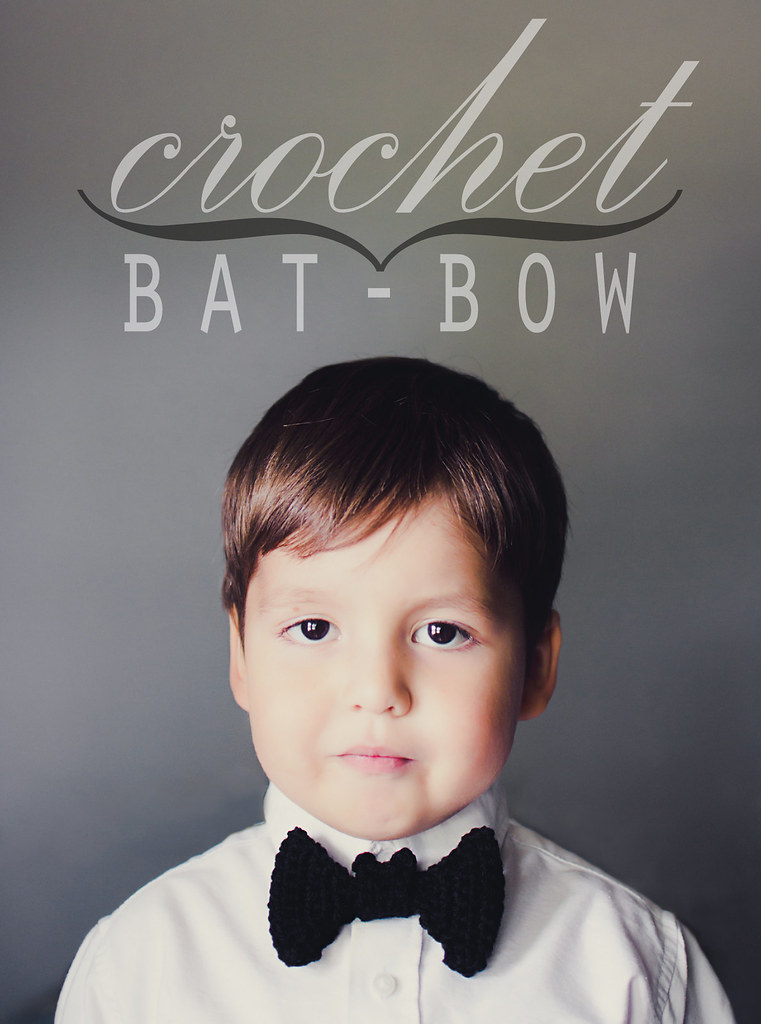
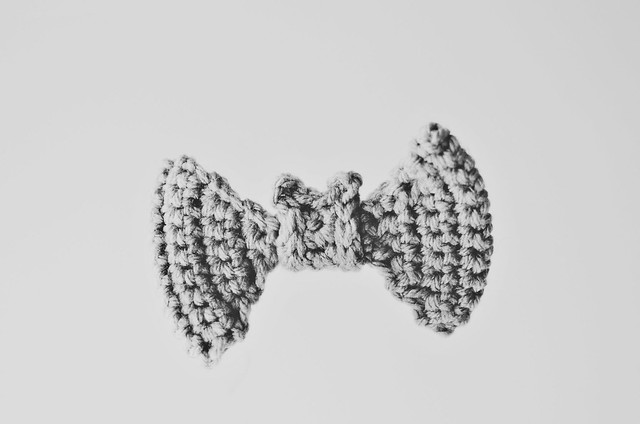
Pretty self-explanatory. A bow that looks like a bat. I’m sure you have seen some variation of it around the web, but here’s my take! It’s really simple to crochet and I’ve provided a few photos for assembly. I really just wanted to make this post to share photos of my adorable son. He looks like he’s about to take my order.

Using some worsted weight acrylic and a 5mm (H) hook, start crocheting!
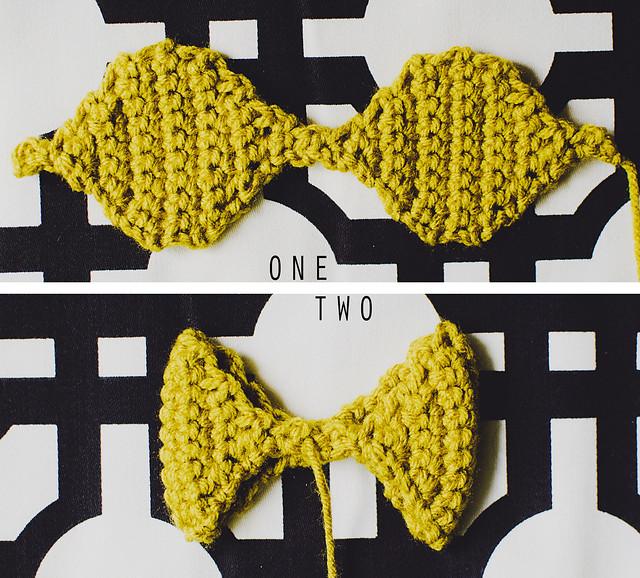
One: Make the wings.
Row 1: Ch 2, SC in second ch from hook, Ch 1, turn.
Row 2: SC in st, Ch 1, turn.
Row 3: 2 SC in st, Ch 1, turn. (2 sts)
Row 4: 2 SC in each st, Ch 1, turn. (4 sts)
Row 5: 2 SC in first st, SC in next 2 sts, 2 SC in last st, Ch 1, turn. (6 sts)
Row 6: 2 SC in first st, SC in next 4 sts, 2 SC in last st, Ch 1, turn. (8 sts)
Row 7: 2 SC in first st, SC in next 6 sts, 2 SC in last st, Ch 1, turn. (10 sts)
Rows 8-10: SC across, Ch 1, turn. (10)
Row 11: SC2tog, SC in next 6 sts, SC2tog, Ch 1, turn. (8 sts)
Row 12: SC2tog, SC in next 4 sts, SC2tog, Ch 1, turn. (6 sts)
Row 13: SC2tog, SC in next 2 sts, SC2tog, Ch 1, turn. (4 sts)
Row 14: SC2tog twice, Ch 1, turn. (2 sts)
Row 15: SC across, Ch 1, turn. (2)
Row 16: SC2tog, Ch 1, turn. (1 st)
Rows 17-18: SC, Ch 1, turn. (1)
Row 19: 2 SC in st, Ch 1, turn. (2 sts)
Row 20: SC across, Ch 1, turn. (2)
Rows 21-31: Repeat Rows 4-14.
Row 32: SC2tog, Ch 1, turn. (1 st)
Row 33: SC. Finish off, leaving about 8″ tail.
Two:
Weave in one end and with the second (the 8″ tail), stitch the beginning and end together. Lay the wings flat with the seam sitting in the middle. You can also make a few stitches in the center to keep it together. Weave in that end.
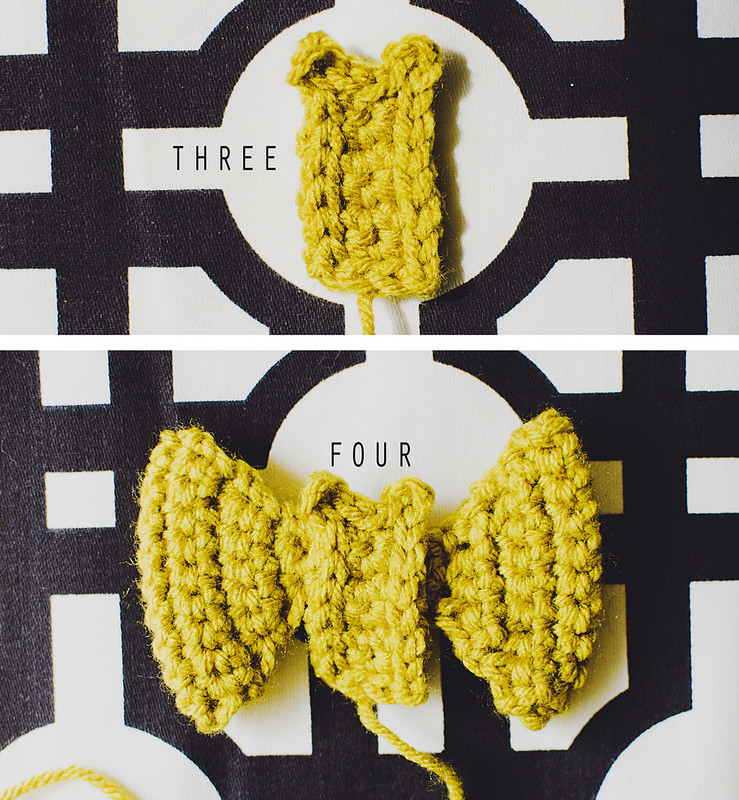
Three: Make the bat body.
Row 1: Ch 4, SC in 2nd chain from hook, SC in next 2 ch, Ch 1, turn. (3 sts)
Row 2-6: SC in each st, Ch 1, turn.
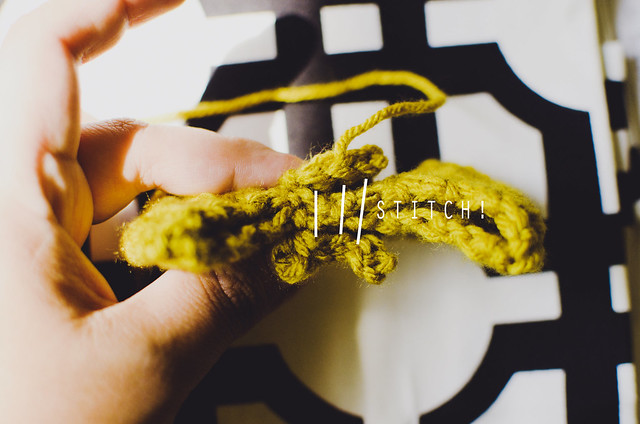
On Row 6, do not ch 1 & turn. Instead, slst down along the edge of the rectangle (6 slst along the side). When you get to the next corner, Ch 3, then slst back into the same st, slst in next 2 sts (you should be at the next corner), Ch 3, slst back into same st, then slst back down the other long rectangle edge, slst across last short edge. Finish off, leaving about 10″ tail.
Four: Attach body to wings.
Weave in your beginning tail, then position the head/body over the center of the wings. Using your 10″ tail, whip-stitch the beginning chain and the last row together over the wings. It’ll be a snug fit, but you should still be able to rotate the body around, as you won’t be sewing into the wings.
There are a few ways to use your little bat bow. In the photos of my son, I just have it pinned right next to his button with a safety pin. You could glue it to a headband or even thread some elastic through the back. Whatever you’d like!


I hope you have some time to make a bunch of little bows! I think it would look really adorable as part of a vampire costume!

Click here for a text only version of this pattern!
Pin It


That is so cute, Lisa. Your son is adorable. He looks so handsome in the first photos and so fun in the last one!
This is so cute! Making right now.
So cute! I’m going to make headbands for my girls since they can’t wear costumes to school
Soooo cute, and such a great idea! I think I might try making one…
how adorable!!!
There is NO possible way I could love this any more.
I never though a bat could be this cute…
Made this tonight for a friend. Thank you!
[…] DIY Crochet Bat Bow Tie Tutorial and Free Pattern from Good Knits here. At the link you can see more photos where the bat’s little ears are sticking out. If can’t crochet you could always make the really easy DIY Felt Bat Bow Tie here (and reader tracerracerx’s version here). […]
Is there a way to make this pattern page more printer friendly?
Good idea, Ellen! I added a text only PDF link to the bottom of the post.
thanks!
Wow! Thank you for sharing this beauty!
Xxxxxx Ale
Love it, I will try it soon
Very cute and easy, thank you
Easy and cute
The text-only PDF is super helpful! Thank you.
Is there anyway you can make a video? My bat wings are not turning out like they should
Pictures or images doesn’t open
Really very cute! It was easy and quick, thanks!
Witth havin sso much written content do you eever runn into any problems
of plagorism or copyright infringement? My blog has a lot of
exclusive content I’ve either authored myself or outsourced buut it looks
like a lot of it is popping it up aall over the web without my agreement.
Do you know any ways to help prevent content from eing stolen? I’d truly appreciate it.
Take a look at myy web-site: jbo vietnam; jbovietnam.net,
ỵaml
Start by making a slip knot with your yarn and create a foundation chain of 12 stitches.
In the second chain from the hook, single crochet (sc) across the chain. You should have 11 single crochet stitches.