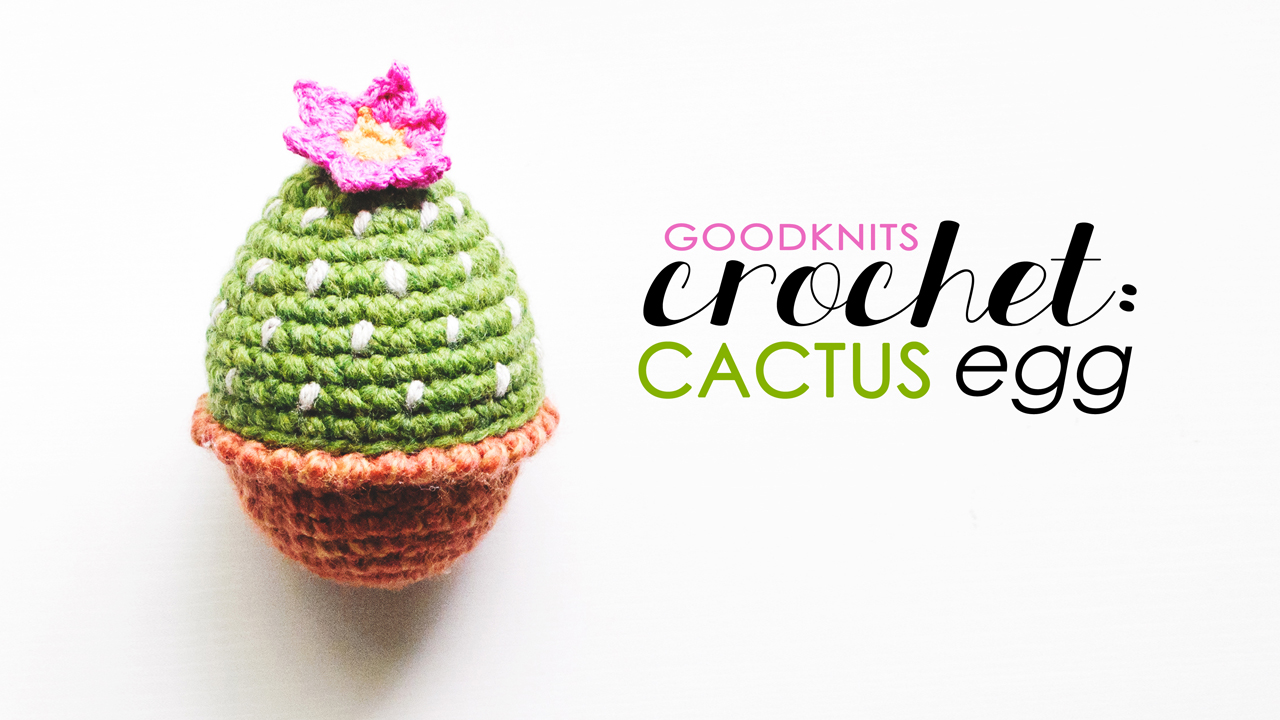
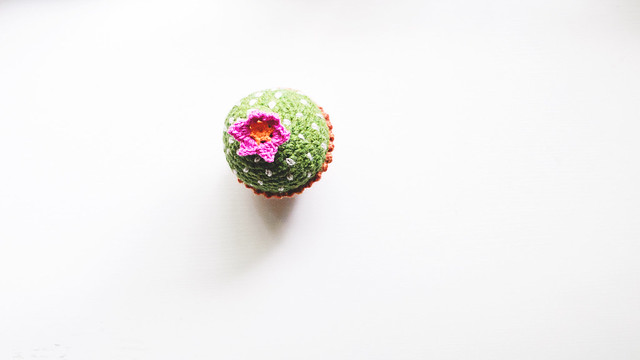
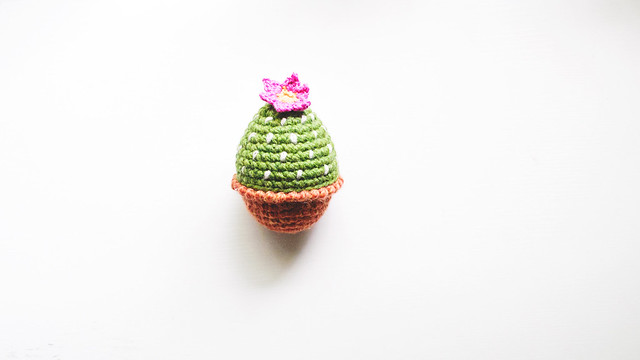
It isn’t a secret that I love crocheting these eggs. It also isn’t a secret that I love succulents and cacti! A few weeks ago, when the eggs started appearing at my local Target, I thought–why not combine the these two loves of mine? What resulted was this adorable cactus egg! I added a little flower to the top because those are my favorites. As always, you are able to fill these with treats for your little (or big) Easter egg hunters.
Do you wanna make one? There’s only a few days left til Easter, but I bet you can grow a little cactus egg collection by then!
Check out the pattern VIDEO I made, below. I learned how to make a stop motion video for this! Huzzah!
Stitch abbreviations & skills used
SC – single crochet
DC – double crochet
slst – slip stitch
ch- chain
st- stitch
magic loop
working in the round with and without joining rounds
picot – chain 2 size
The pattern is almost identical to the Bunny Food eggs pattern I shared, last year. The only difference is I did not work into the back loops only, so I had to adjust the height. The baby saguaro that makes an appearance at the end is made with two strands of worsted weight yarn and the pattern was adjusted accordingly. I added his little arms by working tubes that ended with some short rows, so they pointed upward when sewn on. I had to break out my Dremel to make holes in my egg for the plastic safety eyes. Labor of love, for sure!
Things to remember:
-Sew all pieces on before gluing!
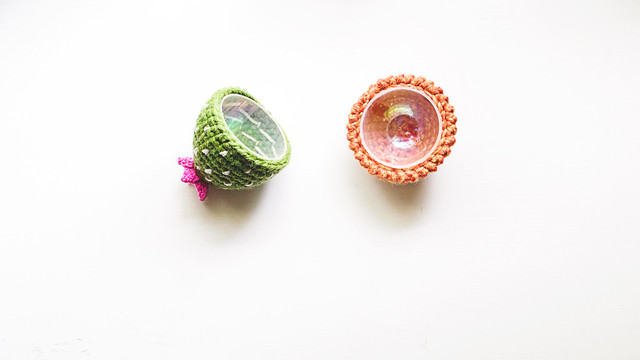
-The crochet fabric is attached after with hot glue. I suggest starting at the top, then working slowly as you go down, stretching the fabric over the egg, until it completely (and evenly!) covered.
-When gluing, try not to let any fabric get stuck over the edge of the egg. If you have a glue mishap, let it cool, then pick it off with a needle.
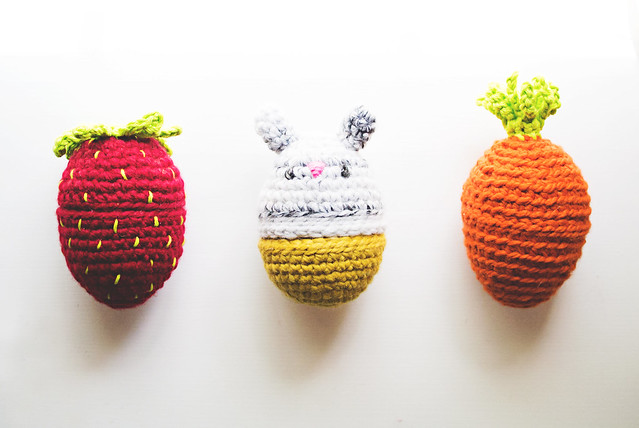
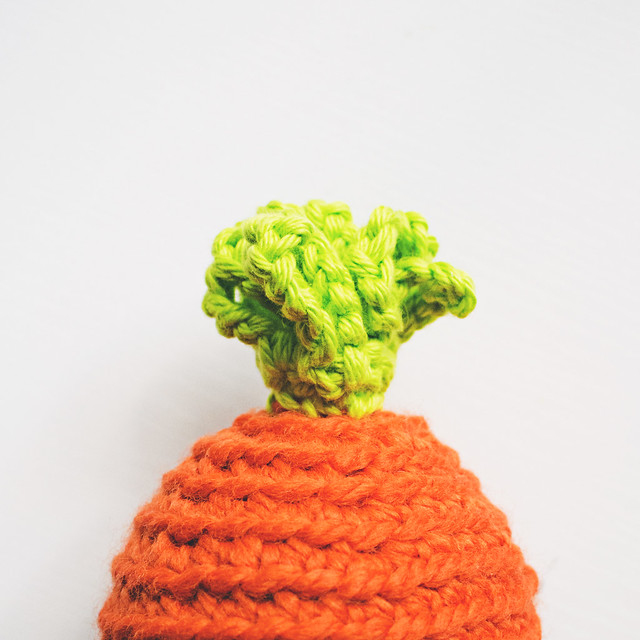
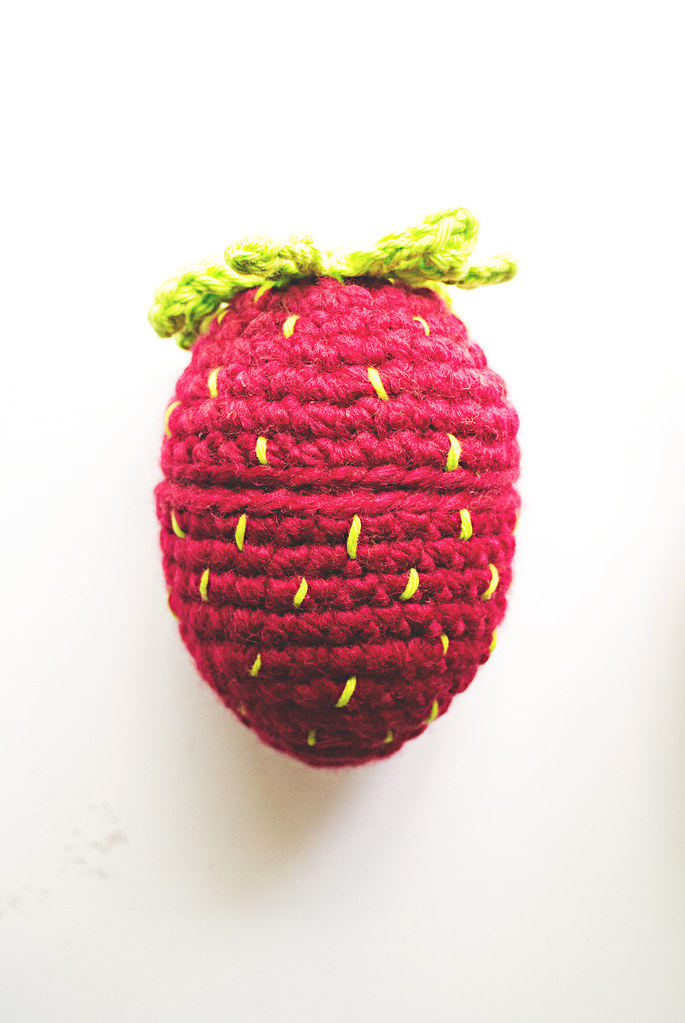
Last Easter, I made a fluffle of amigurumi bunny eggs for my favorite kiddos. This year, I’m branching out into bunny food–carrots and strawberries! They’re little amigurumi crocheted and glued onto Easter eggs. You can fill them with whatever treats your tiny humans might want.
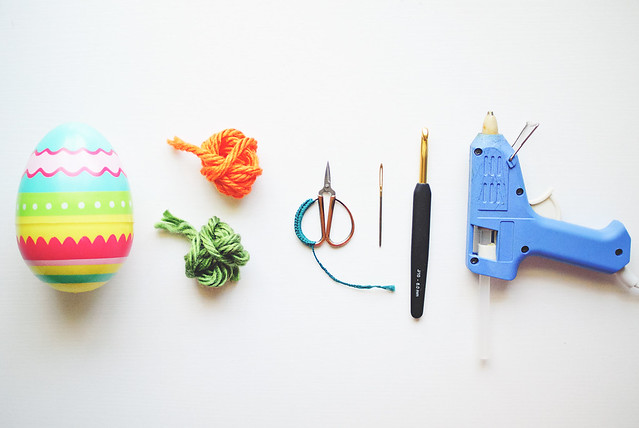
The perfect eggs for these amigurumi are from Target. The plastic feels a little thicker, so I feel like they’ll last longer, and they’re a great size! They’re large Spritz brand eggs and come in a pack of three. I may have a bag full of them under my desk, right now.
My favorite orange for carrots are bulky yarns from Lion Brand, specifically Hometown USA in “Syracuse Orange” and Wool-Ease Thick & Quick in “pumpkin”. For the strawberry, I used Wool-Ease T&Q in “cranberry”. My hook for both was a 6 mm (US J). The green tops on both is worsted weight cotton held double. Use your favorite shade!
The “body” of the egg for both is pretty much the same. Start with a magic loop and do NOT connect at the end of the rounds. Place the cover on the egg part as you go, to ensure the fit. Add a stitch or two, if it’s too small. If it’s too big, skip an increase. Remember you will be gluing, at the end, so it doesn’t have to be perfect, but it should be able to cover the egg with minimal stretch or scrunch. Here’s the pattern I use:
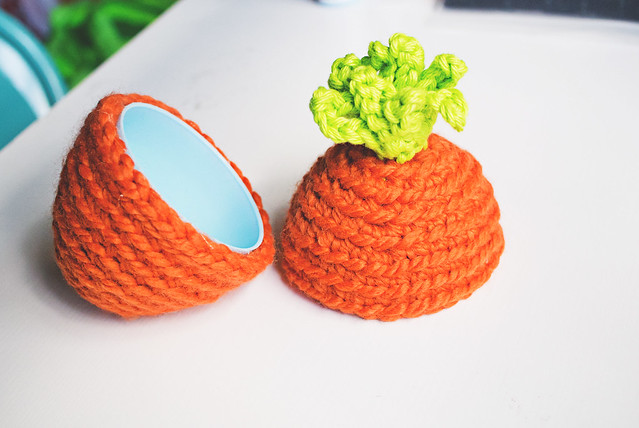
Work in the back loops only for the carrot. Egg Top Round 1: 6 SC into ring Round 2: 2 SC into each st (12 SC) Round 3: [SC into 3, 2 SC into next] 3 times (15 SC) Round 4: [SC into 2, 2 SC into next] 5 times (20 SC) Round 5: [SC into 4, 2 SC into next] 4 times (24 SC) Round 6: [SC into 3, 2 SC into next] 6 times (30 SC) Round 7-9: SC into each st (30 SC) Round 10: slst into each st (30 slst)
Fasten off. If working the strawberry, you may need to make round 10 SC instead of slst.
Egg Bottom Round 1: 6 SC into ring Round 2: 2 SC into each st (12 SC) Round 3: [SC into next, 2 SC into next] 6 times (18 SC) Round 4: SC into each st (18 SC) Round 5: [SC into 2, 2 SC into next] 6 times (24 SC) Round 6: [SC into 3, 2 SC into next] 6 times (30 SC) Round 7-8: SC into each st (30 SC)
Fruit tops
Using 2 strands of worsted, or a single of bulky Round 1: Ch 1, 8 HDC into ring, slst to top of first HDC Round 2: [Ch 8, slst into third ch from hook, Ch 4, slst into same HDC], *slst into next HDC, rep from [ to ]; repeat from * for 8 chain loops total, slst to first st. Fasten off, leaving long tail for sewing.
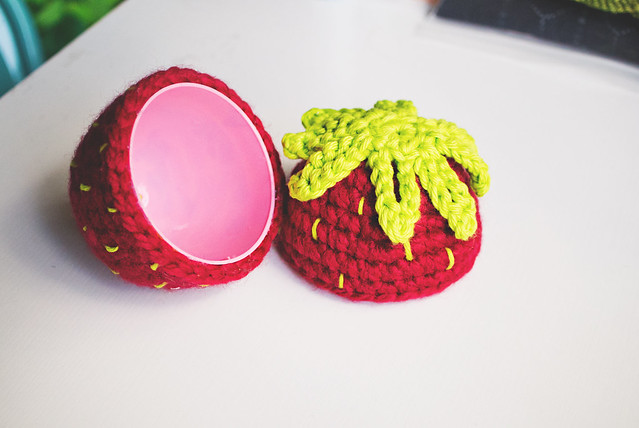
If making a carrot top, weave tail through the loops, and cinch it together, so the loops stand up. Sew onto egg bottom. For strawberry, sew the solid hdc circle onto egg bottom, leaving leaves free.
Use the green yarn to embroider strawberry seeds all over, before gluing.
Use hot glue to attach your pieces to your eggs. Start with the tips and work your way around and down. Be careful and don’t sacrifice any finger tips for perfection!
Fill eggs to your heart’s desire.
If you want to make a bunny with this thicker yarn, use the same pattern for the strawberry body and then add some ears. Mine were super simple, start with 5 SC in a ring, increase to 10, then to 15 and work for however long you like. Fasten off, leaving a longish tail to sew onto your egg top. Sew the ears and embroider the face before you glue! Let me know if you make any!
Are you there, Fall? It’s me, Lisa! I am crocheting and knitting all of the things for you, so please visit as soon as possible. I enjoy the cool mornings when I walk my kiddo to school, but I want you to BITE!
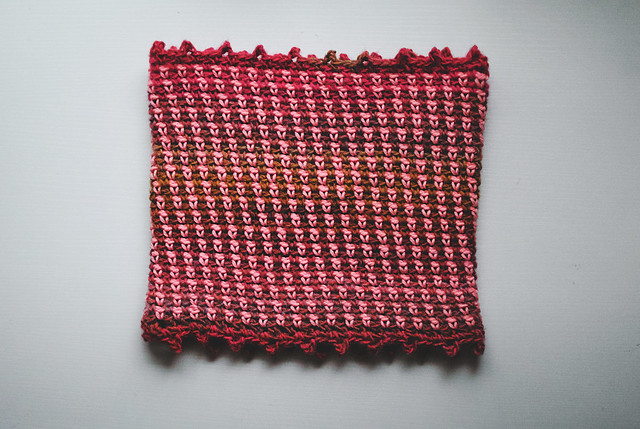
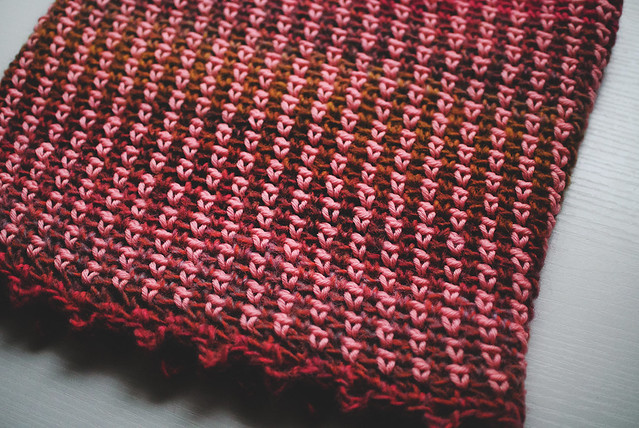
This super simple cowl is the perfect accompaniment to the wrist warmer pattern I shared, last year: Rube. It’s made with the same woven stitch and you alternate colors every row to get sweet sweet vertical stripes! I used Lion Brand Amazing for an extra special color changing treat.
Size
Fits average adult.
Measures 10″ tall by 10.5″ wide, flat & un-stretched.
Gauge
7 sts x 16 rounds = 4″ in woven stitch
Abbreviations(US terminology)
Ch: chain
Slst: slip stitch
SC: single crochet
sk: skip
st: stitch
sp: space
rep: repeat
Pattern
With color A, Ch 80, join with a slst into first ch, being careful not two twist.
Round 1: Ch 1, SC in same sp, Ch 1, sk 1 ch, *SC in next ch, Ch 1, sk 1 ch; rep from * around, slst to first sc. Round 2: Slst into first ch-1 sp, switching to next color, Ch 1, SC in same sp, Ch 1, *SC in next ch-1 sp, Ch 1; rep from * around, slst to first sc.
Repeat round 2 to desired height. I stopped at approximately 9″, ending with color A, fasten off color B.
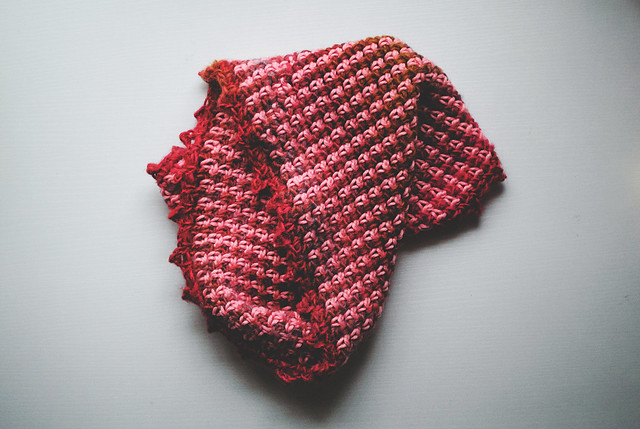
Top picot edge: Still working with color A, Slst into first ch-1 sp, Ch 1, SC in same sp, Ch 3, slst into first ch, SC in next ch-1 sp, Ch 1, *SC in next ch-1 sp, Ch 3, slst into first ch, SC in next ch-1 sp, Ch 1; rep from * around, slst into first SC. Fasten off.
Attach color A into a ch-sp made by the foundation chain, Ch 1, then work like top picot edge, starting with the “SC in same sp…”
Fasten off and weave in all ends.
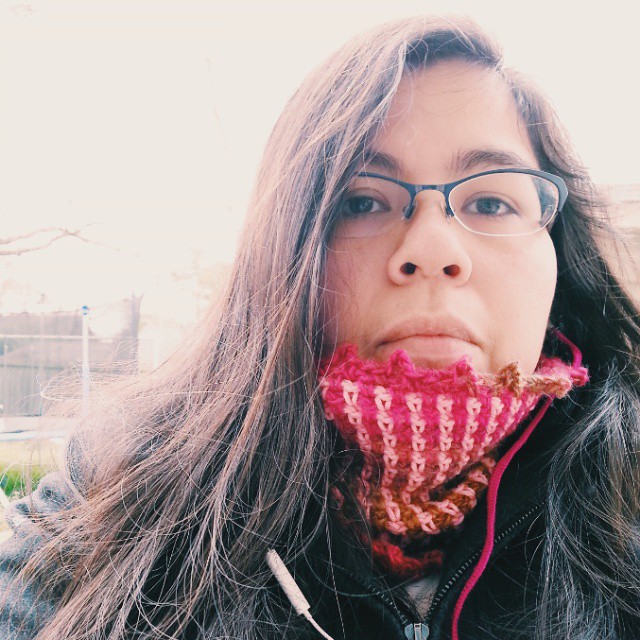
Me, when I first crocheted it, back in FEBRUARY!
There will be a visible “seam” where the rounds end and new color is joined. It looks more visible in photos than it does in person!
If you want a downloadable PDF of the pattern, check it out on Instructables!. Click “vote” at the top right corner of the page to help me out. :)
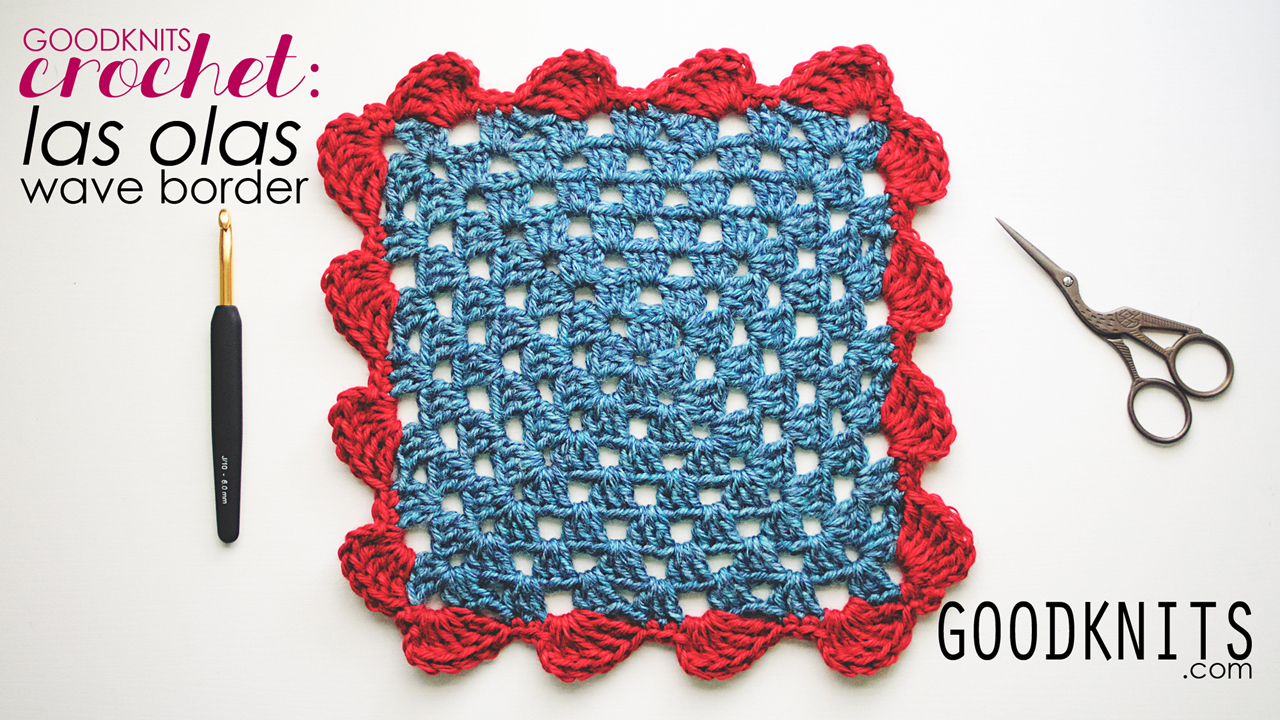
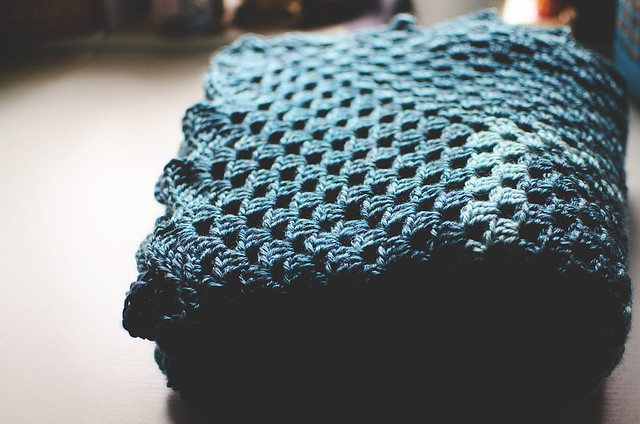
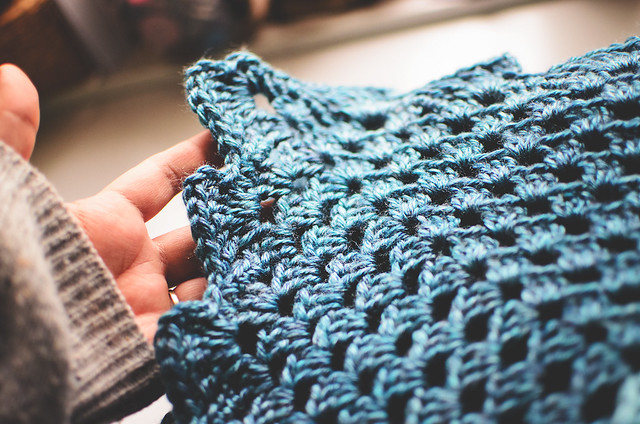
I mentioned on Instagram, a few weeks ago, that my uncle passed away. I made this blanket for my aunt. My uncle’s sister, who made the long road trip in from Mexico, started the border for me when I told her I didn’t know what to do. The blanket is a 40-round granny square, so I made a simple single crochet border that she worked over. Essentially, she crocheted into my last granny square round.
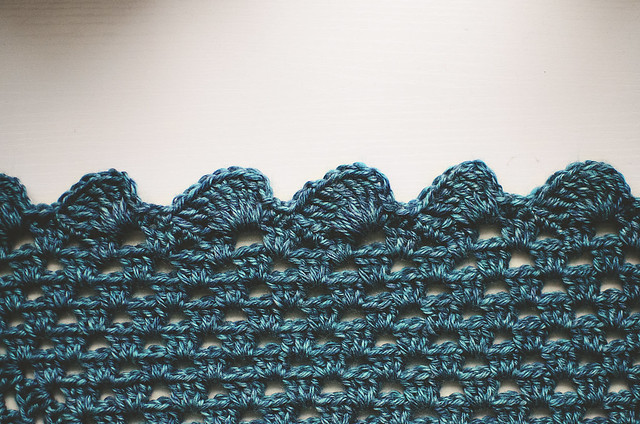
What resulted were these beautiful olas, or waves. I loved it and my aunt thought it was pretty, so when we ran out of yarn, I promised to finish it. I thought I would share the instructions, since I had never seen a border like this. It resembles a scallop, but they lean to the side, so it’s more wavy.
I made a video, which I’ve embedded below, but I want to put out the written instructions first. US terminology is used throughout. You should know: chain (CH), single crochet (SC), and treble/triple crochet (TR). This is the pattern for working around a granny square. You should have an uneven number of rounds, so there is an even number of chain spaces (ch-sp) between the corner spaces.
Attach your yarn in a corner and chain 1.
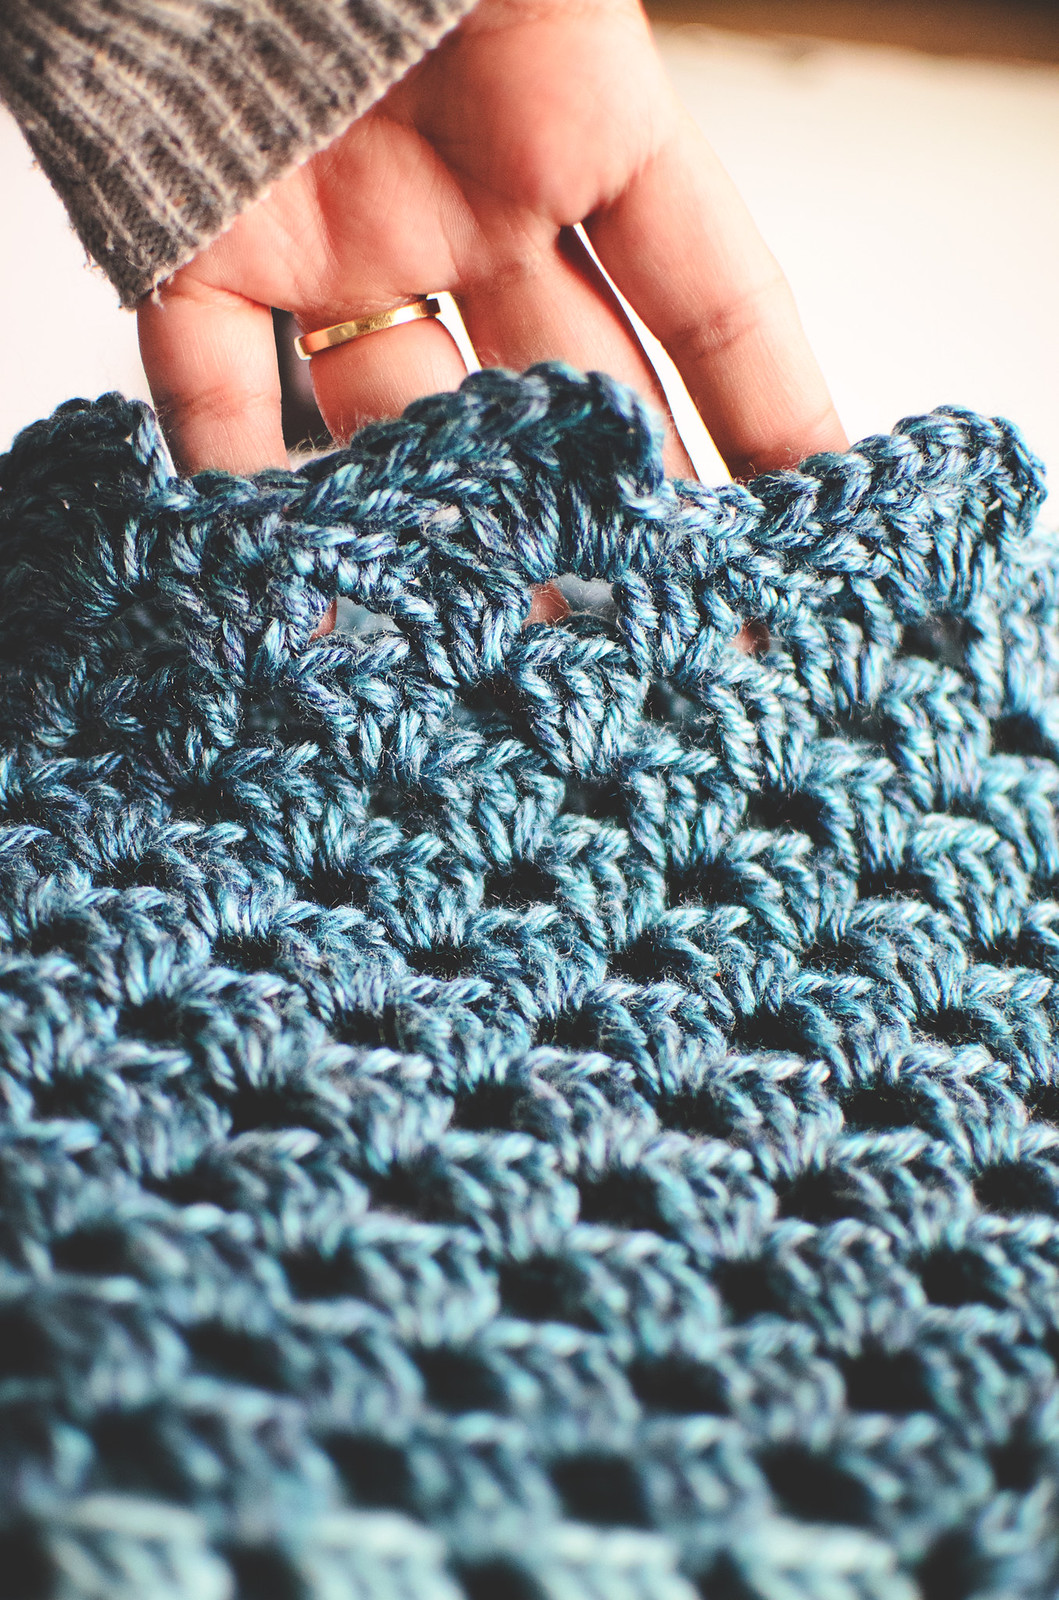
[SC in same space, Ch 2, 5 TR in same space. *Skip next cluster of stitches and space, SC in center of next cluster, SC in next stitch, SC in next space, 5 TR in same space; Repeat from * to last ch-space of this side of the square, skip last cluster of stitches and SC in corner space, Ch 2] Repeat between [ ] for 4 sides, slst into first SC. Fasten off and weave in ends.
To work this as an edge for other blanket patterns, start with a round of single crochet. There should be a multiple of 8 plus 3 between each corner space (I suggest working a [sc, ch 2, sc] into each corner).
Attach the yarn in the corner space (the chain 2), then work the first wave: ch 1, SC in same space, Ch 2, 5 TR in same space. [Skip 5 stitches, SC in each of next two stitches, work a wave in the next stitch: SC, Ch 2, 5 TR in same space.] Repeat between [ ] to the corner. Skip last 3 stitches and SC into corner, ch 3, SC in same space. Work the next edge the same way. Start with a wave in the corner, then skip 5 stitches, work 2 SC, and a wave…continue until you have worked all the way around the blanket. Slip stitch into the first SC.
Affiliate links help keep my blog running. If you are interested in any of the supplies used in this video, follow the links below:
There ya go. What do you think of videos? I get requests for videos, especially for the Mary Jane slipper tutorial, but they are tough to make! At least for me. I suppose it’s a learning curve and if I made more, things would feel more natural. I’m also getting over a cold, so I feel like I sound…weird. Anyway. Do they help? How’s the quality?
I keep mentioning that I’ve knit a whole bunch of cowls over the past few weeks. It all started with the #bulkyhatkal and my brand new set of interchangeable needles.
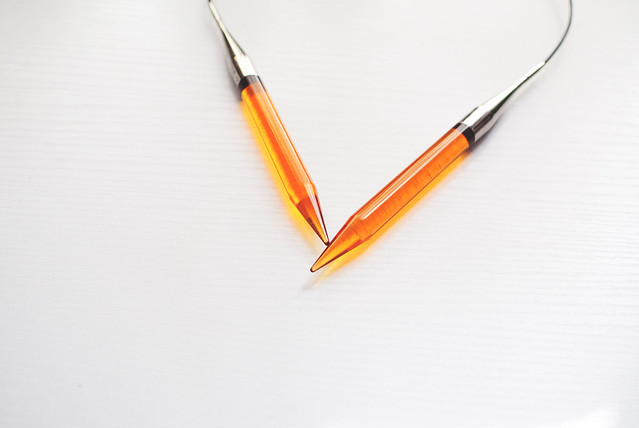
I received the Knitter’s Pride Trendz Chunky Set to work the KAL and they have been the best addition to the set of interchangeable needles I bought from Knit Picks, a few weeks ago. Those only go to size US 11, so I needed bigger sizes to work with bulkier weights of yarn.
I used the US 17 needles for my hat and then switched to the US 15 (seen above) for my cowls. The needles are fantastic! I’m new to interchangeables, so I don’t know how the cords compare, but I can’t imagine them working any better. They have the perfect amount of flexibility and the needle part is a great length–not too long or short. My hands didn’t get that sore feeling that usually accompanies bulky knitting.
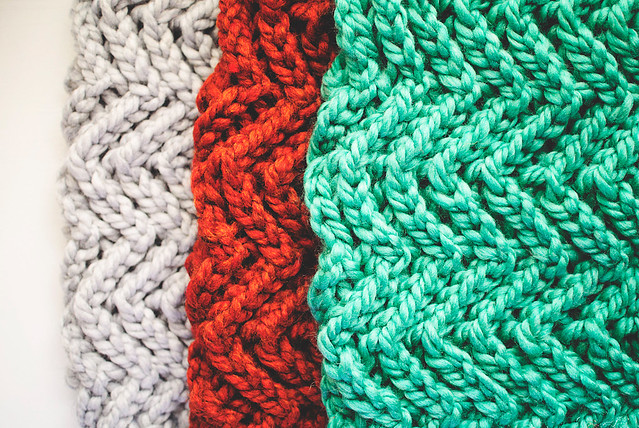
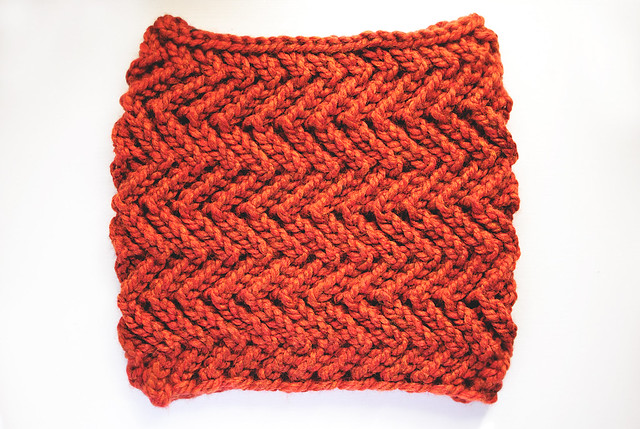
I picked up a few different colors of super bulky yarn at Michael’s and just took off! One of the very first patterns I tried was the Swirling Cowl by Signe Marie Ricter. That pattern is for even bulkier yarn than I’ve got, so I increased my CO to 50 and started. When I got about 5 rounds in, however, I decided I wanted to make the swirl go the other way, so I changed things up a bit. Working alternating repeats of left and right leaning stitch patterns, I ended up with a really cool zig-zag cowl!
I wrote up an explanation of my modifications, so you can make one for yourself! If you’d like the original swirly cowl, check out the link I posted above! It is really pretty. Make both?!
Knit with Loops & Thread Cozy Wool
Yarn: One skein of super bulky yarn: Lion Brand Wool-Ease Thick & Quick (6 oz/170 g equals 106 yd/ 97m) OR Loops & Threads Cozy Wool (4.5 oz/127 g equals 90 yd/82 m) Needle: 10 mm (US 15) 16-24″ circular needle
Right-leaning stitch pattern
*YO, K2tog; rep from * around.
Left-leaning stitch pattern
*SSK, YO; rep from * around.
CO 50, place marker and join to work in the round.
Start right-leaning stitch pattern and work for 5 rounds.
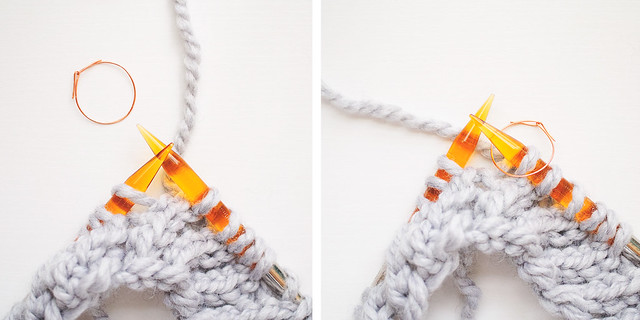
Switch to left-leaning stitch pattern, as follows: remove stitch marker (left photo), place first stitch on to right-hand needle without twisting, replace marker (right photo).
Start left-leaning stitch pattern and work for 5 rounds.
Switch back to right-leaning stitch pattern, as follows: do NOT make last YO, instead slip the stitch marker to the right hand needle (left photo), YO, and knit the first stitch (right photo). Resume right-leaning stitch pattern.
Continue switching between right and left-leaning stitch patterns to desired height. I worked 3 repeats each, then finished with another section of the right-leaning stitch pattern.
Bind off loosely, weave in ends.
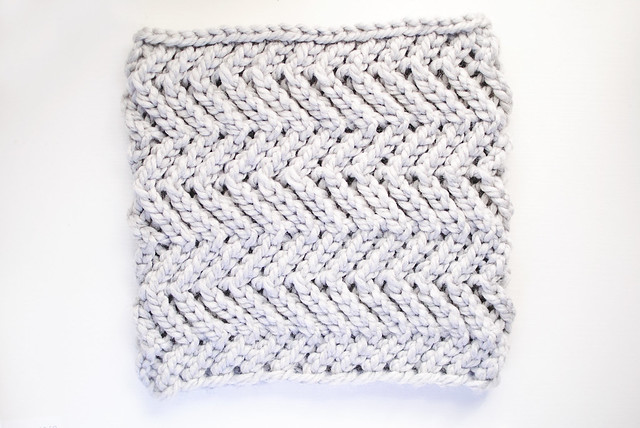
Cowl knit with LB Wool-Ease Thick & Quick
Ta-da! I think it takes me about 2 hours, or a movie, or 3 episodes of my favorite TV show, to work one cowl. That’s pretty sweet instant gratification, don’t you think? I want to make one with a 100 stitch cast-on and a few less pattern repeats, to loop around my neck a couple times. You only need to remember to CO an even number and the pattern should work out. Perhaps you want to make some boot cuffs? Try casting on about 24 stitches. The good thing is if you have to frog a project to adjust the size, you aren’t working on an incredible number of stitches, so it won’t hurt too much.
Disclaimer: I was sent a set of Trendz Chunky Interchangeable Needles for review. All opinions are my own. No monetary compensation was given, but the link above is an affiliate link from Amazon.
You may find affiliate links and banners throughout my blog. I earn a small commission from purchases made through these links. It helps pay for keeping this blog running! All reviews and products are items I have personally used and loved.


