
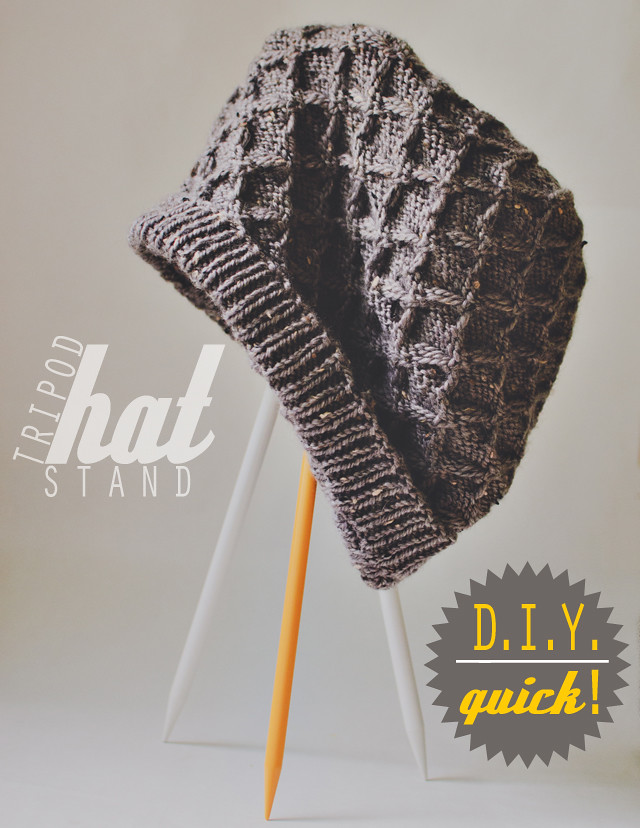
Hello, friends! I’m back with another (quick) D.I.Y. project.
I have seen some beautiful coat racks made with sticks, THIS ONE being my favorite. I wanted something on a smaller scale for me to throw hats on, so I rummaged through my most abundant supply of sticks–my knitting needle jar! I don’t know about you, but I almost never pass up a 50 cent set of needles at the thrift store. Especially the adorable plastic ones in a random assortment of colors! For this project, I used some of my repeat sizes, but don’t worry about your needles because we won’t be doing anything permanent to them.
ANYWAY–onward!
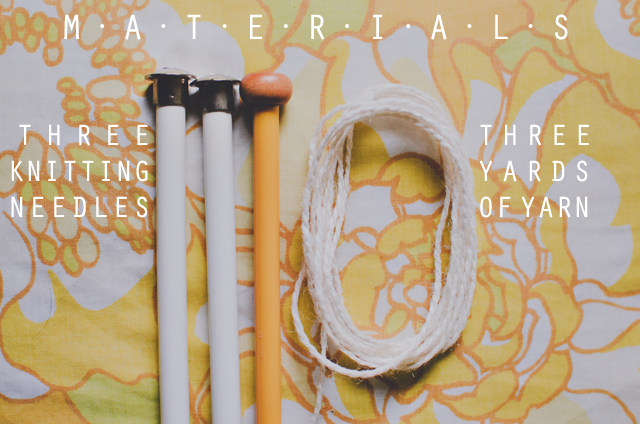
Materials:
3 [13″] knitting needles (OR cut a 3/8″ wooden dowel into 13″ pieces)
~3 yards of yarn
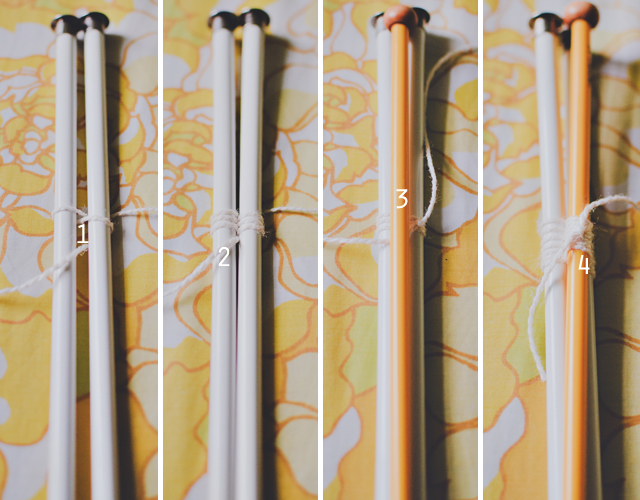
1. Leaving a 6″ tail, start weaving your yarn around two of the needles. Pull tightly with each wrap.
2. Weave in and out of the center and around each needle 3 times, then tie a tight knot with the tail.
3. Put the third needle on top of the stack and start weaving again.
4. Make the same weave in and out of the center around the new needle with each of the first two. Keep your yarn taught! I like to wrap around the new needle, then around one of the firsts, then back around the new, then around the OTHER first needle, then back around the new one…and so forth! You’re just trying to securely attach the needle to the stack while keeping your wraps even. Tie a knot to secure.

5. Open up the needles and make sure they can stand. If you wrapped tightly, you shouldn’t have any problem getting them to balance.
6. Use the remaining yarn to wrap around the whole set, securing your tripod in its open position. It won’t be permanently stuck open, but you’ll be able to put some pressure on top without it collapsing. Firm wraps are key!
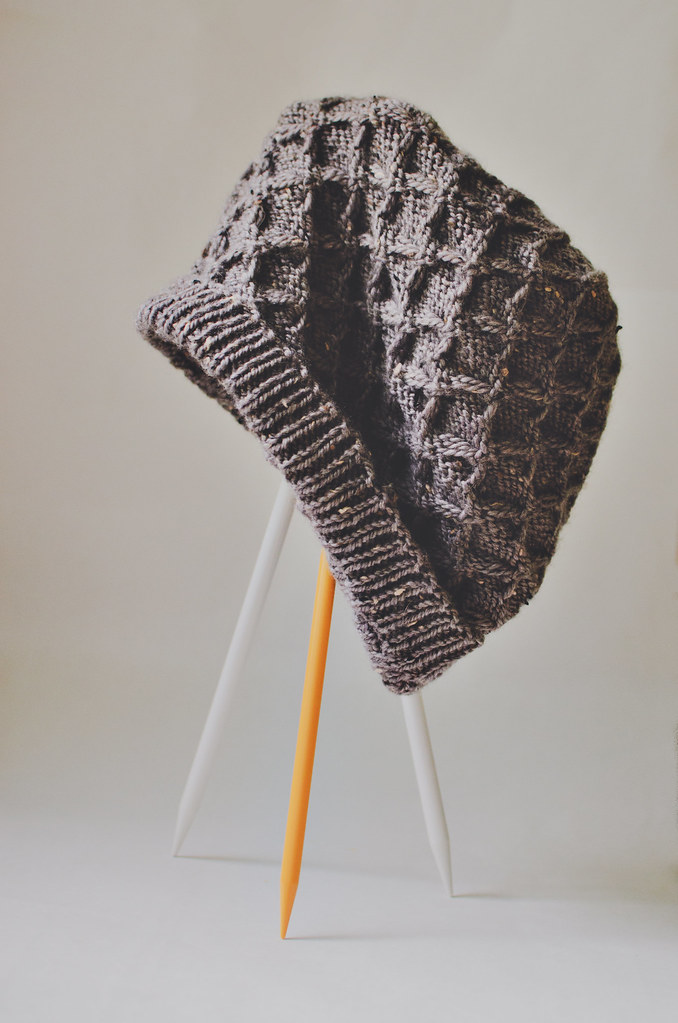
And done! Display your favorite hand-knits*. :)
The hat above is Honey knit with KnitPicks City Tweed DK.
Pin It


