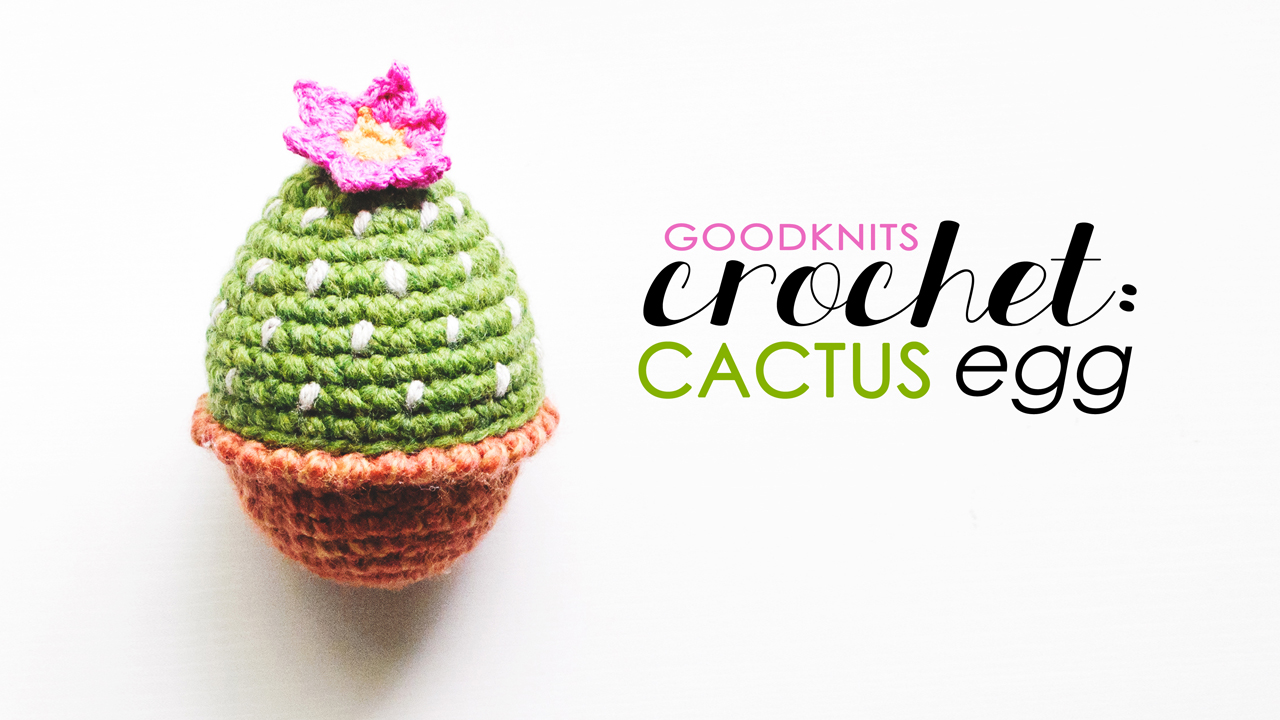
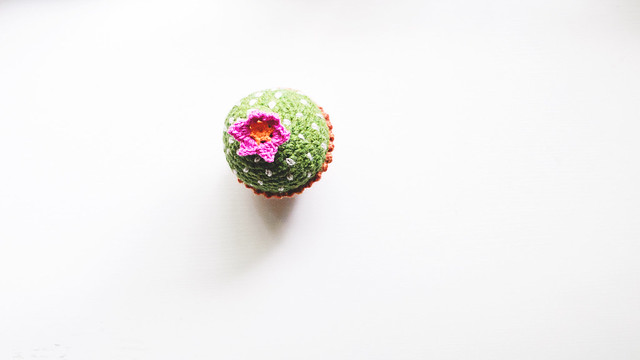
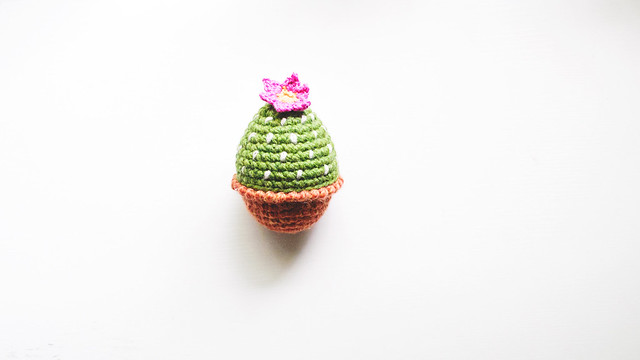
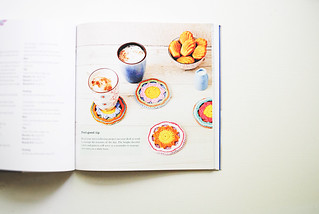
It isn’t a secret that I love crocheting these eggs. It also isn’t a secret that I love succulents and cacti! A few weeks ago, when the eggs started appearing at my local Target, I thought–why not combine the these two loves of mine? What resulted was this adorable cactus egg! I added a little flower to the top because those are my favorites. As always, you are able to fill these with treats for your little (or big) Easter egg hunters.
Do you wanna make one? There’s only a few days left til Easter, but I bet you can grow a little cactus egg collection by then!
Check out the pattern VIDEO I made, below. I learned how to make a stop motion video for this! Huzzah!
Stitch abbreviations & skills used
SC – single crochet
DC – double crochet
slst – slip stitch
ch- chain
st- stitch
magic loop
working in the round with and without joining rounds
picot – chain 2 size
The pattern is almost identical to the Bunny Food eggs pattern I shared, last year. The only difference is I did not work into the back loops only, so I had to adjust the height. The baby saguaro that makes an appearance at the end is made with two strands of worsted weight yarn and the pattern was adjusted accordingly. I added his little arms by working tubes that ended with some short rows, so they pointed upward when sewn on. I had to break out my Dremel to make holes in my egg for the plastic safety eyes. Labor of love, for sure!
Things to remember:
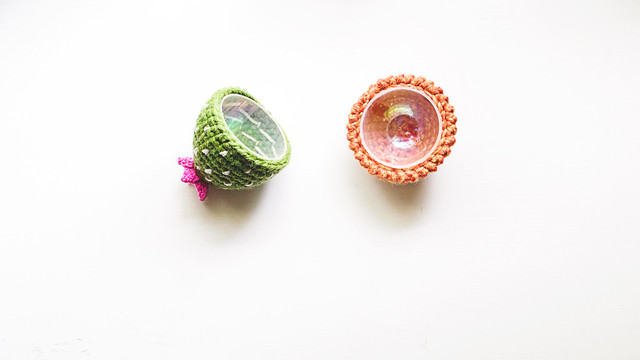
-Sew all pieces on before gluing!
-The crochet fabric is attached after with hot glue. I suggest starting at the top, then working slowly as you go down, stretching the fabric over the egg, until it completely (and evenly!) covered.
-When gluing, try not to let any fabric get stuck over the edge of the egg. If you have a glue mishap, let it cool, then pick it off with a needle.
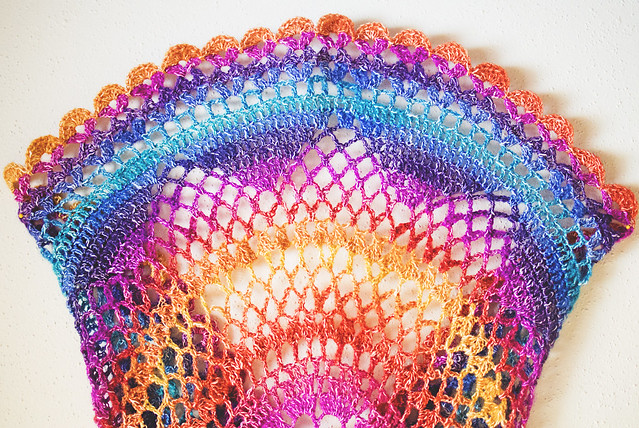
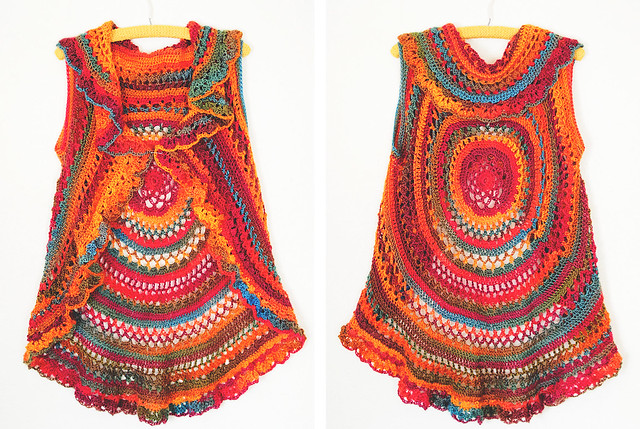
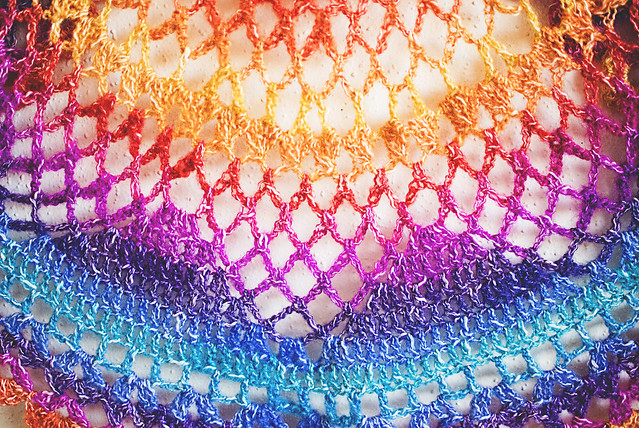
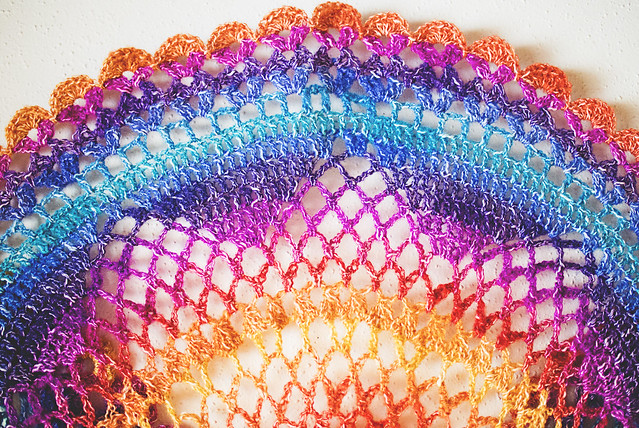
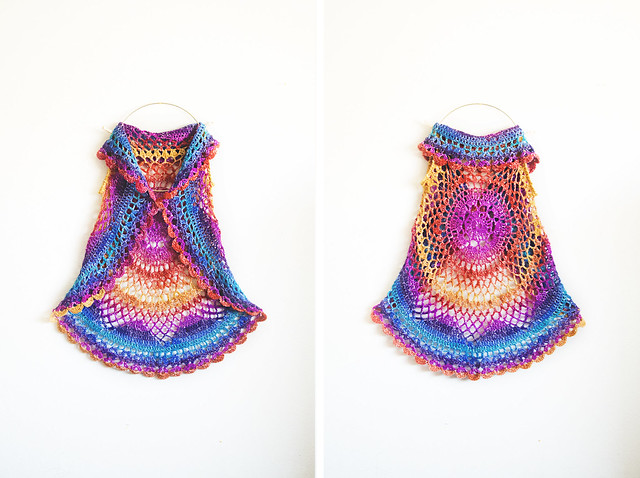
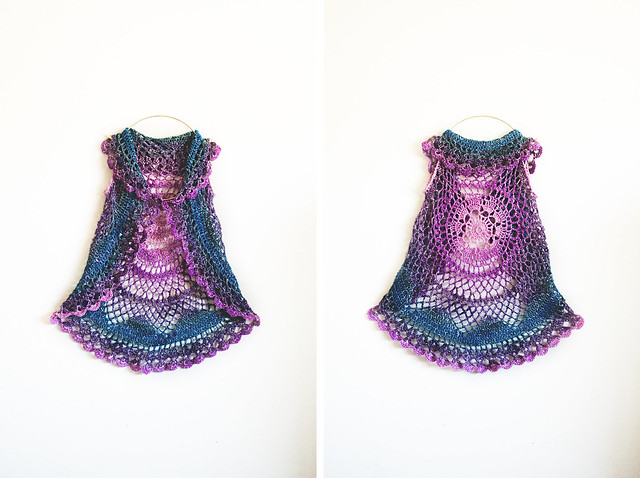
Sometime in 2015, a friend of my aunt’s asked if I could make her a “lacy sweater thing that looks like a rainbow.” She showed me a photo of a circular vest and my mind went, “ohhhhhh” and my mouth went, “YES!” I had known for a little while that I wanted to convert one of my doily blanket patterns into a wearable accessory.
For this version, I decided to use Anya and Red Heart’s Unforgettable yarn. I made some notes about my adjustments and prayed it would fit. I didn’t really have any sizes to go by, just estimations. When I gave it to her, she immediately put it on and…it fit! I was so relieved.
I had plans to edit my pattern and include the adjustments, so folks could make a vest if they wanted to. Maybe include instructions for making different sizes, because ‘Anya’ is mostly concentric circles and it was easy to place the armholes wherever I needed them.
Fast forward two years and my cousin asks if I could make a circular vest for her daughter to use as a swim coverup. I think about the one I made in 2015 and realize I never transcribed my notes. Actually, where IS that notebook? WHAT NOTEBOOK DID I EVEN USE?! You can probably imagine me tearing through every notebook I’ve used in the past few years. I.could.not.find.my.notes. I had to start from scratch.
I asked my cousin for size examples (so I can google size charts! I love that brands have their size charts online) and favorite colors. She said teal, pink, and purple were favorites and I spent the weekend looking up yarn choices. After checking out Unforgettable again, I realized it would be a little heavy for summer time use. Plus, I made an adult size vest, last time, and I needed one to fit an eight year old.
I ended up coming back to Lion Brand’s Shawl in a Ball a lot. I bought two different colors from Craftsy: Restful Rainbow and Lotus Blossom. The latter was almost exactly the same colors my cousin specified. I was so happy when they arrived!
I sat down to make the vest and realized I wanted to use Willow instead of Anya, this time. I used a 6.0 mm (US J/10) hook and started. Since my son is only a few months older than my cousin’s daughter, I decided to use a t-shirt of his to estimate when/where I would need to place the armholes. I simply laid my work on the shirt, the center of the circle a little below the center of the chest. I wanted the armholes to be on the top half of the doily, not right at the center, so the diameter of the circle needed to be bigger than the width of the chest.
When I got to the size I needed, I figured out where in the round I wanted to put the armholes. I decided that the beginning of the round should be in the bottom half, so I worked a small part of the round, then made a long chain and skipped a good amount of the repeats, then started again. I worked the pattern until I got to where I wanted the second armhole. I made another chain, skipped repeats, then finished the round. Armholes! I had armholes. I lined it up with my t-shirt and it was a pretty good match, so I moved on to the next round.
This round was a lot easier than I thought it would be. When I got to the chains, I just worked them like they were regular stitches. However many repeats I skipped in the row below, I just made that many repeats in the armholes. After the round, I counted the stitches (stitch counts are listed at the end of every round) and it matched up. Wheeeeewww!
I finished the rest of the pattern. I didn’t add any extra rounds, but I DID decrease the number of DC stitches in the scallops of the last round. I went from 12 to 8! I had only a few yards of yarn left, so this was a good adjustment! Plus, the round worked up far more quickly. I’m happy to report the vest fit, not only my son, but my cousin’s daughter, as well!
Restful Rainbow
Lotus Blossom
I’ve added these adjustments to the pattern on Ravelry (willow-web-alt.pdf), putting in the specific directions I used. I would LOVE to have other sizes, but I haven’t been able to find the time to try and work them out, plus I don’t know if it would be possible with this yarn, since it feels more lightweight than worsted. The diameter of the doily, laid flat, is 32″. The bottom of the armholes are about 16″ apart. The tops are 9.5″ apart. Maybe a larger hook would make a larger doily? If someone has a teen they want to make this for, try a 6.5 mm hook! If you want to make it for an adult, you may need to find a thicker yarn and use a 6.5mm or a 7.0mm hook. I would love to see any vests you make!
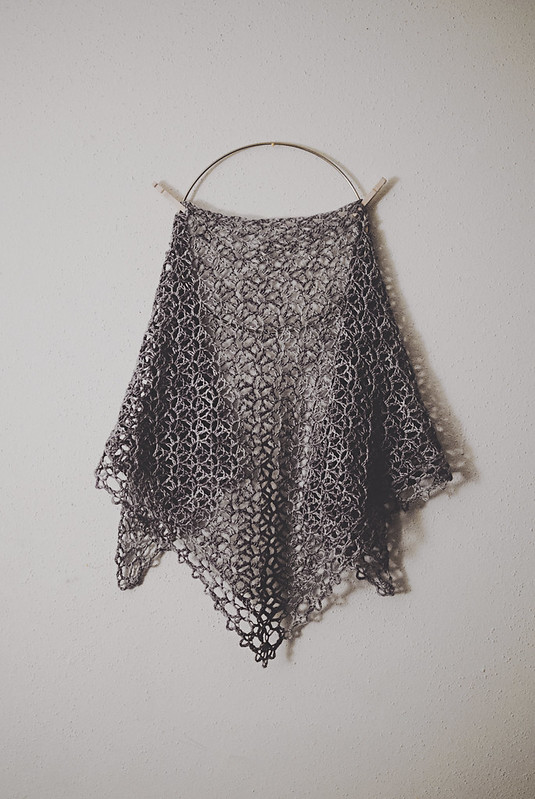
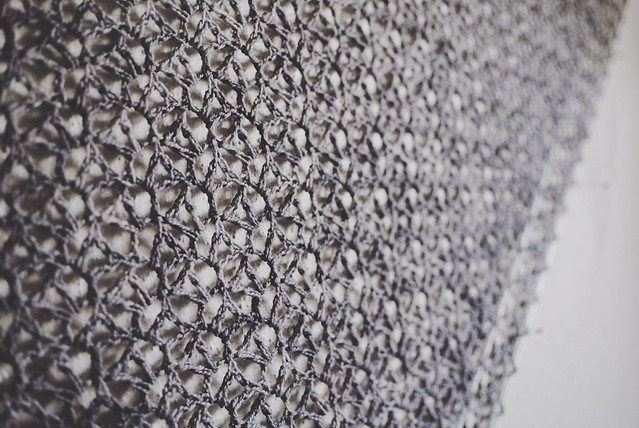
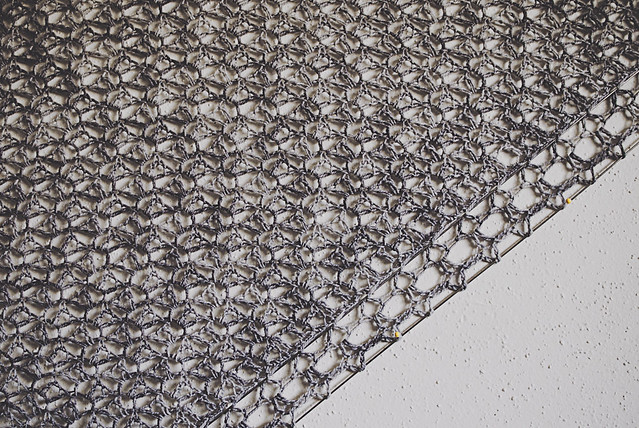
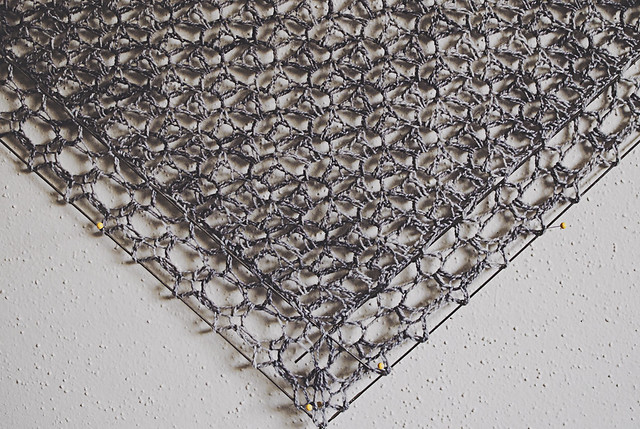
Hi, guys. Remember me? I want to talk about this shawl and soothing crochet in general.
Stitch patterns like the one in Fortune’s Shawlette create an environment for your mind to relax. After the first few repetitions, you don’t really have to think about it anymore; your hands know what to do. That’s what makes a good comfort shawl pattern–a stitch pattern you don’t have to think about, so you can pray for/about healing. Each stitch is free to transform from an “over, through, over, through” in your mind to a “thank you, God” or any other thought/prayer you need to put out there. I don’t think this was necessarily meant to be a prayer shawl, but it certainly was a great pattern to use as one.
Crochet is such a pwoerful tool to use to bring comfort and healing to yourself and others.
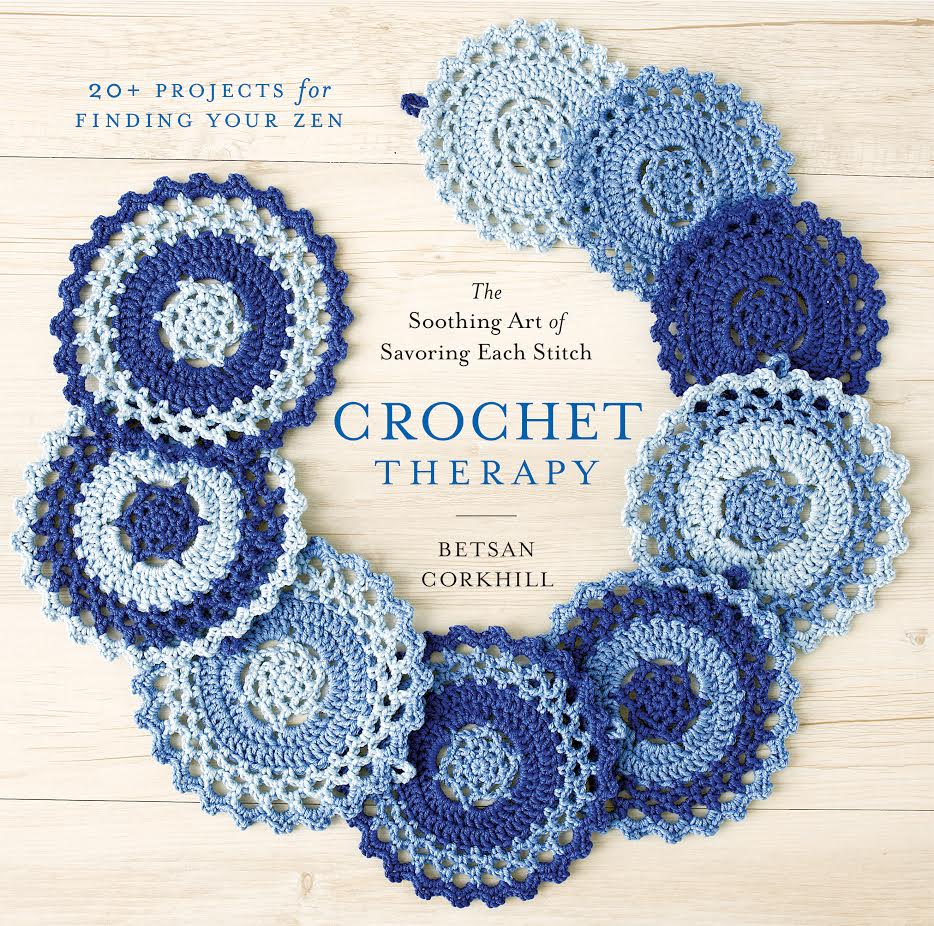
Almost a year ago, I was asked to contribute two patterns to a new book that would combine therapeutic exercises with complementary crochet projects. The idea was literally crochet as therapy. I thought this was a wonderful idea and I couldn’t be more happier with the end result. This beautiful book arrived a few weeks ago and was released in the US, a few days ago.
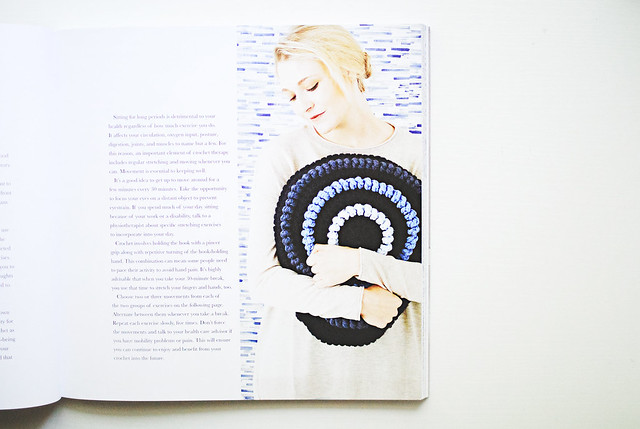
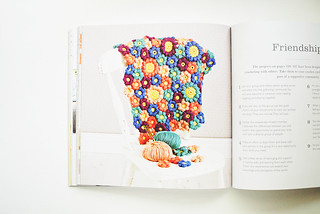
Behold, Crochet Therapy by Betsan Corkhill. First off all, let me brag a little: the mandalas on the cover are my project. I actually crocheted each of those! The photography and styling in this book is phenomenal. Every scene is light, calming, and downright gorgeous. All of the projects compliment each other so well.
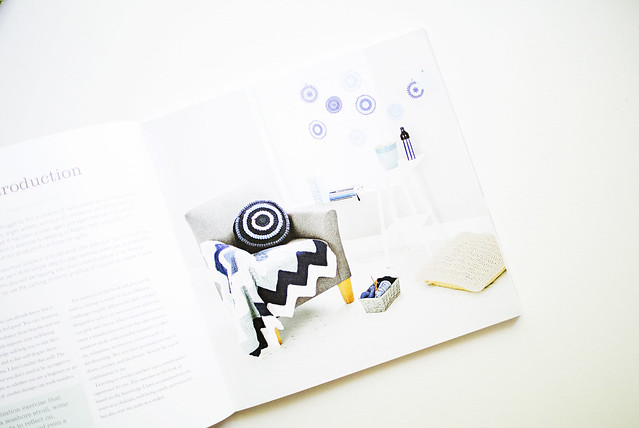
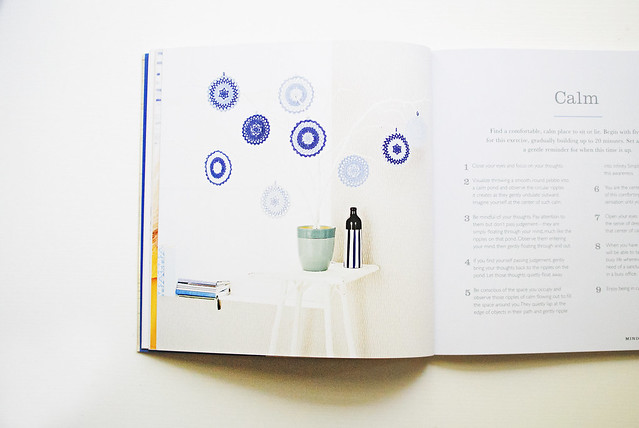
This photo is opposite the introduction page.
Let’s get down to the book itself. Betsan Corkhill is a well-being expert with a background in physiotherapy. She combines her medical knowledge with her craftiness and is a champion of the use of fiber arts as a therapeutic tool. The book is comprised of ten exercises, each accompanied by two crochet projects to enhance the benefits for your well-being. The exercises incorporate mindfulness, visualization, relaxation, daydreaming, and motivation. You can start from the beginning, or choose which you need specific help with. Why does crochet (and knitting!) work so well at creating a healthier, calmer, more creative mind?
It’s known that two-handed, coordinated patterns of movement that cross the midline of the body take up a lot of brain capacity. The brain can’t fully focus on two things at a time, so the more absorbing the task, the less capacity it has to pay attention to issues that are detrimental to your well-being.
Crafing will help take your mind off things that are making you anxious, or stressed out in general. I think we can all use a little bit less stress and anxiety, don’t you think?
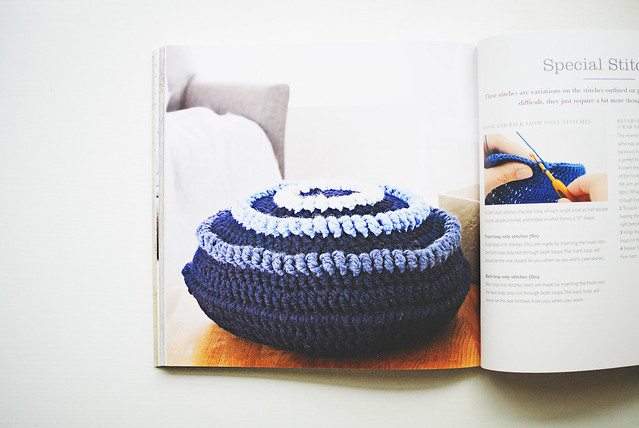
My two projects, the mandalas (seen best on the cover) and a round pillow, are part of the “Calm” chapter. The mandalas are a simple 9-round pattern that is easily memorized. You can take your hook and a bit of your yarn in your bag to crochet one whenever you find yourself in need of a calm few minutes. The pillow emulates rippling water. It’s a simple round construction with a few three-dimensional rounds (like ripples!). It’s crocheted in bulky yarn (I used Lion Brand’s Wool-Ease Thick & Quick) and works up very fast. It would make a fantastic calming housewarming gift.
Some of my other favorite projects in the book:
I’m swooning over that puff flower quilt!
Overall, I really love Crochet Therapy. It’s a book for every level of crochet, beginner to expert. Even the most seasoned crocheter will get something out of it. I always knew crochet was something to do when I needed to destress and focus, but now I have something I can utilize to help me gain even more benefits from the craft. I highly recommend the book to anyone who would like to learn about how crafting in general can help you be more mindful in your everyday life.
GIVEAWAY
I have an extra copy from the publisher and would LOVE to give it away! Enter with the widget below and a winner will be chosen late Friday night.
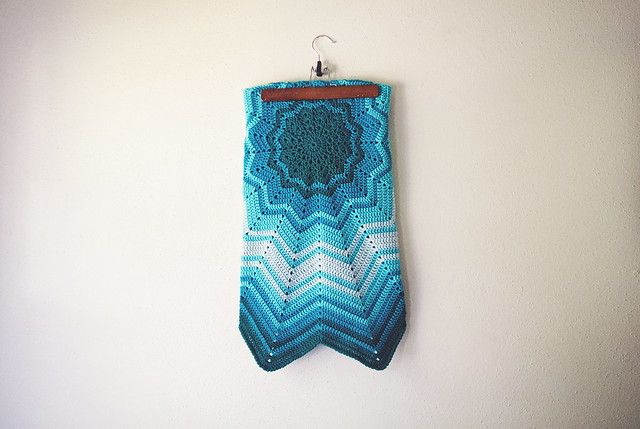
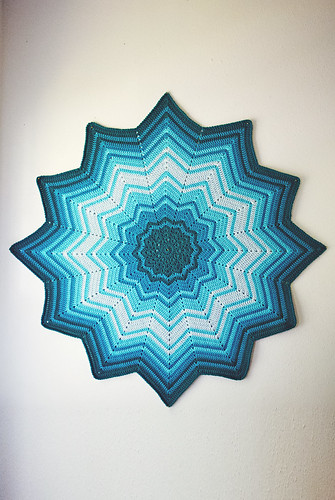
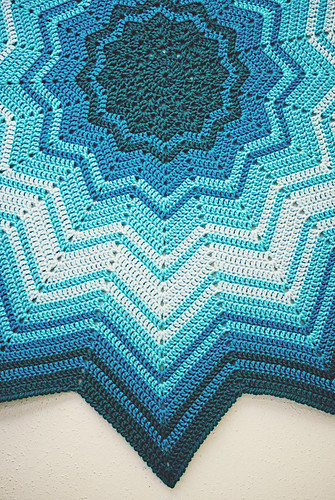
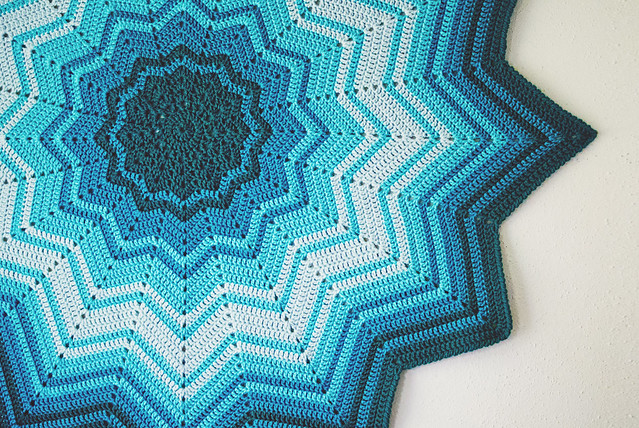
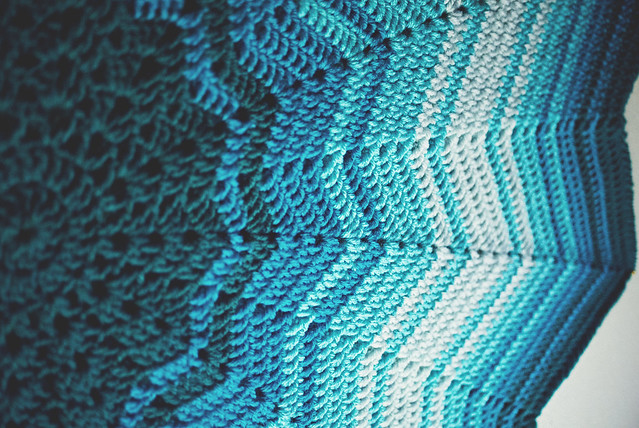
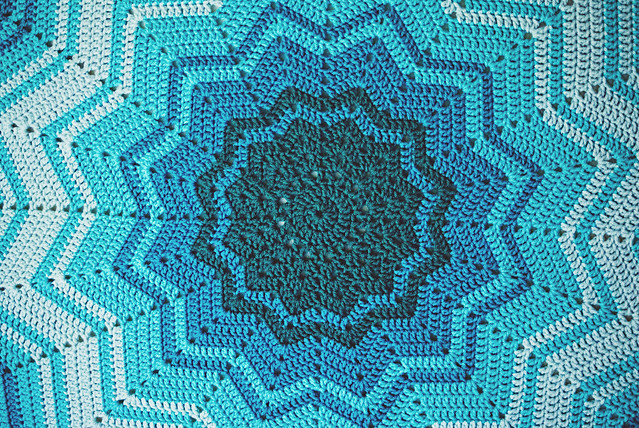
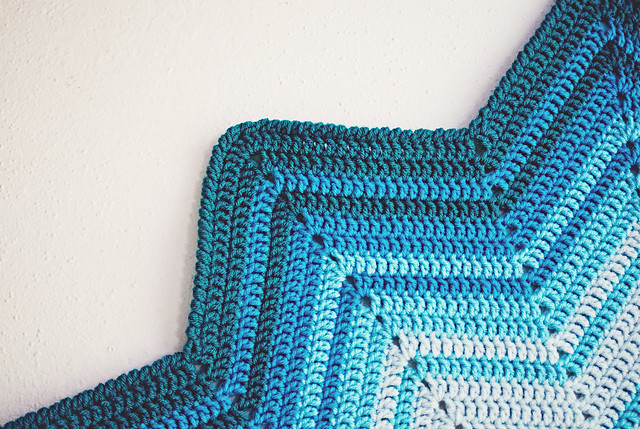
Pattern:Rainbow Ripply Baby Blanket Size: 33 rounds, plus one round of crab stitch Hook: 5.5mm (US I/9) Yarns: Hobby Lobby’s “I Love This Yarn!” in four shades of blue, completely replicated from the wonderful AFwifeCrochetNut, who hit it out of the park, again. Here’s her blanket: Little Boy Blue. I only changed the darkest color. I found a more…greenish(?) teal for that.
Do you remember my Study in Pink blanket from last year? Well, I loved it so much I HAD to make it in blue. We were blessed to have a cousin expecting a baby and I knew it’d be the perfect blanket. By the way, she delivered a beautiful baby boy, last month! I think he’s grandma’s tenth or eleventh great grandson. Can you believe that out of thirteen or so great grands, only two are girls? Bananas! I don’t complain because I love love love blue.
Have you made any baby blankets, lately? Do you find yourself gravitating to the same patterns over and over?
You may find affiliate links and banners throughout my blog. I earn a small commission from purchases made through these links. It helps pay for keeping this blog running! All reviews and products are items I have personally used and loved.


