By Lisa Gutierrez on 04/30/2012 
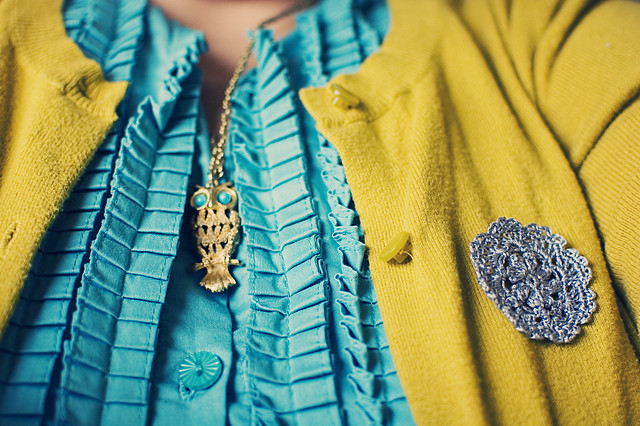
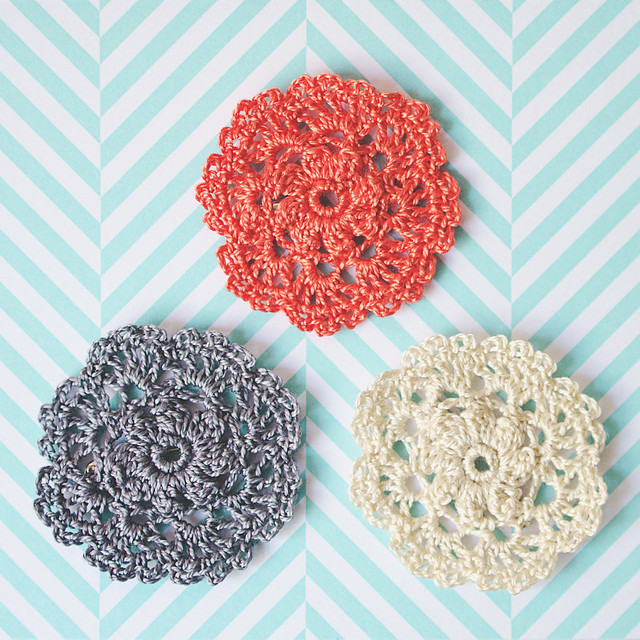
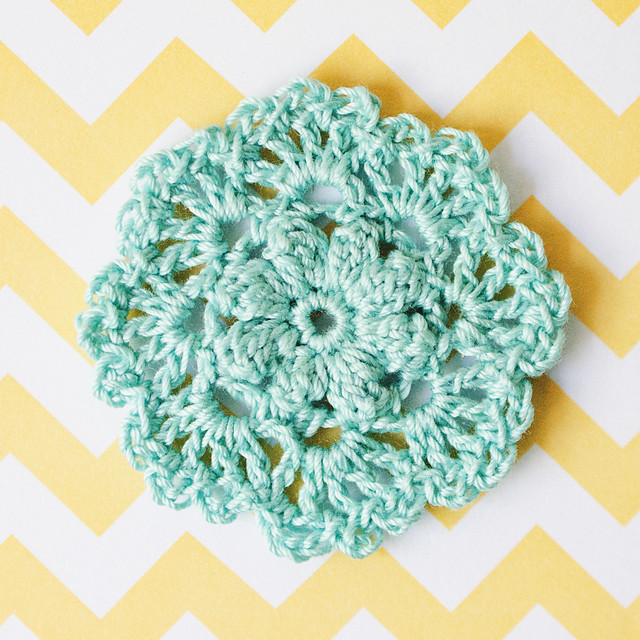
Cordi was always an after-thought pattern of Lace Love. It was more like a bonus. Since Mother’s Day is this weekend, I thought it would be a nice to time to share the pattern with everyone. They’re lovely little brooches that you can make to adorn gifts or cards.
There are two mistakes in the original pattern, but I’ve changed them, so this should be smooth sailing!
You need: approximately 8 yards of crochet thread (I use DMC Perle Cotton 8), 1.75mm crochet hook, and a needle to weave in your ends.
Finished size is approximately 2” in diameter. The piece should be about 0.75” after round 2.
Special Stitches:
Beg-POP (beginning popcorn): Ch 3, work 3 DC into the same stitch. Drop the loop from your hook and insert it from front to back into the top
of the beg Ch-3. Grab the dropped loop with your hook and pull it through the stitch to complete.
POP (popcorn): Work 4 DC into the same stitch. Drop the loop from your hook and insert it from front to back into the first DC of the group. Grab the dropped loop with your hook and pull it through the stitch to complete.
PATTERN (US terminology)
Ch 5, slst to first ch to make ring.
Round 1: Ch 1, 8 SC into ring, slst to first sc. (8 SC)
Round 2: Beg-POP into first SC, Ch 3, *POP into next st, Ch 3; Rep from * around. Slst into top of Beg-POP. (8 POP + 8 ch-3 sp)
Round 3: Ch 1, SC into first ch-3 sp, Ch 3, SC into same sp, *SC into next ch-3 sp, Ch 3, SC into same sp; rep from * around, slst into first SC.
Round 4: Slst into first ch-3 sp, ch 4, DC in same sp, [Ch 1, DC, in same sp] 3 times, *DC in next sp, [Ch 1, DC in same sp] 4 times; Repeat from * around, slst into third ch of beg ch-4.
Round 5: Ch 1, SC in first ch-1 sp, [Ch 3, SC in next ch-1 sp] 3 times, *SC in next ch-1 sp, [Ch 3, SC in next ch-1 sp] 3 times; Rep from * around, slst into first sc.
Fasten off. Weave in ends and attach pin in center back.
Enjoy!
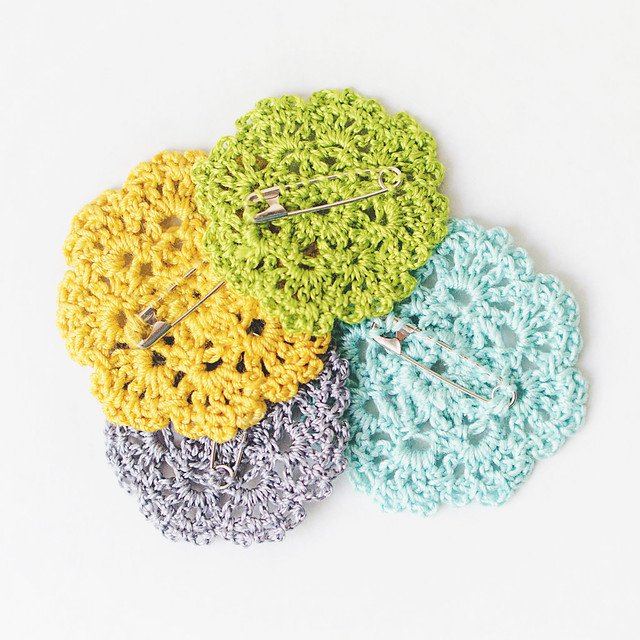
If you make any, be sure to add them to the Ravelry page!
If you can’t crochet, but would still like a doily brooch, see my shop!
Pin It
By Lisa Gutierrez on 04/24/2012 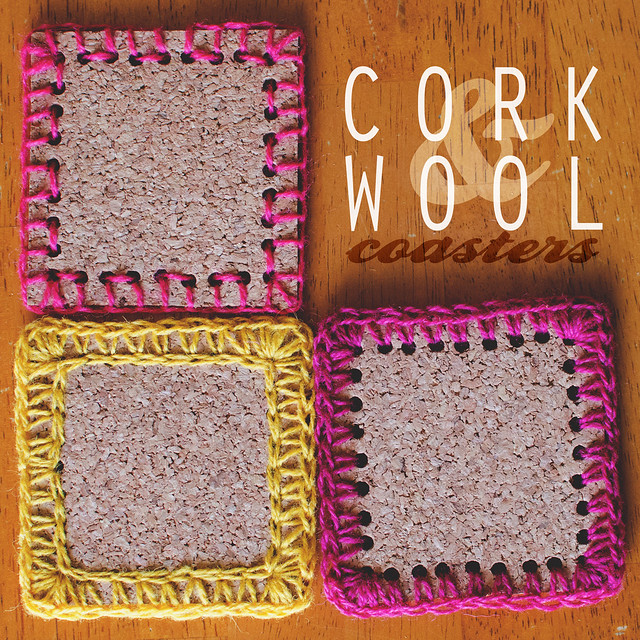
It’s been a while since my last DIY, so I thought I would remedy that with a quick cork coaster idea. It’s pretty simple and you can have a set made in under an hour, I bet. Below you will find instructions for both crochet or embroidered coasters.
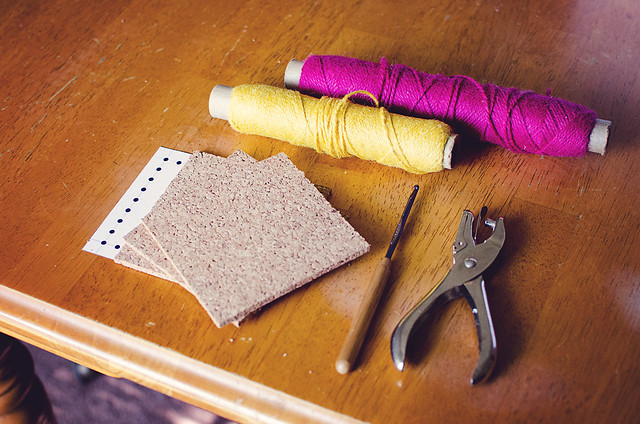
Supplies:
4″ x 4″ cork squares (I buy 12″ cork tiles and cut them with a rotary cutter)
standard hole punch
DK weight yarn— I used needlepoint wool, but any thin yarn will do
2.75mm (C) hook (increase the hook size if you use a thicker yarn, but make sure it fits through the holes)
yarn needle
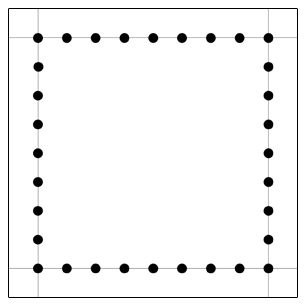
template

Use the template to punch holes evenly around the square.
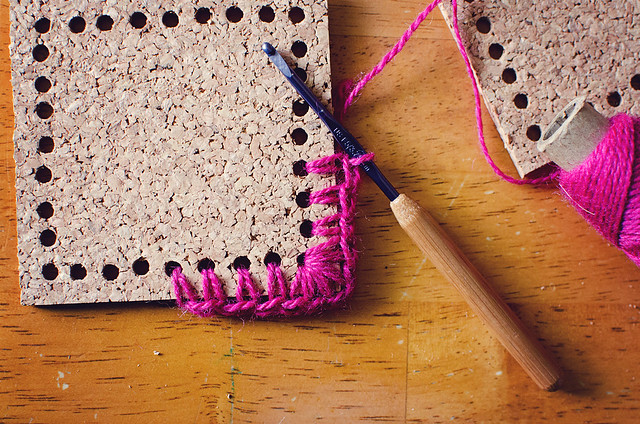
If you crochet, attach the yarn at the center of one of the sides. Single crochet (US) around the coaster, making 5 single crochet stitches in the corners. Slip-stitch to the first SC to end. Optionally, you can slip-stitch through all holes, if you want to fill them (see yellow coaster in title image).
If you haven’t yet picked up the craft of crochet, below is a simple embroidery stitch called the blanket stitch.
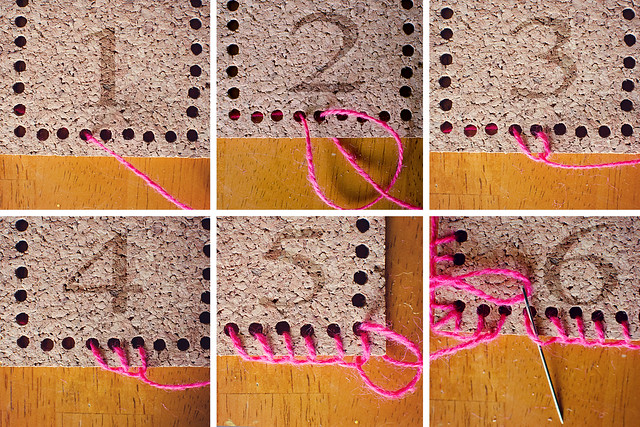
1. Insert needle from back to front through a hole. Bring through about 2 yards of yarn and leave about 10″ hanging at the back.
2. Insert needle from front to back through the next hole, making sure to bring your needle through the loop created.
3. Pull snug against the edge of the coaster.
4. Repeat steps 2 & 3 until you get to a corner.
5. At the corners, repeat steps 2 & 3 twice more in the same spot (3 stitches in each corner).
6. When you come to the end, pull the rest of the yarn through the first loop, as shown in last image.
Using the beginning & end yarn, tie a knot and weave in the ends through the loops on the back.
And that’s it! If hearts are more your thing, check out my last cork coaster: Embroidered Heart Coaster. These would make mighty cute Mother’s Day gift sets. ♥ ♥
Pin It
By Lisa Gutierrez on 04/10/2012 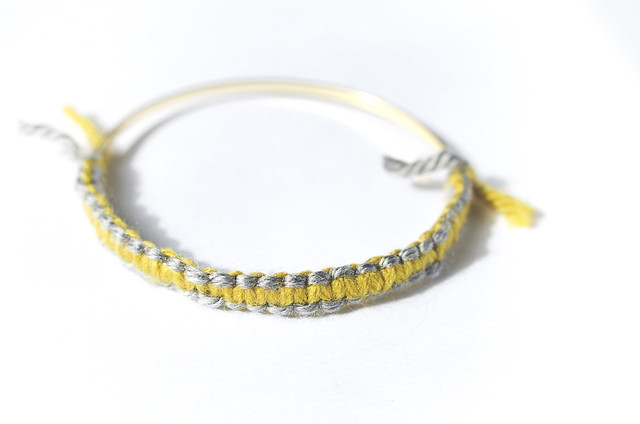
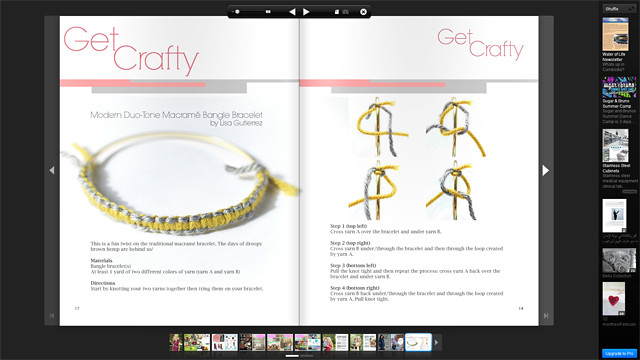
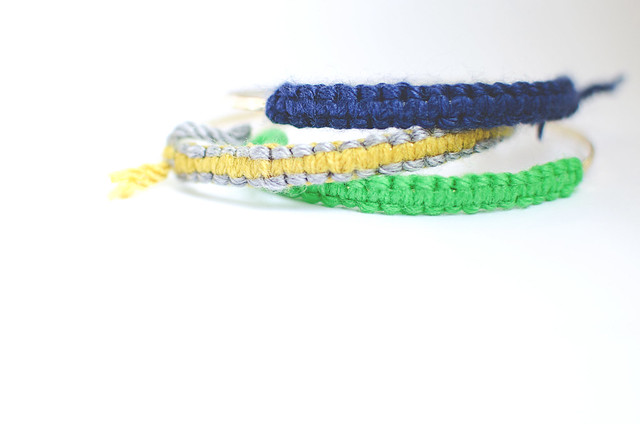
I recently did a little DIY for the Spring 2012 issue of Stroller Magazine. It’s a free publication primarily geared toward moms.
The step-by-step photo DIY is easy to follow and you should have a pretty bracelet in no time at all. This is a fun twist (oh, a pun!) on the traditional macrame bracelet. Gold and bright colors > droppy brown macrame. Go and check it out!
Stroller Mag is no longer available, so I put the steps up on my blog HERE.
 Pin It
By Lisa Gutierrez on 03/10/2012 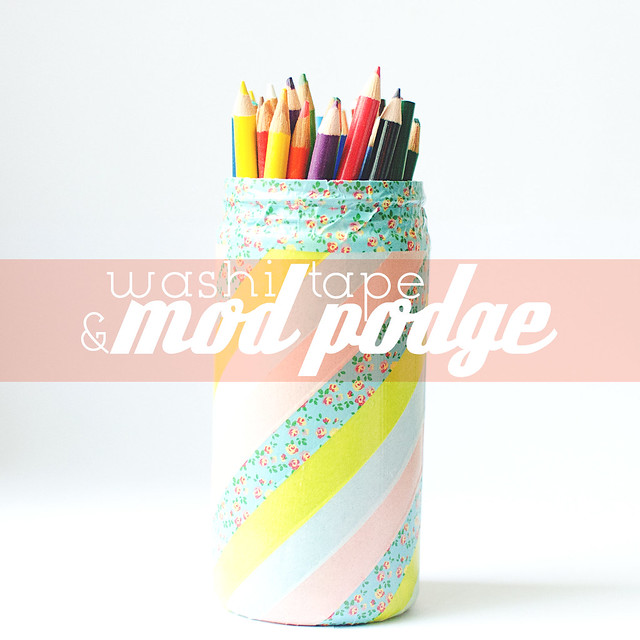
The giveaway winner was chosen and posted in the widget! If you didn’t win, but still fancy yourself a pretty jar for markers, pencils, knitting needles, crochet hooks, branches, or whatever, make one yourself! It would probably be the easiest project you ever undertook.
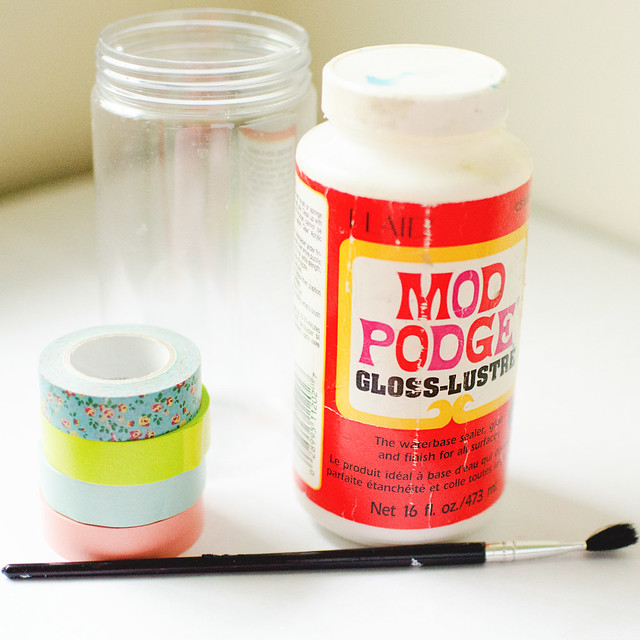
The only supplies you need are: an empty container (this is a plastic container that had cheap grated parmesan; we eat a lot of pizzzzza), washi tape, mod podge, and a paint brush.
Cover the jar in washi tape and then give it a few thin coats of mod podge. That’s it.
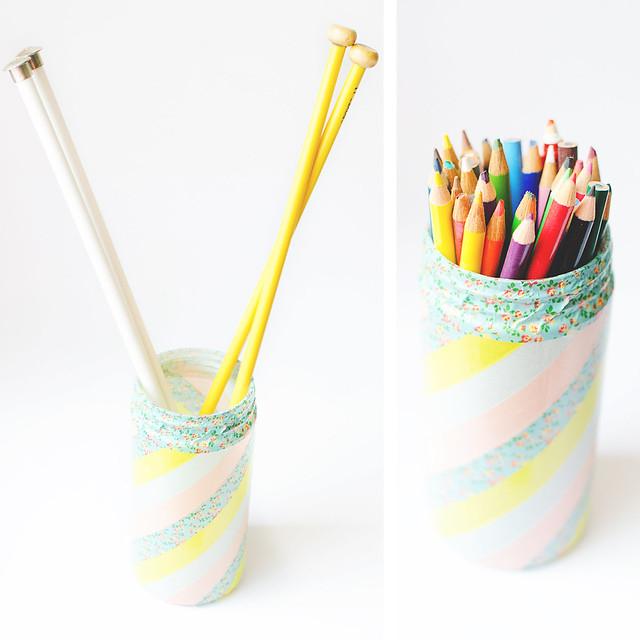
The diagonal lines were trickier than the straight horizontal ones, of course, but it still worked out nice.
Fun fact: my container of mod podge is older than my oldest child (he’s almost 7)! It’s on its last leg and will probably be replaced soon.
Pin It
By Lisa Gutierrez on 02/19/2012 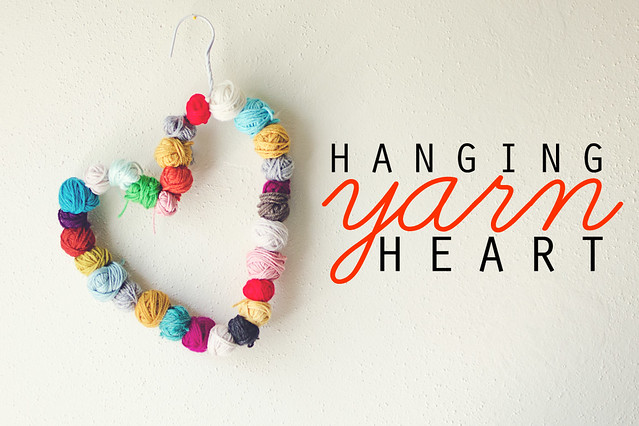
I know Valentine’s Day has passed, but I kind of like hearts. And I LOVE yarn. My scrap jar is one of my favorite sources of craft supplies. This project is so easy, I didn’t take any step-by-step photos.

You start with a wire hanger (mine is coated in white plastic*), shape it into a heart, or circle, or whatever shape you want, untwist the top, thread your balls of yarn scraps around the whole thing, then re-twist the top. Done. No glue means you can re-use the yarn if you find yourself on the path of, say, a granny square afghan.
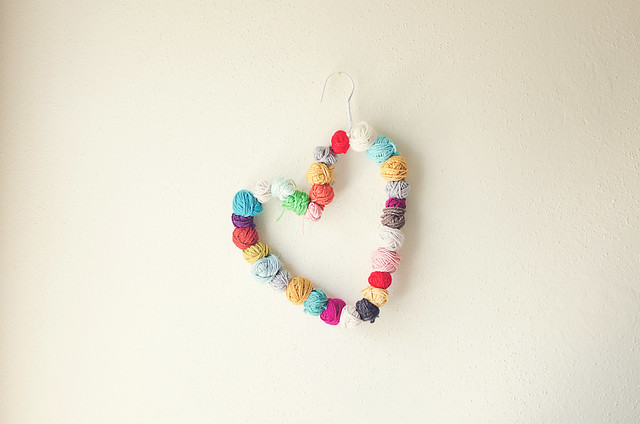
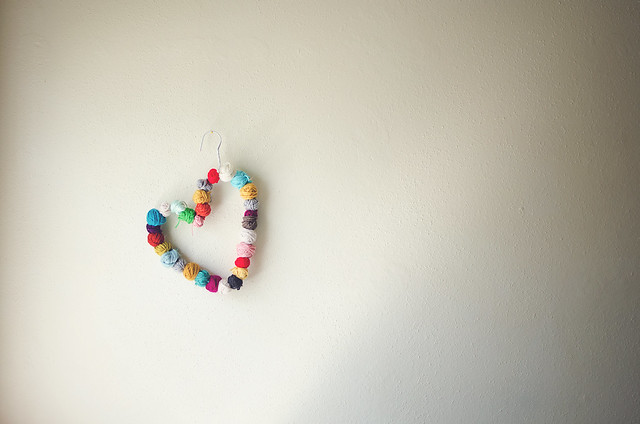
*My plastic-coated hanger kept its original twist while I threaded, so re-twisting was a cinch.
Pin It
|
Disclosure You may find affiliate links and banners throughout my blog. I earn a small commission from purchases made through these links. It helps pay for keeping this blog running! All reviews and products are items I have personally used and loved. |


