Past Valentine’s Day Projects

hearts and heart
[Knit heart, thrifted garland]

9.365: plate of cupcakes
[Cupcake containers]

heart crayons [1]
[Heart crayons]

amigurumi heart
[Amigurumi heart friend]

scoop of love
[Heart pins]

My husband has been in Las Vegas 4 out of the past 5 Valentine’s Days. He works for an apparel company and so he’s there for the men’s fashion convention, MAGIC (ha). The first few years it really bummed me out, but now I’m used to it. These days, I consider it more of a kid’s holiday. We get to play with pinks! Reds! Whites! Hearts! Cupcakes! It’s a crafty holiday and so I really dig it. How about you?

Do you like Valentine’s Day or do you ditch it? Is it more of a romantic or fun holiday for you?

I’ll be back soon with a super simple under-five-minutes crochet heart pattern.

Pin It

Make it: Hanging Card (& photo) Holder

00-title

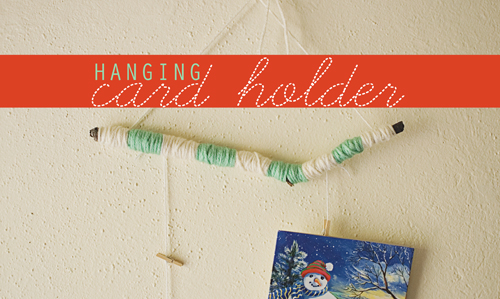
Are you receiving Christmas cards yet? We got our first a few days ago and it’s been hanging out on my shelf since then. This morning, I decided it needed a new home. I wanted something small, but still cute. ALSO, I wanted something I could hang on to past Christmas. Perhaps something to hang my Instax photos from? Mmmhmmm!
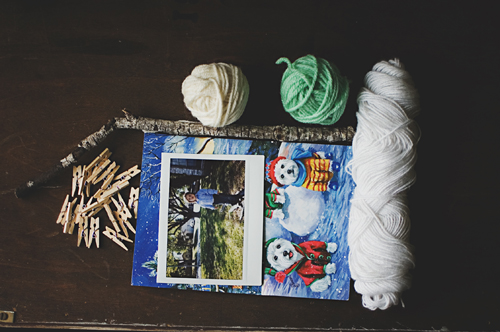
00-mats

Supplies:
random thin tree branch (this one is about 11″ long)
yarn (I used regular worsted weight for stick-wrapping and some fine weight cotton for hanging)
tiny clothespins
cards! and/or photos!
other: scissors, pin or nail to hang the holder from

01

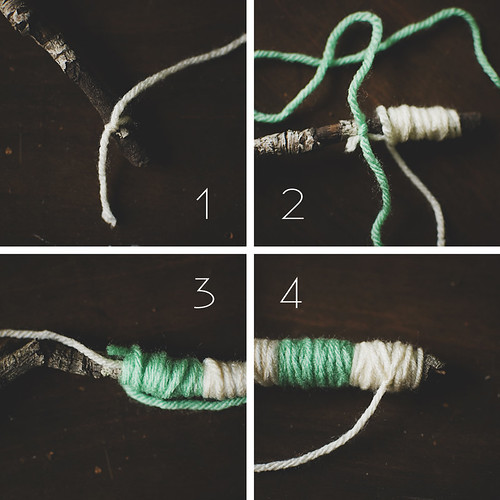
1. Tie a knot and start wrapping up your branch.
2. After about an inch or so, tie on your second color and start wrapping.
3. Wrap the second color around your branch AND the first color’s tail.
4. Keep wrapping, alternating colors (OR keep it solid OR add more colors). When you get to the end, cut off about 2 feet of your last color and tie a knot on the branch.

02

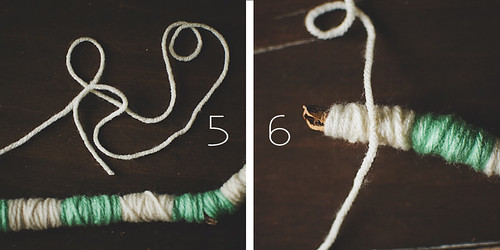
5. Your excess yarn should be able to reach across to the other side of the stick. 2 feet is what I used for my 11″ branch.
6. Tie your yarn around the other end of the branch. Trim any excess.

03

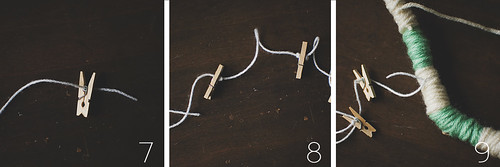
7. Grab your finer weight yarn and cut a piece about 18″ long. Tie a knot an inch from the end. Thread the yarn through the spring of your clothespin.
8. Tie another knot (large enough to not slip through the spring) and thread more pins. Leave about 4-5″ between each pin.
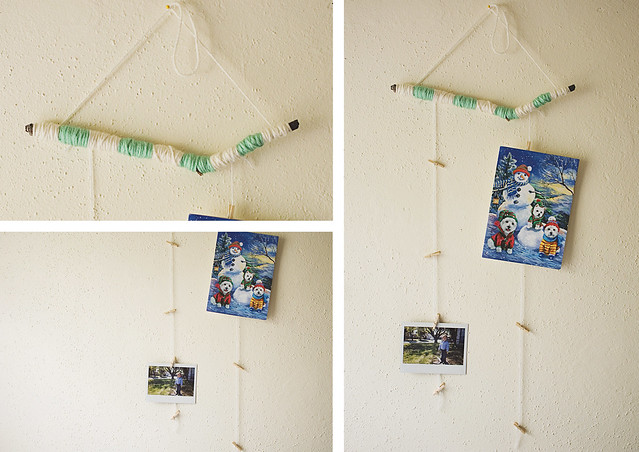
9. When you have about 4″ left, tie your string of pins around the branch.

Make another string of clothespins and tie around your branch as well. Hang and enjoy!

col

Make it: Winter Hat Ornaments

Another November sponsor is here with a SUPER adorable DIY! My son is on Thanksgiving break and I think we’ll be making a few of these this week!
——————————

Hello, Goodknits readers!

I’m Kate from, Otillie’s Closet and I’m thrilled to be posting on one of my favorite knitting blogs. Lisa is such an inspiration by balancing an active knitting and crochet life all while keeping track of her two adorable boys. Because of that, I thought her readers (you!) might enjoy a fun holiday DIY that involves yarn and is kid-friendly. I remember making these as a kid and in fact I still have a few hidden away in a box that I put on my tree every year. These simple Winter Hat Ornaments are perfect to make while digesting your Thanksgiving turkey.


You might have even made these as a kid as well! In case you don’t quite remember this tutorial is for you! Let’s get started by gathering a few supplies…


1. Scissors
2. Toilet paper or paper towel tube
3. Sharpie
4. Measuring tape or ruler
5. Scraps of yarn! Grab any size and any colors you have in your stash.


Flatten your paper tube. Don’t worry about bending it.


Measure sections that are 3/4 of an inch wide. Use your sharpie to mark and then cut.


With a regular toilet paper tube I got five rings.


Cut yarn strands roughly 14 inches long. Don’t worry about being too exact! Fold each piece in half and cut as many as you possibly can.


Slip the loop from one strand of yarn through a paper tube. Loop it around the two ends and pull tight.


Keep going all the way around the tube. Make sure you have enough strands to cover the paper but don’t squash the yarn too closely together.


Now squish all those strands through the tube….you’ve just formed the brim of the hat!


Using one of your spare strands of yarn tie a double knot about an inch from the brim. I also used this strand to tie a little loop which I will use to hang the ornaments.


Trim the loose strands to form a puffball. Make it as fluffy or as short as you want!


And there you have it! Pretty cute, right? It’s pretty fun to get creative with different colors and fibers. I used two worsted weight yarns and one bulky. Little fingers might have more success with bulky yarn.


I hope you have fun with these little guys…they are kind of addicting to make! Thanks to Lisa for letting me do this post – it made me feel like a kid again. If you make any of your own stop on by my blog and let me know!
——————————

Aren’t these the cutest??! I want to grab my whole jar of scraps and start making a bunch. I may have to pass this DIY on to my kiddo’s teach for them to make before Christmas vacation. Go visit Kate’s blog and tell her how awesome she is!

Pin It

diptych: doily & pumice

diptych: doily & pumice

I love the looks of lace covered stones/river rocks/whatever. I thought I would try making one, but I don’t have any flat rocks AND I put away a lot of my crochet cotton. I DO have a few of these pumice stones from some personal care kits and a pile of doilies. And so I decided to use it to wrap this stone.

I love the clash of the textures!! The doily I used on this was annoyingly small. All my vases covered it completely and it felt purposeless. Not anymore!

r1

I ♥ Vintage Craft [#2]

vin1

I’m back again to share some more Vintage Craft LOVE! My last post can be found here.

That hanger up there was made using some strips of torn fabric. The original idea came from Family Circle’s Favorite Do-It-Yourself Projects, copyright 1976.

vin

In the book, they say to use old NYLONS. Like, old PANTYHOSE that you DYE whatever color you want. Ummmm I don’t wear pantyhose, so…no. I just tore some strips of vintage fabric and got to knotting!

I started on the end of the hook of the hanger and went down and around. If you know how to make a macrame bracelet, then you can do this project! It’s just a bunch of square knots. Imagine the hanger is your center strands and make your knots around it. Easy peasy! My rough estimation had my strip length total at about 11 yards. I had ten 40″ pieces. I knotted two together to start and when those ran out, I knotted two more to their ends. It took less than one episode of Big Love to complete.

Join in on the Vintage Craft fun:

DanielleThompson

Pin It