Make it: Cork & Wool Coasters

01title

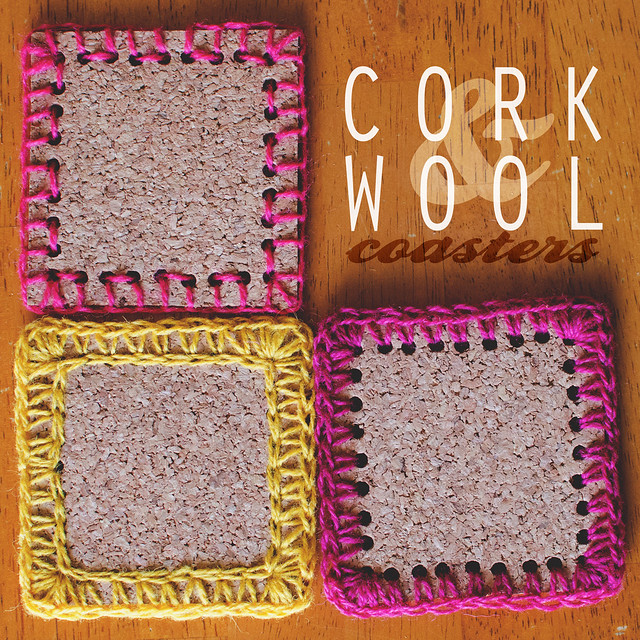
It’s been a while since my last DIY, so I thought I would remedy that with a quick cork coaster idea. It’s pretty simple and you can have a set made in under an hour, I bet. Below you will find instructions for both crochet or embroidered coasters.
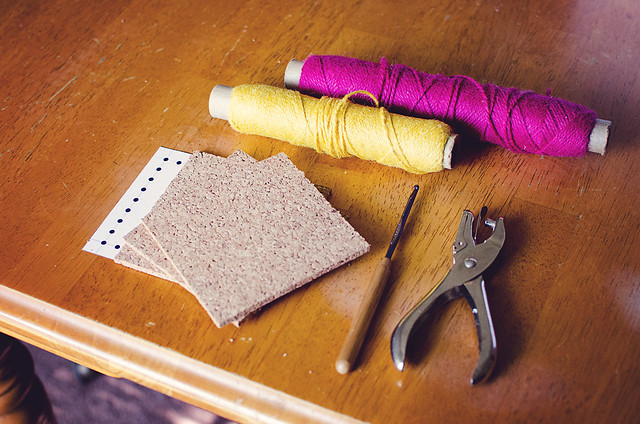
02supplies

Supplies:
4″ x 4″ cork squares (I buy 12″ cork tiles and cut them with a rotary cutter)
standard hole punch
DK weight yarn— I used needlepoint wool, but any thin yarn will do
2.75mm (C) hook (increase the hook size if you use a thicker yarn, but make sure it fits through the holes)
yarn needle

template

03step1

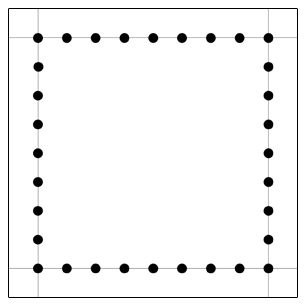
Use the template to punch holes evenly around the square.

04crochet

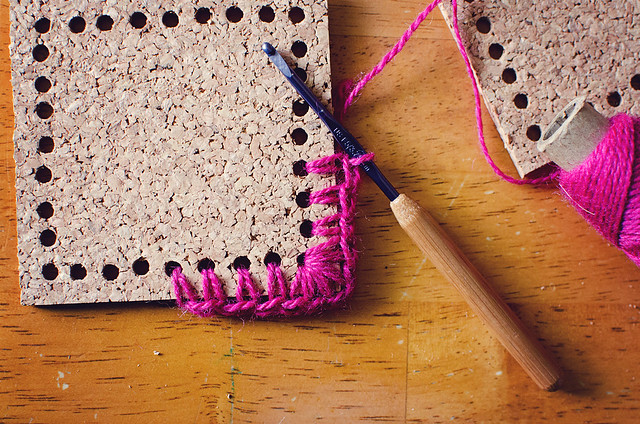
If you crochet, attach the yarn at the center of one of the sides. Single crochet (US) around the coaster, making 5 single crochet stitches in the corners. Slip-stitch to the first SC to end. Optionally, you can slip-stitch through all holes, if you want to fill them (see yellow coaster in title image).

If you haven’t yet picked up the craft of crochet, below is a simple embroidery stitch called the blanket stitch.

blanket-stitch

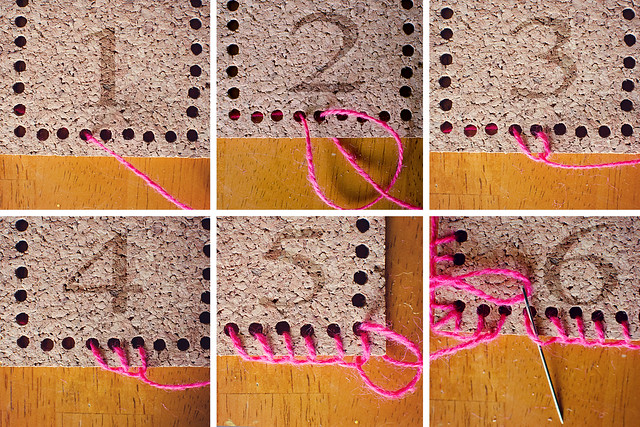
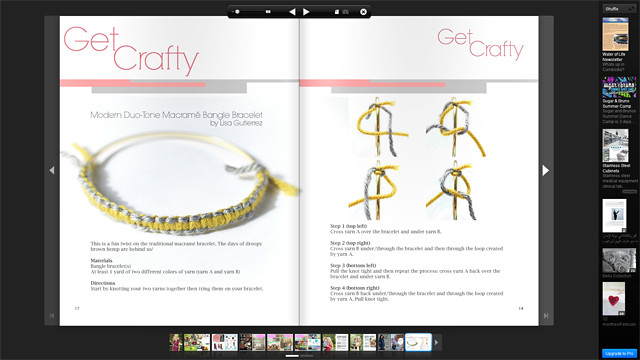
1. Insert needle from back to front through a hole. Bring through about 2 yards of yarn and leave about 10″ hanging at the back.
2. Insert needle from front to back through the next hole, making sure to bring your needle through the loop created.
3. Pull snug against the edge of the coaster.
4. Repeat steps 2 & 3 until you get to a corner.
5. At the corners, repeat steps 2 & 3 twice more in the same spot (3 stitches in each corner).
6. When you come to the end, pull the rest of the yarn through the first loop, as shown in last image.

Using the beginning & end yarn, tie a knot and weave in the ends through the loops on the back.

And that’s it! If hearts are more your thing, check out my last cork coaster: Embroidered Heart Coaster. These would make mighty cute Mother’s Day gift sets. ♥ ♥

Pin It

DIY: duo-tone macrame bangle

project01

I recently did a little DIY for the Spring 2012 issue of Stroller Magazine. It’s a free publication primarily geared toward moms.

The step-by-step photo DIY is easy to follow and you should have a pretty bracelet in no time at all. This is a fun twist (oh, a pun!) on the traditional macrame bracelet. Gold and bright colors > droppy brown macrame. Go and check it out!

Stroller Mag is no longer available, so I put the steps up on my blog HERE.

goodknits in stroller magazine

project02

Pin It

Cross Stitch: floral pendant

cross stitch pendant

04

I have had a crush on the wooden cross-stitch pendants for a long time, but seeing Danielle’s projects, two weeks ago, pushed me over the edge. I bought a pendant. ONE. Because I was unaware of how much I would love this tiny project! I racked my brain for ideas–my initial, “mom,” a bunny, etc. Finally, a lightbulb went off and I ran to my bookshelf and pulled out some vintage needlepoint books. It was tough finding something small. I had a lot of beautiful fonts but they were all too big.

05

I finally came across this book with nothing but floral charts. There’s a whole page with these small flowers. I chose the one I liked most and transferred it to some graph paper, then drew the template of the pendant around it. I had to sacrifice a bit of the edges, but I don’t mind. I am in loooooove!

06

fishtail and x-stitch

I am kicking myself for not buying more pendants. I bought them from the same place Danielle did–The Workroom. I am going to buy some more soon. I think they’d be beautiful key chains for Mother’s Day! Psssst! I already bought the floss for my next. Shades of coral for the flower and mint for the background. I can’t wait!

What do you think? Tiny projects are awesome, no? I started this yesterday and finished it this morning. I would have finished sooner if I hadn’t accidentally cut my working thread at one point. Pfffft!

Pin It

Make it: washi tape covered container

title

The giveaway winner was chosen and posted in the widget! If you didn’t win, but still fancy yourself a pretty jar for markers, pencils, knitting needles, crochet hooks, branches, or whatever, make one yourself! It would probably be the easiest project you ever undertook.

supplies

The only supplies you need are: an empty container (this is a plastic container that had cheap grated parmesan; we eat a lot of pizzzzza), washi tape, mod podge, and a paint brush.

Cover the jar in washi tape and then give it a few thin coats of mod podge. That’s it.

dip

The diagonal lines were trickier than the straight horizontal ones, of course, but it still worked out nice.

Fun fact: my container of mod podge is older than my oldest child (he’s almost 7)! It’s on its last leg and will probably be replaced soon.

Pin It

A Month of Craft Photos: Days 21-28

A Month of Craft Photos: Day 21
21; crafting companion (orig. #30)
this pillow sits on the top edge of the couch and the kitten likes to nap there almost every time I sit to knit.

A Month of Craft Photos: Day 22
22; contrast
a colorwork hat–diagonal shifting stripes. I was in that sort of mood for a few days. I learned– knitting with both of my hands makes them cramp up big time! I don’t usually get any hand cramping problems, but when I’m knitting with two colors, my left hand ends up sore for a few hours.

A Month of Craft Photos: Day 23
23; inspiration from clothes
fun, bold colors, patterns, teal, red, etc.

A Month of Craft Photos: Day 24
24; up close
I love lace. Orange lace? Even better.

A Month of Craft Photos: Day 25
25; when I craft
knitting in the morning; listening to dreams of the little ones while they munch on eggs and toast.

A Month of Craft Photos: Day 26
26; organization
really, this is just a shelf of yarn that will get used up soon. my stash is located in bins, but the yarn that will be used up soonish gets put on the shelf. I like looking at the colors–inspiration abound!

A Month of Craft Photos: Day 27
27; the wrong side
I finished the hat I was working on a few days ago. It’s a colorwork hat, so the wrong side is all sorts of lovely stripes of wool. I like the floating yarn!

A Month of Craft Photos: Day 28
28; simplicity
the crochet looks complicated. I bought the doily for a great price because it has a hole in it. Placed in an embroidery hoop, it’s a simple, yet beautiful, wall adornment.

Pin It