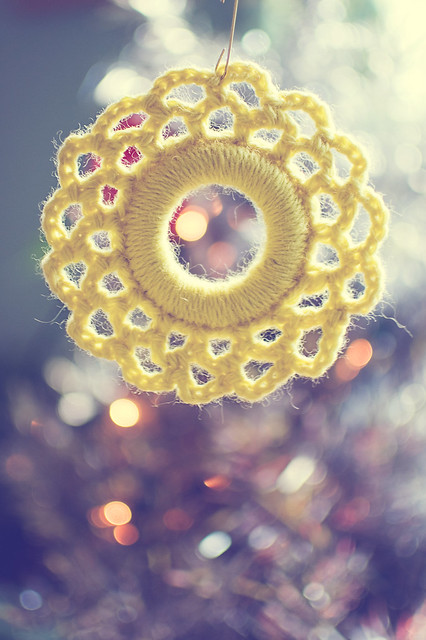
By Lisa Gutierrez on 11/13/2011 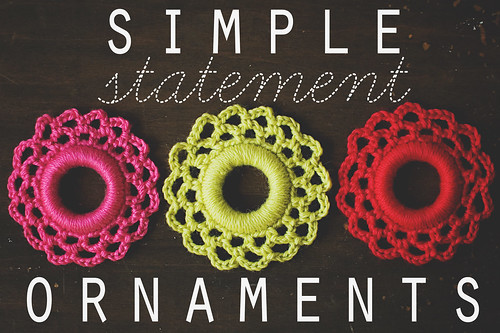
You knew these were coming, right? It’s just about mid-November, so that means it is perfectly acceptable to start making ornaments for your tree or to gift to family. These are quick and easy and if you liked the Simple Statement Wreath but didn’t think you had a place for one in your house, these would be a nice substitute.
Let’s get started!
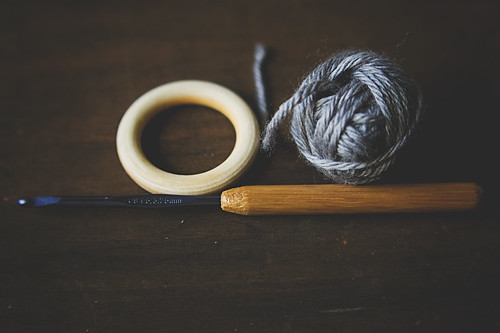 Materials
2″ cabone ring (I used wooden ones by Boye )
3.75mm (F) hook
small amount (approx. 10 yards) of worsted weight yarn
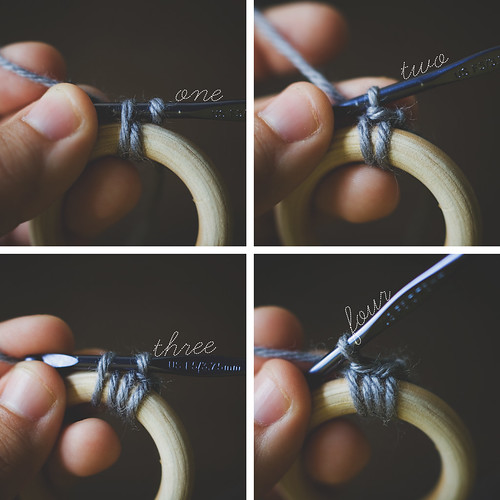 one:
one: start with a slip-knot around your hook and grab a loop from front to back through the ring (two loops on hook)
two: yarn-over and pull through both loops on hook
three: grab another loop from front to back through the ring (two loops on hook)
four: yarn-over and pull through both loops on hook
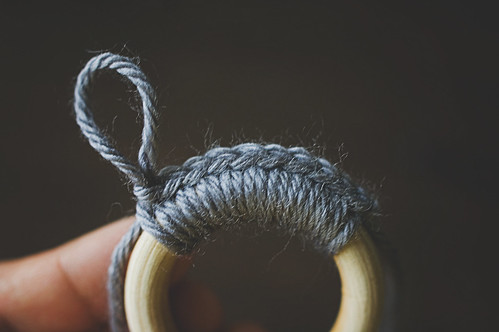
repeat steps three & four until you have 45 stitches around your ring. If you are going with a larger or smaller ring, make sure you end with a multiple of THREE.
Slip-stitch to first stitch, then begin border rounds.
Border Round 1: Ch 1 and SC into same stitch, ch 4, *skip 2 stitches, sc into next stitch, ch 4; repeat from * until 2 stitches remain. Ch 2, DC into first SC. (15 loops if you began with 45 stitches around the ring)
Border Round 2: Ch 5, SC into first ch-4 loop, ch 5, *sc into next ch-4 loop, ch 5; repeat from * around, ending with a slip stitch into top of DC of last round. (15 loops)
Fasten off, weave in ends.
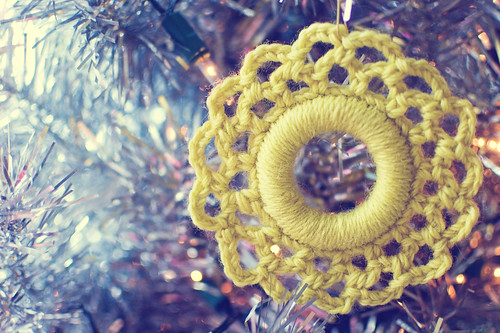
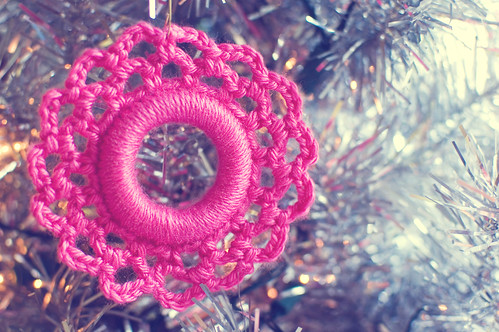
Use those regular wire ornament hooks to hang them from your tree. Or string them up like a garland. Or make a mobile. Or blow your own mind by making a wreath out of them! A bold statement wreath out of simple statement ornaments based on the simple statement wreath. That’s just wild. I’ll stop, now. I’m sure you can come up with more on your own. Have fun!
 Pin It
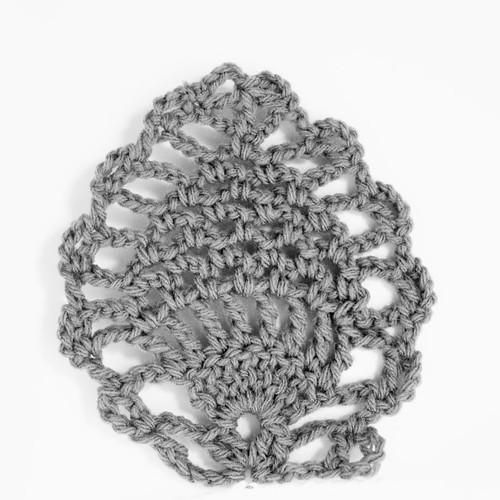
By Lisa Gutierrez on 09/26/2011 
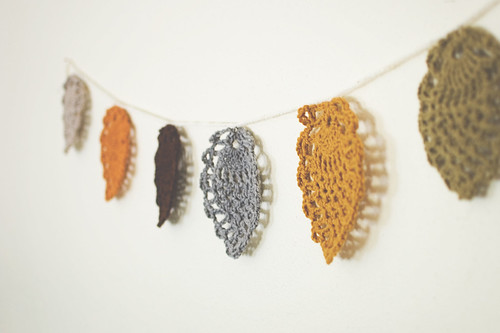
The doily love branches off.
Last week, I was pattern drafting and after crocheting a pineapple, I realized it really resembled a leaf. Since it IS Autumn (despite the wicked hot weather in my part of Texas), I thought stringing a few fall-colored pineapples together would make a lovely garland. I liked it so much, I want to share this pineapple pattern with you. It’s varies from my pattern-pineapple simply in size and stitch count.
You’ll need: 6.00mm (J) hook and small amounts of worsted weight yarn (I used some Vanna’s Choice and some scraps of wool) in various colors. You can adjust the size of each “leaf” by changing hook sizes and yarn weights. Using a smaller hook and the same yarn will produce a stiffer leaf. This would be helpful if you are hanging the garland across an open space, so they won’t flop on themselves. You’ll also need a yarn needle to weave in your ends and a smaller hook (I used C) to make your chain to hook them together.
Abbreviations (US terminology): Ch- chain, DC- double crochet, SC- single crochet, TR- triple crochet, slst- slip stitch, sk- skip, sp- space
Note: the Ch 4 at the end of each row does NOT count as the first stitch of the next row! Crochet the final DC of each row into the DC of the previous row.
Pattern:
Ch 13
Row 1: DC in 5th Ch from hook, Ch 3, sk 3 chains, (2 DC, ch 2, 2 DC) in next chain, Ch 3, sk 3 chains, DC in last chain. Ch 4, turn.
Row 2: DC in first st, Ch 3, 8 TR in ch-2 sp, Ch 3, DC in final st. Ch 4, turn.
Row 3: DC in first st, Ch 3, TR in first TR, *Ch 1, TR; Rep from * across all TR sts, Ch 3, DC in last st. Ch 4, turn.
Row 4: DC in first st, Ch 3, SK ch-3 sp, SC in first ch-1 sp, *Ch 3, SC in next ch-1 sp; Rep from * across ch-1 spaces, Ch 3, DC in final st. Ch 4, turn.
Row 5: DC in first st, Ch 3, SK ch-3 sp, SC in next ch-3 sp, *Ch 3, SC in next sp; Rep from * across pineapple, Ch 3, DC in final st. Ch 4, turn.
Row 6-8: Repeat Row 5.
Row 9: DC in first st, Ch 3, SK ch-3 sp, *SC in next ch-3 sp, Ch 3* twice, DC in final st. Ch 4, turn.
Row 10: DC in first st, Ch 3, Sk ch-3 sp, SC in next ch-3 sp, Ch 3, DC in final st. Ch 4, turn.
Row 11: 3 stitch DC-decrease over the first DC, center SC, and last DC.
[YO, insert hook into first DC and pull loop through, YO, pull through 2 loops on hook.
YO insert hook into SC and pull loop through, YO, pull through 2 loops on hook.
YO insert hook into DC and pull loop through, YO, pull through 2 loops on hook.
YO, pull through remaining 4 loops on hook.]
Ch 4, slst into DC of Row 10.
Fasten off. Weave in ends.
For the visual crocheters, I made a diagram. This is my first, so don’t laugh at its unevenness!

NOTE: There was a mistake in the diagram. The ch-1 spaces between the single crochet stitches should really be CH-3 spaces. The diagram has been changed to reflect the corrections. The filled in RED chains = chain 3.
I attached them together using a basic chain. My chain went like this:
Ch 15, slst through center of pineapple, *Ch 30, slst through center of next pineapple; Rep from * until all pineapples are attached. Ch 15, fasten off.

If you make one of these, please consider sharing it with the brand new goodknits flickr group! Feel free to share any photos of projects you have created using my tutorials or patterns. I would love to browse!
Pin It
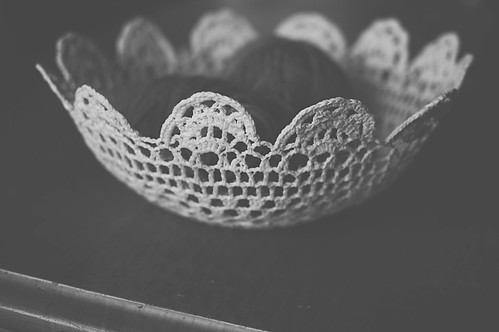
By Lisa Gutierrez on 08/26/2011 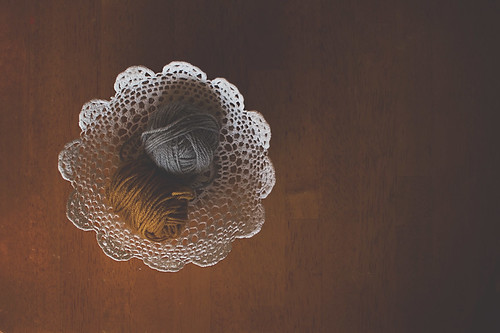
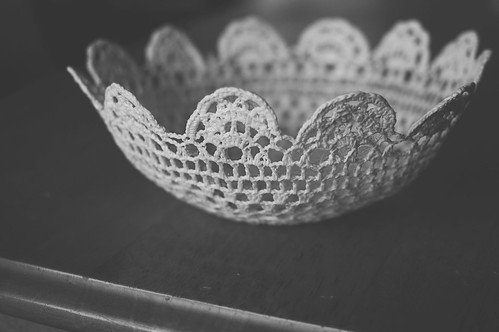
I’ve wanted to make one of these for a while. I didn’t have any starch or fabric stiffener on hand, so I used a bottle of Elmer’s. It worked pretty nicely.
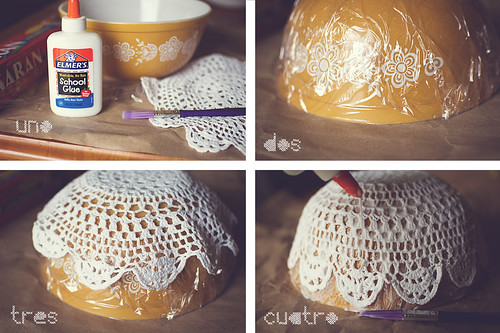
Those are the general steps I took. A few hours after #4, I applied some more glue. I suppose one could pour the glue in a bowl and dip the doily in it beforehand to completely saturate it without re-applying later.

By Lisa Gutierrez on 08/10/2011 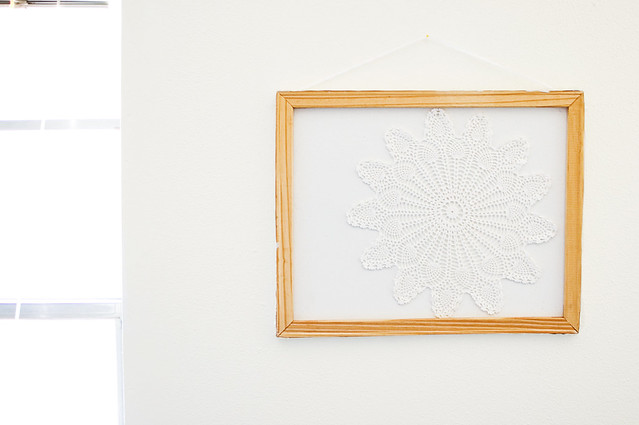
White on white.
Because sometimes we need a break from color.
By Lisa Gutierrez on 06/07/2011 Good day, folks! I come to you today with a knitting pattern! It’s a beanie pattern and you can find all sorts of cool information about it by clicking on the photo below. :)

Let me know what you think on that page!
|
Disclosure You may find affiliate links and banners throughout my blog. I earn a small commission from purchases made through these links. It helps pay for keeping this blog running! All reviews and products are items I have personally used and loved. |


