Tutorial: Embroidered “knit” heart

title

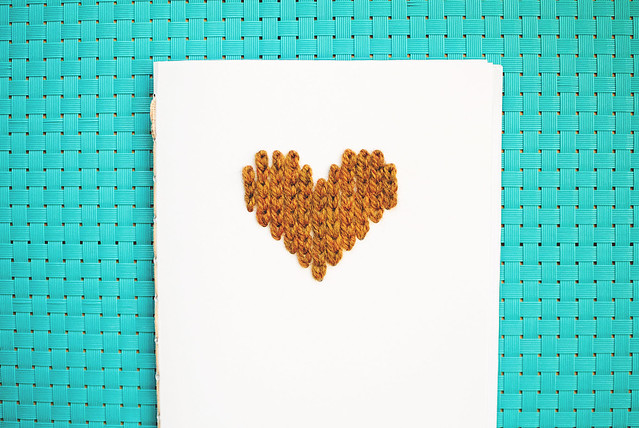
I wanted a design for the front of a knitting notebook and after doodling a few different ideas, I came up with this sweet heart. The embroidered chain stitch resembles knitting when they’re put right next to each other, so it was the obvious choice for a knitting notebook. Here are some instructions for making your own little heart!
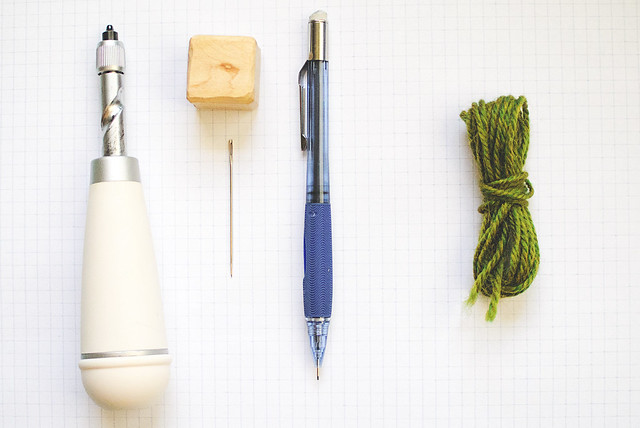
01materials

Materials
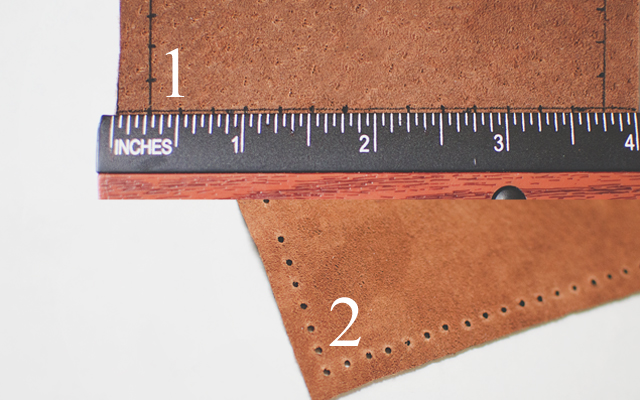
-a tool to make small holes in paper; I use this Martha Stewart Screw Punch (affiliate link), but you could use a sharp needle + something to “hammer” it or an awl
-pencil
-about 3 yards of worsted weight yarn
-yarn needle that will fit through the holes you make
-graph paper (the paper I used is 5 squares per inch)
-card stock or whatever you want to embroider your design on

The Design

02pattern

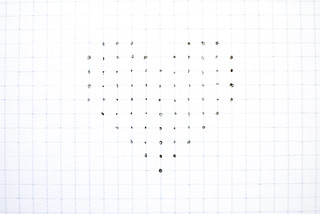
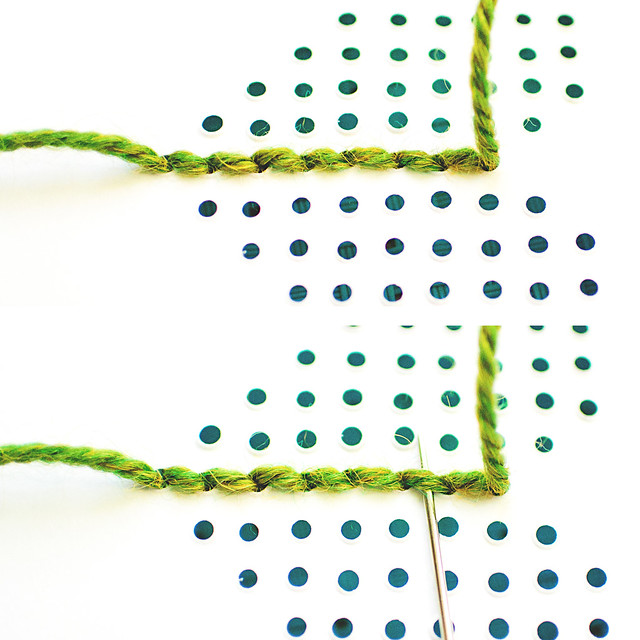
I used graph paper to plot out my design evenly. Place the graph paper with your design on the card stock where you want to place your stitches. Use the screw punch or awl to punch holes (you’ll want to put a self-healing cutting mat, or other board you don’t care about indenting, under your paper). The holes will aid you in keeping the chain stitches straight. If you are already an embroidery master, you can probably freehand them!

On the other hand, if you have never embroidered the chain stitch, I have outlined the steps below:

embroidered chain stitch step by step via goodknits

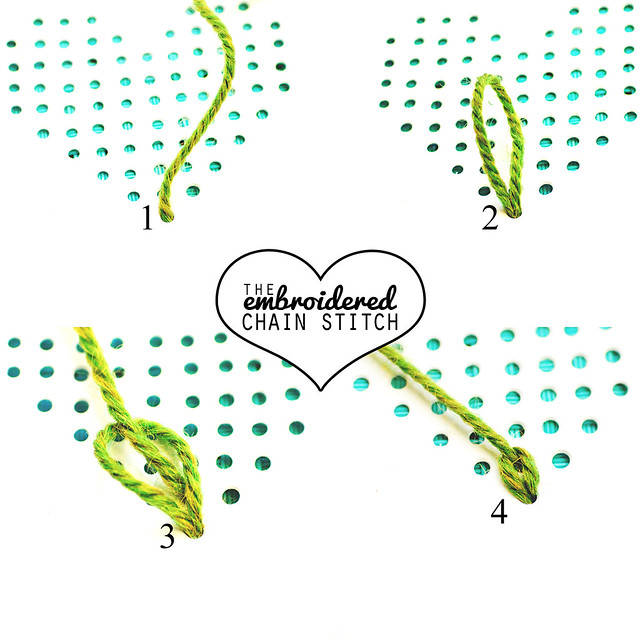
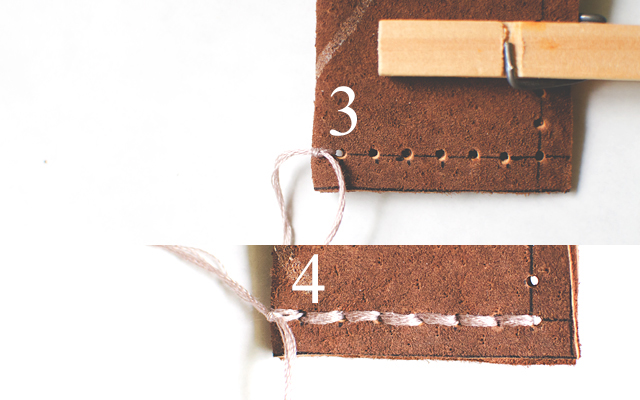
1. Bring about half of the yarn through the bottom center hole from back to front.
2. Go back through from front to back in the same space, but do not pull the yarn all the way through.
3. Come back up through the next hole up AND through the first loop you made.
4. Pull the yarn all the way through, tightening the first loop/stitch.

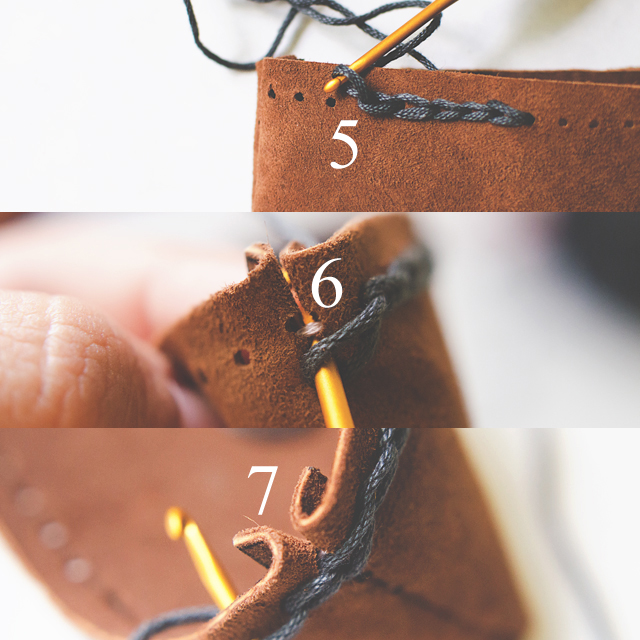
Repeat steps 2-4 for the embroidered chain stitch. I got into a habit of making two loops and using the second loop to tighten the first, like this:

05-alt

At the end of the column (and the rest of the columns), finish the stitch by going down into the same hole, over the last loop, instead of through it, like this:

06-endcolumn

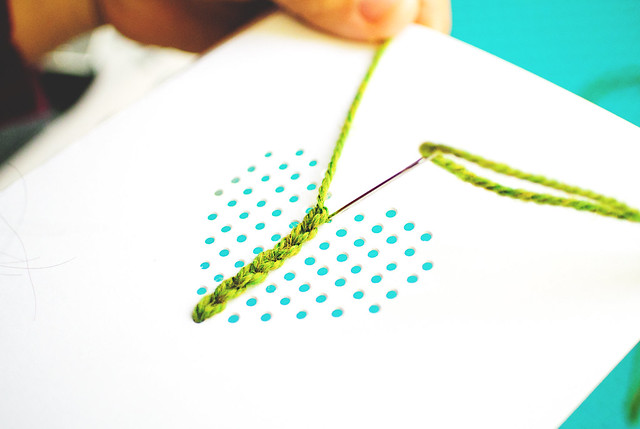
To make the next column, weave the yarn through the back of the stitches toward the bottom:

07-backweave

Work the next column and continue until all columns on this half of the heart are complete.

08-startcolumn2

Weave in this end of the yarn through the back of the stitches:

10-backhalf

Use the other half of the yarn to work the second half of the heart. Weave in your yarn when you’re done and that’s it!

embroidered knit heart animation

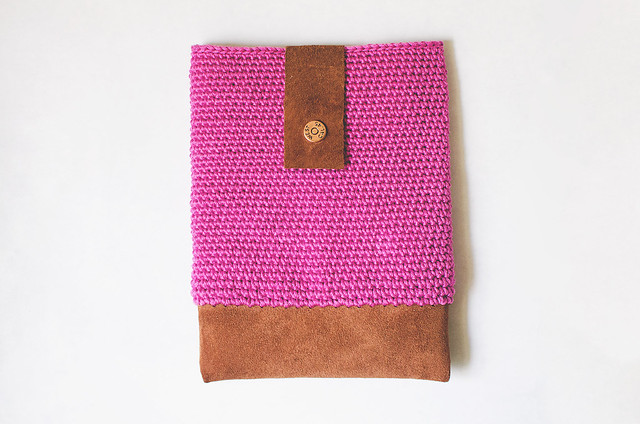
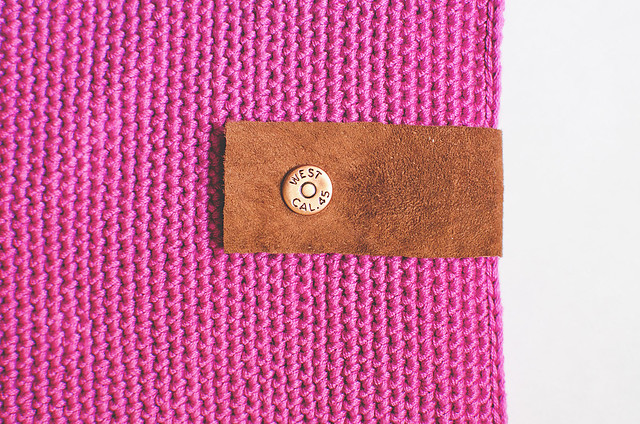
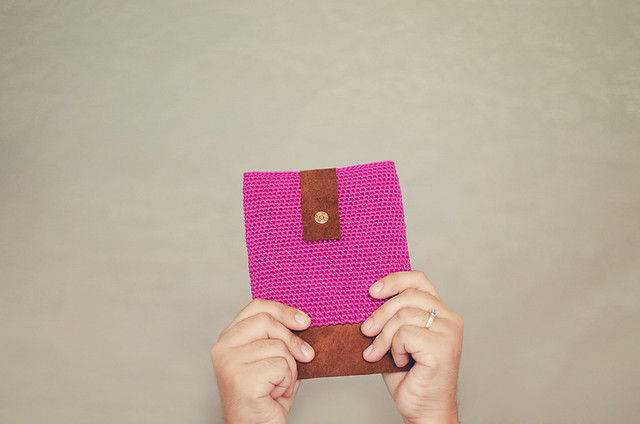
Here is my [handmade] notebook:

knitlovenotebook

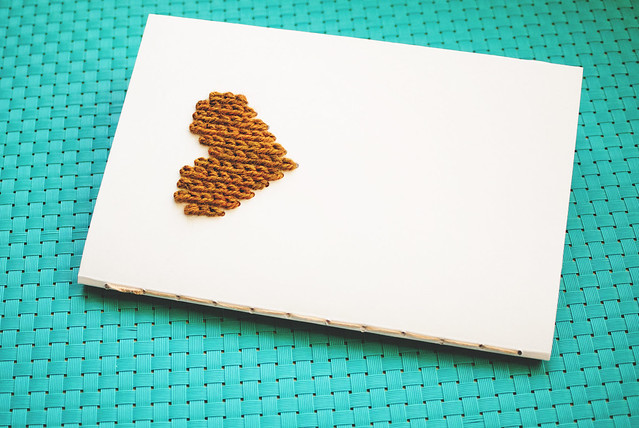
I filled it with knitter’s graph paper and stitched it up by hand. That screw punch I linked above REALLY comes in handy for projects like this!

You could use this tutorial to make a lovely Valentine’s Day card! You can make other designs, as well, just be sure to have at least two dots per column when you are plotting it out on graph paper. I want to do a set of scissors! If I can come up with a few designs, I’ll make another post to share!

knitlovenotebook2

Pin It

Christmas countdown!

the advent tree & tree

Or advent calendar. Whatever you want to call it, it’s hanging on my foyer wall.

I spent the past week browsing Pinterest and just becoming so overwhelmed with advent calendar ideas. I kept complaining, “we neeeeed a calendar. we neeeeed a countdown. blah, blah, blaaaaaaah.” Finally, yesterday, I stopped complaining and went to Hobby Lobby for supplies. While taking Andrew to the bathroom (OF COURSE), I noticed the shelf with wood sheets and my mind flashed to the few scrap wood trees I’d seen in my Pinterest perusing. Bingo!

I loved the look of the scrap trees, but I wanted something really quick and easy. You can see the exact materials I used, below:

I stamped the numbers using a set my MIL gave me a few years ago. Everything is hot glued together and it hangs with a small piece of yarn. I’m going to fill the tiny envelopes with activity prompts and/or chocolates (I’m thinking Andes!) for both boys. I’m glad I got it done on time. They are super excited for tomorrow! I’m just a little terrified that 2012 is already so close to being over. How’d it go by so quickly?!

Pin It

D.I.Y. (quick!): tripod hat stand

00

Hello, friends! I’m back with another (quick) D.I.Y. project.

I have seen some beautiful coat racks made with sticks, THIS ONE being my favorite. I wanted something on a smaller scale for me to throw hats on, so I rummaged through my most abundant supply of sticks–my knitting needle jar! I don’t know about you, but I almost never pass up a 50 cent set of needles at the thrift store. Especially the adorable plastic ones in a random assortment of colors! For this project, I used some of my repeat sizes, but don’t worry about your needles because we won’t be doing anything permanent to them.

ANYWAY–onward!

01

Materials:
3 [13″] knitting needles (OR cut a 3/8″ wooden dowel into 13″ pieces)
~3 yards of yarn

02

1. Leaving a 6″ tail, start weaving your yarn around two of the needles. Pull tightly with each wrap.
2. Weave in and out of the center and around each needle 3 times, then tie a tight knot with the tail.
3. Put the third needle on top of the stack and start weaving again.
4. Make the same weave in and out of the center around the new needle with each of the first two. Keep your yarn taught! I like to wrap around the new needle, then around one of the firsts, then back around the new, then around the OTHER first needle, then back around the new one…and so forth! You’re just trying to securely attach the needle to the stack while keeping your wraps even. Tie a knot to secure.

03

5. Open up the needles and make sure they can stand. If you wrapped tightly, you shouldn’t have any problem getting them to balance.
6. Use the remaining yarn to wrap around the whole set, securing your tripod in its open position. It won’t be permanently stuck open, but you’ll be able to put some pressure on top without it collapsing. Firm wraps are key!

04

And done! Display your favorite hand-knits*. :)

The hat above is Honey knit with KnitPicks City Tweed DK.

Pin It

D.I.Y. (quick!): painted lace planter

t00

I thought I would share a little series of quick D.I.Y. projects. I know sometimes we don’t have a lot of time to get crafty, so I hope to provide a few little bits of inspiration to help you get something done quick. First up is a painted pot, inspired by lacey scallops.

t01

Supplies:
-clay pot
-1″ circle stickers (I made mine with my Xyron 150, but you can find circle labels at office supply stores)
-paint
-paint brush
-wooden skewer or thin paint brush (not shown)

t02

1. Place stickers along the rim of the planter, very slightly overlapped. I fit 14 on my 4.5″ pot.
2. Paint! I suggest about 3 thin coats. Let the pot dry for 2-3 minutes between coats. Optionally, you can also paint about an inch of the inside.

t03

3. Remove the stickers before the final coat dries completely.
4. Use a wooden skewer or thin paintbrush to add 3 little dots on each scallop.

Let your pot dry, then fill it with your favorite little plant. I chose some of my ‘Black Prince’ echeverias. The most beautiful succulent around!

bp1

bp2

Pin It

Tutorial: Crochet + Leather

cnl

This is a quick tutorial showing the steps I took to crochet on to leather. If you use felt or other fabric, you can skip steps 1 & 2, because those are preparing the leather for stitching. I tried making this with just a needle and hammer and it killed my fingertips.

You can use this tutorial for general projects that you want to add some leather to the bottom. Perhaps a wallet or clutch or go big and make a sleeve for your tablet. For brevity’s sake, I’m going to use my Kindle as a guide.

The Kindle is about 4.5″ wide and 6.5″ tall with about a .5″ thickness. My case is 5.5″ wide and 7″ tall, measured flat. I used a piece of leather that was 4″ x 6″.

PREPARING LEATHER FOR STITCHES

steps1-2

1. Using a fine tip Sharpie and a ruler, mark your stitch line straight across each side 1/4″ in from the edge. Make your stitch marks 1/4″ from each other, as well. On the short side, omit the very center mark (notice that the 2 on the ruler does not have a notch marked).
2. Make your stitch holes. My husband said when he worked with leather in the past, they would use a hammer + nail to make the holes. I tried using a thick needle and it made my fingertips raw. I looked up leather punches and almost purchased one online when I remembered this rarely used* tool in my crafty arsenal–my Martha Stewart screw punch! I used the 1/8″ tip and punched my holes in just a few minutes.

SEW SIDE SEAMS

steps3-4

3. Fold your leather in half, right sides together. Attach some embroidery floss (or thread of choice) by pulling it through the hole closest to the fold. Leave a 2″ tail and tie a [tight] knot.
4. Sew up the small seam, making sure to pull tight. Don’t pull tight enough to warp the fabric, but you also don’t want your stitches to be THAT visible when you turn it right side out. I stitched up and then back down to the beginning and tied another knot with the beginning tail. Seam up the other short side.

PREPARE EDGE FOR CROCHET

steps5-7

5. Using a 2.5mm hook (or smaller, if you’ve got it) and the yarn you plan to make the top out of (I used Sinfonia– a sport weight cotton), pull a loop through a hole along the long edge, leaving a 6″ tail. Slip-stitch around. Try to keep your stitches loose, so you don’t warp the fabric.
6. When you get to the first edge, make a slip stitch into the seam UNDER the first seam-stitch. Fold your seam flat as you work.
7. Keep going across to the other edge and do the same. When you get back to the very last hole, cut your yarn leaving about 6″ and pull it through. Using a yarn needle, make the last chain stitch through the first, then go back through the last hole again. Tie a knot with beginning tail.

Now your leather base is ready for stitches! Notice how the slip-stitches look like the tops of regular crochet stitches? Well, crochet into them!

I used a 3.5mm (US E-4) hook and my sport weight cotton to single crochet around. There were 44 slip-stitches, but my stitch count was 66 (*SC in first, 2 SC in next* around). I didn’t join at the end, instead I spiraled up for 35 rounds. For round 36, I slip-stitched around and then fastened off.

01

04

For the closure, I used a 4.75″ x 1.25″ piece of leather with a brass snap attached to the front. I was also thinking I could use a zipper instead. Maybe next time!

kindled

* I originally bought it to make notepads for myself and my kid who loves to doodle in my notebooks, but I used it a few times and put it away.

Pin It