By Lisa Gutierrez on 09/25/2012 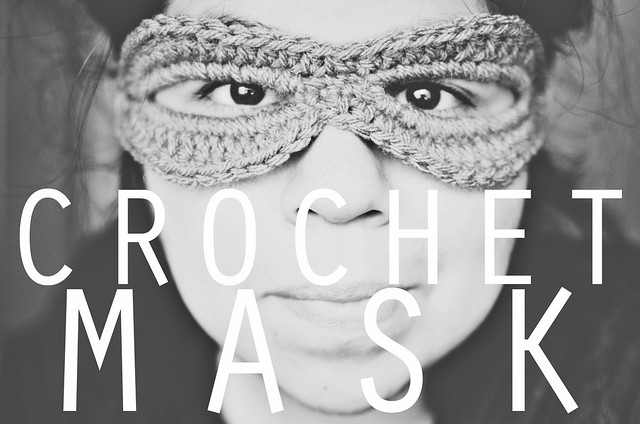
With October fast-approaching, I thought it was time to share this quick pattern.
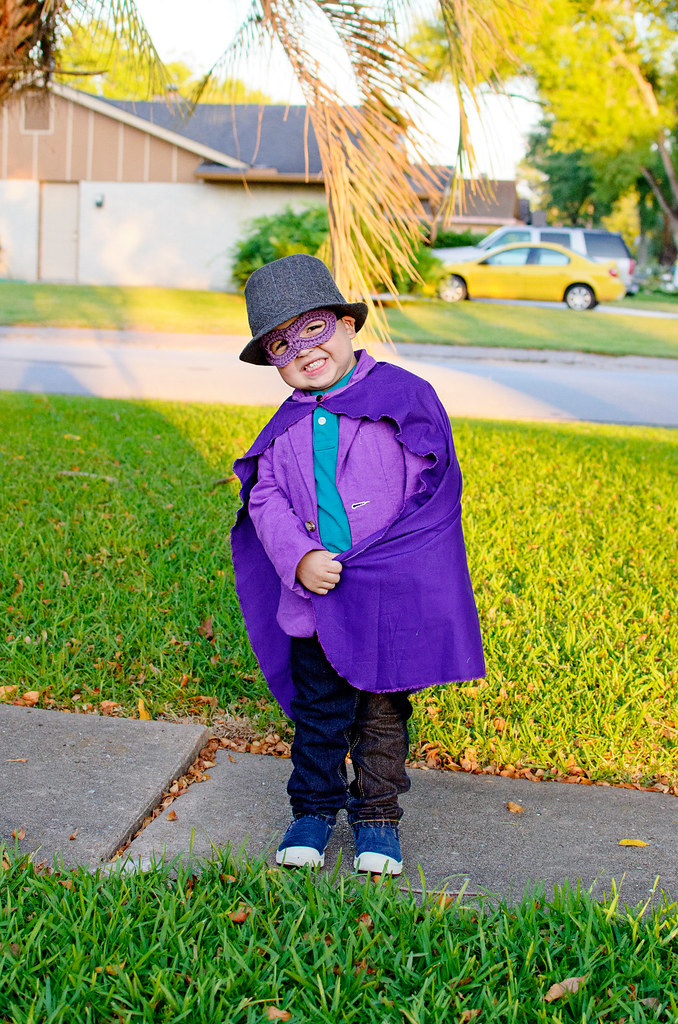
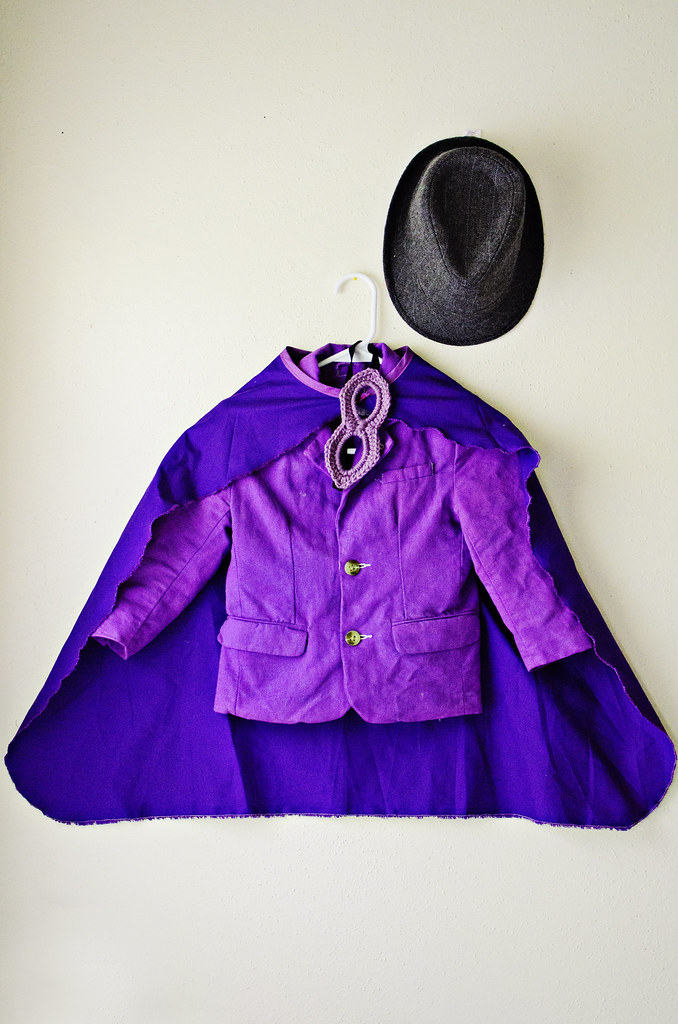
Andrew, who’s 4, has decided he wants to be Darkwing Duck for Halloween, this year. Yes, the cartoon character from the early 90s. I can thank my husband for introducing that one to the boys. He’s dressed in a purple double-breasted blazer, a cape, mask, and hat (no pants because cartoon ducks don’t wear pants). I searched a few thrift stores for a purple blazer, but couldn’t find one. I DID find a white linen/cotton blazer to dye, though. I also picked up some purple fabric to make a cape and he has a gray fedora that will do just fine. I only needed to figure out the mask situation (and find him some white pants, because no way he’s going pantless).
I know I could make one out of the same purple fabric, but I got the idea in my head that he needed a mask made of yarn. I wasn’t near my computer when I made this grand decision, so I whipped one up just winging it. The results were pretty damn cute.
I would have just called it a day after that first try, but I soon realized the elastic was in the wrong place. I made it sort of cat-eye shaped, so the elastic is attached at the top corners. Since the top sits on his eyebrows, whenever he emoted, the mask shifted. Big boo! I spent the evening thinking about how else to make it and the next morning I crocheted and frogged and crocheted and frogged and finally got a simple shape that was also simple to crochet (2 rounds!!). Make a bunch and hand them out at Halloween!
I’ve provided some photos to help aid in the construction. It might sound a little tricky, but after the first you’ll get ’em made in like 5 minutes, I bet!
You’ll need: worsted weight yarn (I used Vanna’s Choice), 5mm (H) hook, and some elastic.
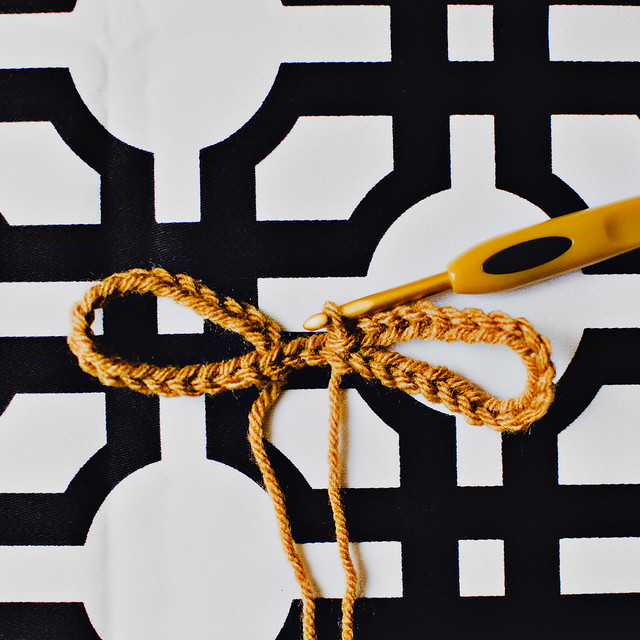
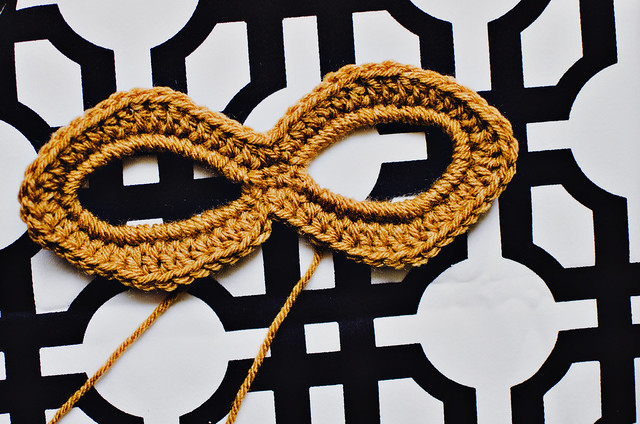
Ch 21, slst into first ch to make a loop (left in above photograph).
Ch 23, slst into 21st ch from hook to make second loop (right).
This leaves you with 2 loops connected by 2 chains.
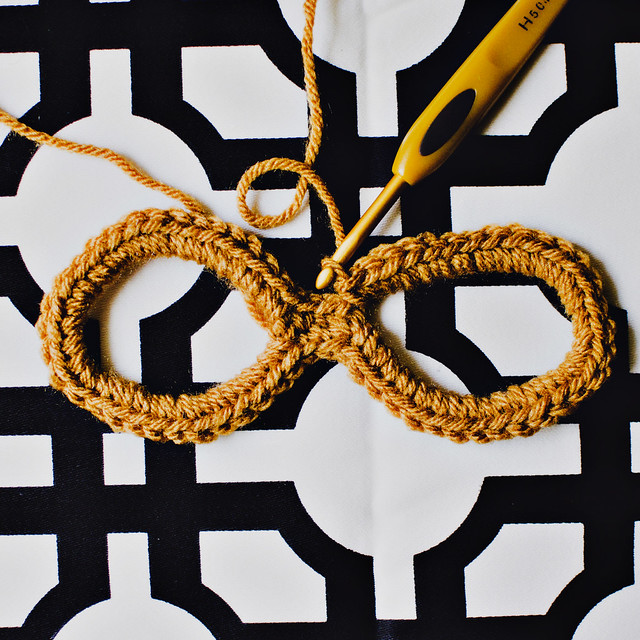
Ch 1, SC into next 2 chs, 30 SC into the loop. Shift them around so they’re evenly arranged around the loop. They’ll all fit!
SC into the back of the center 2 chs, 30 SC in next loop.
DO NOT JOIN.
SC2tog across the center 2 sts, *[HDC in next 5 sts, DC in next 4 sts, HDC in next 5 sts] 2 DC in each of the next 2 sts, repeat from [ to ]*
SC2tog across center 2 sts; Rep from * to *, slst into first st. Finish off, weave in ends.
Cut an 11″ piece of elastic and attach each end to each side of your mask. I used 3/8″ black elastic. You can adjust the size to fit the head you’re making the mask for.
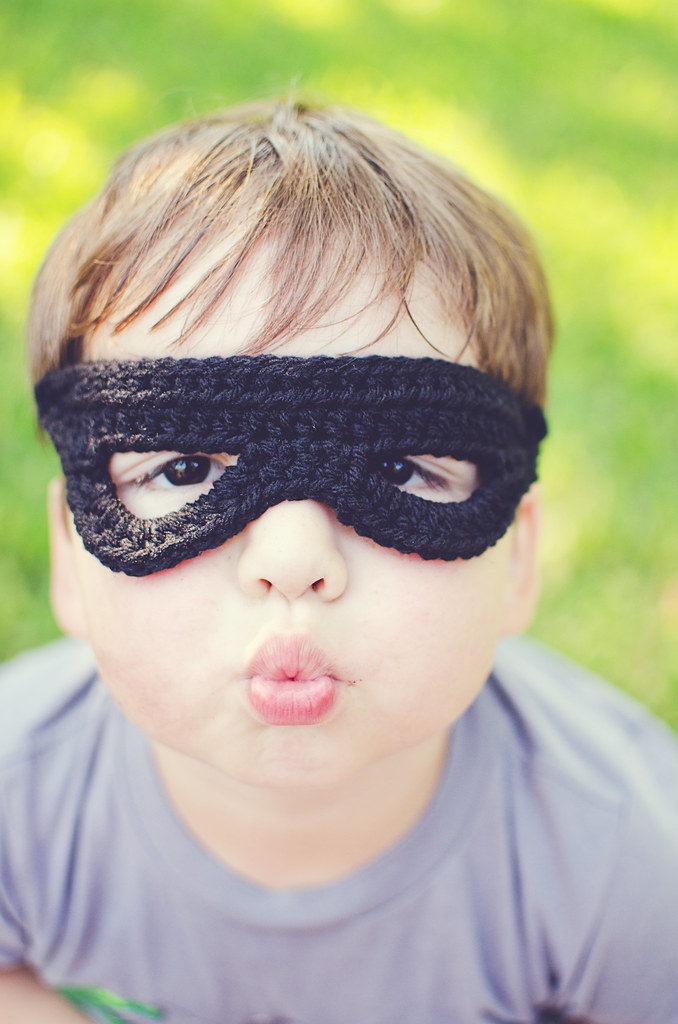
Put it on and enjoy! Feel free to adjust the pattern to fit your head. If the 30 stitches around the eye opening are too big or too small, change the size of the beginning chain loops! You’ll have to change the second row, too. To get the shape, I split the stitch count in half then added taller stitches to the top, bottom, and side.
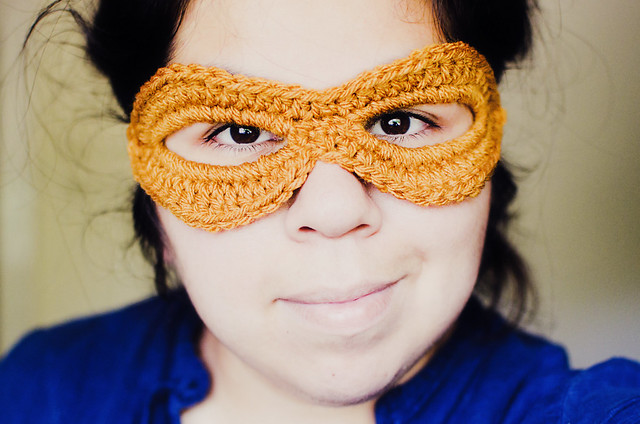
sorry, I’m not as cute as my kid, but he hasn’t been feeling well, so I’m not going to force him to pose for me.

As with all things things that can be made for children, please supervise them when they’re playing. The mask can knock out their peripheral vision and they could bump into things! Show your little one how to adjust the mask to fit around their eyes. It took a while for me to get used to having it on my face. It was pretty annoying at first, but I wore it for a bit!
[Text-only version of the pattern may be viewed HERE.]

ETA
Here is my little one wearing a purple mask with his Darkwing Duck costume! The only adjustment I made to the mask was to assemble the eyeholes with a pipe cleaner instead of a crochet chain, then worked the pattern from “30 SC into the loop…” It makes the eyeholes easier for kids to keep…umm…open? It keeps them from shifting into their eyes!
Pin It
By Lisa Gutierrez on 09/20/2012 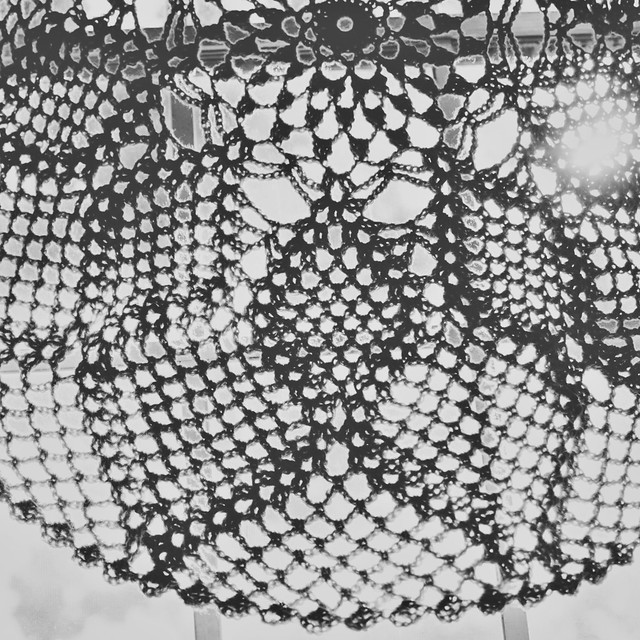
A new doily blanket pattern!
See, I’ve been quiet around these parts, but I’ve been keeping busy. Two kiddos in school equals twice as much homework and, even worse, TWICE AS MUCH LAUNDRY. Alas, sometimes I’ve gotta check out and just sit on the couch & crochet all day.
I finished this up a few weeks ago, but then it took me a while to write out the pattern and even longer for me to sit down and type it up. My process for pattern-making usually goes something like this: crochet while writing it out w/my favorite pencil, then type it up, crochet it again, checking pattern for typos, take photos, compose pattern + photos into pretty PDF file. I sort of did the same this time, except I stopped writing while crocheting about halfway through. REGRET set in immediately. I had to crochet it again by feeling out the stitches and wrote down what I was doing, changing things up a bit in the process. I got burnt out by that, so it took me a few days to sit down with it and type it up.
NOW. I had originally planned to release the pattern tomorrow, but I want a few more days with it. I’m going to go over the pattern a few times to check for typos and consistency in the directions and I’ll see if I can crochet another one this weekend. My mom’s birthday is coming up, so it’ll be the perfect gift!
I hope to see you back here sometime next week with more details plus tons more photos!
By Lisa Gutierrez on 07/24/2012 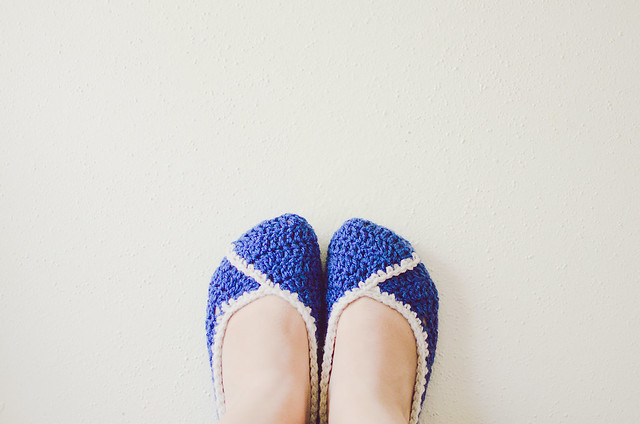
Hello, friends!
I have been wanting a new slipper for a while. I kept putting it off because I couldn’t think of anything that didn’t start exactly like my Mary Janes. I knew I wanted something bold, but timeless.
I had the idea for a wrap shoe, but I was stuck on the same sort of construction as the Mary Janes (from the toe to heel). I knew FOR SURE I wanted something that was crocheted in one piece.
I picked up some yarn and started with the toe and made some interesting shaping, but once I got to the sole I realized it was way too similar to the MJs. I frogged it and started over.
This time, I started at the heel! Working back and forth across some stitches, I shaped the heel a bit, then crocheted a sole for a few more rows. When I got toward the toe, the fun began! Using a combination of increases and eventually some decreases, I ended up shaping a wrapped toe.
I wasn’t in love. There is my confession. It looked OK after I seamed it up, but I was kind of meh about it. I thought about it for a day and then started another pair. After I finished the first, I made the quick decision to seam up the second one with the wrap going in the opposite direction. Aha! That’s what was missing.
I was in love.
And now I want to share it with you! Visit the pattern page HERE. It’s FREE and there are even some photos to help guide you during the assembly. Truly, it’s the only tricky part. I would suggest crocheting both slippers first, then sitting down to assemble them. I used Vanna’s Choice because it comes in such a great assortment of colors and tends to hold up really well.
Let me know what you think! Add your project to the Ravelry page so I can see your slippers!
Pin It
By Lisa Gutierrez on 06/13/2012
By Lisa Gutierrez on 04/30/2012 
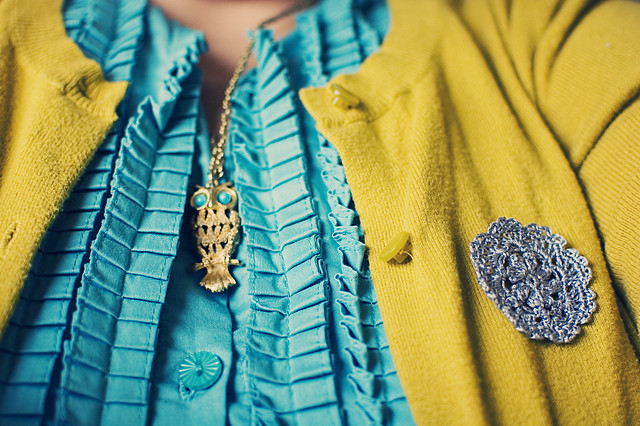
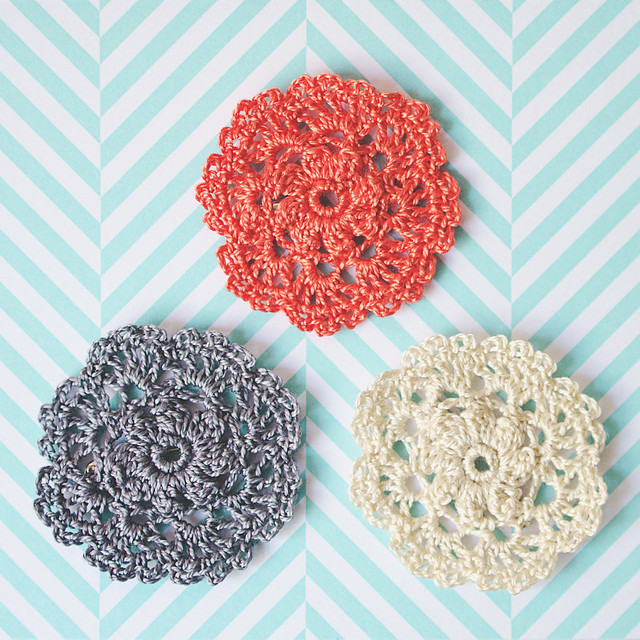
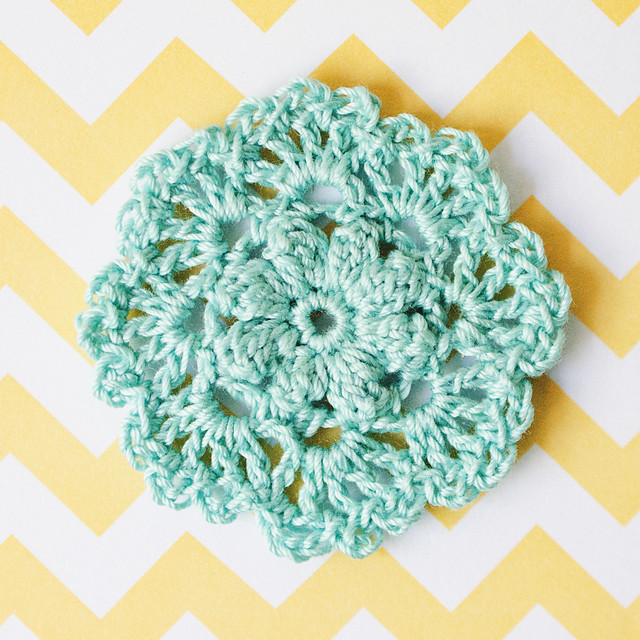
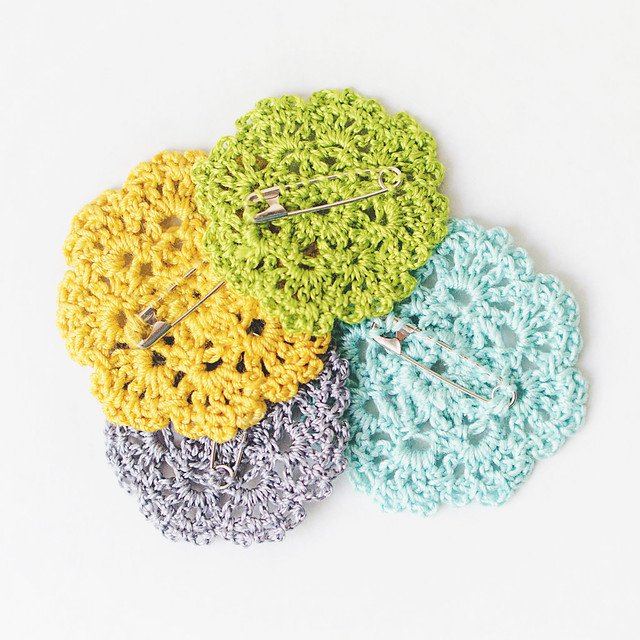
Cordi was always an after-thought pattern of Lace Love. It was more like a bonus. Since Mother’s Day is this weekend, I thought it would be a nice to time to share the pattern with everyone. They’re lovely little brooches that you can make to adorn gifts or cards.
There are two mistakes in the original pattern, but I’ve changed them, so this should be smooth sailing!
You need: approximately 8 yards of crochet thread (I use DMC Perle Cotton 8), 1.75mm crochet hook, and a needle to weave in your ends.
Finished size is approximately 2” in diameter. The piece should be about 0.75” after round 2.
Special Stitches:
Beg-POP (beginning popcorn): Ch 3, work 3 DC into the same stitch. Drop the loop from your hook and insert it from front to back into the top
of the beg Ch-3. Grab the dropped loop with your hook and pull it through the stitch to complete.
POP (popcorn): Work 4 DC into the same stitch. Drop the loop from your hook and insert it from front to back into the first DC of the group. Grab the dropped loop with your hook and pull it through the stitch to complete.
PATTERN (US terminology)
Ch 5, slst to first ch to make ring.
Round 1: Ch 1, 8 SC into ring, slst to first sc. (8 SC)
Round 2: Beg-POP into first SC, Ch 3, *POP into next st, Ch 3; Rep from * around. Slst into top of Beg-POP. (8 POP + 8 ch-3 sp)
Round 3: Ch 1, SC into first ch-3 sp, Ch 3, SC into same sp, *SC into next ch-3 sp, Ch 3, SC into same sp; rep from * around, slst into first SC.
Round 4: Slst into first ch-3 sp, ch 4, DC in same sp, [Ch 1, DC, in same sp] 3 times, *DC in next sp, [Ch 1, DC in same sp] 4 times; Repeat from * around, slst into third ch of beg ch-4.
Round 5: Ch 1, SC in first ch-1 sp, [Ch 3, SC in next ch-1 sp] 3 times, *SC in next ch-1 sp, [Ch 3, SC in next ch-1 sp] 3 times; Rep from * around, slst into first sc.
Fasten off. Weave in ends and attach pin in center back.
Enjoy!
If you make any, be sure to add them to the Ravelry page!
If you can’t crochet, but would still like a doily brooch, see my shop!
Pin It
|
Disclosure You may find affiliate links and banners throughout my blog. I earn a small commission from purchases made through these links. It helps pay for keeping this blog running! All reviews and products are items I have personally used and loved. |


