By Lisa Gutierrez on 11/23/2014 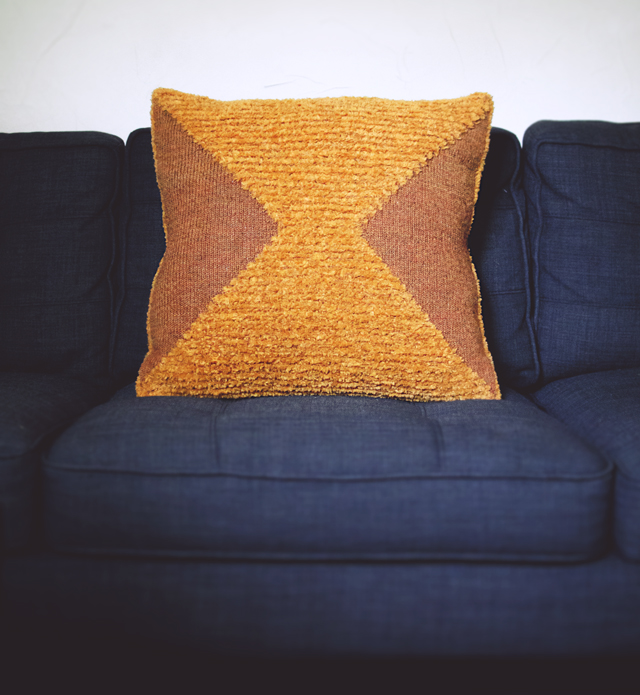
Hey, friends! I was sick for a whole 5 days and didn’t touch my needles. I decided I should probably compose a post about a pillow I knit early this year. I don’t have a pattern written up because I don’t really think anyone wants to knit one, but perhaps you might like the idea of using two gauges at once and YOU want to experiment, too? Anyway…
Way, waaaay back in February, I started knitting a pillow with Lion Brand’s Luxe Fur Yarn . It was on super sale at Michael’s and so so soft, I picked up like 10 balls and was determined to knit something…ANYTHING with it. Maybe a teddy bear?! . It was on super sale at Michael’s and so so soft, I picked up like 10 balls and was determined to knit something…ANYTHING with it. Maybe a teddy bear?!
I knew that it would be a little tricky to knit with yarn that had so much texture, so I paired it with a regular worsted weight yarn in a similar tone. That just so happened to be Berroco’s Ultra Alpaca. I started knitting a gauge swatch and wondered what it would look like if I dropped the fur and worked stripes without it. I knew I’d need to use a smaller needle, so I switched right there. I made a little swatch with furry stripes and knew I was on to something.
What proceeded was a marathon knitting session where I jotted down notes on notes of measurements and calculated possible patterns. I realized that one stitch with both yarns (and the larger needle) was close enough to two stitches with just my lighter yarn (and smaller needle). Using a series of short rows, I was able to create the front of the pillow you see above in one single piece. The blocking I did afterwards was minimal, too. I didn’t have much to do once I finished.
Yarns: Lion Brand Luxe Fur (about 6 skeins) and Berroco Ultra Alpaca (2 skeins)
Needles: 6.5 mm (US 10.5) and 3.75 mm (US 5) 29″ circular needles (you’ll be using both at the same time)
Gauges: (both yarns, bigger needle) 16 sts x 28 rows = 6″ x 6″ in garter stitch
(lighter yarn, smaller needle) 11 sts x 15 rows = 2″ x 2″ in stockinette stitch
I started by casting on 50 stitches with both yarns and the bigger needle. I knit one row, then started my work with both needles and gauges. When I was using the smaller needle, I knit with only the ultra alpaca. When I switched back to the larger needle, I picked up the Luxe Fur.
Row 2 looked something like this: With smaller needle, kfb, switch to larger needle and both yarns, K 48, switch to smaller needle, kfb, turn. [What I ended up with is 4 stitches on the smaller needle and 48 stitches left on the bigger needle]
Still using smaller needle, Rows 3 and 4 were my short rows. For Row 3, I slipped the edge stitch, purled the next stitch, wrapped the next stitch and turned. Row 4, I knit the two stitches, then turned.
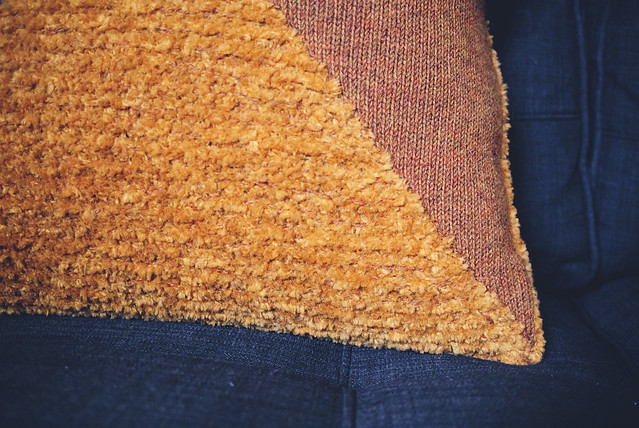
Row 5 went right across. When I came to a wrapped stitch, I just picked the wrap up and knit it with the stitch. I started with the smaller needle and slipped 1, P 1, switch needles and K 48, switch needles and P 2, turn. The furry part of the pillow is in garter stitch while the other is in stockinette.
Rows 6 and 7 were short rows like 3 and 4. Row 6: slip 1, K 1, wrap and turn. Row 7: P 2, turn.
Row 8 and every 6th row from here on out, I increased the number of stockinette stitches by knitting in the front and back of the edge fur stitches with the smaller needle. I ended up with 4 rows of stockinette in the lighter yarn equaling 2 rows of garter stitch in the heavier weight. It certainly wasn’t a perfect match, but it worked! I increased the stockinette portion until I only had 10 stitches left in the original gauge on the larger needle and 80 stitches on the smaller needle (40 on each side).
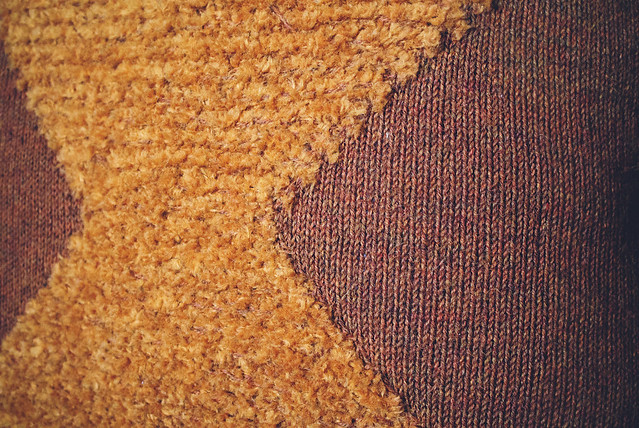
At this point, I started the same sort of pattern, but instead of increasing the stockinette portion, I decreased by using my larger needle and both yarns. Basically, I would use the larger needle and both yarns to turn two stockinette stitches into one on either side of my fuzzy center. Once I got back to 50 stitches on my larger needle, I had about as close to a square as I would get.
It was actually a rather simple pattern, but the result looks rather impressive, if I may say so.
The back of the pillow is two fuzzy panels with twisted rib in the smaller gauge. It was meant to be an envelope design, but I stuffed a 24″ pillow and it gaped too much, so I attached a zipper along the edge of one side and along the furry edge of the other.

Do you ever get the desire to experiment with knitting like this? I can say this is the first time for me. I don’t know if I’ll make anything similar. This pillow is enormous, so maybe one day I’ll knit a smaller one to compliment it. I DO like knitting with yarns I don’t normally have in rotation. That’s why I’m currently in a big chunky yarn fit. I have knit no less than 5 cowls for Christmas. This entire week I’ve been sick, all I wanted to do was knit, but coughing and knitting equals gross.
Pin It
By Lisa Gutierrez on 10/22/2014 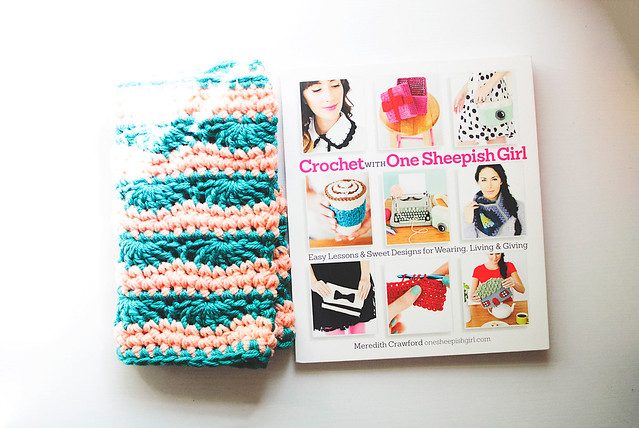
Hey, friends! I hope everyone is well. I have a cough that just won’t go away. It’s just a little scratch at the back of my throat that makes me sound like I’m trying to get people’s attention every 5 minutes. Ahhheeemmmm.
Anyway! Today, I have something really lovely to talk about. I have been following Meredith Crawford’s blog, One Sheepish Girl, for a little while, so when I was asked if I wanted to review her new book AND have a giveaway on the blog, I immediately responded with a “heck yes!” Not my exact words, but you get the idea.
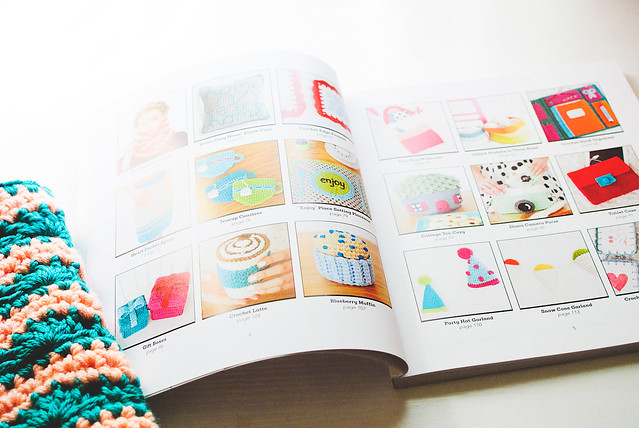
First of all, this book is a thing of beauty. The photos are gorgeous and the projects are all bright and pretty. My FAVORITE aspect of the book, though? The table of contents! Recently, my son has asked to read the table of contents for any book we are starting. It was kind of weird at first, but now it’s part of our routine. It’s nice to know what’s coming up and in this book, you can SEE everything. I loved that.
The first part of the book includes a sweet introduction and then some very detailed instructions for crocheting. There are directions for the basic stitches you’ll need to know, changing colors, finishing, embroidering, surface crochet, blocking, and even sewing in a zipper or liner! All have step by step photos and instructions. That alone makes it a great gift for new crocheters. I would have loved to have this when I first started. I’ll definitely be referencing these when I get around to working with zippers (I’ve been crocheting for 8-ish years and they STILL scare me).
The rest of the book is the patterns, divided into three categories: WEARING, LIVING, and, GIVING. It’s pretty easy to find something to crochet for any occasion.
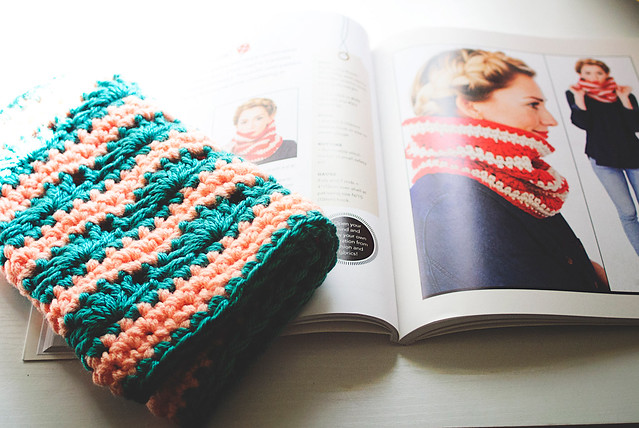
I went through the book several times to figure out what I wanted to make for this post. I chose to crochet the Scallop Stripe Cowl. The pattern calls for super bulky yarn, of which I didn’t have in colors I loved, so I used two strands of worsted weight yarn. I used the same hook size (N) and it worked out nicely!
The instructions were very easy to follow, though I would have liked to have a stitch count at the end of rows. That’s just a personal preference, though! I think this pattern would be very easy to adjust to work with different weights of yarn. The stitch pattern is simple enough to memorize and work while you’re watching a favorite TV show or listening to music/books.
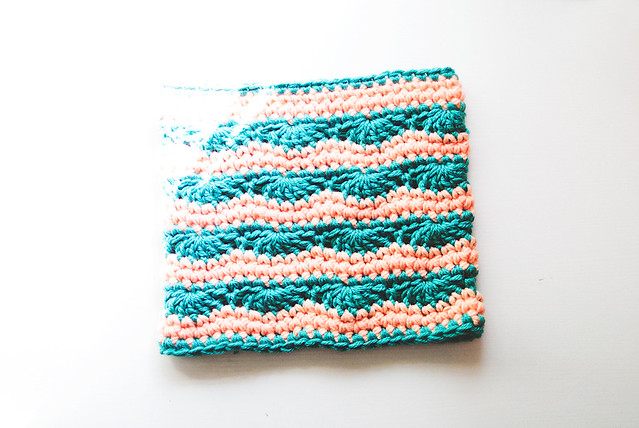

Pattern: Scallop Stripe Cowl by Meredith Crawford from Crochet With One Sheepish Girl
Yarn: one skein each of Red Heart Soft in deep sea and Hobby Lobby’s I Love This Yarn in light peach, held double
Hook: 10mm (US N/15)
Now, if the weather here in Houston would cooperate with my yarny desires, it’d be cold enough to wear this regularly. Just wearing it to take the photos had me super cozy, on the verge of a sweat.
If you are interested in the book, you can find it on Amazon and Barnes and Noble! Perhaps you can buy one for yourself, then try and win one for a friend? Enter the Rafflecopter giveaway below! No purchase necessary. Open to residents of the US and Canada only. Giveaway ends October 30, 12am.
a Rafflecopter giveaway
Pin It
By Lisa Gutierrez on 09/26/2014 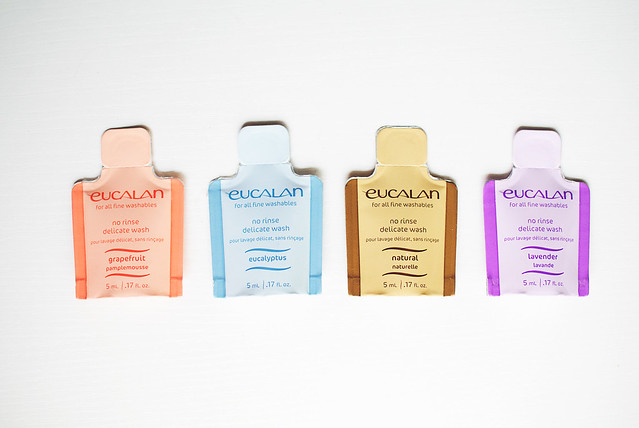
Scents available: grapefruit, eucalyptus, natural, lavender.
When I bring out my wool hats and cowls for the fall and winter seasons, I usually just shake off any dust (and, God forbid, any bugs) and move along. When asked if I wanted to review Eucalan, a no rinse wash perfect for delicate items, I got pretty excited. Read my thoughts below and find out how to win some Eucalan for yourself!
I understand woollies don’t need to be washed after every wear, or even every season for that matter. I usually store my pieces in a plastic box in the closet, but sometimes one gets lost behind the couch or stuck under a bed for a few months. I was fairly intrigued by this product because my normal method of washing includes a wash AND rinse cycle. Agitating the fibers too much can lead to felting and that’s a big no no!
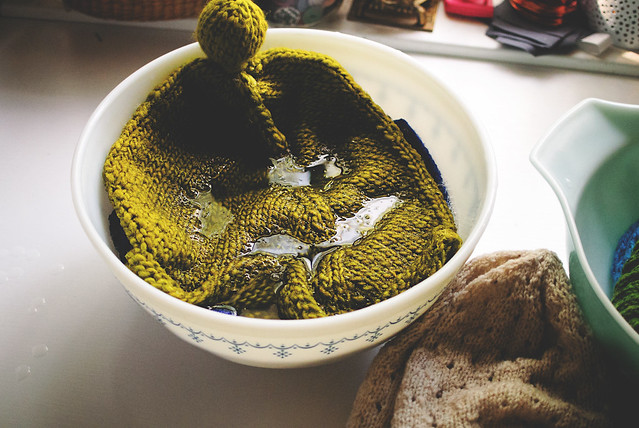
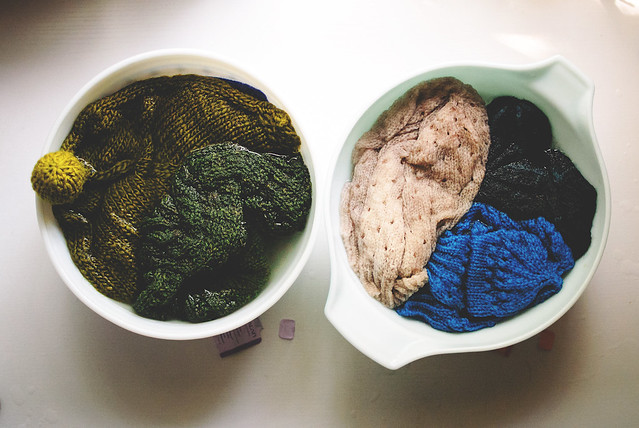
Washing with Eucalan was a total breeze! You put some water in a basin or large bowl, squeeze in the Eucalan, mix it up a bit with your hand, then soak the item. I put a few hats in this bowl, making sure they were all of the same color family, since it was the first time some got washed and I wasn’t sure of their colorfastness. Once the item is in the water, you squeeze it a bit to make sure the Eucalan soap gets into the fibers.
According to Eucalan, the best scents for our wool are eucalyptus and lavender. They are natural moth and flea inhibitors, so washing after the cold season is over, before you put the garments away, is probably a better idea. I decided to do it before because, like I said, hats end up under beds and in the couch more often than not around this house. I’m thinking I will purchase a bottle to re-wash everything at the end of winter.
After the items have soaked for at least 15 minutes, you simply pull them out, squeezing out excess water, and set them on a towel. I like to lay them flat, roll ’em up, and squeeze even more water out. Then, I lay them all on a fresh towel to completely dry under a ceiling fan.
I must say, the scents are wonderful! They aren’t overpowering like a perfume, but are more…crisp and clean! I was so, so happy. I am not a fan of cleaning products scented with lavender, so I didn’t have high hopes, but it definitely smells more herb-y (I love lavender flowers!) and like an essential oil rather than a fragrance.
Eucalan also features lanolin in its formula, so the wool fibers soften and plump up oh so gloriously. I anticipate no itchy necks or ears this fall! You can also use Eucalan on other delicates like lingerie. Read more about their products on Eucalan.com.
Visit Eucalan on Facebook and read the Eucalan Blog for tips on washing your most treasured items!
Enter the Eucalan Giveaway
Eucalan is graciously providing a Gift Pack to one lucky reader! Leave a comment below telling me how (if) you wash your woollies or just say hello. Submit your entries via the Rafflecopter widget below. You have 5 chances to win! You may need to view the giveaway in a browser. Winner will be displayed next Friday.
a Rafflecopter giveaway
Giveaway open to residents of the U.S. and Canada only. Sorry to my other international readers!
Disclosure: I was sent a sample pack of Eucalan’s products to review on the blog. All opinions and photos are my own.
Pin It
By Lisa Gutierrez on 09/24/2014 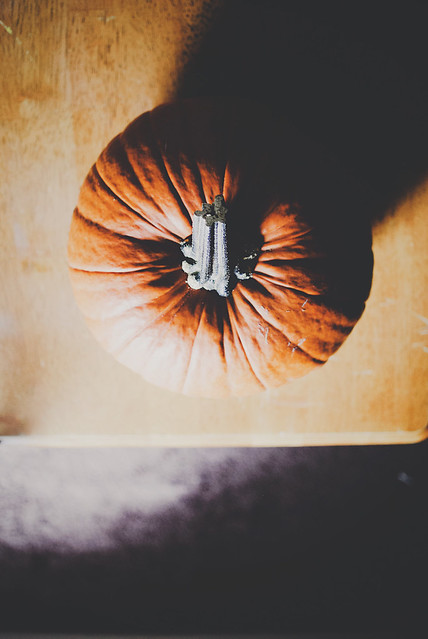
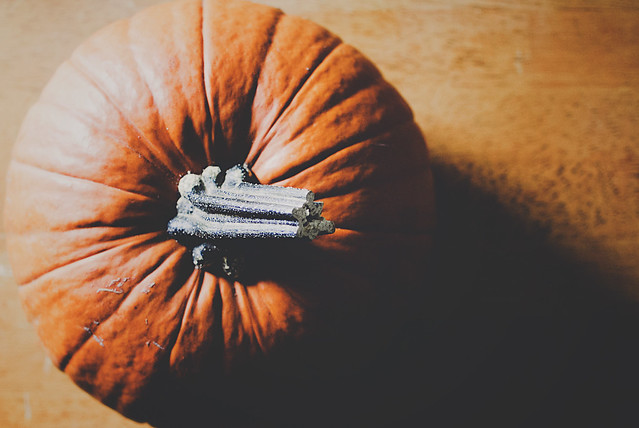
‘Tis the season for roasting sugar pumpkins and baking that mush into muffins! My husband brought home pizza and this whopper of a sugar pumpkin, yesterday. I may or may not have been sighing about my lack of pumpkin, the days prior.
I love roasting pumpkin for fresh pumpkin muffins and pies and cookies and and and…let’s just say sweet, spicy pumpkin anything is my favorite. Except for lattes. I can’t stand pumpkin spice lattes. Go figure! I’ve written about roasting pumpkins before, HERE.
Are you excited for fall or will you miss summer? I’m not gonna lie. Summer is comforting, but Autumn is my favorite. I lovelovelove bundling up my kids and walking in the crisp cool air to pick them up at school. Baking without feeling like I’m being baked is also really nice. Let’s not forget the copious amounts of knitting and crocheting that are about to take place. I learned to knit two socks at once, this summer. I’ll share that project soon! How are you ringing in the new season?
By Lisa Gutierrez on 07/18/2014 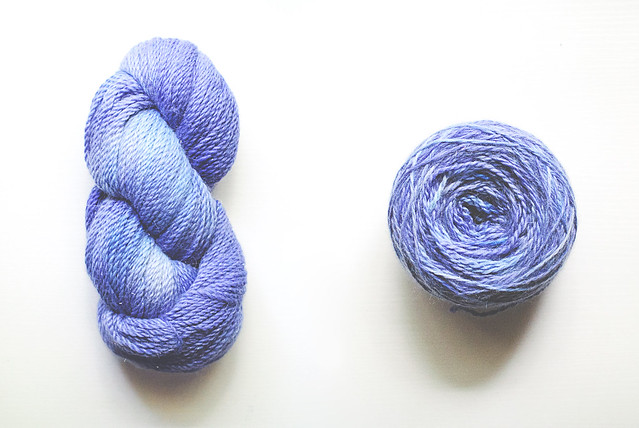
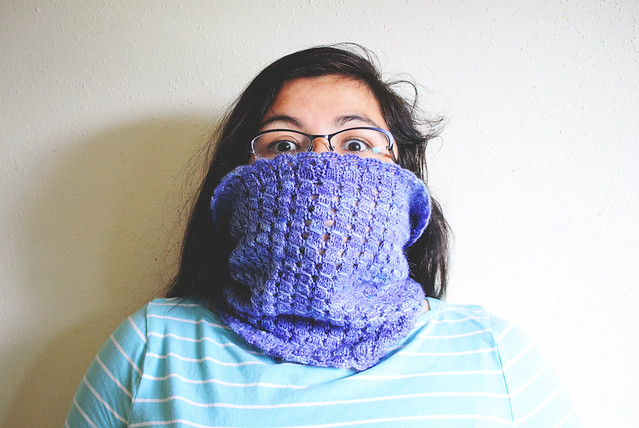
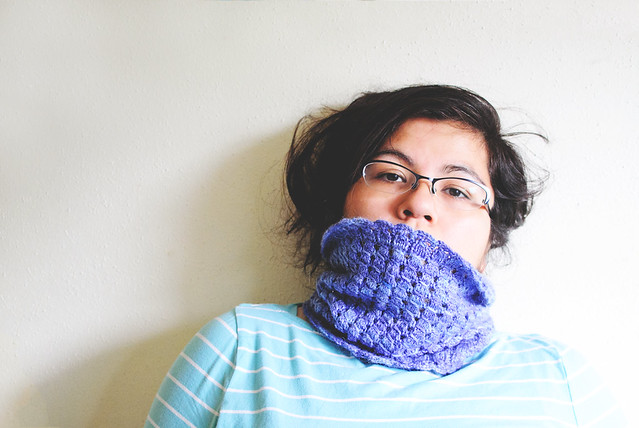
Hello, friends! Long time no see, hm? I’m sorry about my summer absence. My boys take up a lot of my day time and I just have not been able to plan any posts. I’m here today with something good, though–my very first yarn review!
I was sent a skein of Llama Sparkle from Red Barn Yarn. It is a hand-painted worsted weight yarn that is 95% baby llama and 5% stellina, so it is soft as butter with a little sparkle. To be honest, I don’t usually purchase yarns with shiny stuff spun into them, so this was a treat. What really made my day, though, was the color. It was a little tough to capture the perfect shade, but you can see some of the variation below:
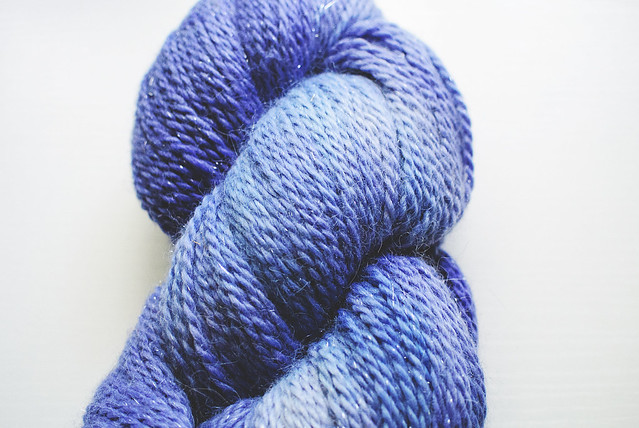
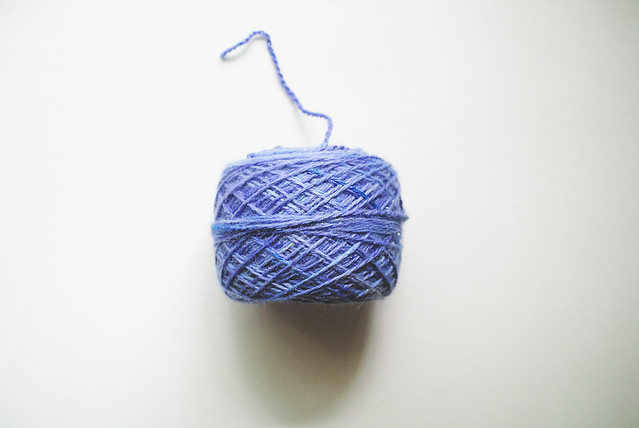
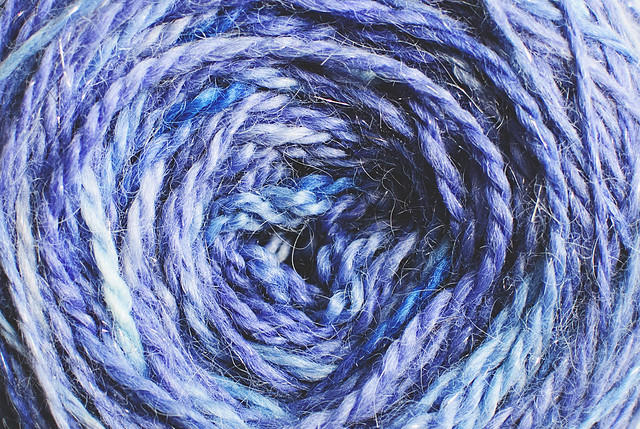
Beautiful, huh? The sparkle is very subtle, but it gives the perfect amount of shine. You can see the other yarn bases and colors available from Red Barn Yarn on their website. You can also find a list of their stockists. If you can’t find a retailer close by, you can contact them to purchase yarn directly by emailing info@redbarnyarn.com.
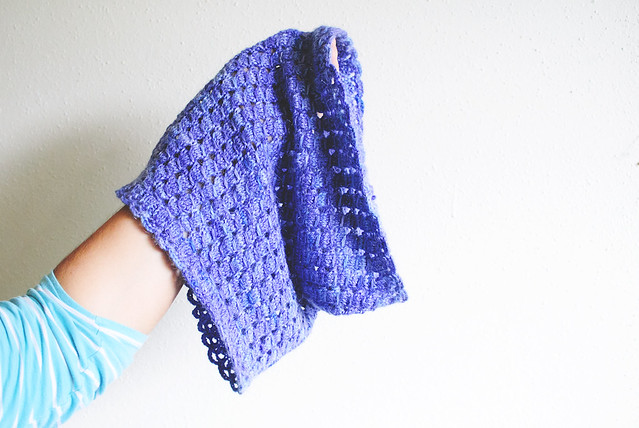
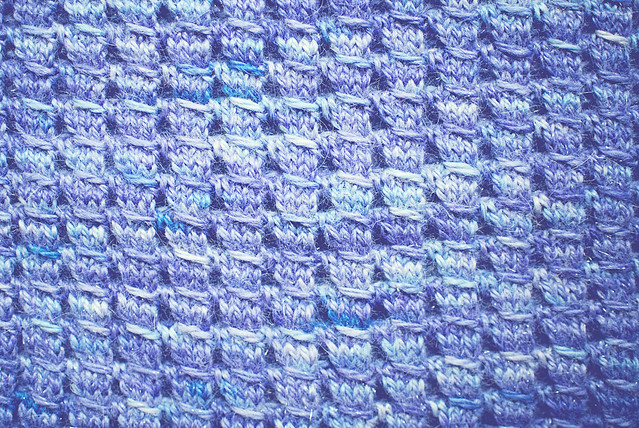
With just one skein, I made this gorgeous cowl! I browsed my stitch dictionary and found this one called “Mrs. Hunter’s Pattern” and it reminded me of crochet. I knew that I wouldn’t have enough yarn for a crochet project, so I really wanted to use this stitch. I love the color variation in the yarn SO MUCH! It looks pretty amazing in this pattern, too. I feel like my photos don’t do it justice, but of course I took a ton anyway.
(omg)
Like I said previously, this yarn is like butter. The baby llama is incredibly soft and bloomed beautifully after a wash. There was a little bit of color in the water after I soaked the cowl, but I didn’t notice any fading in the actual yarn.
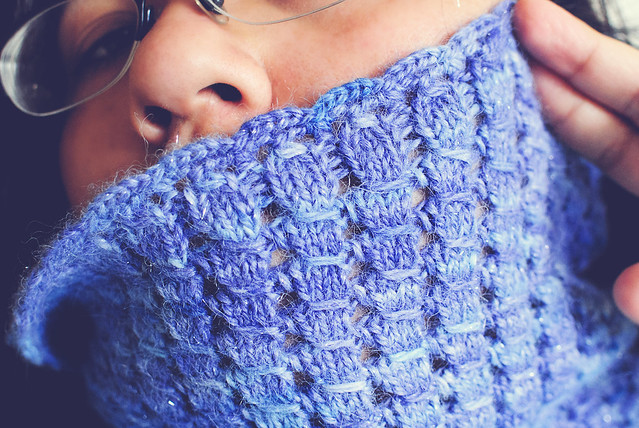
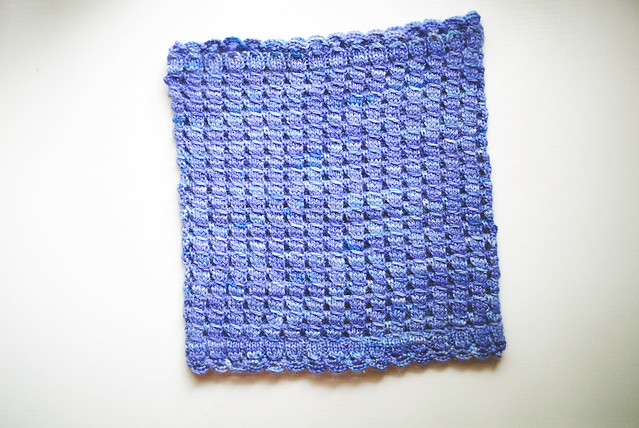
When I got to the end of my cowl, I realized I did not like the curling at the bottom (I went straight into the pattern after casting on), so I finished it off with a knit 3, purl 1 rib and a crochet cast-off and border. The result was a scalloped edge that lays relatively flat. I then picked up stitches along my cast-on edge and did the same thing there!
Let me know if there is any interest in a full pattern write up! I can whip something up to share with you guys. I was looking at my pattern page and realized I have waaaaay more crochet patterns than knit ones! I need to remedy that.
If you are interested in learning more about Red Barn Yarn, check out their website and if you have any further questions, join the Ravelry group: Red Barn Yarn Afficianados!
What are you doing this summer? Getting any knitting or crochet done in this heat?! I was straight up sweating during these photos. IN MY AIR CONDITIONED HOME! I can’t wait until it’s cold outside and I can wear this on my walks to my kids’ school. I’m gonna be so toasty!
Disclosure: I was given a skein of free skein of yarn for review purposes. All opinions are my own.
Pin It
|
Disclosure You may find affiliate links and banners throughout my blog. I earn a small commission from purchases made through these links. It helps pay for keeping this blog running! All reviews and products are items I have personally used and loved. |


