By Lisa Gutierrez on 09/25/2010 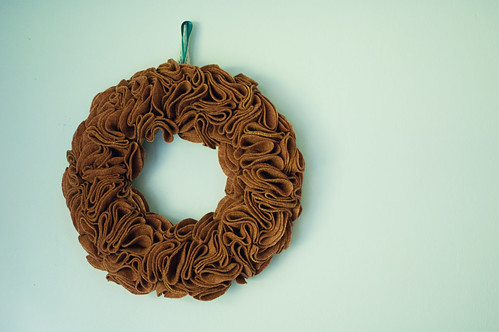
I think that’s what I’m going to aim to be, this year.
This is wreath numero dos and we’re not even through the first week of fall. I used the tutorial found here. I used her tips and the circles were way quick to cut. They were 3-3.5″ in diameter and my wreath form is 10″, so I used about a hundred. I KNOW it sounds like a pain, but I think I spent an hour, hour and a half TOPS on the entire thing. Plus, I bought the foam wreath form at the Dollar Tree and the felt was from a remnants bin at Jo-Ann. SO, the total cost was maybe $3.50 or so. It’s so ruffly and pretty. I adore it and want to make a million more.

ohh, wreath bokeh. love&love.
Are there any wreath tutorials you think I should try next? Link a girl up!
By Lisa Gutierrez on 09/23/2010 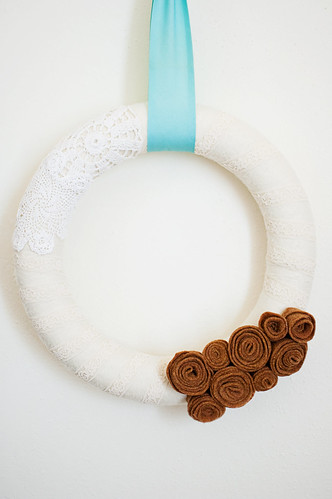
It’s fall! Of course it’s in the 80s with a “feels like” at 90, but I DREAMED of cool, crisp air. It was a really nice dream and I’m just going to try my best to be patient for the cold fronts. I’m ready to roast some pumpkins for bread, bust out the tried & true chili and soup recipes, and find a nice sweater for my walks to pick Nate up at school. SO ready!
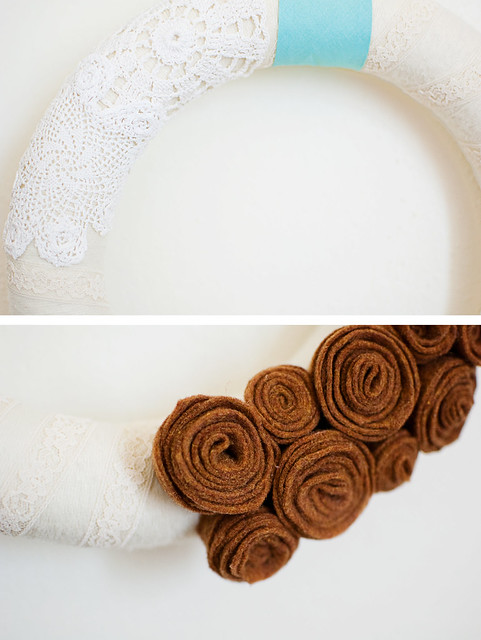
Anyway, I think wreaths are pretty awesome year-around, but I like them even more during fall & winter. To ring in the new season, I whipped this little wreath up, yesterday. I was originally going to make a pretty rosie wreath, via the tutorial on The Pretty Poppy. It’s insanely cute, no?! I really wanted to add those darn doilies, though, so I stuck with a small group of rosettes. I added the doilies opposite them on the wreath and really liked the symmetry it created.
You can’t really tell from the photo above, but the [foam] wreath is wrapped in yarn. That was probably the most time consuming part of this project. I suspect it took about a straight hour. I need to find a new method of wrapping. After I glued on the rosettes and doilies, I wrapped the empty spots in some lace hem tape I had. It was in a little baggies of vintage craft goods I found at a thrift store. I think it adds some nice dimension to it!
By Lisa Gutierrez on 08/31/2010 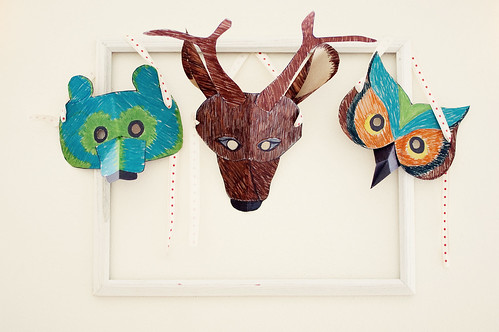
Right before Jason left for Vegas (like the day before!), I came across the first issue of a magazine called Nuno. I saw it had some great projects in it, so I bought it, downloaded it, and skimmed the amazingly gorgeous photos. I figured the boys and I could do some while daddy was away.
Well, Vegas week went by and since it was the week before school (KINDERGARTEN!) I decided to start enforcing a bedtime. Sooo, the projects got put on a back burner. We started preparing for school (did I mention KINDERGARTEN?!) and then daddy came home and then the weekend passed and holy moly! I’m a mother to a kindergartener, now!
It feels like that first day, both our tummies filled with butterflies, was ages ago, but it was really only a week. Sunday evening, I decided we would make masks after school on Monday. I printed out the templates and after we walked home in drizzling rain, we sat down to cut, color, tape, and wear these gorgeous masks. I chose the color scheme for the owl. I let Andy choose two markers for the bear and Nathan exclaimed he wanted his deer to “look REAL.” Nathan cut out the templates, I traced them and colored them (I think I have the only kids who think coloring is boring after about 2 minutes) and cut out the cardboard. I used some ribbon to tie them onto their heads.
They thought they were so cool! To my surprise, Andrew was able to see through the holes. Or one of the holes, at least. He kept coming to me, staring up, then lifting the mask and exclaiming, “HI!” with a giggle. It was ultra-adorable. It was so overcast, though, I didn’t get to get any good photos of them galavanting around as woodland creatures. Maybe this afternoon, if the rain clouds find their way out of town.
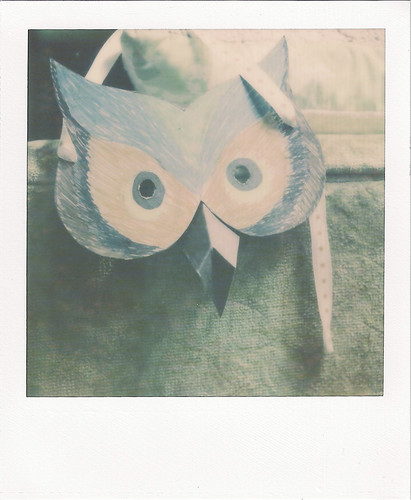
I took this photo around 10pm, last night. Everyone went to bed early, including the husband, so I was all alone. Me and my camera. And the owl mask.
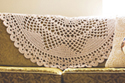
By Lisa Gutierrez on 08/29/2010 Inspired by the doily pillow tutorial on Smile and Wave, I started scouring thrift stores and craigslist for any little sets of doilies I could find. I HAD to make one. My couch NEEDED it!
One of the thrift stores close to our new house had some and I was SO excited! Until I saw the price tag. GAH! Them ladies knew how long and tedious doily making was and priced them accordingly. Unfortunately, doilies aren’t in the family budget, so I had to pass those up.
A week later, we headed back to our old stomping grounds in South Houston and hit up our old favorite thrift stores, including SeAM. I’m happy to say SeAM did not disappoint. I found a bunch of doilies for about two bucks. I used all the large ones, a medium one, and a few small ones to fill in open spaces. I still have a medium sized one and two little baby doilies left. I’m in LOVE!
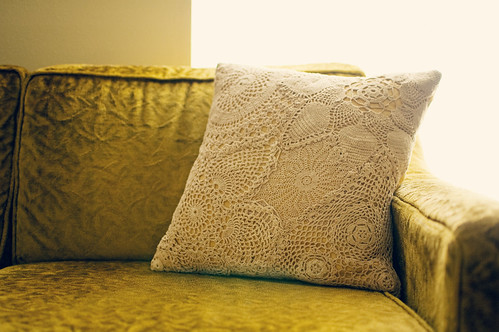
I did this a little differently than the tutorial. After figuring out the configuration (most exciting craft-related puzzle!), I pinned the doilies to some yellow fabric, about 17.5″ square. I then hand-sewed them down, overlapping where necessary. I didn’t want to cut any and there wasn’t much overhang, so I didn’t. Most of the doilies were bright white and one was a lovely light brown, so I whipped up a pot of super strong tea and let the pillow top soak for about 10 minutes. I washed it with some dish soap and tossed it in my dryer for a bit. Tea staining for the win!
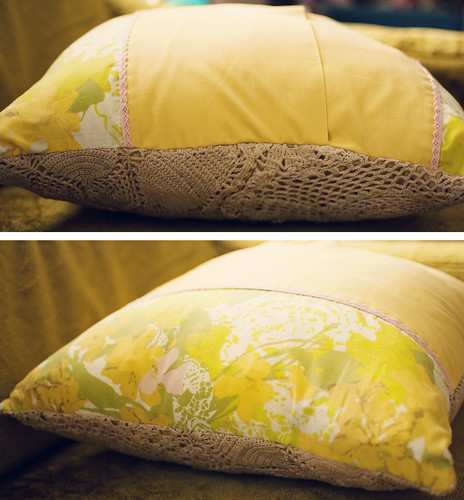
I used a vintage pillow case for the back. Again, i can’t stress enough how much I love reusing pillowcases like this. The hem is already there, so I don’t need to do any extra sewing! I cut out a piece about half the width of the pillow and one that was two thirds. I pinned it down and sewed it up. My 18″ pillow form makes it a little over-stuffed, but that’s how I like ’em.
If you have any doilies you don’t want (psssssh!), please do let me know.
By Lisa Gutierrez on 04/09/2010
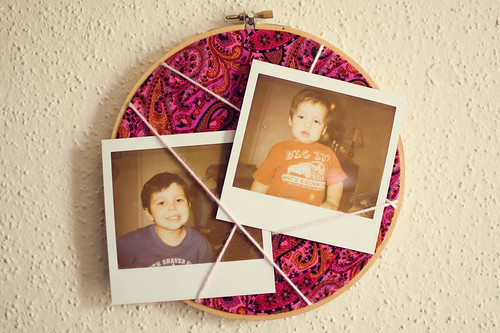
Inspired by the wonderful wooden wall plaque photo display tutorial on One Pearl Button, I made a photo hoop! I did things a bit differently, but it was still a quick and easy project.
I used fabric, an embroidery hoop, and hot glue.
First, I stretched the fabric and glued it to the inside hoop.
Then, I took off the outside hoop, wrapped the yarn where I wanted it and glued the ends to the inside hoop.
Next, I replaced the outside and glued on a backing.
Easy peasy! I’ve always loved the look of hanging embroidery hoops. Next time I think I’ll paint it prior to assembly.
|
Disclosure You may find affiliate links and banners throughout my blog. I earn a small commission from purchases made through these links. It helps pay for keeping this blog running! All reviews and products are items I have personally used and loved. |