By Lisa Gutierrez on 10/18/2011 
My oldest son’s great grandmother crocheted a blanket for him while I was pregnant. The entire thing is just one stitch and the border is a simple 5 rows of single crochet. It’s gloriously simple and oh so beautiful. When I finally learned to crochet, I knew I’d want to make a blanket just like it. I didn’t have the pattern and great Grandma said she crocheted it from memory–it was her go to stitch pattern and she would make several a year for any new babies who entered her life.
I STILL wanted to make it, though. So, I just sat with it for a few minutes and counted and came up with the stitch pattern. I crocheted a giant baby blanket for my cousin’s first born back in 2007 using it (you can see it stuffed in a basket of handmade baby goodies, here), but for some reason or another, I didn’t write up the pattern to share.
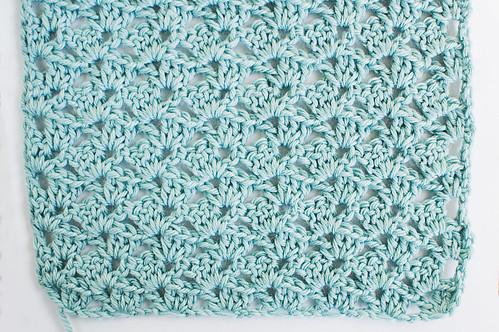
Yesterday, I got an email asking about it (you can see it in the background of my one-hour neckwarmer pattern) and so I decided to pull out the baby blanket and write up a proper stitch pattern. If you’re familiar with a more traditional name for it, please do let me know. It’s like a shell stitch pattern, but it’s not quite the same, hence the “offset.” Anyway, I hope you enjoy it!
Ch any multiple of 4
Row 1: [2 DC, ch 1, DC] in 4th Ch from hook, *skip 3 Ch, [3 DC, ch 1, DC] in next Ch; Rep from * across chain. Ch 3, turn.
Row 2: [2 DC, ch 1, DC] in the first ch-1 space, [3 DC, ch 1, DC] in all ch-1 spaces, except the last. 3 DC in last ch-1 space, Ch 1, DC into top of beginning ch-3 of previous row. Ch 3, turn.
Repeat Row 2 until scarf if as long as you would like it to be.
Using some worsted (aran) weight yarn and a 5.5mm hook, make a scarf or neckwarmer by chaining 28 or 32. Make a baby blanket by chaining something substantially larger, like 160. It’s surprisingly fast, once you get going.
Like I said above, if you know what this stitch is called or have any other reference for it, let me know!
Click here to see my other Offset Shell blankets!
It’s an addictive stitch pattern!

Pin It
By Lisa Gutierrez on 09/26/2011 
The doily love branches off.
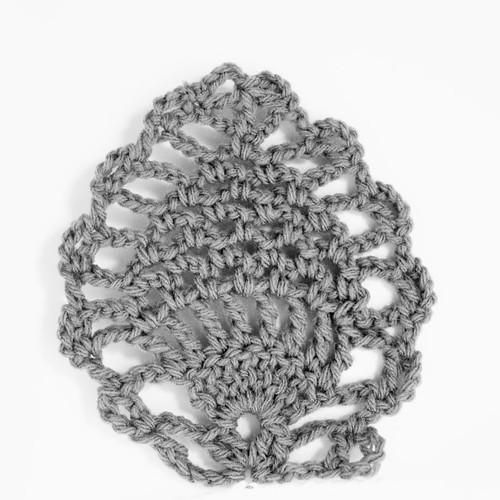
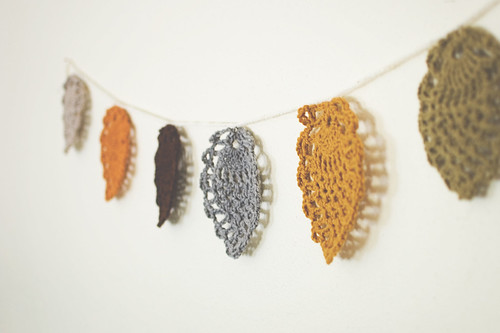
Last week, I was pattern drafting and after crocheting a pineapple, I realized it really resembled a leaf. Since it IS Autumn (despite the wicked hot weather in my part of Texas), I thought stringing a few fall-colored pineapples together would make a lovely garland. I liked it so much, I want to share this pineapple pattern with you. It’s varies from my pattern-pineapple simply in size and stitch count.
You’ll need: 6.00mm (J) hook and small amounts of worsted weight yarn (I used some Vanna’s Choice and some scraps of wool) in various colors. You can adjust the size of each “leaf” by changing hook sizes and yarn weights. Using a smaller hook and the same yarn will produce a stiffer leaf. This would be helpful if you are hanging the garland across an open space, so they won’t flop on themselves. You’ll also need a yarn needle to weave in your ends and a smaller hook (I used C) to make your chain to hook them together.
Abbreviations (US terminology): Ch- chain, DC- double crochet, SC- single crochet, TR- triple crochet, slst- slip stitch, sk- skip, sp- space
Note: the Ch 4 at the end of each row does NOT count as the first stitch of the next row! Crochet the final DC of each row into the DC of the previous row.
Pattern:
Ch 13
Row 1: DC in 5th Ch from hook, Ch 3, sk 3 chains, (2 DC, ch 2, 2 DC) in next chain, Ch 3, sk 3 chains, DC in last chain. Ch 4, turn.
Row 2: DC in first st, Ch 3, 8 TR in ch-2 sp, Ch 3, DC in final st. Ch 4, turn.
Row 3: DC in first st, Ch 3, TR in first TR, *Ch 1, TR; Rep from * across all TR sts, Ch 3, DC in last st. Ch 4, turn.
Row 4: DC in first st, Ch 3, SK ch-3 sp, SC in first ch-1 sp, *Ch 3, SC in next ch-1 sp; Rep from * across ch-1 spaces, Ch 3, DC in final st. Ch 4, turn.
Row 5: DC in first st, Ch 3, SK ch-3 sp, SC in next ch-3 sp, *Ch 3, SC in next sp; Rep from * across pineapple, Ch 3, DC in final st. Ch 4, turn.
Row 6-8: Repeat Row 5.
Row 9: DC in first st, Ch 3, SK ch-3 sp, *SC in next ch-3 sp, Ch 3* twice, DC in final st. Ch 4, turn.
Row 10: DC in first st, Ch 3, Sk ch-3 sp, SC in next ch-3 sp, Ch 3, DC in final st. Ch 4, turn.
Row 11: 3 stitch DC-decrease over the first DC, center SC, and last DC.
[YO, insert hook into first DC and pull loop through, YO, pull through 2 loops on hook.
YO insert hook into SC and pull loop through, YO, pull through 2 loops on hook.
YO insert hook into DC and pull loop through, YO, pull through 2 loops on hook.
YO, pull through remaining 4 loops on hook.]
Ch 4, slst into DC of Row 10.
Fasten off. Weave in ends.
For the visual crocheters, I made a diagram. This is my first, so don’t laugh at its unevenness!

NOTE: There was a mistake in the diagram. The ch-1 spaces between the single crochet stitches should really be CH-3 spaces. The diagram has been changed to reflect the corrections. The filled in RED chains = chain 3.
I attached them together using a basic chain. My chain went like this:
Ch 15, slst through center of pineapple, *Ch 30, slst through center of next pineapple; Rep from * until all pineapples are attached. Ch 15, fasten off.
If you make one of these, please consider sharing it with the brand new goodknits flickr group! Feel free to share any photos of projects you have created using my tutorials or patterns. I would love to browse!
Pin It
By Lisa Gutierrez on 06/20/2011 
Tomorrow is the Summer Solstice! Are you ready for all that daylight? Personally, the more natural light around me, the better. I could do without the heat, though.
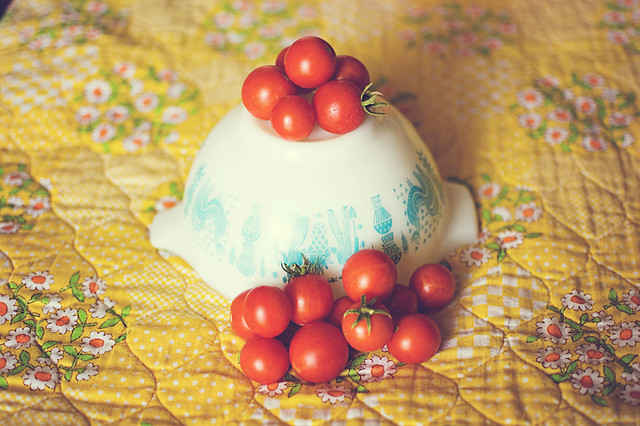
To celebrate the day of the year with the most daylight, I thought it would be appropriate to share something photography-related with you. How about some Photoshop fun?
This is a simple little action I created to help tweak your photo(s) to get that summery feel. I think it works particularly well with images that have yellow. I usually have A LOT of trouble with yellow. It’s just always so bright and over powering. I think it looks pretty good with a bit of haze and a slight color adjustment.
Download the action with this link (right click, Save As…). If you’ve never installed actions in Photoshop, don’t worry–it’s pretty easy! Just open the program (I have CS3) and then double click the file in whatever folder it was downloaded to. Open up the Actions palette (Window>>Actions or ALT + F9) and select the ‘Summer Haze’ action. Press the play button (triangle) and voila! Magic!
I hope you enjoy it. Run it and mess around with the layers to get your desired effect. I am no Photoshop pro, but I DO feel comfortable messing with layers and whatnot. Playing with actions has helped me get to this point where I can create my own!
The image above (see original here) and the ones below were edited with the action. Hover over them (let it load) to see the originals! [If the hover effect does not work with your browser, click the link below each photo to view the original.]

[before]
[before]

[before]

[before]

[before]
[before]
The effect is very subtle, but I like it! I did minor editing in Adobe Camera Raw (fixing white balance and exposure when needed) and then ran the action. All of these were saved as-is without tweaking the layers further. It has slightly different results on each image! Play around with it and let me know what you think!
Happy Summmerrr! As if it weren’t hot enough already.
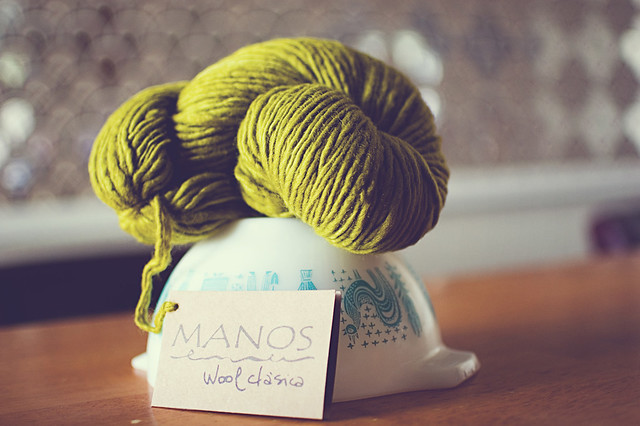
***p.s.! I won that skein of Manos Wool Classica from Flint Knits! I had completely forgotten about the giveaway, so it was SUCH a wonderful surprise! This color (citric) is absolutely gorgeous and I can’t wait to knit it up.***
By Lisa Gutierrez on 06/07/2011 Good day, folks! I come to you today with a knitting pattern! It’s a beanie pattern and you can find all sorts of cool information about it by clicking on the photo below. :)

Let me know what you think on that page!
By Lisa Gutierrez on 02/08/2010 Valentine’s Day is less than a week away! Yeah, I know, it’s a faux-holiday invented by major corporate scum to steal all our money! And blah blah blah. It’s also one of the few times a year I get to play with pink! I think I’ve said this before, but being a mom to boys means I don’t often see pink. You could say that’s my fault for following gender rules, but really, my son loves pink! He just doesn’t choose it as often as he chooses red or orange. It’s ok with me, because I do love me some orange. I just get a little tired of passing over pink, is all.
Anyway…This weekend, my sister chipped in and helped me with the single party favor I had my heart [!] set on making for Nate’s pre-k class. Heart crayons. Though stripping them of their paper and breaking them into small enough pieces was an absolute [and literal! my thumb still hurts] pain, they came out lovely.
![heart crayons [1]](http://farm5.staticflickr.com/4060/4341112706_57f451019c_z.jpg?zz=1)
Most how-to’s on the subject of heart crayons show an aluminum pan filled with crayon bits. Well, I went out and bought an aluminum pan, made a batch, but could NOT get them out! It was awful. So, I went out again and found a silicone pan and these lovely hearts were easily achieved.
![heart crayons [3]](http://farm5.static.flickr.com/4050/4341111314_efda9ebc4c_m.jpg) ![heart crayons [4]](http://farm5.static.flickr.com/4019/4340366197_4c7e3623f9_m.jpg)
I actually didn’t have enough crayon scraps (and I wasted a lot in the aluminum pan), so I bought 2 boxes of 64 Rose Art crayons ($2 each) for these. We split them up by color group and filled the slots accordingly. The aluminum pan fiasco taught me that contrasting colors didn’t go too well together in this project. I tried my best to keep them all within the same color group. I love the marbled–spin-art-ish–look!
![heart crayons [2]](http://farm3.staticflickr.com/2685/4340367527_2dc29810a9_z.jpg?zz=1)
I made a cheesy little tag with the line “you color my world” on it. Valentine’s Day party is this Friday!
ETA (some years later)
I’ve been emailed a few times to post some actual instructions. It’s super easy if you have the right tools! I bought THIS PAN from amazon because I couldn’t find it at my local stores. from amazon because I couldn’t find it at my local stores.
Separate your crayons by color groups: reds/pinks, purples, blues, greens, oranges/yellows. To get the paper off easily, cut a slit down the length of the crayon with a knife. Break them into ~1/3″ – 1/2″ pieces and place like colors into pans. You get a better result if you mix lighter shades of a certain group with darker shades. I also like to add a piece or of contrasting color. Go wild! It makes a great sorting game. My kiddo liked it and then when I let him break the crayons? pssssh. Dream come true!
Bake between 225F and 250F for about 10 minutes. Take a look at them after 10 and if they are completely melted, gently take them out, and let them cool for at least 10 minutes. If there are still some chunks after 10 minutes, let them go for another minute or two. Keep an eye on them!
Have fun!
Pin It
|
Disclosure You may find affiliate links and banners throughout my blog. I earn a small commission from purchases made through these links. It helps pay for keeping this blog running! All reviews and products are items I have personally used and loved. |


