Print it: Christmas “cross-stitched” signs

so this is christmas

so this is christmas v.2.0

Last year, I printed this Christmas sign on kraft card stock. I couldn’t find it in my box of Christmas stuff, so I can only assume I put it in the recycle bin after the holidays. This year I went with white cardstock and decorated it with reg gingham washi tape. I like the brightness! If you would like to print your own, click the image below (or right-click, save as…). Let me see where you put it!

sothisisxmas-xst

——————————————————————————————————————————————————

merry christmas!

I used the same Photoshop “cross-stitching” technique for our Christmas card. I already had the word “Christmas” so adding the “merry” was simple and quick. I also used kraft card stock for that. I think it looked awesome! If you would like to print it out, click the link below. If you would like to use it on a card like I did, you’ll have to download it and use a photo editing program to arrange it properly for your printer.

merryxmas-xst


**These files are free for personal use only! Do not distribute without a link back to goodknits.com. Thank you!**

Photo Edit: Winter Haze

a1-2

Hello, friends! I am here with a new Photoshop action. Throughout the summer, my most favorite edit for my photos was my Summer Haze action. It works fabulous with yellows and just gives photos that beautiful summer glow. For monotone photos, I use my Hazy B&W action.

I was editing some photos the other day and I found myself tweaking the colors some more. Just to make them a bit more dramatic and cool (tonally). It’s an adjustment to my other actions and if you are familiar with those, you’ll notice it. I have an updated version of the ATN file for download, HERE (right-click, save as). It includes Summer Haze, Hazy B&W, Dark & Moody B&W, and Winter Haze.

When you run any of the actions, it creates a few adjustment layers that get grouped into a folder AND a sharpening layer. You can adjust all of the layers to your liking. Sometimes they get too dark, so I adjust the DARKEN layer. Sometimes the contrast gets too be too much, so I adjust the CONTRAST layer. Sometimes the coloring looks TOO off, so I adjust the corresponding layer. Adjustment layers are wonderful in that you can easily ADJUST them! :)

(Hover to see the BEFORE, if it doesn’t work, click the links below the photos)


[before]


[before]

Let me know if you use it and what your results are! If you need help installing/using actions, see my Summer Haze post! I get pretty detailed in that one. :)

A tip: hide the “WINTERIZE” layer and get a dark, dramatic “real” edit like this-

309.365: the kid's face

Have fun! Feel free to add photos edited with any of my actions to the GOODKNITS Flickr group!

Photoshop: Hazy B&W

190.365: the talking face

Oh, Andrew. Here’s some proof that if you are talking while I am photo-taking, you will look silly. He was telling me about this headband my sister put on him. It was all sorts of cute!

I finished up my week of black & white, today. I’ve really fallen in love with photoshop, lately. I have been using my Summer Haze action (with tip) a lot for my color photos and then one day I played it on my black and white images and loooved the slightly hazy look it gave! I ended up tweaking the layers a bit, so I came up with a new action to make it easier/faster to get hazy B&W images. If you’re interested in trying it out, download the action HERE (right click, save). Let me know what you think?


The August Break 08

the brothers

diptych: bored brothers

the handsome #1

post-script: I pulled a winner for the apron giveaway! Congratulations to Fiona!!

Summer Haze

summer haze

Tomorrow is the Summer Solstice! Are you ready for all that daylight? Personally, the more natural light around me, the better. I could do without the heat, though.

To celebrate the day of the year with the most daylight, I thought it would be appropriate to share something photography-related with you. How about some Photoshop fun?

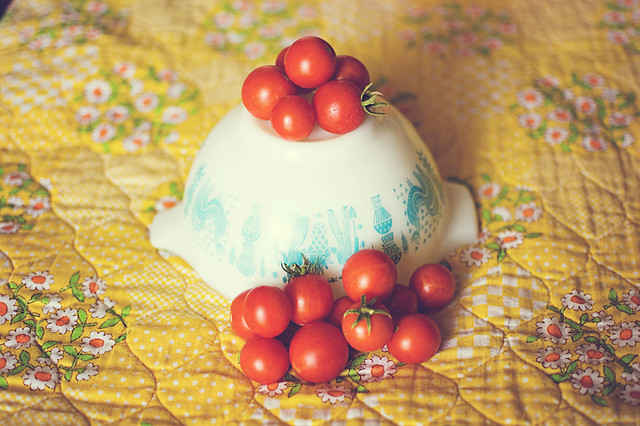
This is a simple little action I created to help tweak your photo(s) to get that summery feel. I think it works particularly well with images that have yellow. I usually have A LOT of trouble with yellow. It’s just always so bright and over powering. I think it looks pretty good with a bit of haze and a slight color adjustment.

Download the action with this link (right click, Save As…). If you’ve never installed actions in Photoshop, don’t worry–it’s pretty easy! Just open the program (I have CS3) and then double click the file in whatever folder it was downloaded to. Open up the Actions palette (Window>>Actions or ALT + F9) and select the ‘Summer Haze’ action. Press the play button (triangle) and voila! Magic!

I hope you enjoy it. Run it and mess around with the layers to get your desired effect. I am no Photoshop pro, but I DO feel comfortable messing with layers and whatnot. Playing with actions has helped me get to this point where I can create my own!

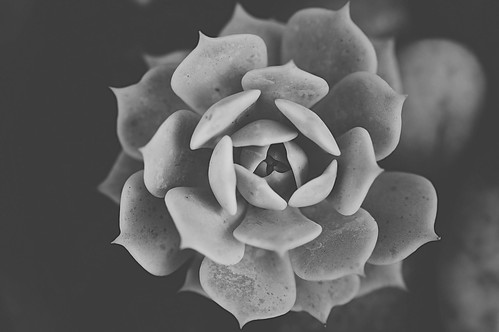
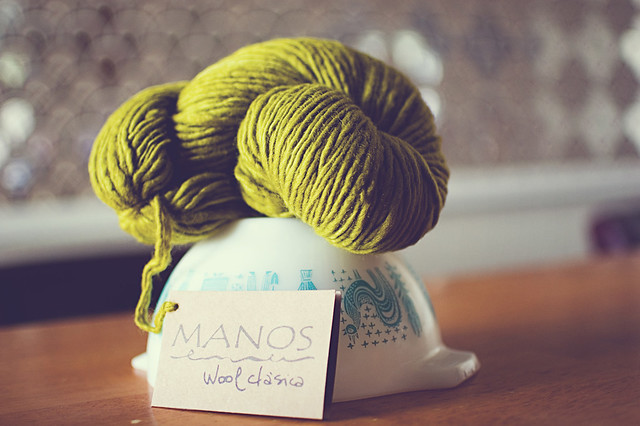
The image above (see original here) and the ones below were edited with the action. Hover over them (let it load) to see the originals! [If the hover effect does not work with your browser, click the link below each photo to view the original.]


[before]


[before]


[before]


[before]


[before]


[before]

The effect is very subtle, but I like it! I did minor editing in Adobe Camera Raw (fixing white balance and exposure when needed) and then ran the action. All of these were saved as-is without tweaking the layers further. It has slightly different results on each image! Play around with it and let me know what you think!

Happy Summmerrr! As if it weren’t hot enough already.

***p.s.! I won that skein of Manos Wool Classica from Flint Knits! I had completely forgotten about the giveaway, so it was SUCH a wonderful surprise! This color (citric) is absolutely gorgeous and I can’t wait to knit it up.***