By Lisa Gutierrez on 11/01/2012 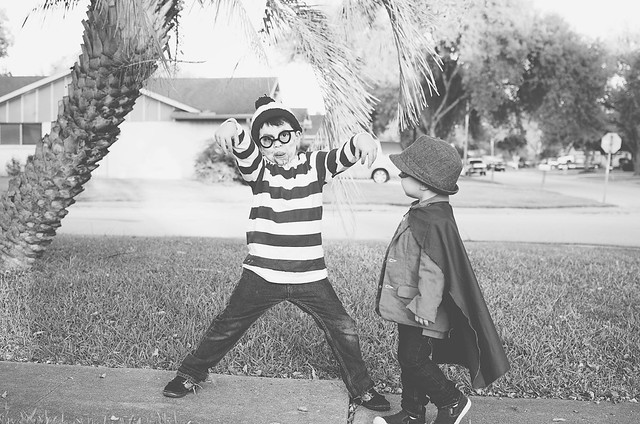
The book character parade was all sorts of adorable. My kids looked like THIS before school. My heart went all mushy for my baby in overalls. I wish he could wear them all the time. For trick or treating, Waldo turned into some sort of zombie thing and the little mouse transformed into Darkwing Andrew. I didn’t get around to finding a duck bill, so we sort of nixed the duck part. He still looked pretty darn cute.
[You can see past Halloween photos HERE]
While they went trick or treating, I sat around and handed out candy. I got only a handful of trick or treaters before 7:30. The big groups started coming after 8, which is when I went in to get the boys ready for bed. Jason handed out the rest of the bucket and that was that.
Helloooo, November.
By Lisa Gutierrez on 10/29/2012 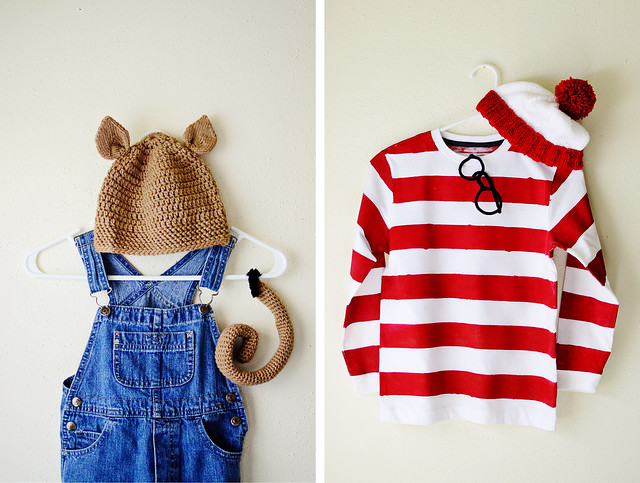
At least mostly handmade.
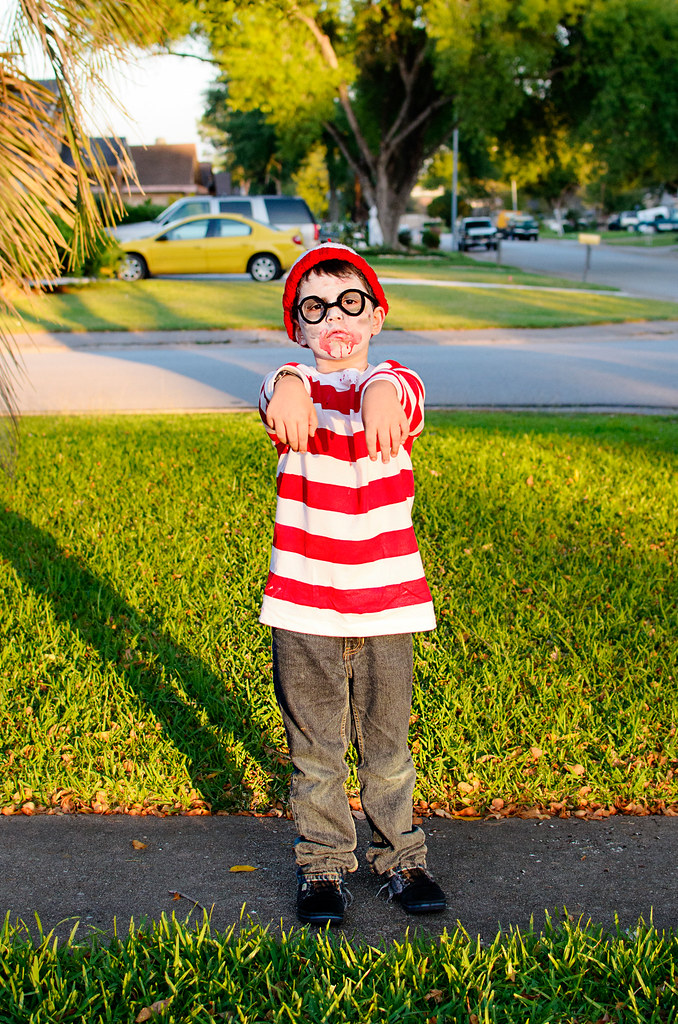
These are my boys’ costumes for the book character parade at their school. Andrew (4) chose the mouse from If You Give a Mouse a Cookie and Nathan (7) chose Waldo of Where’s Waldo? fame.
You would think the Waldo costume were the easiest thing in the world to put together, but..ummm…NO.
The first thing I did was make the hat. That part was easy. I CO 60 with a 5.5mm circular and k2p2 for like 20 rounds, then switched colors and knit about 20 more rounds, then did a basic crown decrease. Giant pom-pom completes the look. It fits him perfectly and took only a few hours. I want to make more in a bajillion different colors.
Next, I looked for a Waldo shirt. I only found red & white striped shirts that were for the adult version of the Waldo costume. Nothing that would fit a 7 year old! So, I figured I’d just paint a white shirt. I looked at Target for a white shirt–nothing. I looked at Wal-Mart–nothing. Frustrated, I moved on to the glasses. I thought I’d just find some at a thrift store and pop out the lenses, but no. I couldn’t find any round ones! SOOOO, pipe cleaners to the rescue! And the boy could help, so WIN!
I just needed the darn shirt. I finally found white long sleeve t-shirts at Old Navy and they had his size–whew! Painting was a whole other ordeal. I mixed my acrylic paint with some textile medium I’ve had forever. I used blue painter’s tape to mark off the stripes. It came out better than I was expecting. Even though some of the lines are a little messy, I still like the look. I heat set it, today, but I’m afraid to wash it, so the boy is going to wear it as-is. The acrylic was really rough, but the iron smoothed it out considerably. He’ll wear blue jeans and I’m thinking of letting him take my old Polaroid camera with him. He wants to be a zombie for Halloween night and I’m going to try so hard to get him to be ZOMBIE WALDO. How cool would that be?
Andrew’s mouse costume was easy-peasy. I made a basic crochet beanie (SO QUICK!) and then I knitted the ears on. I made the ears in the round with short-row shaping. I don’t know why I decided I would knit them, but I’m glad I did. Since they’re double-thick, they stand up and are just so damn cute. He wore the hat to the school’s Fall Festival this weekend (and a blue cape!) and received many compliments. However, they all thought he was a cat or even some sort of bear? Oh well! His tail is a long tube with a JUMBO pipe cleaner shoved down the center. Seriously. Easiest costume ever. I added a little loop to the back of his overalls to “tie” his tail on. He’s in love and so am I.
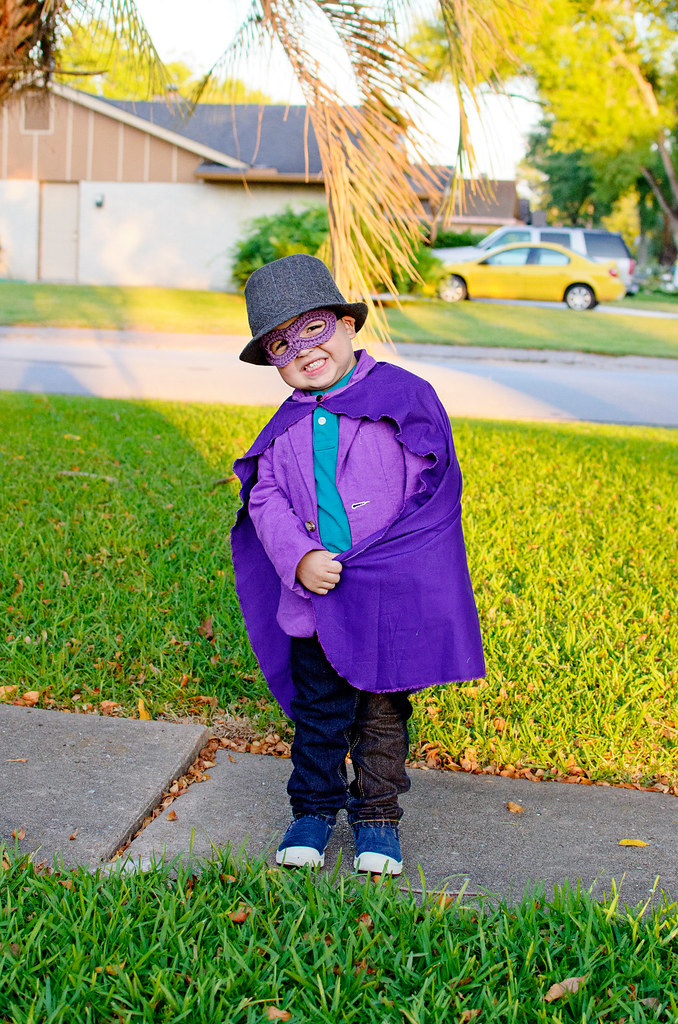
This next costume is for you 90’s kids. Get ready…
Do you know who he’s going to be? Hmmmmmm??
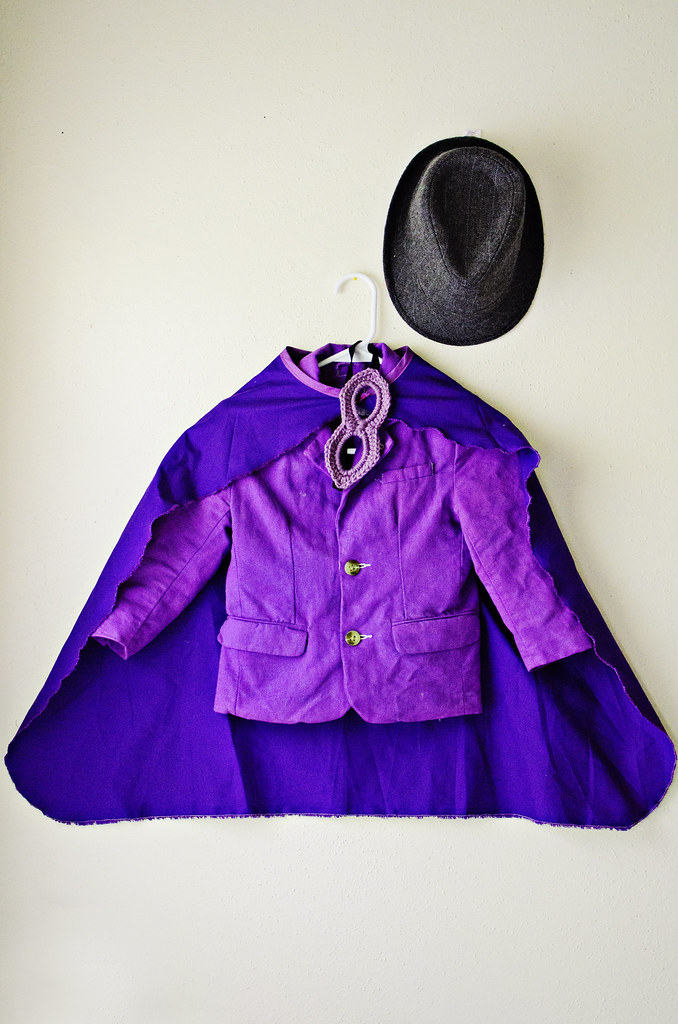
If you guessed Darkwing Duck, you are correct! My husband introduced them and so my littlest has been raving about a Darkwing Duck costume all month. The first thing I knew he would need was a purple blazer. OF COURSE there were no purple blazers for boys to be found. I went to Goodwill and found a cream linen blazer, picked up a packet of purple dye, and BAM! Purple blazer. The boy swooned. Like, really. He was so giddy to put it on. I made the cape (cut out the general shape, use double-fold bias tape around the neck, then zig-zagged around the edges) and crocheted the mask (I made the first row around a pipe cleaner so it’s stiff!). He already had the fedora. I just need to figure out what pants he’s going to wear. Darkwing Duck doesn’t wear pants, but it’s going to be too cold to go pants-less. He has some yellow boots to wear as duck feet, so I was thinking white pants, but I can’t find any! Ah!
Anyway, I kind of went all out with the DIY, this year. To be completely honest, this is the first year I’ve put together costumes for them. It’s usually my sister that buys them whatever they want or we go to a thrift store and my kid picks out a super-hero costume. I’m pretty excited for Halloween, this year! We may put them on tomorrow so I can get photos.
Pin It
By Lisa Gutierrez on 10/11/2012 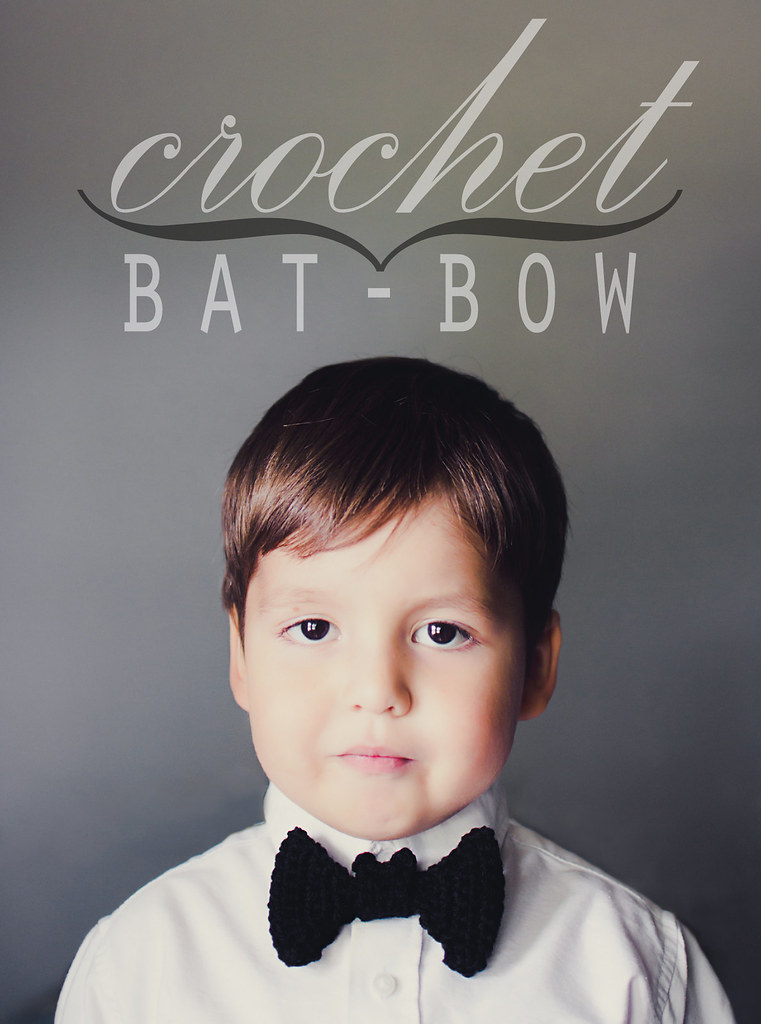
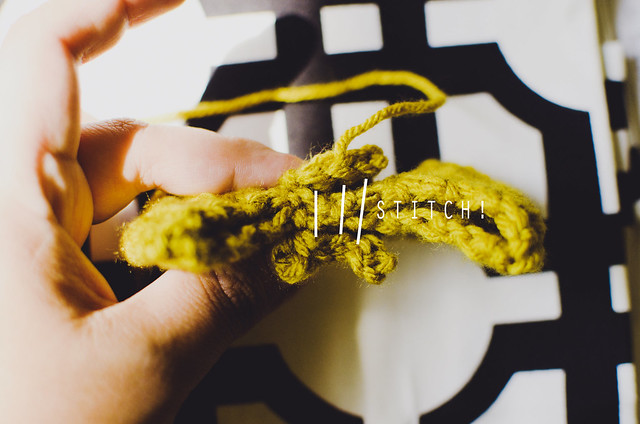
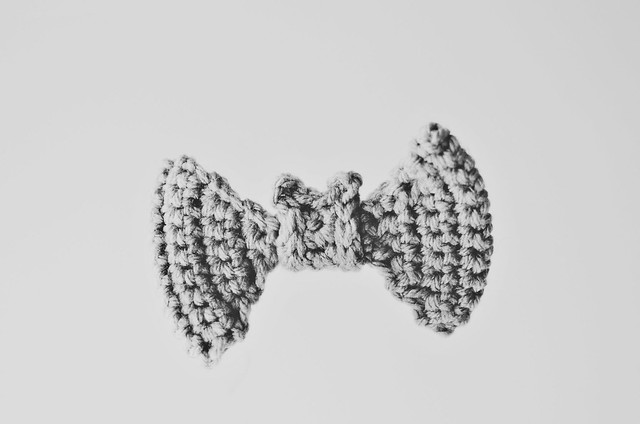
Pretty self-explanatory. A bow that looks like a bat. I’m sure you have seen some variation of it around the web, but here’s my take! It’s really simple to crochet and I’ve provided a few photos for assembly. I really just wanted to make this post to share photos of my adorable son. He looks like he’s about to take my order.

Using some worsted weight acrylic and a 5mm (H) hook, start crocheting!
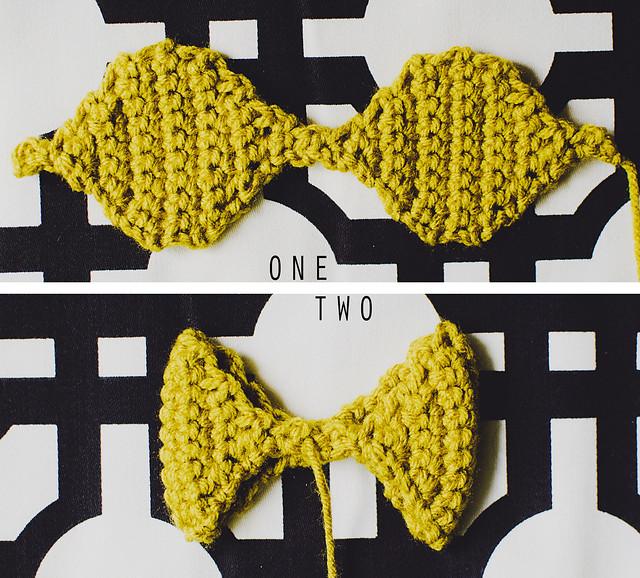
One: Make the wings.
Row 1: Ch 2, SC in second ch from hook, Ch 1, turn.
Row 2: SC in st, Ch 1, turn.
Row 3: 2 SC in st, Ch 1, turn. (2 sts)
Row 4: 2 SC in each st, Ch 1, turn. (4 sts)
Row 5: 2 SC in first st, SC in next 2 sts, 2 SC in last st, Ch 1, turn. (6 sts)
Row 6: 2 SC in first st, SC in next 4 sts, 2 SC in last st, Ch 1, turn. (8 sts)
Row 7: 2 SC in first st, SC in next 6 sts, 2 SC in last st, Ch 1, turn. (10 sts)
Rows 8-10: SC across, Ch 1, turn. (10)
Row 11: SC2tog, SC in next 6 sts, SC2tog, Ch 1, turn. (8 sts)
Row 12: SC2tog, SC in next 4 sts, SC2tog, Ch 1, turn. (6 sts)
Row 13: SC2tog, SC in next 2 sts, SC2tog, Ch 1, turn. (4 sts)
Row 14: SC2tog twice, Ch 1, turn. (2 sts)
Row 15: SC across, Ch 1, turn. (2)
Row 16: SC2tog, Ch 1, turn. (1 st)
Rows 17-18: SC, Ch 1, turn. (1)
Row 19: 2 SC in st, Ch 1, turn. (2 sts)
Row 20: SC across, Ch 1, turn. (2)
Rows 21-31: Repeat Rows 4-14.
Row 32: SC2tog, Ch 1, turn. (1 st)
Row 33: SC. Finish off, leaving about 8″ tail.
Two:
Weave in one end and with the second (the 8″ tail), stitch the beginning and end together. Lay the wings flat with the seam sitting in the middle. You can also make a few stitches in the center to keep it together. Weave in that end.
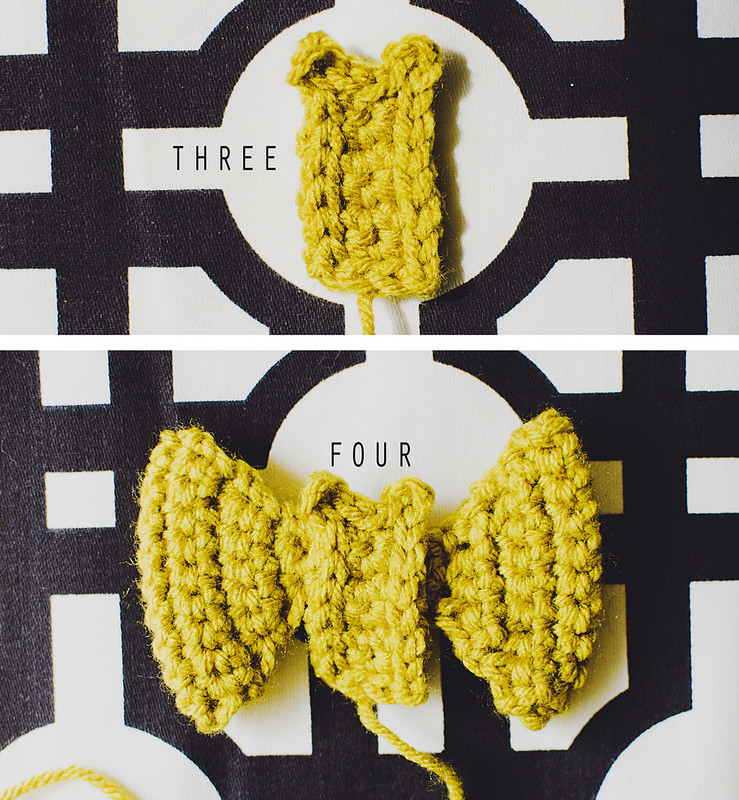
Three: Make the bat body.
Row 1: Ch 4, SC in 2nd chain from hook, SC in next 2 ch, Ch 1, turn. (3 sts)
Row 2-6: SC in each st, Ch 1, turn.
On Row 6, do not ch 1 & turn. Instead, slst down along the edge of the rectangle (6 slst along the side). When you get to the next corner, Ch 3, then slst back into the same st, slst in next 2 sts (you should be at the next corner), Ch 3, slst back into same st, then slst back down the other long rectangle edge, slst across last short edge. Finish off, leaving about 10″ tail.
Four: Attach body to wings.
Weave in your beginning tail, then position the head/body over the center of the wings. Using your 10″ tail, whip-stitch the beginning chain and the last row together over the wings. It’ll be a snug fit, but you should still be able to rotate the body around, as you won’t be sewing into the wings.
There are a few ways to use your little bat bow. In the photos of my son, I just have it pinned right next to his button with a safety pin. You could glue it to a headband or even thread some elastic through the back. Whatever you’d like!


I hope you have some time to make a bunch of little bows! I think it would look really adorable as part of a vampire costume!

Click here for a text only version of this pattern!
Pin It
By Lisa Gutierrez on 10/02/2012 CLOSED! Winner announced at end of post.

For some reason, the lovely folks of Tumbleweeds Handcraft thought I was interesting enough to interview and ask me what my ideal features in a pair of sunglasses would be. What resulted were these absolute beauties you see right up there and down below.
I seriously swooned for several minutes when they arrived. Like stared at them sweetly and sighed. Ahhh. They’re simple and classy, but still so intriguing! They’re the clubmaster style with cherry veneer and mother of pearl inlay. I couldn’t capture the mother of pearl iridescence, but it’s there and it’s beeeauutiful.


Do you like them as much as I do? Well, the glasses are available in the Tumbleweeds Handcraft Etsy shop, but there is a very limited quantity!! Get them while they’re still available.
If you’re more of the gambling type, they have generously offered a pair to one lucky winner! To enter, just leave a comment below.
For extra entries (leave a comment for each):
-Visit the Tumbleweeds Handcraft shop and let me know which glasses are your favorite!
-Follow Beca’s blog, Tales of a Tumbleweed (GFC or Bloglovin).
-Tweet about the giveaway & leave me a link to your tweet. Example: I want to win a pair @tumbleweedsshop sunglasses via the @goodknits blog! http://goodknits.com/blog/?p=4801
-Pin this post (you can use the button below or pin any of the images in this post). Leave me the link to your pin.
Make sure you provide a valid email in the email field when you’re leaving your comment(s), so I can contact ya if you win! Giveaway ends at noon (CST), next Monday, October 8.


The winner will also received a crocheted carrying case for their glasses! My case is this lovely coral cotton with rust leather and pearl snap! I may or may not have cuddled it earlier. OK, I DID.
—————————————

The winner of the giveaway is comment #39–Berta’s!
Pin It
By Lisa Gutierrez on 08/28/2012 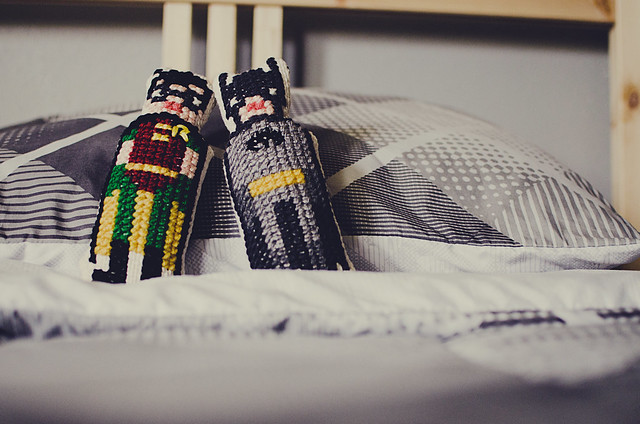
I know I’ve been a bad blogger, but I hope that with my boys in school I’ll be able to spend some of my free time crafting. Let’s just not look at that pile of laundry on the floor of the bathroom, OK? Thanks.
Moving along…
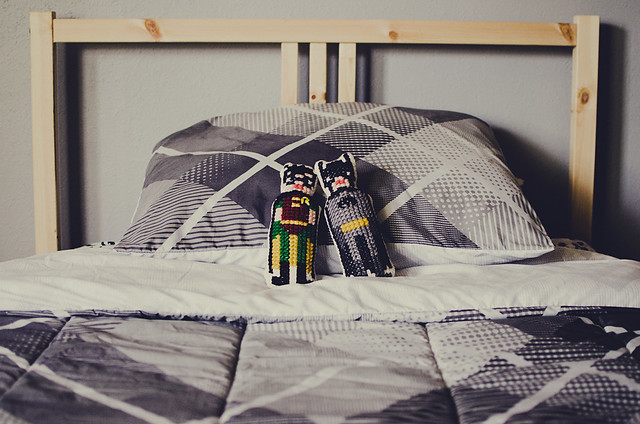
The lovely Danielle of Kitschy Digitals asked if I would be interested in stitching up some samples of the beautiful patterns available on the site. She specifically wanted me to try out some of the cross-stitch patterns from Wee Little Stitches. Of course I said yes! I mean, cross-stitched superheroes are absolutely too cute to pass up. Plus, I have two boys that kinda love when I make toys (tootin’ my own horn).
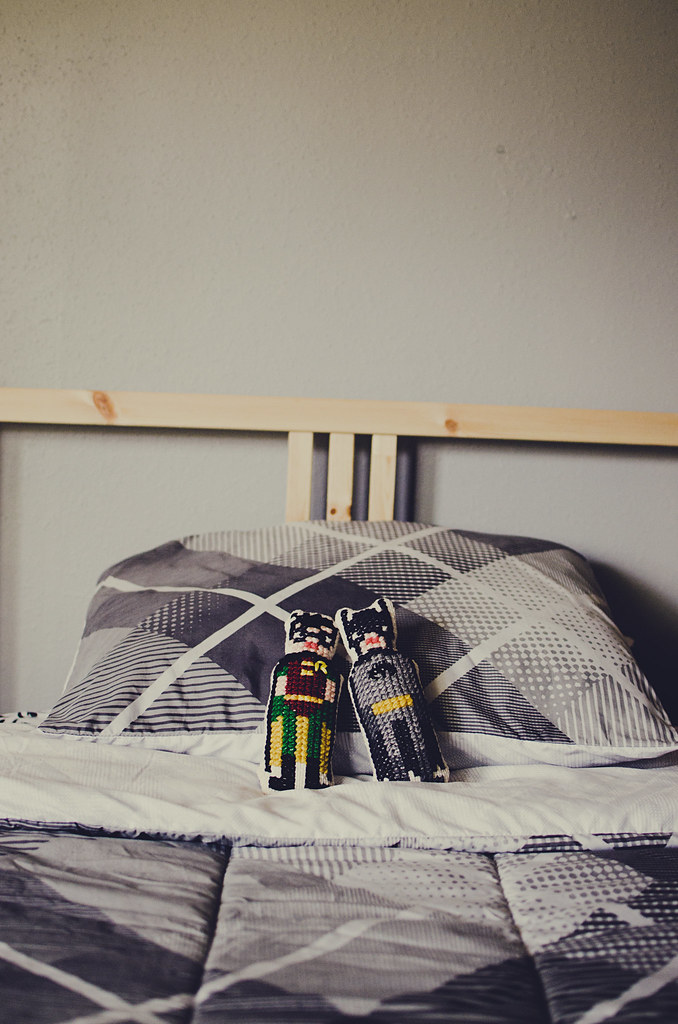
I got the Batman and Robin from the AMAZING Superhero Alphabet Cross-Stitch Pattern. We wanted them to be big enough to be squishable dolls, so I knew I’d have to enlarge the pattern. Instead of searching the ‘net for a tutorial, I perused one of my many vintage needlework books. There were two methods that stuck out–using a smaller count fabric or re-charting the pattern by making each 1×1 square a 2×2.
That latter was really intriguing and it was pretty simple to adjust the pattern, but I soon learned it would take FOUR times as long to stitch up. I persisted and ended up with a cute-as-a-button Superman. As much as I loved it, I knew I wanted to make more than one and not spend my entire day cross-stitching. I decided to go with a smaller count fabric.
I used a 40% off coupon (keeping it real) and picked up some Monk’s Cloth at Hobby Lobby. It was my first time using Monk’s cloth…my first time using any evenweave! It was a new skill to learn–not hard, just different than stitching on Aida. I couldn’t find any Aida larger (smaller?) than 11 count, though! The Monk’s Cloth is 7 count and working on it resulted in dolls that are 8-10″ tall. I used my scrap yarn and these babies worked up so fast!
I also made an Iron Man and Incredible Hulk (in the same pattern!):

Their backs are home-decor weight fabric I had hanging about. I used my machine to sew along the edges, leaving the bottoms open for stuffing. I stuffed as firmly as I could and then hand-stitched it closed.
I think I’m gonna have to stitch a Nintendo controller next…for my husband! Or maybe a gorgeous sleepy owl for myself? Thank goodness the boys go to bed at 7. Mama’s got some stitching to do!
Pin It
|
Disclosure You may find affiliate links and banners throughout my blog. I earn a small commission from purchases made through these links. It helps pay for keeping this blog running! All reviews and products are items I have personally used and loved. |


