By Lisa Gutierrez on 12/01/2014 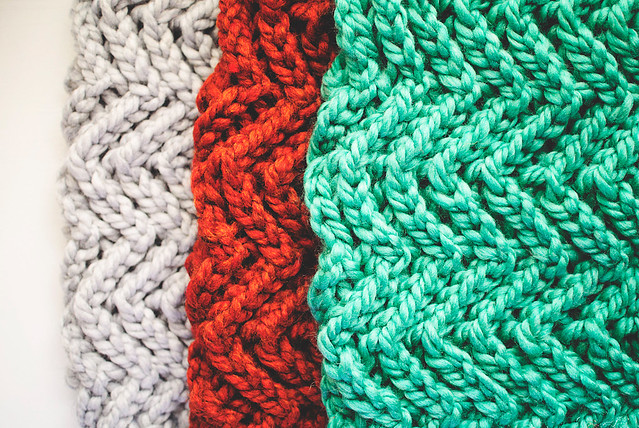
I keep mentioning that I’ve knit a whole bunch of cowls over the past few weeks. It all started with the #bulkyhatkal and my brand new set of interchangeable needles.
I received the Knitter’s Pride Trendz Chunky Set to work the KAL and they have been the best addition to the set of interchangeable needles I bought from Knit Picks, a few weeks ago. Those only go to size US 11, so I needed bigger sizes to work with bulkier weights of yarn. to work the KAL and they have been the best addition to the set of interchangeable needles I bought from Knit Picks, a few weeks ago. Those only go to size US 11, so I needed bigger sizes to work with bulkier weights of yarn.
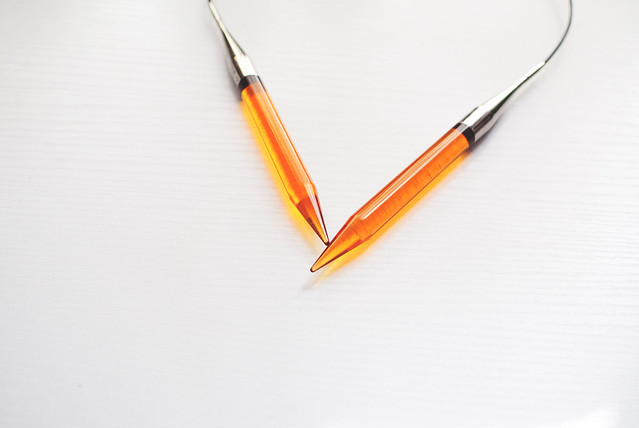
I used the US 17 needles for my hat and then switched to the US 15 (seen above) for my cowls. The needles are fantastic! I’m new to interchangeables, so I don’t know how the cords compare, but I can’t imagine them working any better. They have the perfect amount of flexibility and the needle part is a great length–not too long or short. My hands didn’t get that sore feeling that usually accompanies bulky knitting.
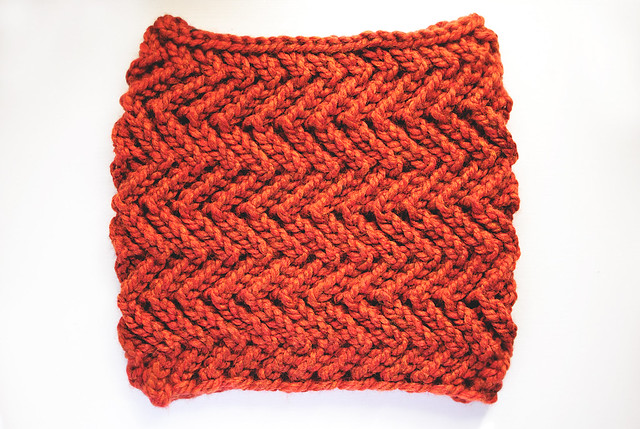
I picked up a few different colors of super bulky yarn at Michael’s and just took off! One of the very first patterns I tried was the Swirling Cowl by Signe Marie Ricter. That pattern is for even bulkier yarn than I’ve got, so I increased my CO to 50 and started. When I got about 5 rounds in, however, I decided I wanted to make the swirl go the other way, so I changed things up a bit. Working alternating repeats of left and right leaning stitch patterns, I ended up with a really cool zig-zag cowl!
I wrote up an explanation of my modifications, so you can make one for yourself! If you’d like the original swirly cowl, check out the link I posted above! It is really pretty. Make both?!
Knit with Loops & Thread Cozy Wool
Yarn: One skein of super bulky yarn: Lion Brand Wool-Ease Thick & Quick (6 oz/170 g equals 106 yd/ 97m) OR Loops & Threads Cozy Wool (4.5 oz/127 g equals 90 yd/82 m)
Needle: 10 mm (US 15) 16-24″ circular needle

Right-leaning stitch pattern
*YO, K2tog; rep from * around.
Left-leaning stitch pattern
*SSK, YO; rep from * around.
CO 50, place marker and join to work in the round.
Start right-leaning stitch pattern and work for 5 rounds.
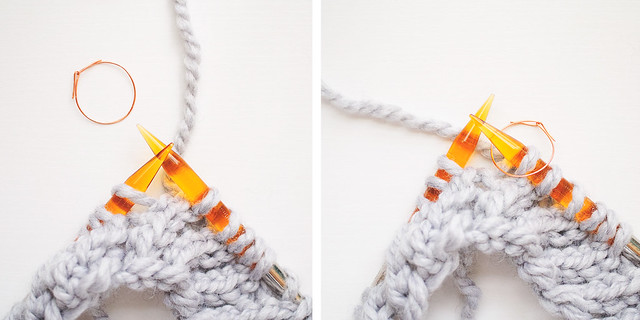
Switch to left-leaning stitch pattern, as follows: remove stitch marker (left photo), place first stitch on to right-hand needle without twisting, replace marker (right photo).
Start left-leaning stitch pattern and work for 5 rounds.

Switch back to right-leaning stitch pattern, as follows: do NOT make last YO, instead slip the stitch marker to the right hand needle (left photo), YO, and knit the first stitch (right photo). Resume right-leaning stitch pattern.
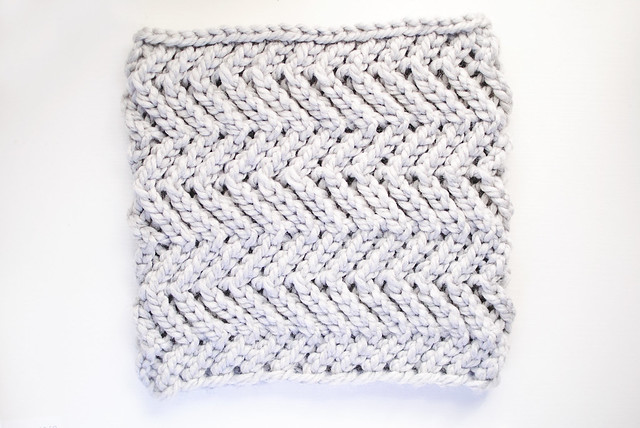
Continue switching between right and left-leaning stitch patterns to desired height. I worked 3 repeats each, then finished with another section of the right-leaning stitch pattern.
Bind off loosely, weave in ends.
Cowl knit with LB Wool-Ease Thick & Quick
Ta-da! I think it takes me about 2 hours, or a movie, or 3 episodes of my favorite TV show, to work one cowl. That’s pretty sweet instant gratification, don’t you think? I want to make one with a 100 stitch cast-on and a few less pattern repeats, to loop around my neck a couple times. You only need to remember to CO an even number and the pattern should work out. Perhaps you want to make some boot cuffs? Try casting on about 24 stitches. The good thing is if you have to frog a project to adjust the size, you aren’t working on an incredible number of stitches, so it won’t hurt too much.
Disclaimer: I was sent a set of Trendz Chunky Interchangeable Needles for review. All opinions are my own. No monetary compensation was given, but the link above is an affiliate link from Amazon.
Pin It
By Lisa Gutierrez on 11/25/2014 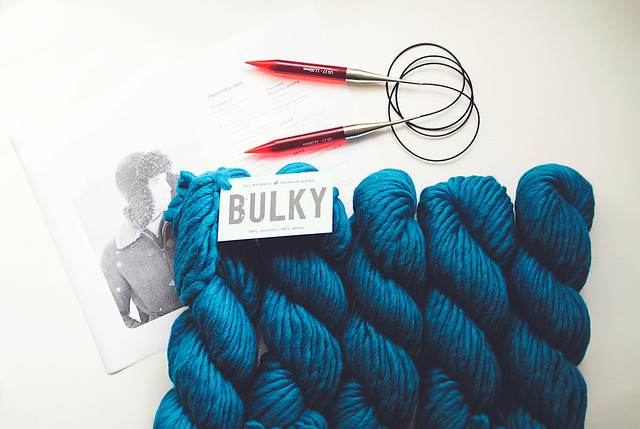
The good folks over at Blue Sky Alpacas are hosting a really lovely Bulky Hat knit-a-long, right now, in their Ravelry Group. Through December 15, you can get a coupon for $5 off their Bulky Knit Hats for Kids & Adults book by Sarah Smuland. For every completed hat you post, you are entered to win a cool prize that includes a knitting kit AND needles from Knitter’s Pride. Pretty sweet, hmm?
I was sent enough yarn to knit the amazing “Trapper Hat” from the book. I LOVED the ear flaps and was intrigued by the fluffy bits under them and on the brim. I chose the colorway Atlantis because my kids both love blue and it’s totally grown on me. I’ll take a blue of every yarn ever, thankyouverymuch.
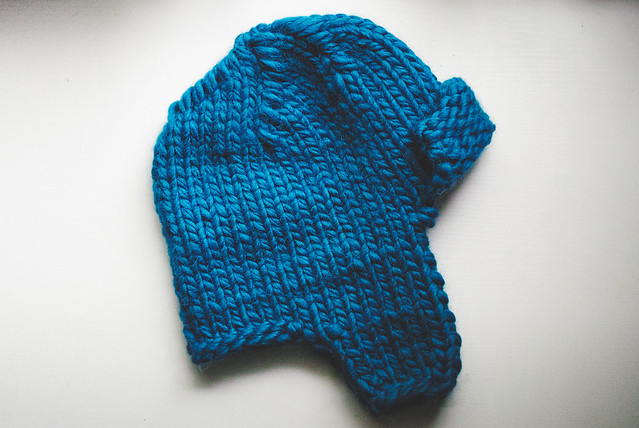
It took me about 3 hours to knit this baby up. You start with the ear flaps and brim, then they get joined and you work the rest of it. It was a super simple pattern to follow and I was almost ready to call it a day right there. BUT THEN…I remembered the fluff. I really wanted to see how much cuter this hat could get.
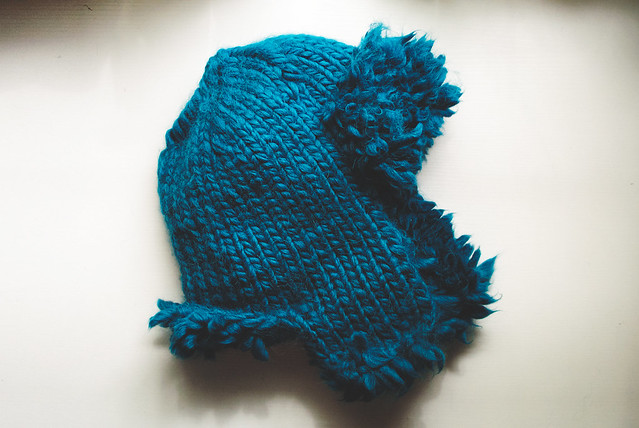
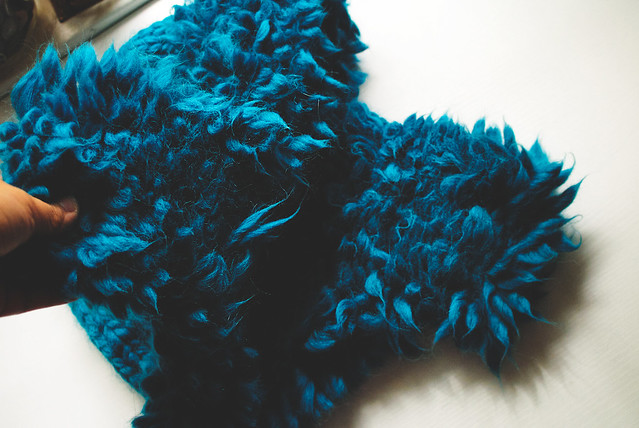
The answer was “pretty damn cute.” It took me about as much time to attach 300+ pieces of fringe as it did to knit. I thought it would be a tedious process that would bore me to tears, but I was SO wrong! I found my groove while working and with each piece that was attached, I got more and more excited.
I let out an actual squeal when it was done. I sewed up the front brim and plopped it on my head. SO DAMN CUTE. My son walked in a few seconds later, I suppose to see what the ruckus was, and I pretty much threw it on his head and squealed again. What could make this cute hat cuter? This dude’s cheeks.

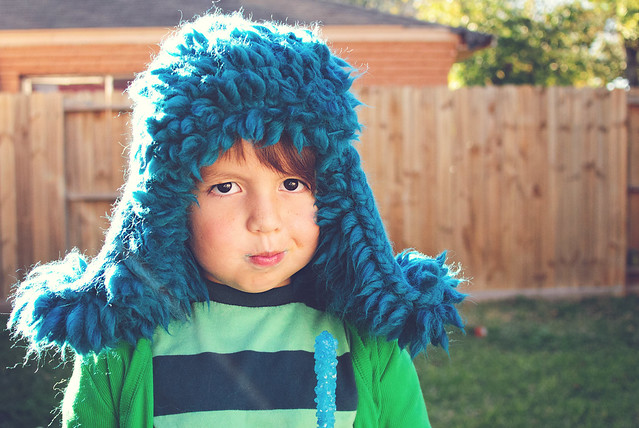
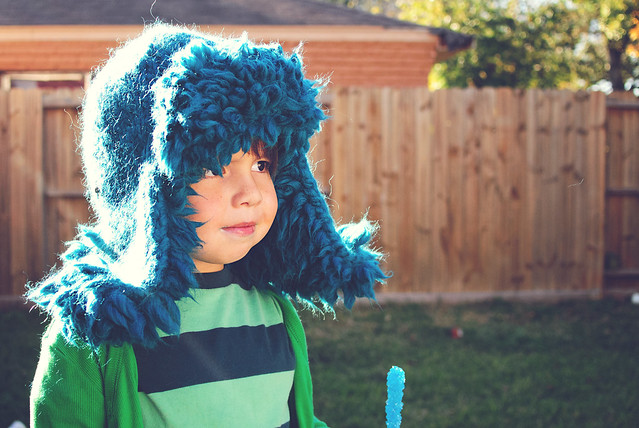
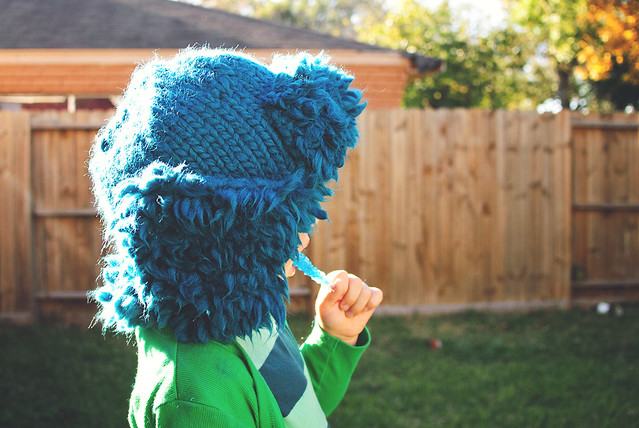

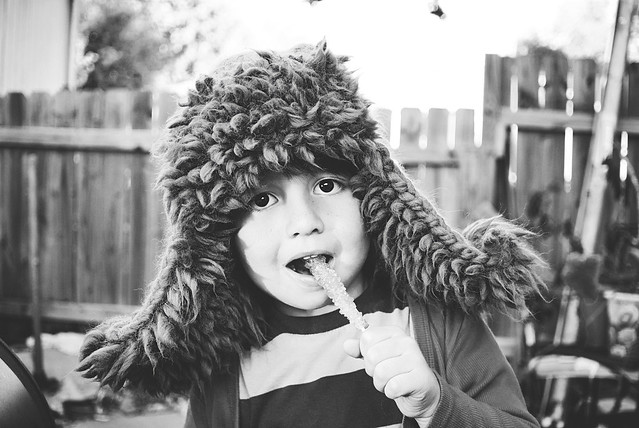
I knit the largest size, so it is definitely too big for his head. It even fits me a bit over-sized, but I think it works well with this style of hat. I let him ride his scooter with it and giggled pretty much the entire time.
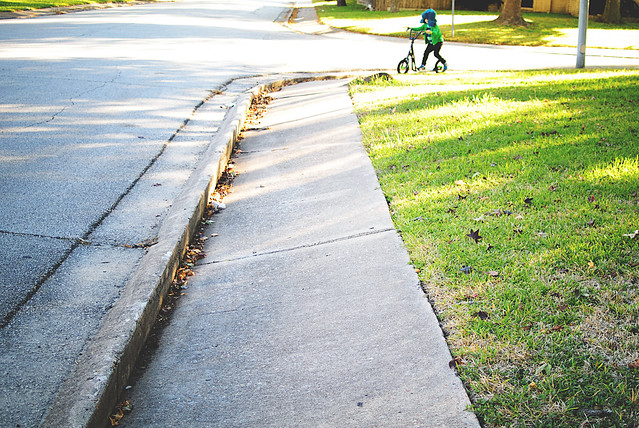
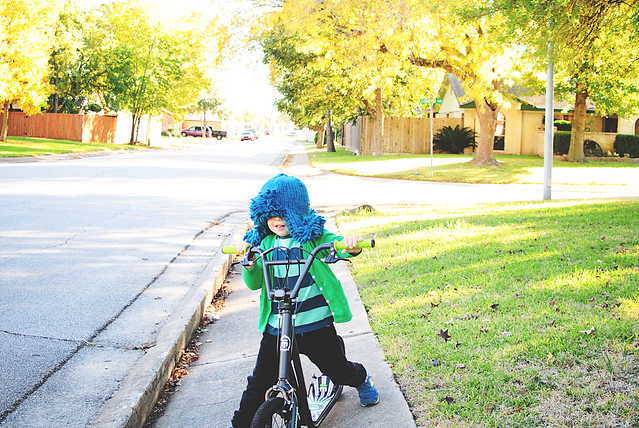

We hate our sidewalks. Look at that face! Sigh.
Check out the KAL and maybe join us? These quick knits would be great Christmas presents!! This is the project that put me on an extreme bulky knits kick. Did I mention I’ve knit like five cowls in the past 2-3 weeks? I knit TWO more, today. It’s just SO nice to start a project and finish it the same day. Bulky yarn for the win!
Disclaimer: I was sent yarn and needles to complete this project. All opinions in this post are most definitely my own.
Pin It
By Lisa Gutierrez on 11/23/2014 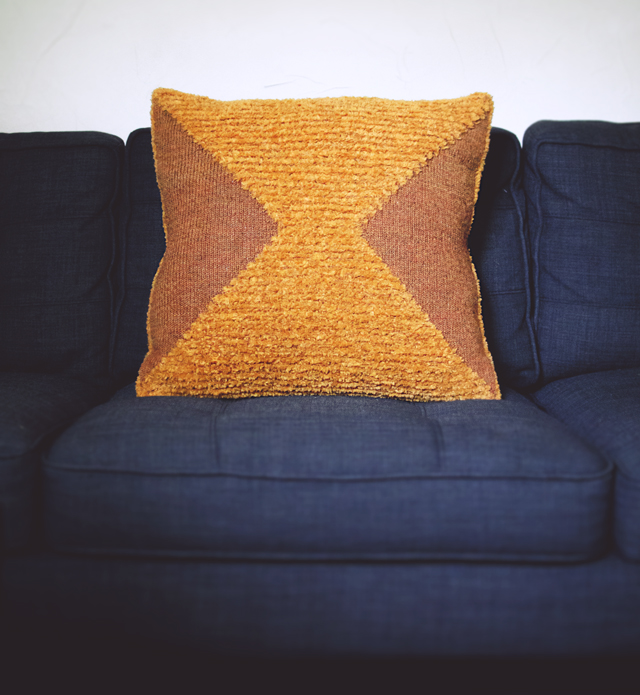
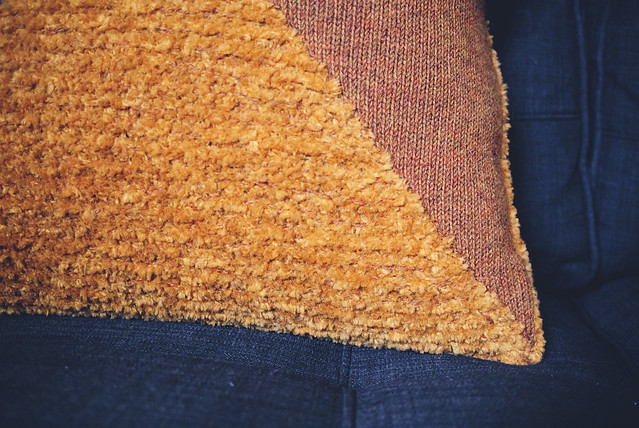
Hey, friends! I was sick for a whole 5 days and didn’t touch my needles. I decided I should probably compose a post about a pillow I knit early this year. I don’t have a pattern written up because I don’t really think anyone wants to knit one, but perhaps you might like the idea of using two gauges at once and YOU want to experiment, too? Anyway…
Way, waaaay back in February, I started knitting a pillow with Lion Brand’s Luxe Fur Yarn . It was on super sale at Michael’s and so so soft, I picked up like 10 balls and was determined to knit something…ANYTHING with it. Maybe a teddy bear?! . It was on super sale at Michael’s and so so soft, I picked up like 10 balls and was determined to knit something…ANYTHING with it. Maybe a teddy bear?!
I knew that it would be a little tricky to knit with yarn that had so much texture, so I paired it with a regular worsted weight yarn in a similar tone. That just so happened to be Berroco’s Ultra Alpaca. I started knitting a gauge swatch and wondered what it would look like if I dropped the fur and worked stripes without it. I knew I’d need to use a smaller needle, so I switched right there. I made a little swatch with furry stripes and knew I was on to something.
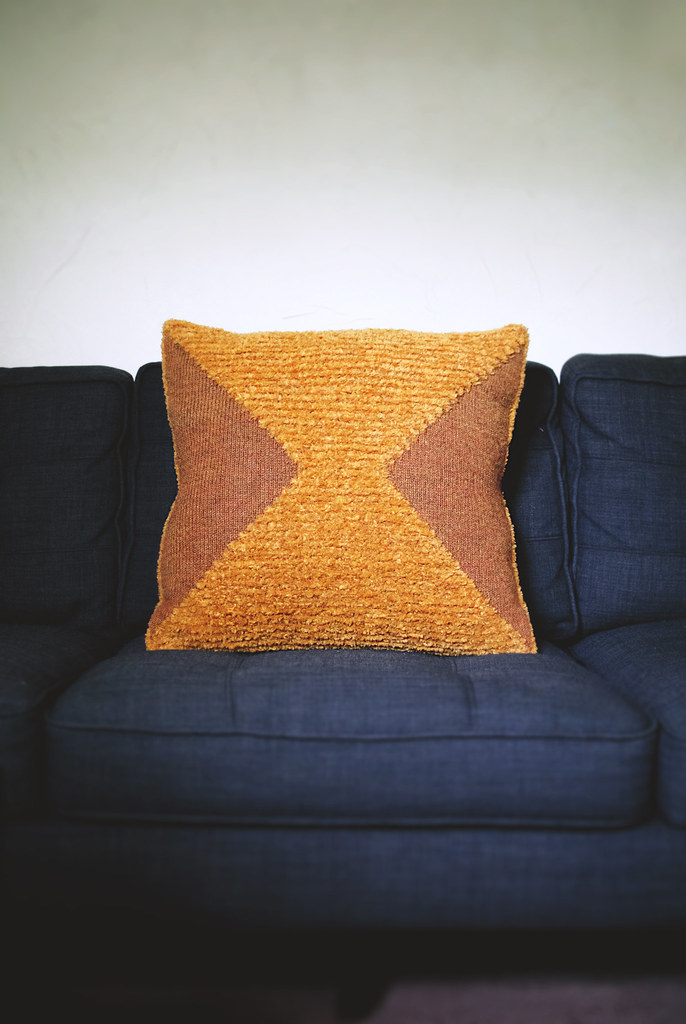
What proceeded was a marathon knitting session where I jotted down notes on notes of measurements and calculated possible patterns. I realized that one stitch with both yarns (and the larger needle) was close enough to two stitches with just my lighter yarn (and smaller needle). Using a series of short rows, I was able to create the front of the pillow you see above in one single piece. The blocking I did afterwards was minimal, too. I didn’t have much to do once I finished.
Yarns: Lion Brand Luxe Fur (about 6 skeins) and Berroco Ultra Alpaca (2 skeins)
Needles: 6.5 mm (US 10.5) and 3.75 mm (US 5) 29″ circular needles (you’ll be using both at the same time)
Gauges: (both yarns, bigger needle) 16 sts x 28 rows = 6″ x 6″ in garter stitch
(lighter yarn, smaller needle) 11 sts x 15 rows = 2″ x 2″ in stockinette stitch
I started by casting on 50 stitches with both yarns and the bigger needle. I knit one row, then started my work with both needles and gauges. When I was using the smaller needle, I knit with only the ultra alpaca. When I switched back to the larger needle, I picked up the Luxe Fur.
Row 2 looked something like this: With smaller needle, kfb, switch to larger needle and both yarns, K 48, switch to smaller needle, kfb, turn. [What I ended up with is 4 stitches on the smaller needle and 48 stitches left on the bigger needle]
Still using smaller needle, Rows 3 and 4 were my short rows. For Row 3, I slipped the edge stitch, purled the next stitch, wrapped the next stitch and turned. Row 4, I knit the two stitches, then turned.
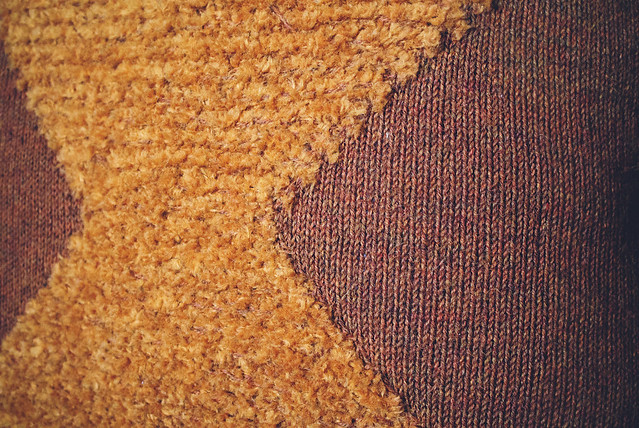
Row 5 went right across. When I came to a wrapped stitch, I just picked the wrap up and knit it with the stitch. I started with the smaller needle and slipped 1, P 1, switch needles and K 48, switch needles and P 2, turn. The furry part of the pillow is in garter stitch while the other is in stockinette.
Rows 6 and 7 were short rows like 3 and 4. Row 6: slip 1, K 1, wrap and turn. Row 7: P 2, turn.
Row 8 and every 6th row from here on out, I increased the number of stockinette stitches by knitting in the front and back of the edge fur stitches with the smaller needle. I ended up with 4 rows of stockinette in the lighter yarn equaling 2 rows of garter stitch in the heavier weight. It certainly wasn’t a perfect match, but it worked! I increased the stockinette portion until I only had 10 stitches left in the original gauge on the larger needle and 80 stitches on the smaller needle (40 on each side).
At this point, I started the same sort of pattern, but instead of increasing the stockinette portion, I decreased by using my larger needle and both yarns. Basically, I would use the larger needle and both yarns to turn two stockinette stitches into one on either side of my fuzzy center. Once I got back to 50 stitches on my larger needle, I had about as close to a square as I would get.
It was actually a rather simple pattern, but the result looks rather impressive, if I may say so.
The back of the pillow is two fuzzy panels with twisted rib in the smaller gauge. It was meant to be an envelope design, but I stuffed a 24″ pillow and it gaped too much, so I attached a zipper along the edge of one side and along the furry edge of the other.

Do you ever get the desire to experiment with knitting like this? I can say this is the first time for me. I don’t know if I’ll make anything similar. This pillow is enormous, so maybe one day I’ll knit a smaller one to compliment it. I DO like knitting with yarns I don’t normally have in rotation. That’s why I’m currently in a big chunky yarn fit. I have knit no less than 5 cowls for Christmas. This entire week I’ve been sick, all I wanted to do was knit, but coughing and knitting equals gross.
Pin It
By Lisa Gutierrez on 07/18/2014 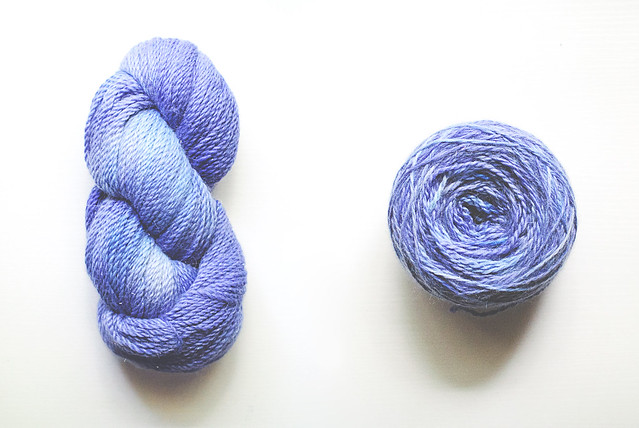
Hello, friends! Long time no see, hm? I’m sorry about my summer absence. My boys take up a lot of my day time and I just have not been able to plan any posts. I’m here today with something good, though–my very first yarn review!
I was sent a skein of Llama Sparkle from Red Barn Yarn. It is a hand-painted worsted weight yarn that is 95% baby llama and 5% stellina, so it is soft as butter with a little sparkle. To be honest, I don’t usually purchase yarns with shiny stuff spun into them, so this was a treat. What really made my day, though, was the color. It was a little tough to capture the perfect shade, but you can see some of the variation below:
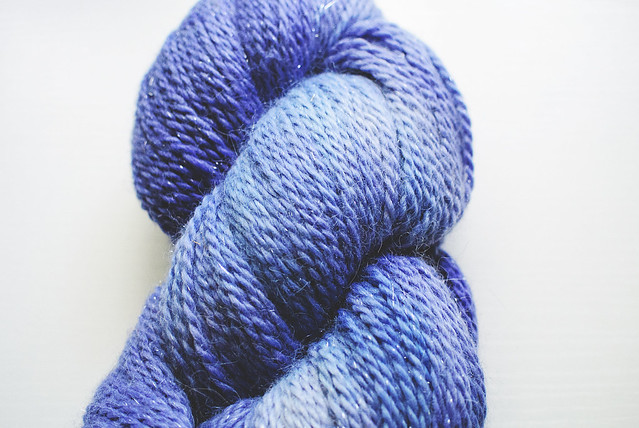
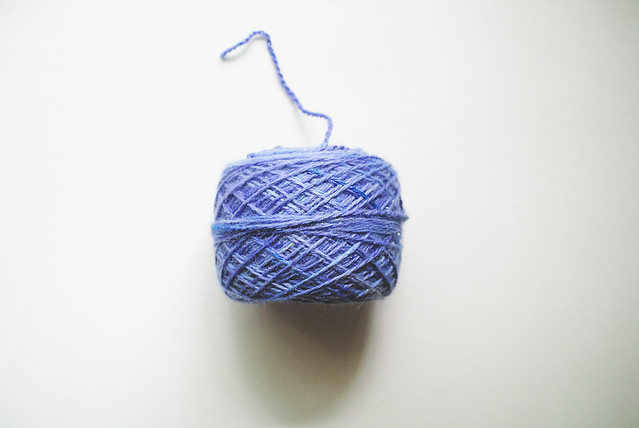
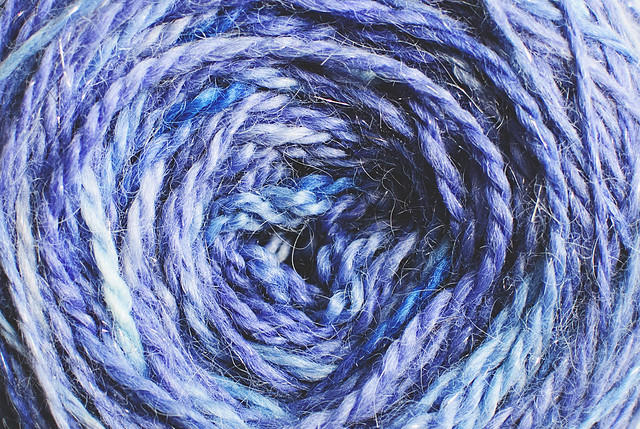
Beautiful, huh? The sparkle is very subtle, but it gives the perfect amount of shine. You can see the other yarn bases and colors available from Red Barn Yarn on their website. You can also find a list of their stockists. If you can’t find a retailer close by, you can contact them to purchase yarn directly by emailing info@redbarnyarn.com.
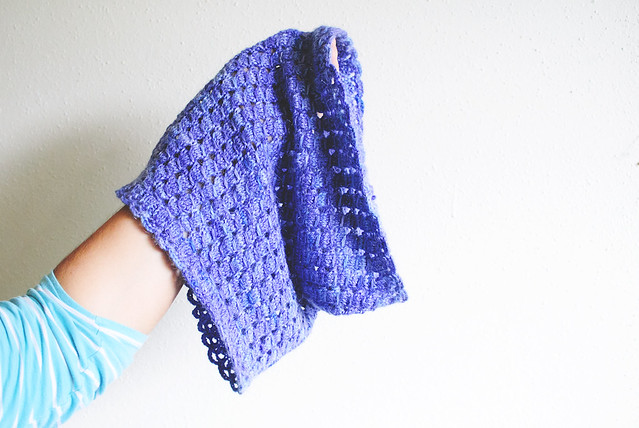
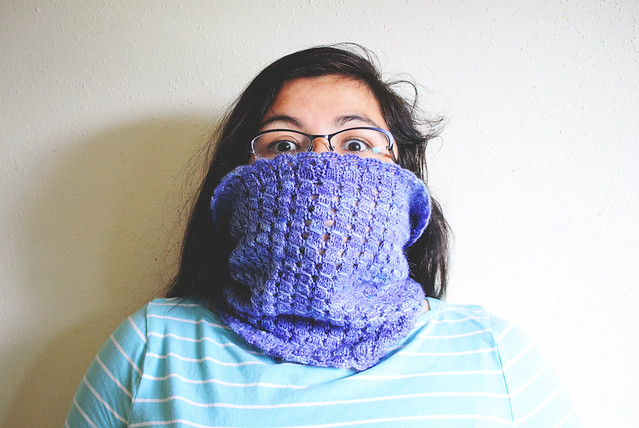
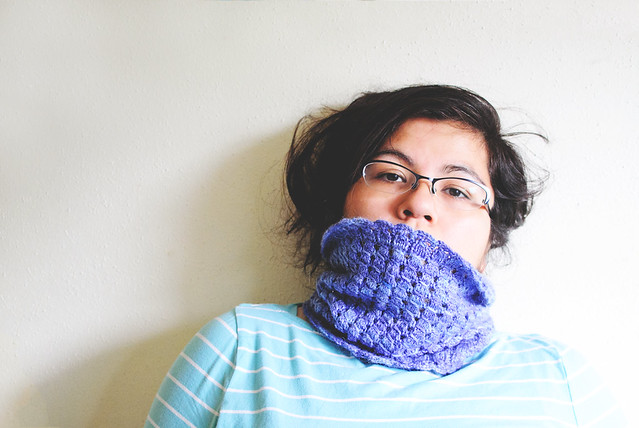
With just one skein, I made this gorgeous cowl! I browsed my stitch dictionary and found this one called “Mrs. Hunter’s Pattern” and it reminded me of crochet. I knew that I wouldn’t have enough yarn for a crochet project, so I really wanted to use this stitch. I love the color variation in the yarn SO MUCH! It looks pretty amazing in this pattern, too. I feel like my photos don’t do it justice, but of course I took a ton anyway.
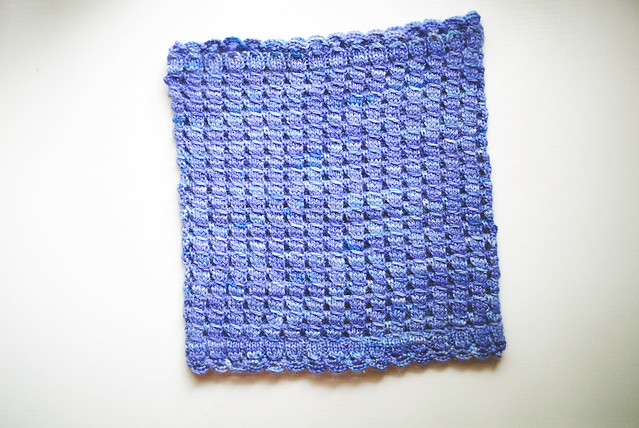
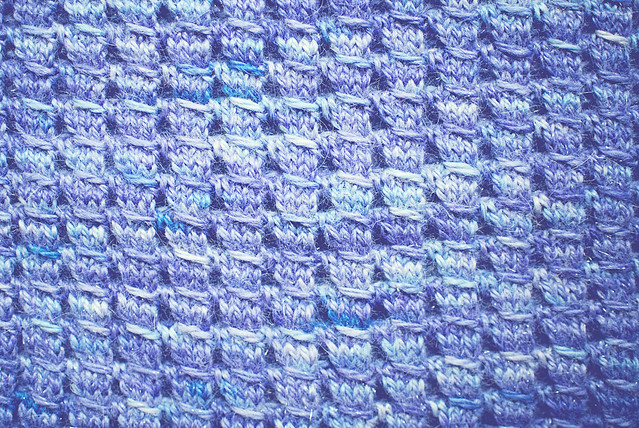
(omg)
Like I said previously, this yarn is like butter. The baby llama is incredibly soft and bloomed beautifully after a wash. There was a little bit of color in the water after I soaked the cowl, but I didn’t notice any fading in the actual yarn.
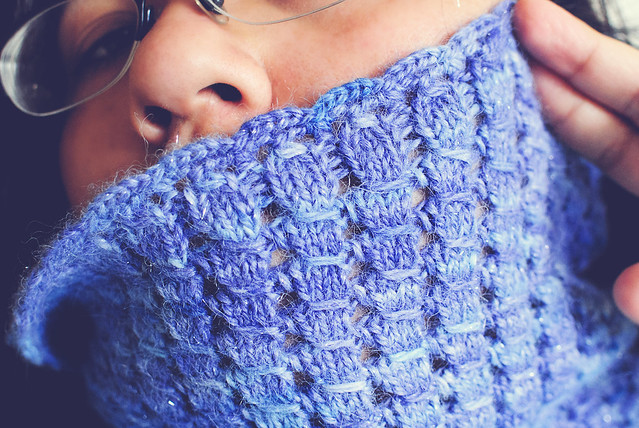
When I got to the end of my cowl, I realized I did not like the curling at the bottom (I went straight into the pattern after casting on), so I finished it off with a knit 3, purl 1 rib and a crochet cast-off and border. The result was a scalloped edge that lays relatively flat. I then picked up stitches along my cast-on edge and did the same thing there!
Let me know if there is any interest in a full pattern write up! I can whip something up to share with you guys. I was looking at my pattern page and realized I have waaaaay more crochet patterns than knit ones! I need to remedy that.
If you are interested in learning more about Red Barn Yarn, check out their website and if you have any further questions, join the Ravelry group: Red Barn Yarn Afficianados!
What are you doing this summer? Getting any knitting or crochet done in this heat?! I was straight up sweating during these photos. IN MY AIR CONDITIONED HOME! I can’t wait until it’s cold outside and I can wear this on my walks to my kids’ school. I’m gonna be so toasty!
Disclosure: I was given a skein of free skein of yarn for review purposes. All opinions are my own.
Pin It
By Lisa Gutierrez on 05/23/2014 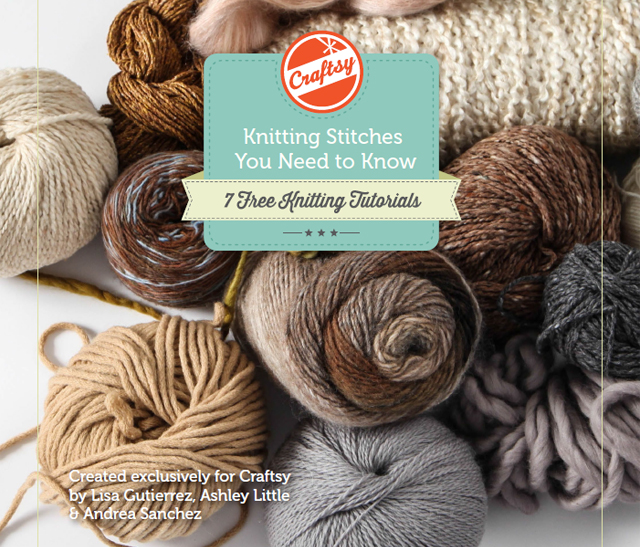
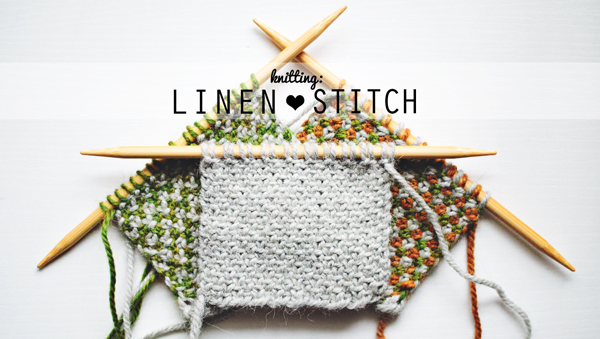
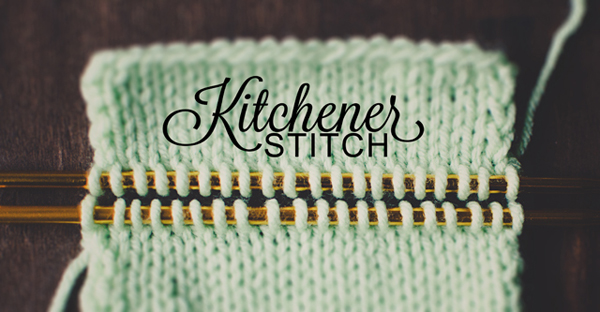
Hey, guys! I hope you’ve had a great week. I’m here to share a bundle of knitting stitches I contributed to. It is seven basic knitting tutorials bundled into a REALLY sweet file. Like the title says, it’s completely FREE. The layout of the files is top notch and really easy to follow. I think it would be a great companion for new knitters who are looking to branch out. Give it a look! The tutorials I contributed are:

Let me know what you think! Are you a new knitter? Thinking of learning? I learned to crochet before I knit, so I love to talk to crocheters who are *thinking* of adding knitting to their yarny crafts but just don’t know where to start.
Pin It
|
Disclosure You may find affiliate links and banners throughout my blog. I earn a small commission from purchases made through these links. It helps pay for keeping this blog running! All reviews and products are items I have personally used and loved. |


