By Lisa Gutierrez on 01/14/2014 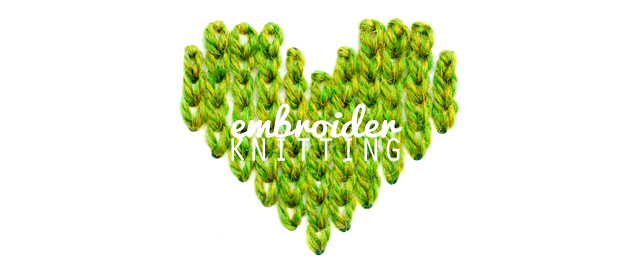
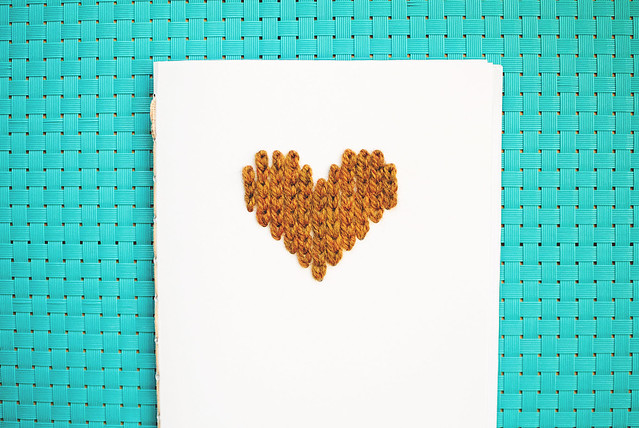
I wanted a design for the front of a knitting notebook and after doodling a few different ideas, I came up with this sweet heart. The embroidered chain stitch resembles knitting when they’re put right next to each other, so it was the obvious choice for a knitting notebook. Here are some instructions for making your own little heart!
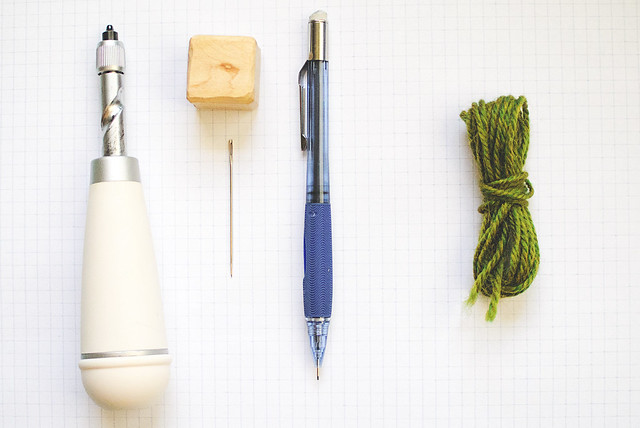
Materials
-a tool to make small holes in paper; I use this Martha Stewart Screw Punch (affiliate link), but you could use a sharp needle + something to “hammer” it or an awl (affiliate link), but you could use a sharp needle + something to “hammer” it or an awl
-pencil
-about 3 yards of worsted weight yarn
-yarn needle that will fit through the holes you make
-graph paper (the paper I used is 5 squares per inch)
-card stock or whatever you want to embroider your design on
The Design
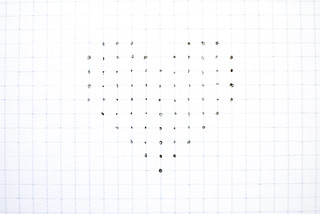 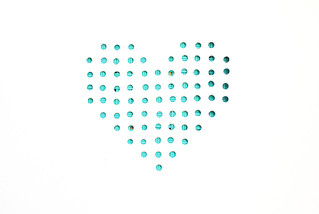
I used graph paper to plot out my design evenly. Place the graph paper with your design on the card stock where you want to place your stitches. Use the screw punch or awl to punch holes (you’ll want to put a self-healing cutting mat, or other board you don’t care about indenting, under your paper). The holes will aid you in keeping the chain stitches straight. If you are already an embroidery master, you can probably freehand them!
On the other hand, if you have never embroidered the chain stitch, I have outlined the steps below:
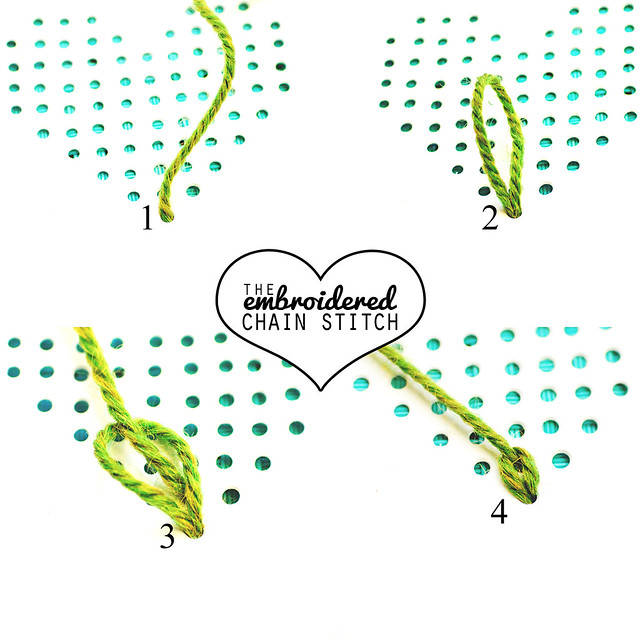
1. Bring about half of the yarn through the bottom center hole from back to front.
2. Go back through from front to back in the same space, but do not pull the yarn all the way through.
3. Come back up through the next hole up AND through the first loop you made.
4. Pull the yarn all the way through, tightening the first loop/stitch.
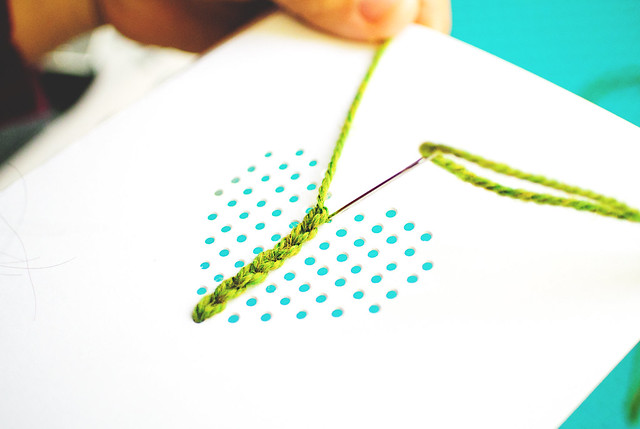
Repeat steps 2-4 for the embroidered chain stitch. I got into a habit of making two loops and using the second loop to tighten the first, like this:

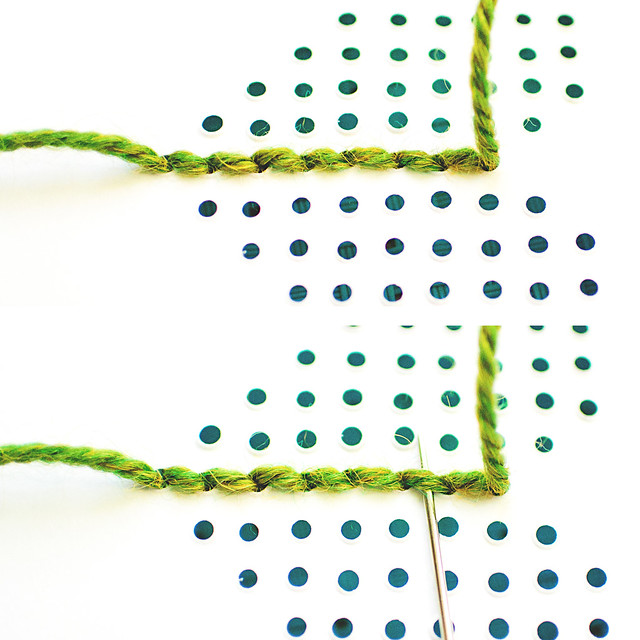
At the end of the column (and the rest of the columns), finish the stitch by going down into the same hole, over the last loop, instead of through it, like this:
To make the next column, weave the yarn through the back of the stitches toward the bottom:
Work the next column and continue until all columns on this half of the heart are complete.

Weave in this end of the yarn through the back of the stitches:

Use the other half of the yarn to work the second half of the heart. Weave in your yarn when you’re done and that’s it!
Here is my [handmade] notebook:
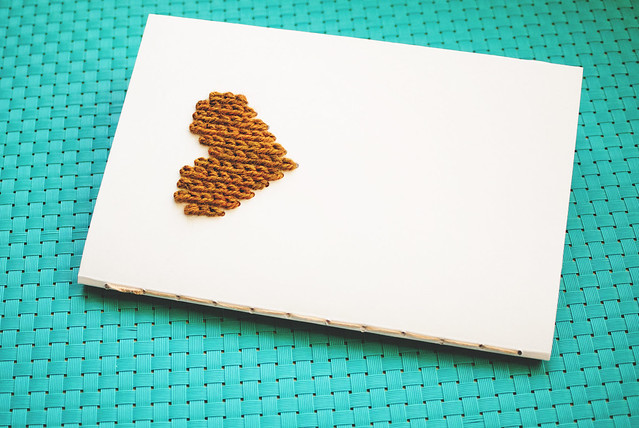
I filled it with knitter’s graph paper and stitched it up by hand. That screw punch I linked above REALLY comes in handy for projects like this!
You could use this tutorial to make a lovely Valentine’s Day card! You can make other designs, as well, just be sure to have at least two dots per column when you are plotting it out on graph paper. I want to do a set of scissors! If I can come up with a few designs, I’ll make another post to share!
 Pin It
By Lisa Gutierrez on 12/09/2013 We are barreling toward Christmas and I just want things to slooooow down. For like a day, at least. Please? We put up our tree, this weekend, and I realized I haven’t bought ANY gifts. I finished knitting one glove, then moved on to deep cleaning/organizing both my living room and office (we FINALLY bought a couch! Another story for another day). I’m still not finished with that, but at least you can see my floor, now! I’m going to be one of those poor souls out shopping the weekend before Christmas. Maybe crying a bit in the car. We’ll see!
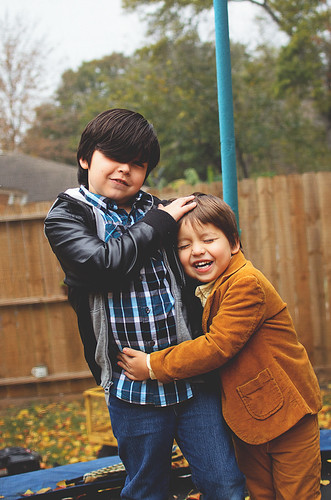
Anyway, I say all that to get to this: the Christmas card! In years past, I have taken and edited photos by early November. This year, we were a week into December and I still had no idea what we’d do! On Sunday, I started getting a little anxious about it, so I went outside with my boys and just took a bunch of shots. It was a cold+gray day, but they still had fun and we were all giggling around the yard. This shot ended up being my favorite. It isn’t perfect and they aren’t even looking at the camera, but it so wholly captures their joy for this season!

Last year, I entered my card into the Holiday Photo Challenge at thepapermama.com and it was great fun, so I’m entering this year, as well. She always has a quirky card to share. I kind of love that her chickens are in her photo, this year. Seriously. Go check it out: 2013 Holiday Photo Challenge @thepapermama! Enter your own card for a chance to win some super prizes.
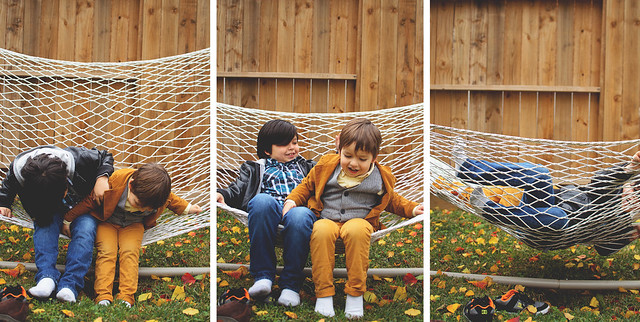
Here are some outtakes from this year:


With a full heart, we wish you a happy Christmas! If you’re on my address list, you’ll hopefully get a card before the big day. If not, consider this your e-version!
Pin It
By Lisa Gutierrez on 12/03/2012 
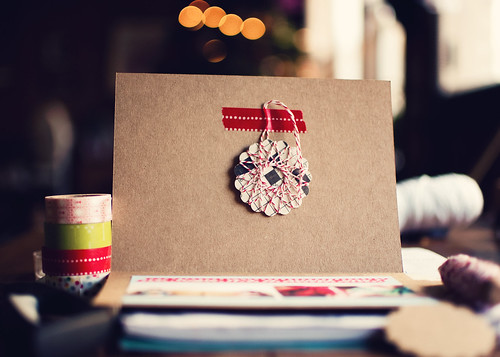
I finished up our Christmas card, this weekend. I had a few different ideas, but in the end, simplicity won. I took the photos about two weeks ago in the boys’ bedroom (the windows in their room are right next to each other, so there’s great light). They wore gray gingham shirts from Target and I crocheted some simple bow ties. They totally brought the charm and I got several nice photos.
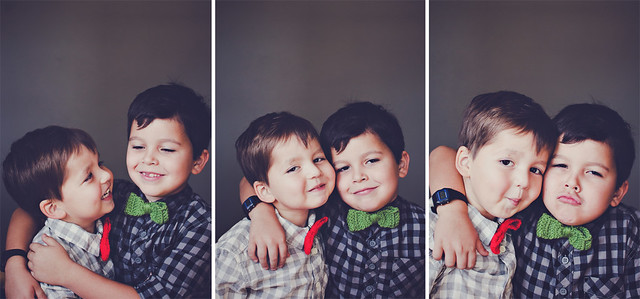


When designing the actual card, I wanted something beautiful, but not outrageous. I found the font on Lost Type Co-op [Lavanderia] and was in love. The rest was pretty simple, a line here, a line there, and some stars. I ordered 4″ x 6″ prints from Snapfish and mounted them on white cardstock. Easy peasy.
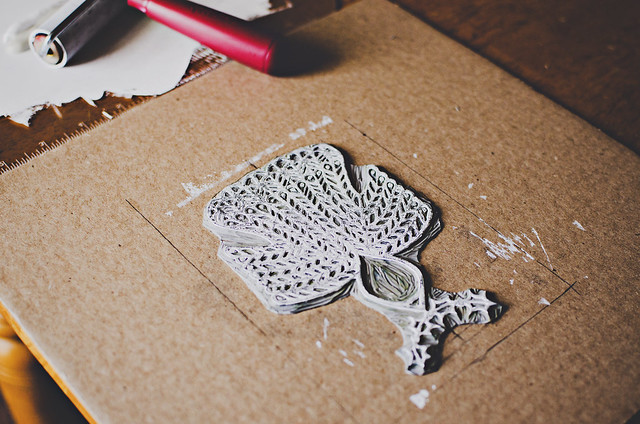
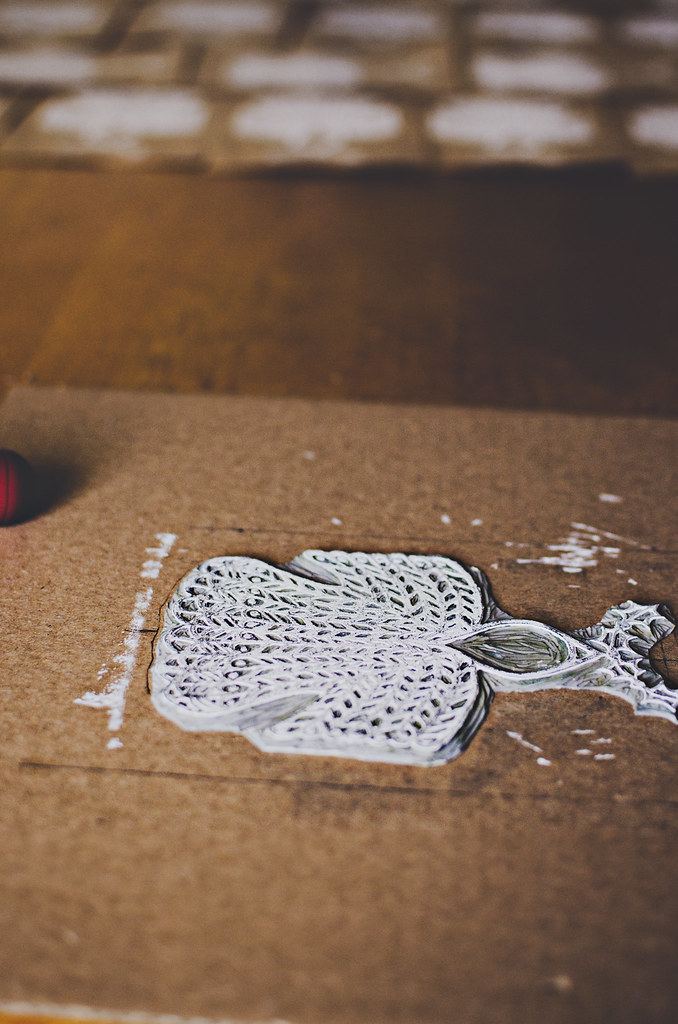
What took time was my peace dove. If you turn it upside down, it’s an angel! I’m leaving it to the recipient to decide what it is.
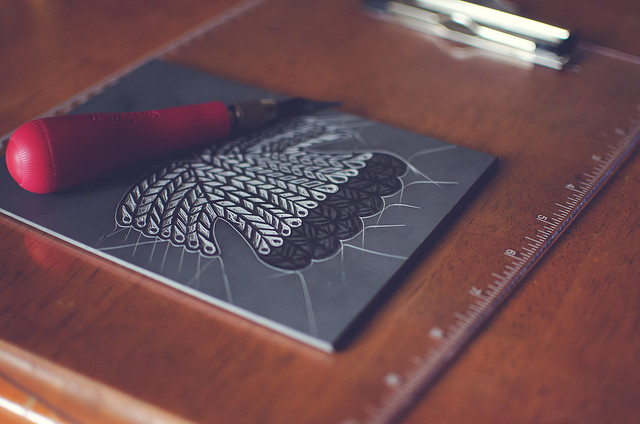
Anyway, my original plan was to put it on some white cards and then have the photo on the inside. I made a few using some pewter ink (from my Speedball metallic ink set ), but I didn’t really dig the huge contrast between white and dark gray. I liked the print enough to know I wanted to use it somehow. After rummaging through supplies, I found the kraft bags and since they were the perfect fit for the print, I decided to give it a shot. I used white ink ), but I didn’t really dig the huge contrast between white and dark gray. I liked the print enough to know I wanted to use it somehow. After rummaging through supplies, I found the kraft bags and since they were the perfect fit for the print, I decided to give it a shot. I used white ink and fell in love. The hours of printing and washing and carving (over and over and over because I kept finding new pieces to carve out) really paid off. and fell in love. The hours of printing and washing and carving (over and over and over because I kept finding new pieces to carve out) really paid off.
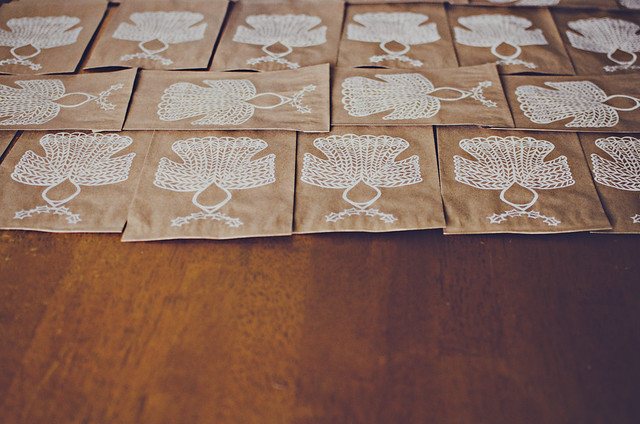

And that was that! I closed each up with a bit of Christmas-y washi tape on the back. The ones I have to mail will be put into white envelopes for some extra protection.
Have you made your Christmas card yet?? Are you DIY-ing any part of it?
I’m linking this post up to The Paper Mama’s Holiday Photo challenge. Go check out the adorable entries (and maybe enter yours??)!
By Lisa Gutierrez on 12/12/2011 
It was last Christmas when I gifted myself a copy of Print Workshop and the basic tools of a block-printing kit. Over the past year, I’ve made quite a few stamps using my trusty lino cutter and the basic tools of a block-printing kit. Over the past year, I’ve made quite a few stamps using my trusty lino cutter , including a crochet-inspired one that I’ve been using on the envelopes for my Lace Love orders. I’ll share that one with you soon, but today I want to talk about my Christmas card! , including a crochet-inspired one that I’ve been using on the envelopes for my Lace Love orders. I’ll share that one with you soon, but today I want to talk about my Christmas card!
I doodled this tree, inspired by a drawing in a children’s book, several times and knew I wanted to incorporate it into our Christmas card somehow. I cut a small version on a scrap piece of Speedy Carve and liked it so much, I began drawing it larger. When I was finally satisfied, I drew it directly on a linoleum block and began carving. I found some metallic Speedball ink on clearance at Hobby Lobby one day and took it as a sign. THIS needed to be on the front of my card! I got to work immediately and had my 30 cards printed in a few short hours.

Its metallic-y shiny goodness–which was surprisingly hard to capture in photos–is not the best part of the card. Nope. The BEST past of the card? The handsome little fellas on the inside:

Thrifted blazers, vests, cardigans, lollipops. Informal to the max, but just our style.
You want to see outtakes, you say? But, of course!


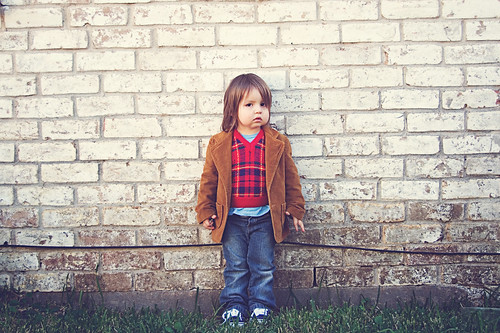


I took the outdoor photos first. There was more than one meltdown, I can promise you that. The black & white photo shows what a toddler looks like when his big brother tells him he WILL NOT hold his hand. Oh my word, the tears! I spared you the photo of them BOTH crying because I threaten their treat. When we finally came back in, they got their lollipop prize and were still so adorable, I HAD to take more photos. In our dining room. Lucky I did because I ended up loving one of those the most!
—————
Did YOU take your own Christmas card photo? How did it go?? How did you “dress it up” for your actual card? I want to know!
—————
p.s. Don’t forget to enter the giveaway for 100 custom postcards I posted earlier today!
—————
p.p.s. I totally forgot to mention I’m linking up with The Paper Mama’s Holiday Photo challenge!

By Lisa Gutierrez on 12/04/2010 
Since I’m mildly obsessed with shop-stitching (explained in this post) and I already had the word “christmas” stitched, I decided to put it on the outside of our Christmas card, this year.
I really love using kraft card stock for our cards. Actually, I like using kraft colored everything. It just adds a sort of rustic feeling to stuff. I used it for our cards last year, and even the year before! I think I’m going to commit, RIGHT HERE AND NOW, to using kraft card stock for every Christmas card I ever make.
Inside, I attached a little ornament for folks to hang on their tree. Oh the joys of getting this done early! People aren’t receiving them ON Christmas, like I’ve done in the past, so they can actually put it somewhere in their house. Oh! I hope everyone enjoys them.
The main event of the card, though? My kids, of course:

I gave up on getting “good” photos of my kids for the cards…ummm…the very first year! In fact, when my oldest was 6 months old and enjoying his first Christmas season, my mother in law and I sat him in front of her Chistmas tree with only a Santa hat on. And I do mean only! He was at the age, though, where his hands tended to migrate south A LOT, so he did his own covering up and there were no penises in my photos. HA! Those didn’t end up getting sent to family. they’re pretty hilarious, though. He was SO FAT.
The years since, pretty much every Christmas card I’ve made has had a subject making a face, sitting without pants, not paying attention, or just generally being themselves. I like it that way. This year, I gave them both a candy cane and sat them on my love seat. I sat across the room and just…snapped away. Voila! That up there is THEM. All the way down to Andrew pretty much INHALING his candy cane and Nathan savoring it.
I sent the cards out, this weekend. I passed them out to those who I see regularly, or would see this weekend. The rest are in the mail, sent out to family and friends whose addresses I have. If you don’t receive one, then this lady doesn’t know where you live! Consider this your e-card. :)
|
Disclosure You may find affiliate links and banners throughout my blog. I earn a small commission from purchases made through these links. It helps pay for keeping this blog running! All reviews and products are items I have personally used and loved. |


