By Lisa Gutierrez on 10/08/2012 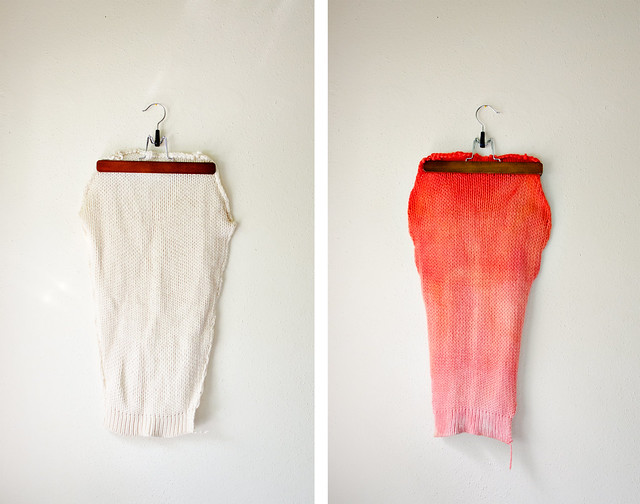
Last month, I got the urge to dye yarn. I didn’t have any bare skeins hanging around, but I did remember I had pieces of a white wool sweater in my closet. Waaay back in 2010, I thrifted a large white wool sweater. It had the perfect seams to unraveling, so I took it apart almost immediately. …Then we bought a house and moved. It got trapped in a box of random crafty shit and I just forgot about it for a year. Last year, I dyed one of the sleeves and then last month I finally dyed the other.
I like sleeve dyeing because it makes me feel like I have more control over where the dye goes. Last year, I used these directions from craftystylish, but this time I wanted to try something different.
I wanted a gradient/ombre look, so I thought about how people get that with shirts by putting small parts of the fabric in at a time. Would it work? YES! I probably made it a little more difficult than it needed to be, but I was working with what I had–2 packs of pineapple Kool-Aid and 1 pack of cherry.
I started by putting my sleeve in a bowl of water with a splash of vinegar. I made sure it was completely saturated, then I put it in the microwave for a minute to temper it. While it was heating up, I mixed the 2 packs of pineapple with 1 cup of vinegar and 1 cup of water and put it in a pot to heat up. I pulled my bowl out of the microwave and lifted the sleeve out (over the bowl, because it was dripping), gently squeezing a bit of the excess water out. I was able to handle it with my bare hands, but use caution if it feels too hot to you.
I started by dipping about 6-8 inches, counting to ten and dipping another 6 inches. I could see a lot of the dye getting absorbed pretty quickly and by the time I got to the last bit, there was hardly any yellow coming off my liquid. I quickly mixed the pack of cherry and 2 cups of water and then lifted my sleeve over the pot, mixed in the cherry and started dipping again. by the time I got to the top, the water was pink. Yay!
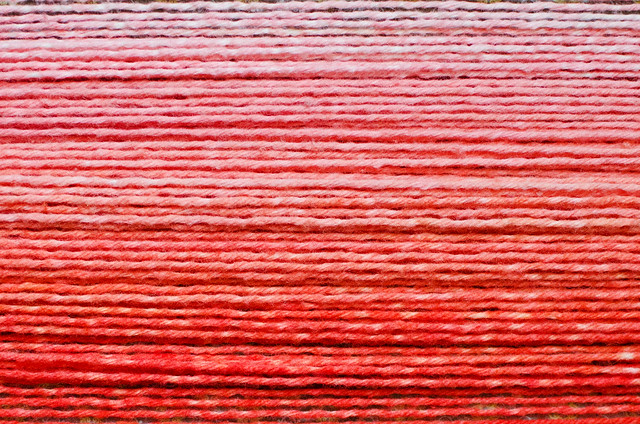
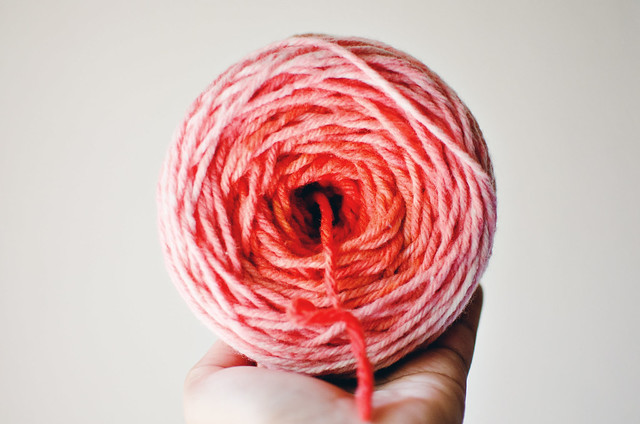
I let it sit in the warming water for a few quick minutes (no boiling!) and then I rinsed it with hot water, slowly getting the temperature down. When I could handle it, I put a dash of baby shampoo in to get any excess dye out. After it was done, I rolled it up in a towel and squeezed out most of the water, then let it hang in front of a fan for a few hours. Once dry, I went about the arduous task of unraveling and getting this yarn into a skein, which entailed ANOTHER bath (once unraveled). It was all worth it, as it looked so pretty wound into a ball.
I had various shades of coral and pink throughout. I was afraid the mix would be too orange, but it came out so lovely!
It took another week or two for me to finally knit something out of it, but here it is! A basic knit hat. The yarn was pretty chunky, so I was able to make a 60-st hat in a day.

It was big enough for me to tuck my hair into.
Do you like to dye your own yarn? Have you ever tried dyeing a sweater sleeve then re-purposing the yarn into something else? I’ve dyed with Kool-Aid before, but this is the first time I’ve actually tried to get the colors to look a certain way.
Pin It
By Lisa Gutierrez on 03/27/2012 CLOSED!!!

Hello, friends! If you hadn’t heard, my lovely little Dory pattern is in the current issue of Craftsanity! I made a few adjustments* to my original pattern to make it more Spring-friendly. In celebration of SPRING and all things yarny, I’m having this little giveaway!

To convert my Dory into something one could wear during Spring, I scoured Ravelry for yarn inspiration. There is SO.MUCH.YARN. out there.
I happened upon Bamboo Cotton (worsted) by Three Irish Girls and was smitten by some of the colors. It was a little pricey, but I bought two skeins from someone’s stash in the beautiful Sweetmint colorway. I knew I would love the color, but what won me over completely was the softness. Ohhhhh my goodness–it is SOFT. I wound up my skein immediately and got started. Soon enough, I had a lovely Spring shawl and only 9 yards left! Perfect!
Unfortunately, the Bamboo Cotton is discontinued, so I went on the hunt for something more widely available. I landed on Cascade Ultra Pima. It is equally as soft and available in a multitude of bright colors. It took a whole skein plus a few yards of the next, but I figured out a few adjustments** to the last border row to make it a one-skein project.

And now, the giveaway! I have a skein of Bamboo Cotton and a skein of Ultra Pima, so that means TWO winners! The first winner will select which they want and the second will get the other yarn. They’re both gorgeous, so there aren’t any losers here. Both winners will also receive a printed copy of Craftsanity! If you aren’t a crocheter and have zero interest in my Dory pattern, do not fret–there are knitting patterns in this issue (and all others), too! There’s something for everyone, so this giveaway is open to knitters and crocheters alike.
To enter, just leave a comment below letting me know what projects are on your to-do list this Spring!
Giveaway ends this Friday, March 30, at 11:59pm CST. I’ll announce the winner shortly after! CLOSED!!!

*My changes include using either of the two Spring yarns above + a 6mm hook and crocheting fewer of the main body repeat. It’s still the same size as the original, just lighter because of the yarn and gauge.
**Make a slst between each scallop instead of a sc.
By Lisa Gutierrez on 02/28/2012 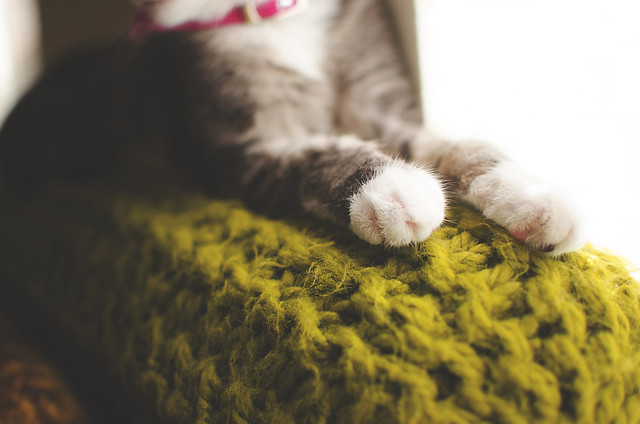
21; crafting companion (orig. #30)
this pillow sits on the top edge of the couch and the kitten likes to nap there almost every time I sit to knit.
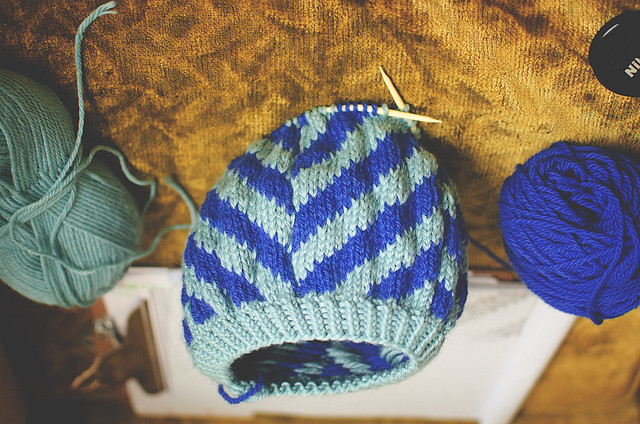
22; contrast
a colorwork hat–diagonal shifting stripes. I was in that sort of mood for a few days. I learned– knitting with both of my hands makes them cramp up big time! I don’t usually get any hand cramping problems, but when I’m knitting with two colors, my left hand ends up sore for a few hours.

23; inspiration from clothes
fun, bold colors, patterns, teal, red, etc.

24; up close
I love lace. Orange lace? Even better.
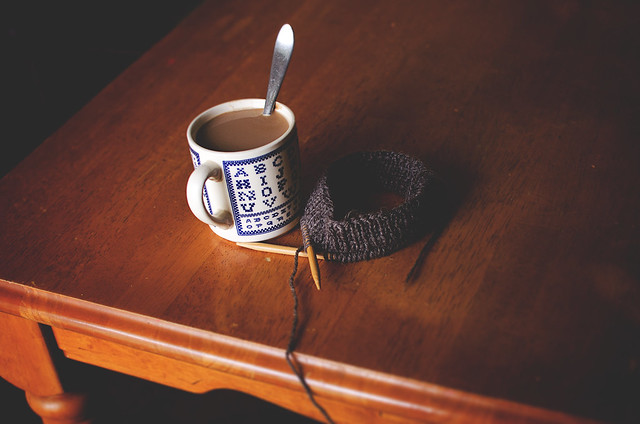
25; when I craft
knitting in the morning; listening to dreams of the little ones while they munch on eggs and toast.

26; organization
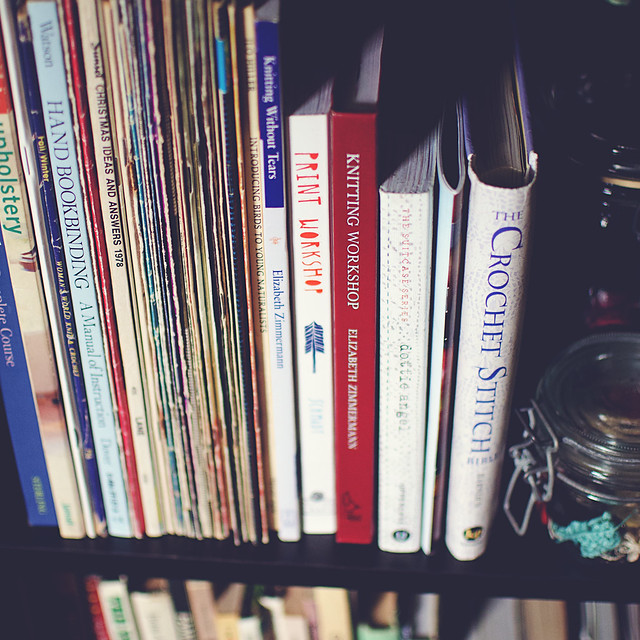
really, this is just a shelf of yarn that will get used up soon. my stash is located in bins, but the yarn that will be used up soonish gets put on the shelf. I like looking at the colors–inspiration abound!

27; the wrong side
I finished the hat I was working on a few days ago. It’s a colorwork hat, so the wrong side is all sorts of lovely stripes of wool. I like the floating yarn!
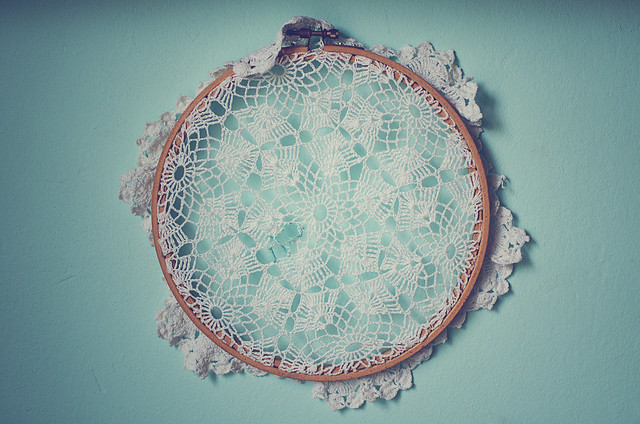
28; simplicity
the crochet looks complicated. I bought the doily for a great price because it has a hole in it. Placed in an embroidery hoop, it’s a simple, yet beautiful, wall adornment.
Pin It
By Lisa Gutierrez on 02/20/2012
By Lisa Gutierrez on 02/19/2012 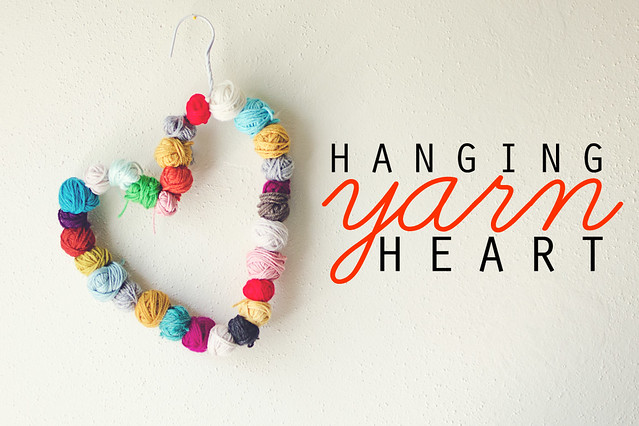
I know Valentine’s Day has passed, but I kind of like hearts. And I LOVE yarn. My scrap jar is one of my favorite sources of craft supplies. This project is so easy, I didn’t take any step-by-step photos.

You start with a wire hanger (mine is coated in white plastic*), shape it into a heart, or circle, or whatever shape you want, untwist the top, thread your balls of yarn scraps around the whole thing, then re-twist the top. Done. No glue means you can re-use the yarn if you find yourself on the path of, say, a granny square afghan.
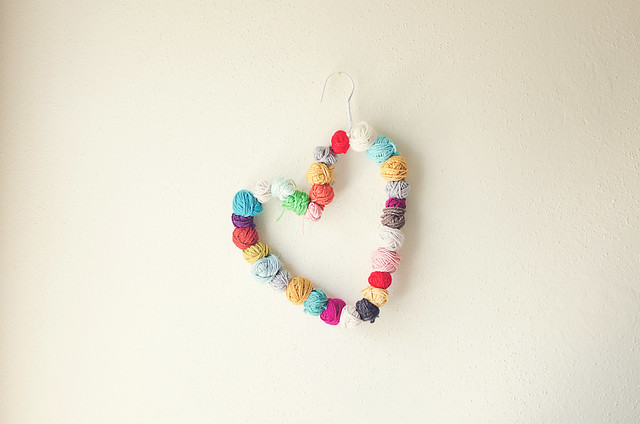
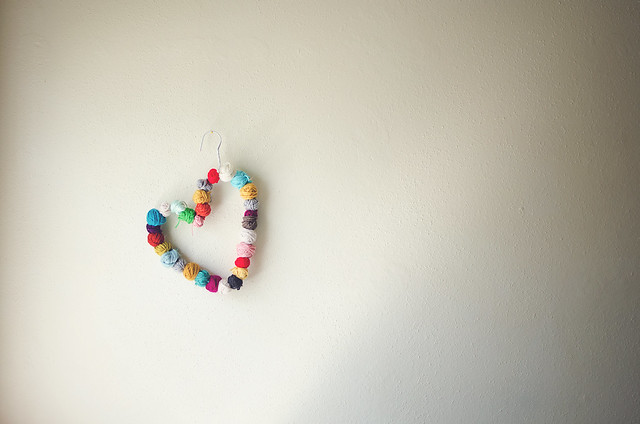
*My plastic-coated hanger kept its original twist while I threaded, so re-twisting was a cinch.
Pin It
|
Disclosure You may find affiliate links and banners throughout my blog. I earn a small commission from purchases made through these links. It helps pay for keeping this blog running! All reviews and products are items I have personally used and loved. |


