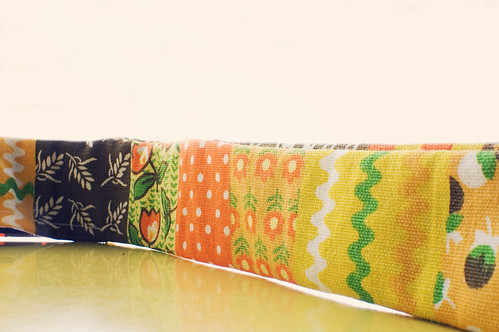
By Lisa Gutierrez on 03/29/2011 Yeah! It’s that time of year, again. Time for a new camera strap cover! Last May, I made one using some fabric from a vintage pillow case. This year, I went bright.

I’ve had this fabric in my possession for years. I think it was one of the first fabrics I thrifted. I saw it hanging amongst some other boring pieces and knew it was special. SO special, I brought it home with me….and then neglected it. Until the other day! I wanted something new for my camera. I love my old strap cover, but I wanted something with some more color. I used the fabric as a backdrop in some photos and wanted to make *something* out of it. Camera strap it is!
Isn’t it wonderfully Springy?
Ooooh! Also–I had a long scrap that I ripped off of it to even out the edge and couldn’t bear to part with it, so I turned it into fabric tape using my Xyron sticker maker. Waste not, want not!
By Lisa Gutierrez on 03/24/2011 
Tell me you love gingham! I found a piece of blue gingham fabric in a remnants bin at a Jo-Ann store that was closing. That means it was something like 75% off. Since Spring was fast approaching and I knew I wanted to make this guy a bow tie some day I immediately plopped it in my basket.
Fast forward to last week and a post in the Celebrate the Boy line-up. Specifically, this one on delia creates. Bingo! I used some scrap fabric to make a prototype and check my measurements. It came out OK, but I didn’t really dig the big triangle sides, so I made a completely rectangular one and voila! Both the boy and I LOVE it.
I want to make more!
Other shortcuts I took were to draw my pattern only twice on the fabric, then fold the piece in half and sew on the lines. I didn’t really want to cut it out four times and then pin and deal with tiny seam allowances. Call me lazy, if ya want, but I made two ties in less than half an hour, including time to wind a bobbin and thread my machine. If only I could get my littlest boy to wear it. He didn’t even let me tie it on his neck.
By Lisa Gutierrez on 10/12/2010 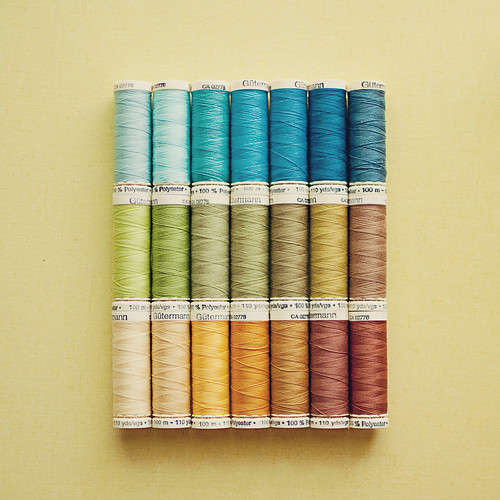
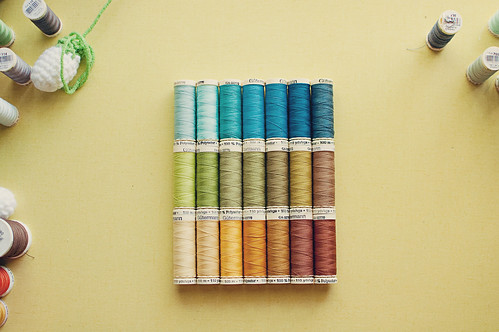
I’m not much of a seamstress, but I’m pretty obsessed with this thread, guys. The Gütermann display at my local Jo-Ann is just gorgeous. There’s another Jo-Ann, about half an hour away, that is closing (to make way for one of those amazing super-Jo-Ann stores!) and so they are liquidating inventory. Everything is on sale! So, while I didn’t have much money, I HAD to scoop up some of the pretty thread. Even if I don’t use it all, it’s really nice to look at, no?
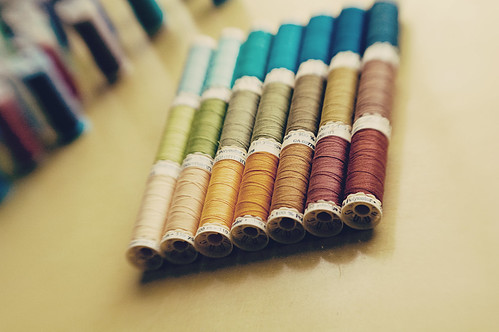
I wanted to capture the scene in as many different ways as possible, while Andy slept in, this morning. First, with my regular camera and lens duo–Nikon D40 +35mm f/1.8. Next, with my Lensbaby 2.0 attached:
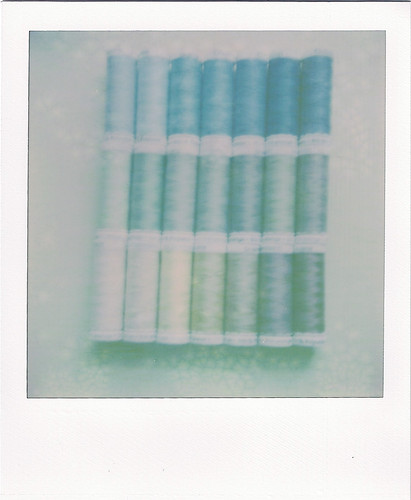
Then I switched over to film and my Polaroid Spectra. This is my last exposure of softtone edge-cut film, from the Impossible Project:
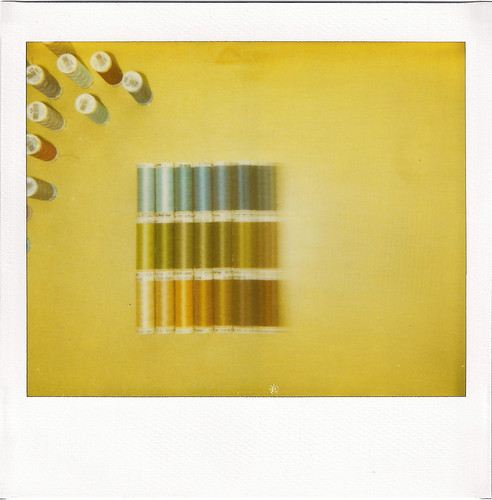
Lastly, with my Polaroid SX-70 and Impossible Project PX70 film. I’ll probably re-scan this later this evening or tomorrow morning, as the photo gets better as it develops more. I’m shooting for a 20-30 hour window from when I snapped the shot.
Big sigh! It’s like candy to a crafter! I’m going to find a way to display these somewhere around my craft-desk. I have a lot of other thread that actually does get used and sits on my thread holder (I’m a novice at best, so thread lasts me a while), but this would probably end up in a drawer otherwise. I’m off to brainstorm!
By Lisa Gutierrez on 09/21/2010 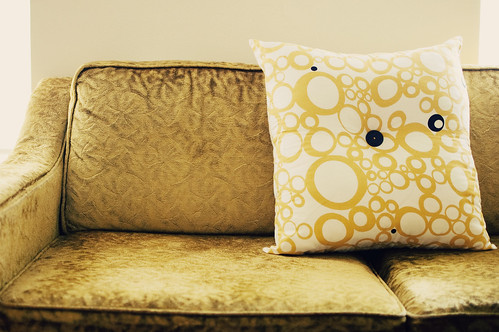
I’ve spent the past few weeks knitting a bunch. I do a lot of my knitting at the extremes of my day–late night after the littlest finally goes down or early morning, after a coffee and a kiss goodbye from both Jason and Nathan.
I’m working on berets. Actually, I’m working on a beret pattern. Because of this, I’ve frogged a few hats. I’m working in worsted weight yarn on about 120 stitches after the beret increase, sooo it’s pretty heartbreaking when I realize I’m headed in the wrong direction, design-wise. I’m hoping to have two different beret patterns done by the end of the month and a little handful of berets to put in my shop.
Because I cannot knit all the time–forcing the craft brings about feelings of loathing and I don’t want that–I tend to pick up little projects between knitting marathons. I finished this pillow on Saturday evening.
I found this pillow case at the thrift store for a quarter and have had it sitting on my desk for a while. I had a body pillow that I no longer needed (hello, if you’ve been pregnant, you know the absolute NECESSITY of a body pillow or two), so I decided to combine them.
I folded up the body pillow and strapped it with some elastic–just tie the ends–squeezed it into the case, chopped off the excess fabric, folded the ends inward, pinned, and hand-sewed it shut, pulling out the elastic before I finished. I did this late at night on Friday (the night I took my littlest to spend the weekend with grandma) and tufted the center on Saturday. Et voila! It’s thick enough to work as a floor cushion when one of the kiddos wants to draw at the coffee table.
It’s the fourth pillow I’ve made for my living room. I should probably line them all up on my little loveseat and take a group photo.
p.s. thursday posted about bloglovin the other day and it reminded me of my account! I signed up a while back, but soon forgot about it and hadn’t even linked my blog. Now that’s taken care of and, if you use bloglovin, you should click the banner on my left sidebar -or here- and follow goodknits! Thanks a bunch, lovelies!
By Lisa Gutierrez on 08/29/2010 Inspired by the doily pillow tutorial on Smile and Wave, I started scouring thrift stores and craigslist for any little sets of doilies I could find. I HAD to make one. My couch NEEDED it!
One of the thrift stores close to our new house had some and I was SO excited! Until I saw the price tag. GAH! Them ladies knew how long and tedious doily making was and priced them accordingly. Unfortunately, doilies aren’t in the family budget, so I had to pass those up.
A week later, we headed back to our old stomping grounds in South Houston and hit up our old favorite thrift stores, including SeAM. I’m happy to say SeAM did not disappoint. I found a bunch of doilies for about two bucks. I used all the large ones, a medium one, and a few small ones to fill in open spaces. I still have a medium sized one and two little baby doilies left. I’m in LOVE!
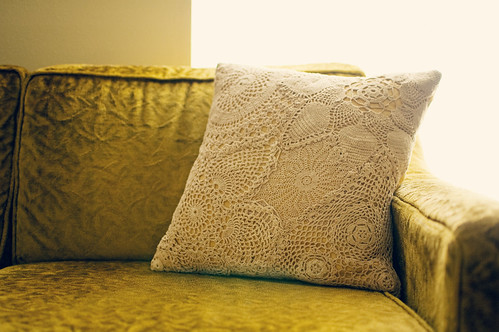
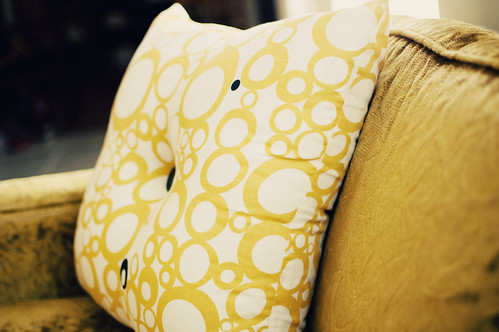
I did this a little differently than the tutorial. After figuring out the configuration (most exciting craft-related puzzle!), I pinned the doilies to some yellow fabric, about 17.5″ square. I then hand-sewed them down, overlapping where necessary. I didn’t want to cut any and there wasn’t much overhang, so I didn’t. Most of the doilies were bright white and one was a lovely light brown, so I whipped up a pot of super strong tea and let the pillow top soak for about 10 minutes. I washed it with some dish soap and tossed it in my dryer for a bit. Tea staining for the win!
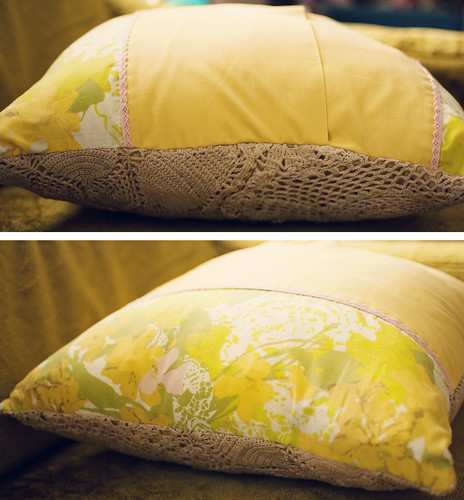
I used a vintage pillow case for the back. Again, i can’t stress enough how much I love reusing pillowcases like this. The hem is already there, so I don’t need to do any extra sewing! I cut out a piece about half the width of the pillow and one that was two thirds. I pinned it down and sewed it up. My 18″ pillow form makes it a little over-stuffed, but that’s how I like ’em.
If you have any doilies you don’t want (psssssh!), please do let me know.
|
Disclosure You may find affiliate links and banners throughout my blog. I earn a small commission from purchases made through these links. It helps pay for keeping this blog running! All reviews and products are items I have personally used and loved. |


