By Lisa Gutierrez on 08/28/2015 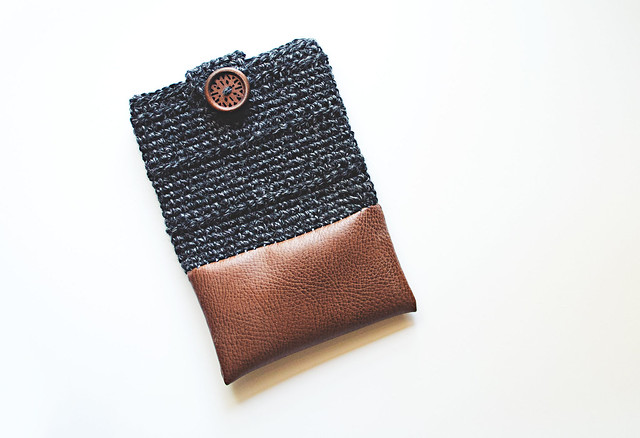
Hey! I seem to have abandoned you, all summer. I share a lot on Instagram and Facebook, if you miss me. I wanted to pop in and share two back-to-school projects I just finished up for my boys.
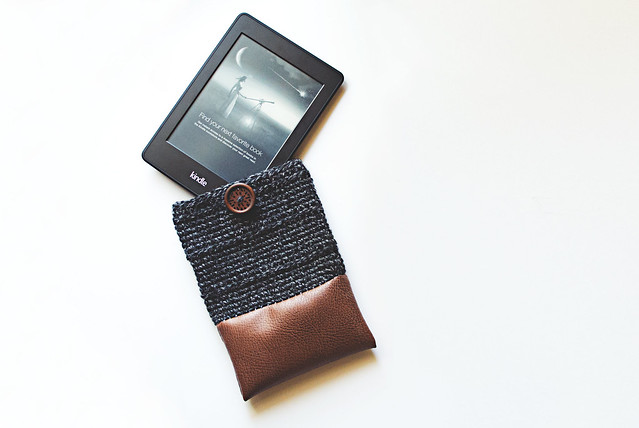
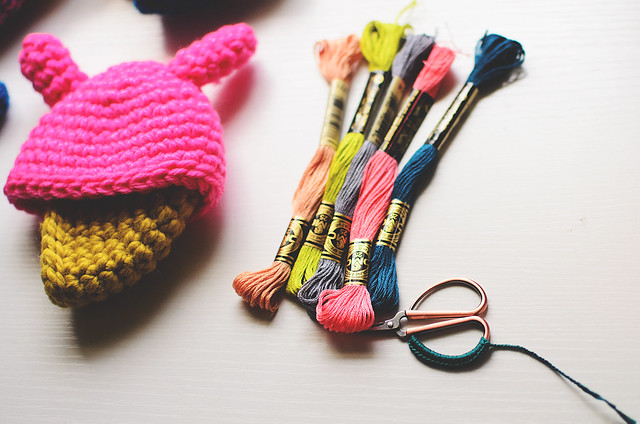
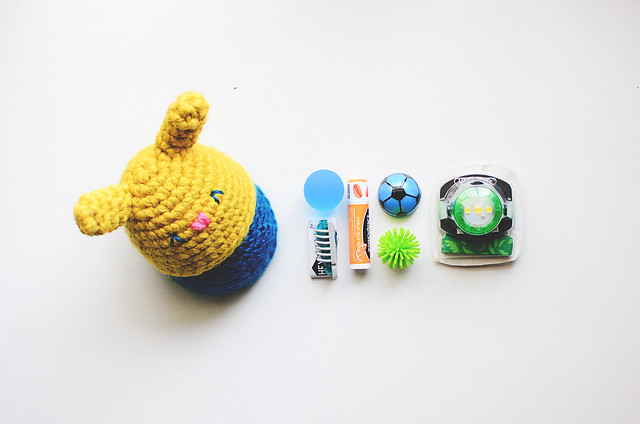
My oldest son got a Kindle for his birthday and he can take it to school, so I made a little cover for it. You might remember my first kindle cover from my tutorial on working crochet on to leather. He likes black and more black, so I used up some leftover Sheepaca from my Wool and the Gang Project, way back in February. It’s the perfect shade of gray that looks “cool” but not just straight up black. I paired it with a piece of vinyl I had in my stash (big hoooray for the remnants bins at Jo-Ann) and finished it off with a wooden button. He liked it!

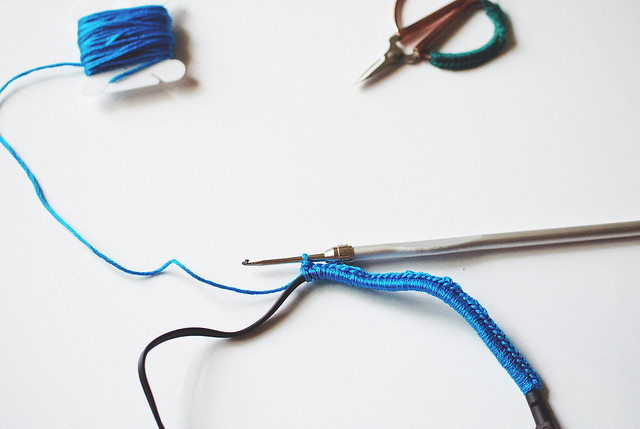
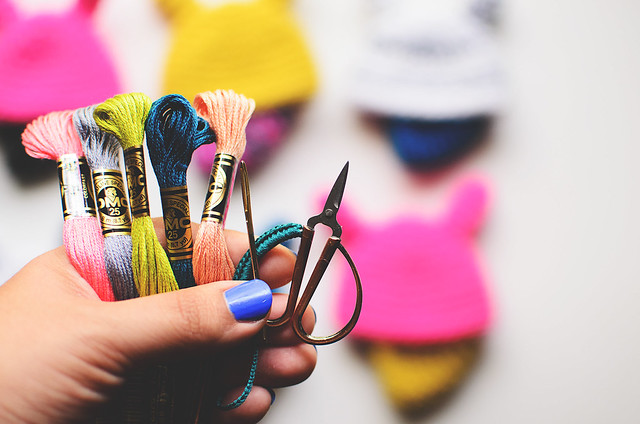
Next up, I covered my youngest son’s earbuds. I find this helps immensely with tangles! This was going to be the start of an actual tutorial, but it’s so easy, I didn’t think it would be necessary. You simply single crochet around the wire of your earbuds. That’s it! No special stitches or anything like that. I would get about 4 little skeins of DMC embroidery floss in your choice of color(s). I used a 2mm steel hook.
I would have a photo of the completed set, but I’m just not that coordinated. Actually, I completely forgot! I whipped this up the day before school started and put them directly into his backpack.
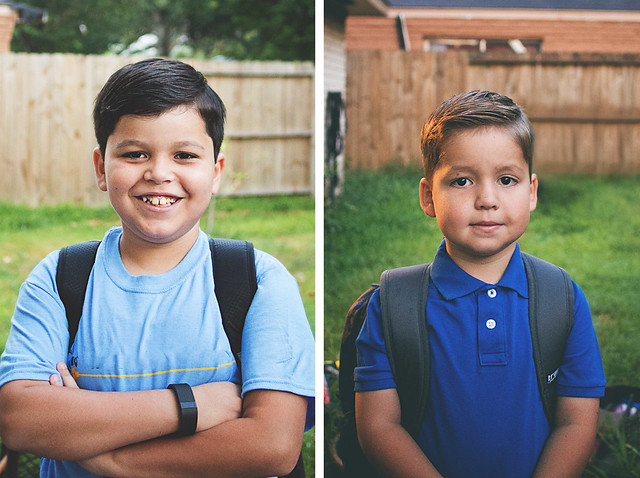
Nathan is finishing up his second week of fifth grade (that’s middle school here!) and Andrew is finishing up his first week of second grade. Can you tell how each of them feel about it? Nathan LOVES his new school and Andrew wants to drop out (ha!). I feel like they should be having the opposite opinions. Big sigh. Nathan was an easy student, but Andrew has been a tough cookie. He likes to read, but strongly dislikes writing. He’s a lefty (his brother is, too!), so it’s really hard for me to help him get things neat. We go through a lot of erasers around here.
Are your kids back in school? Did you knit or crochet any special projects for them or their teachers?
Pin It
By Lisa Gutierrez on 06/11/2015 Disclaimer: This post contains a review for a kit I received from Wool and the Gang. All opinions are my own.
Hello, friends. I cannot believe it’s been over a month since I touched base with you guys. While summer is upon us and wool is the last thing we want to think about, crochet and knitting are still activities I do on a daily basis. When the weather isn’t quite appropriate for woolly accessories, I turn my focus to other fibers and types of accessories, like lace shawls, cotton yarn, and housewares. The latter is something I’ve drifted away from, the past few years. When we first bought our house, I went a little nuts making pillows, weaving doilies, crocheting blankets, ottomans, etc. I kind of missed it, so I was thrilled to hear about the new line of crochet patterns for the home from Wool and the Gang.
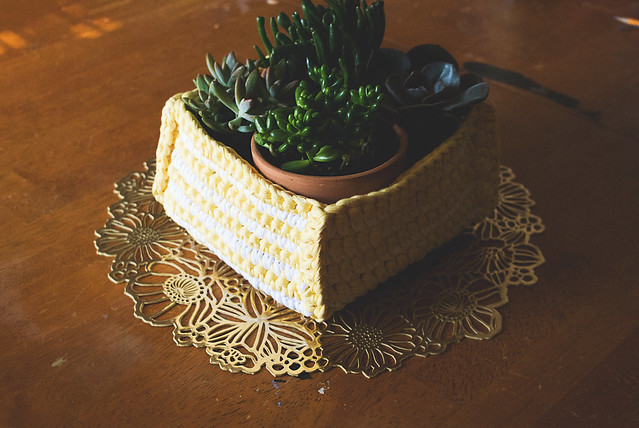
If you remember, I reviewed one of WATG’s knitting kits, way back in February (see here). I loved the presentation of the kits, from the way they are packaged, to the way the patterns are explained. The same goes for the crochet kit I received a few weeks ago. The Bestitched Box Crochet Kit contained 4 cones of their Jersey Be Good yarn, yarn needles for finishing, a pattern booklet, and (the optional) crochet hook. It’s everything you need to complete your project. You only have to decide what colors to use and what to put in it when you’re done.
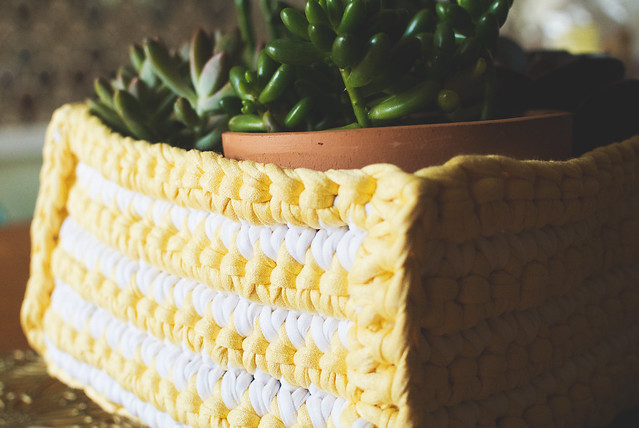
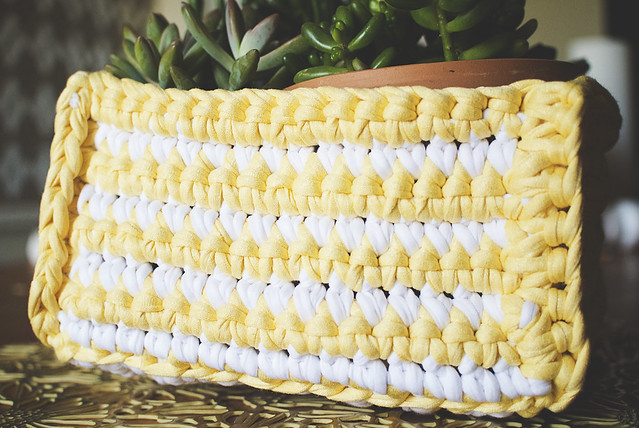
I must admit: I had never used jersey yarn! I had heard about it, I have jersey sheets I want to turn into it, and I love projects made from it…but I had never tried it! My first impression of the cones of yarn were they were softer than I had imagined. That’s weird because I wear t-shirts all the time, so of course it would be soft! It felt a lot stronger, too. I guess I imagined it to be super stretchy and kind of cumbersome to use, but it wasn’t at all. I enjoyed crocheting with it very much. My basket feels quite sturdy and I can see it lasting for years.
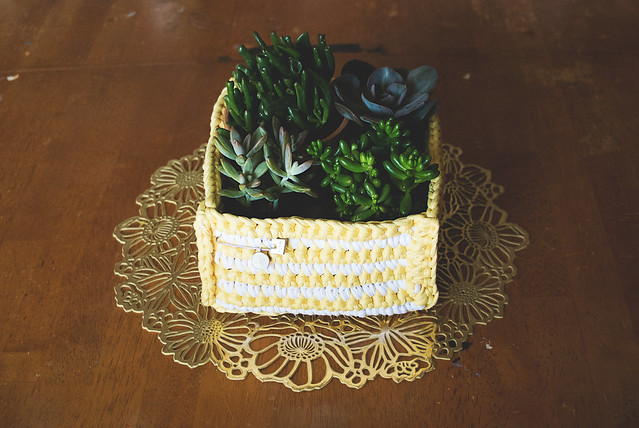
The Bestitched Box pattern comes with directions for two sizes of boxes and includes photos plus information for pretty much every step. The details say it is recommended for intermediate crocheters, but I believe a beginner would be able to make it. It is made entirely in single crochet, so as long as you know how to change colors (for the stripes), you should be able to complete the box. I made the small one and it is an approximately 8″ square.
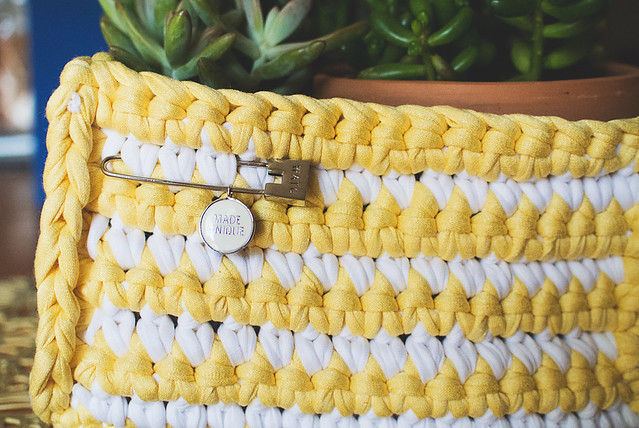
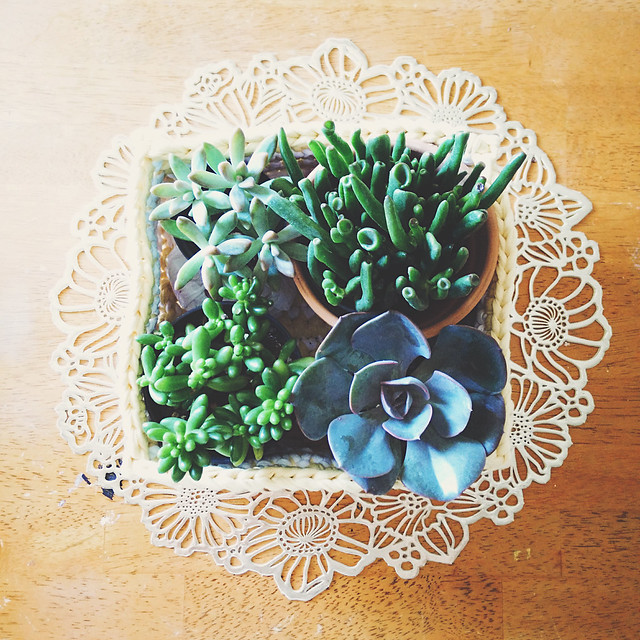
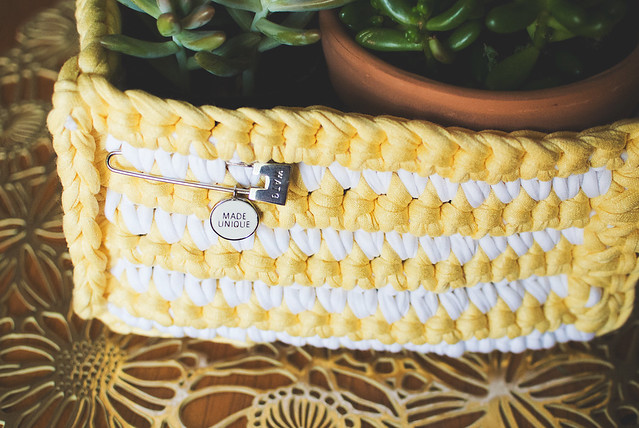
The colors I received are “golden compass” and “white noise.” The white is very bright and the yellow leans more toward a buttercup yellow than a golden yellow. It’s still lovely! Also, isn’t my Made Unique pin the best? Sigh. I want to put it on EVERYTHING, but it might end up on a tote this summer.
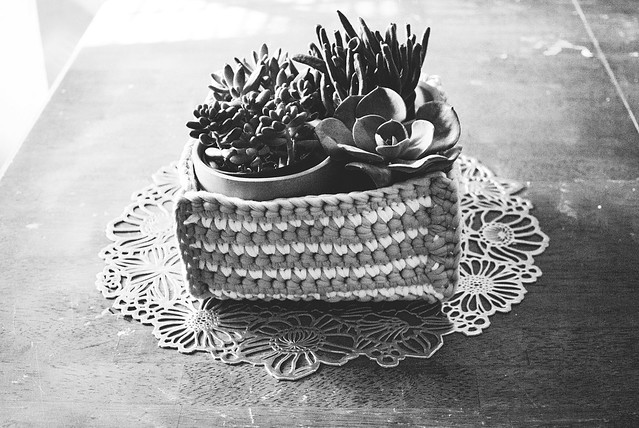
I loved the photo on the kit of a mix of succulents in the box, so I used this as an excuse to buy more plants. I chose four different ones, including a sedum, pachyveria, jade (gollum), and echeveria. I think they’ll stay small enough to live in the box for a little while, then I’ll have to be more!
What do you think? Have you ever crocheted with jersey yarn? Check out all twenty five (25!!) colors from Wool and the Gang, here! I think I need a hot pink pouf for my living room, right? I already made a blue one that my kids loved to death. I think the jersey yarn might last (a lot) longer!
Thank you to Wool and the Gang for sending me this cool kit to crochet and share with you. Show them some love on Instagram, Twitter, and Facebook.
Pin It
By Lisa Gutierrez on 04/22/2015 
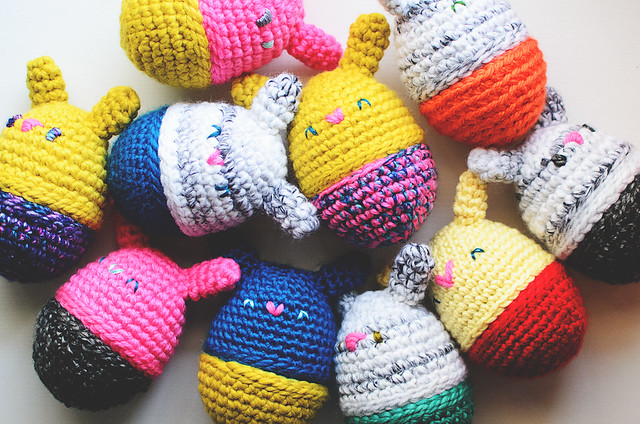

I realize it’s been a few weeks since Easter, but I couldn’t let the month of April finish without sharing my crochet bunny egg photos.
I made these using various shaded of Lion Brand’s Wool-Ease Thick & Quick, Homespun, and combinations of worsted weight scraps. I found the perfect 3.5″ Easter egg, which is a little bit bigger than the normal jumbo eggs, but smaller than the mega eggs. I was able to fit quite a bit of loot in each one. I made 10 different ones for my kids and my cousin’s kids. Pretty much all of the kids I saw on Easter got a bunny egg.
Next year, I’m making carrots!
ETA 2016 HERE IS THE BUNNY FOOD!
Pin It
By Lisa Gutierrez on 03/16/2015 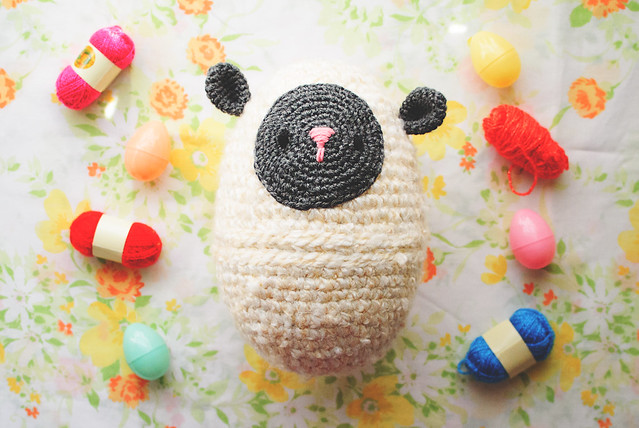
Hey there! I got locked out of my own darn dashboard and had to wait til my IT guy (aka husband) got around to resolving some server issues. All is well, so I’m here today to share my favorite (okay, ONLY) amigurumi of 2015.
He’s a variation of the Bunny Egg Amigurumi I shared a few years ago. Those were cute as heck, but I saw MEGA Easter eggs at the store and KNEW I needed to crochet them into adorable little animals. A few days later, I had my first egg of lamb.
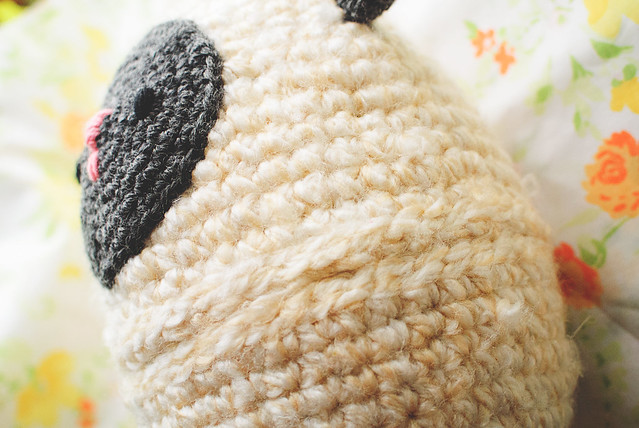
First off, I used thicker yarn and a larger hook. I suggest something more textured, like Lion Brand’s Homespun Thick & Quick, or what I used: Loops & Threads Country Loom (“warm white” from Michael’s). I used a 6 mm (US 10/J) hook. It’s bigger than we normally use for amigurumi, but smaller than what is called for these yarns. You still want tighter stitches for the amigurumis! Less than one skein of Country Loom made the little lamb.
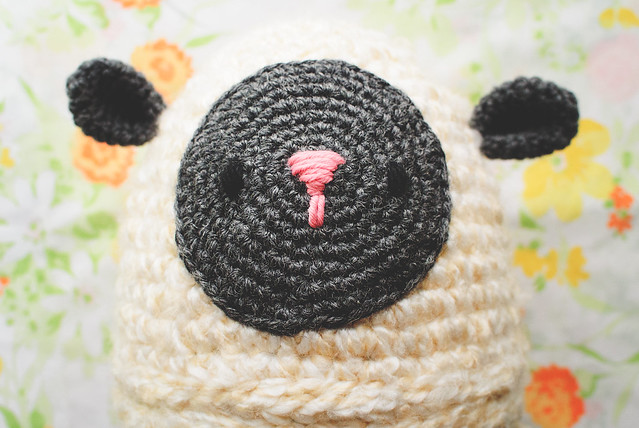
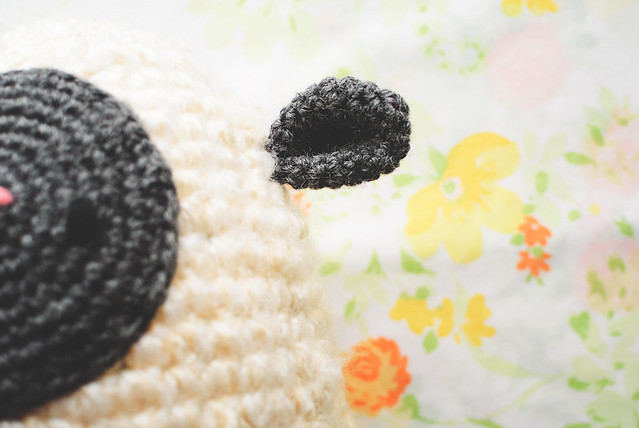
For the face and ears, I used a 4.5 mm (US 6/G) hook and worsted weight yarn from my scrap bucket, so I’m not sure the brand.
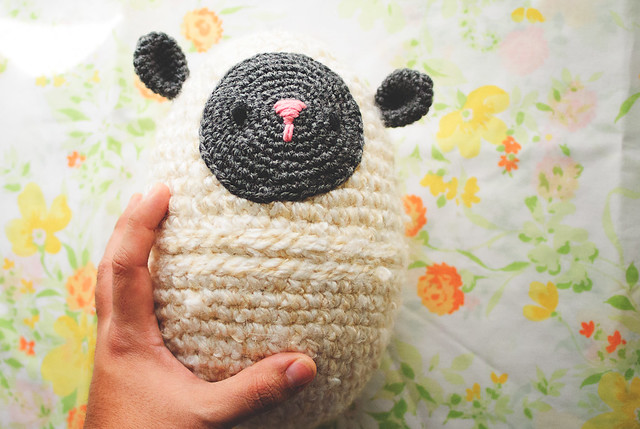
My egg is 8″ in diameter, so there were some adjustments to the pattern. Below, I have listed my stitch counts per round. My increases were made evenly, without joining, using a stitch marker to keep track. I suggest starting each piece with a magic loop.
EGG BOTTOM
Round 1: 6 SC
R 2: 12
R 3: 18
R 4: 24
R 5: 30
R 6: 30
R 7: 36
R 8: 42
R 9-12: 42
R 13: 48
R 14: 48
R 15: slst 48, fasten off and weave in ends.
EGG TOP
Round 1: 6 SC
R 2: 12
R 3: 18
R 4: 24
R 5: 24
R 6: 30
R 7-8: 30
R 9: 36
R 10: 42
R 11-13: 42
R 14: 48
R 15-16: 48
R 17: slst 48, fasten off and weave in ends.
LAMB EARS (make 2)
Round 1: 5 SC
R 2: 10
R 3: 15
R 4-9: 15, fasten off, leaving at least 18″ of tail. Flatten ear and fold bottom in half when sewing in place.
LAMB FACE
His little face is a simple circle made to 54 stitches. I started with 6 in a magic loop and increased by 6 for 9 rounds. I moved the increases around a bit, so it was more circular instead of a hexagon.
I stitched the face onto the circle, then sewed the circle and his ears onto the top piece before hot gluing it onto my egg. I lined up the top of my crochet piece with the top of the egg and glued it first. I then slowly added bits of glue down to the edge and firmly attached the crochet. Keep the egg pieces separate while gluing, so you don’t accidentally glue them together! You wanna fill it with goodies, right?

You can fill your egg with yarn! Give it to a fellow yarny friend. You can also fit WHOLE candy bars into it, if that’s your style. What would you put in yours??
P.S. The MEGA eggs come in three sizes, 8″, 12″, and 16″. I was curious to see what the 16″ looked like, so I made a mama:

It’s cute, but it’s difficult to open and close, so…pretty much useless. It works as a wonderful decoration, though! You could fit a lot of yarn in there, hmm?
Pin It
By Lisa Gutierrez on 02/22/2015 
I get extremely flattered when someone asks me to make them something specific. My mom’s friend recently commissioned a Christening blanket for her new granddaughter. It’s such an important piece of a family’s history! I felt a little intimidated by the significance this might have, but she calmed me down and set me down a simple path: white and square-ish. That’s IT.
Naturally, I scoured the web for Christening blanket patterns and inspiration, but I ended up just using my favorite stitch pattern. The offset shell stitch has been made into many blankets for babies in my family (check out those posts here), so it felt like a good choice.
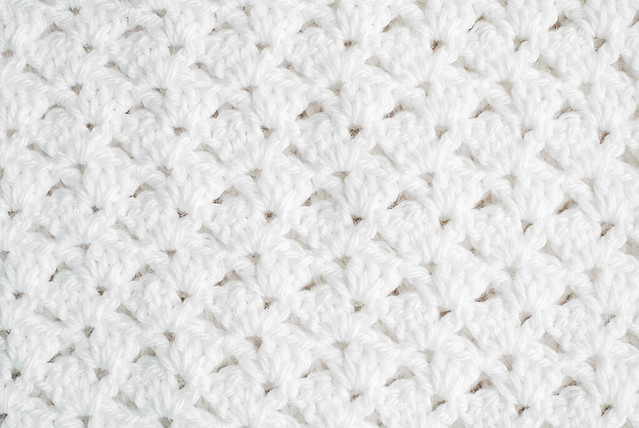
I used Bernat’s Softee Baby and a 5mm (US 8/H) hook. My beginning chain was 148 and I worked until it was just about a square. I’m not sure how many rows exactly. I made a single crochet border around the whole thing, then searched for a lacy border to add. I found about a bajillion charts of lace edges on Pinterest and ended up here where I found the lovely border I ended up choosing.
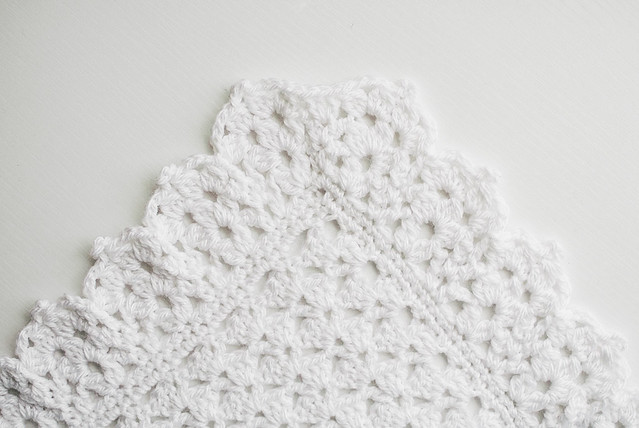
After figuring out the number of stitches in the pattern, I made another round of single crochet to adjust my stitch count. Luckily I wasn’t off by too much!
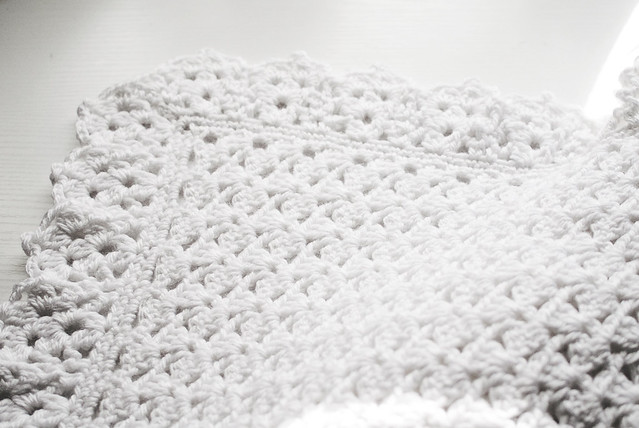
I think it came out lovely. It’s big and squishy and machine washable. It should last a really long time. Who knows, maybe this grandbaby will still have the blanket when she has grandbabies of her own.
Pin It
|
Disclosure You may find affiliate links and banners throughout my blog. I earn a small commission from purchases made through these links. It helps pay for keeping this blog running! All reviews and products are items I have personally used and loved. |


