Crochet: Simple Statement Ornaments

Simple Statement Ornaments

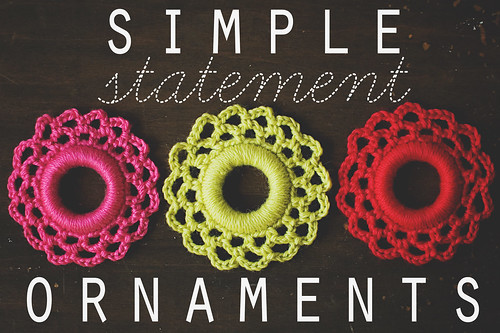
You knew these were coming, right? It’s just about mid-November, so that means it is perfectly acceptable to start making ornaments for your tree or to gift to family. These are quick and easy and if you liked the Simple Statement Wreath but didn’t think you had a place for one in your house, these would be a nice substitute.

Let’s get started!

Simple Statement Ornaments materials

Materials
2″ cabone ring (I used wooden ones by Boye)
3.75mm (F) hook
small amount (approx. 10 yards) of worsted weight yarn

Simple Statement Ornaments steps

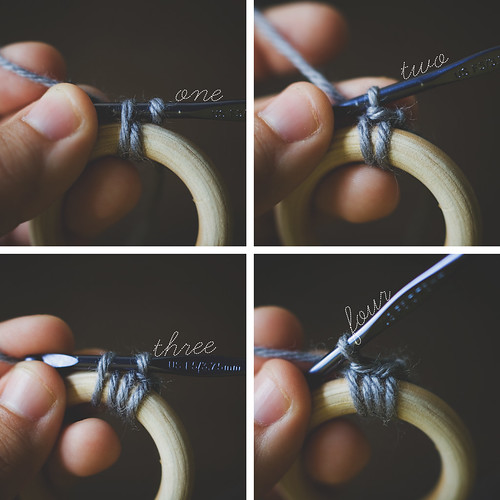
one: start with a slip-knot around your hook and grab a loop from front to back through the ring (two loops on hook)
two: yarn-over and pull through both loops on hook
three: grab another loop from front to back through the ring (two loops on hook)
four: yarn-over and pull through both loops on hook

5

repeat steps three & four until you have 45 stitches around your ring. If you are going with a larger or smaller ring, make sure you end with a multiple of THREE.

Slip-stitch to first stitch, then begin border rounds.
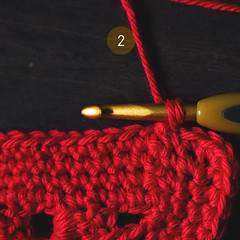
Border Round 1: Ch 1 and SC into same stitch, ch 4, *skip 2 stitches, sc into next stitch, ch 4; repeat from * until 2 stitches remain. Ch 2, DC into first SC. (15 loops if you began with 45 stitches around the ring)

Border Round 2: Ch 5, SC into first ch-4 loop, ch 5, *sc into next ch-4 loop, ch 5; repeat from * around, ending with a slip stitch into top of DC of last round. (15 loops)

Fasten off, weave in ends.

tr1

tr2

Use those regular wire ornament hooks to hang them from your tree. Or string them up like a garland. Or make a mobile. Or blow your own mind by making a wreath out of them! A bold statement wreath out of simple statement ornaments based on the simple statement wreath. That’s just wild. I’ll stop, now. I’m sure you can come up with more on your own. Have fun!

316.365: ornament and bokeh

Pin It

Day 11: something I’ve been craving

314.365: the doilyflakes

I’ve been craving Christmas like no one’s business.
COME ON.

Patterns for this bundle of “doily flakes” will be released next week.

So Fawned 30 Days Hath November

Day 09: A close-up of my day

lg04

I spent my morning photographing and adding two Dory shawlettes to the shop. I really fell in love with this close-up. First, the colors are sweeeet and second, the sun in sparkling on the bottom half. I adore morning light. ADORE!

So Fawned 30 Days Hath November

Photo Edit: Winter Haze

a1-2

Hello, friends! I am here with a new Photoshop action. Throughout the summer, my most favorite edit for my photos was my Summer Haze action. It works fabulous with yellows and just gives photos that beautiful summer glow. For monotone photos, I use my Hazy B&W action.

I was editing some photos the other day and I found myself tweaking the colors some more. Just to make them a bit more dramatic and cool (tonally). It’s an adjustment to my other actions and if you are familiar with those, you’ll notice it. I have an updated version of the ATN file for download, HERE (right-click, save as). It includes Summer Haze, Hazy B&W, Dark & Moody B&W, and Winter Haze.

When you run any of the actions, it creates a few adjustment layers that get grouped into a folder AND a sharpening layer. You can adjust all of the layers to your liking. Sometimes they get too dark, so I adjust the DARKEN layer. Sometimes the contrast gets too be too much, so I adjust the CONTRAST layer. Sometimes the coloring looks TOO off, so I adjust the corresponding layer. Adjustment layers are wonderful in that you can easily ADJUST them! :)

(Hover to see the BEFORE, if it doesn’t work, click the links below the photos)


[before]


[before]

Let me know if you use it and what your results are! If you need help installing/using actions, see my Summer Haze post! I get pretty detailed in that one. :)

A tip: hide the “WINTERIZE” layer and get a dark, dramatic “real” edit like this-

309.365: the kid's face

Have fun! Feel free to add photos edited with any of my actions to the GOODKNITS Flickr group!

Crochet: Get Crabby!

the crab stitch

My favorite border/edge is the Crab stitch (AKA reverse single crochet). It’s super easy and provides a nice neat border for your projects. I’m currently using it on Big Red. Yep, that’s right. I am on the border! After 4 rows of single crochet, I am crabbing it up.

0102
0304

1. How my work looks after my last round of single crochet + 1 ch.
2. Insert hook in stitch immediately to the RIGHT and pull yarn through (2 loops on hook).
3. Pull yarn through both loops.
4. Repeat 2-3.

After a few stitches, you should have a beautiful border going. I’ll be working on my edging this evening. I started it and then realized I should share it for the folks who are looking for a nice, simple border for their work. I’ll share photos of the finished blanket tomorrow. It’s sososo lovely! I am head over heels for RED.

05

What is/are your favorite border(s)/edging(s)??

Pin It