
Inspired by the doily pillow tutorial on Smile and Wave, I started scouring thrift stores and craigslist for any little sets of doilies I could find. I HAD to make one. My couch NEEDED it!
One of the thrift stores close to our new house had some and I was SO excited! Until I saw the price tag. GAH! Them ladies knew how long and tedious doily making was and priced them accordingly. Unfortunately, doilies aren’t in the family budget, so I had to pass those up.
A week later, we headed back to our old stomping grounds in South Houston and hit up our old favorite thrift stores, including SeAM. I’m happy to say SeAM did not disappoint. I found a bunch of doilies for about two bucks. I used all the large ones, a medium one, and a few small ones to fill in open spaces. I still have a medium sized one and two little baby doilies left. I’m in LOVE!
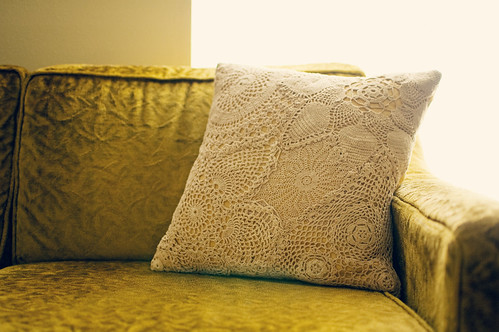
I did this a little differently than the tutorial. After figuring out the configuration (most exciting craft-related puzzle!), I pinned the doilies to some yellow fabric, about 17.5″ square. I then hand-sewed them down, overlapping where necessary. I didn’t want to cut any and there wasn’t much overhang, so I didn’t. Most of the doilies were bright white and one was a lovely light brown, so I whipped up a pot of super strong tea and let the pillow top soak for about 10 minutes. I washed it with some dish soap and tossed it in my dryer for a bit. Tea staining for the win!
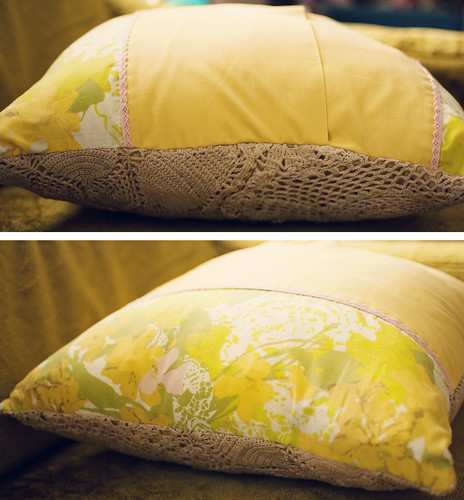
I used a vintage pillow case for the back. Again, i can’t stress enough how much I love reusing pillowcases like this. The hem is already there, so I don’t need to do any extra sewing! I cut out a piece about half the width of the pillow and one that was two thirds. I pinned it down and sewed it up. My 18″ pillow form makes it a little over-stuffed, but that’s how I like ’em.
If you have any doilies you don’t want (psssssh!), please do let me know.


Wow, that looks beautiful! You did a good job on that pillowcase!
thank you!
ohhh i really love this and hadn’t seen this on s&w…great job! i have a new obsession with vintage doilies and this is such a pretty idea :)
yeah! Thank you.
I’m now on the lookout for more doilies for another pillow. Or maybe for a table runner! i’m trying to think outside the doily-box. ;)
That’s so beautiful!
i love your version! it looks fabulous!
It sounds like you had a fun and rewarding time searching for doilies to create your doily pillow. It’s always great when you can find what you need at a thrift store for a good price. Your passion for the project really comes through in your writing, and it’s clear that you put a lot of effort into making the pillow just right.
That looks fantastic!
The material presented is quite intriguing; I frequently watch these for further knowledge
Just curious what price was on the price tag? :) Btw, love the vintage look and the colors. You did a great job! :)
I did not enjoy the way one of the characters passed away, and I will try not to give anything away by saying this, but I thought it was a disappointing ending.