By Lisa Gutierrez on 03/14/2016 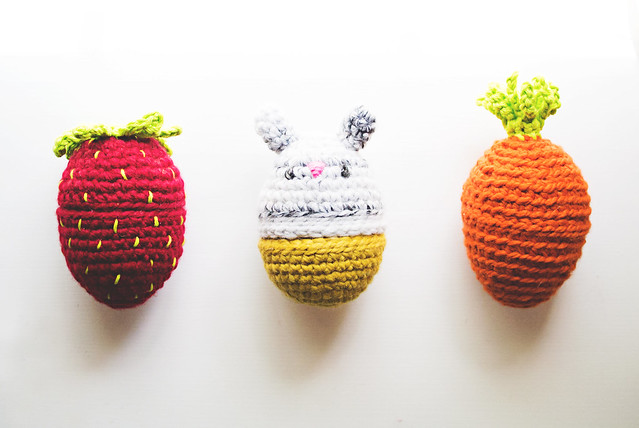
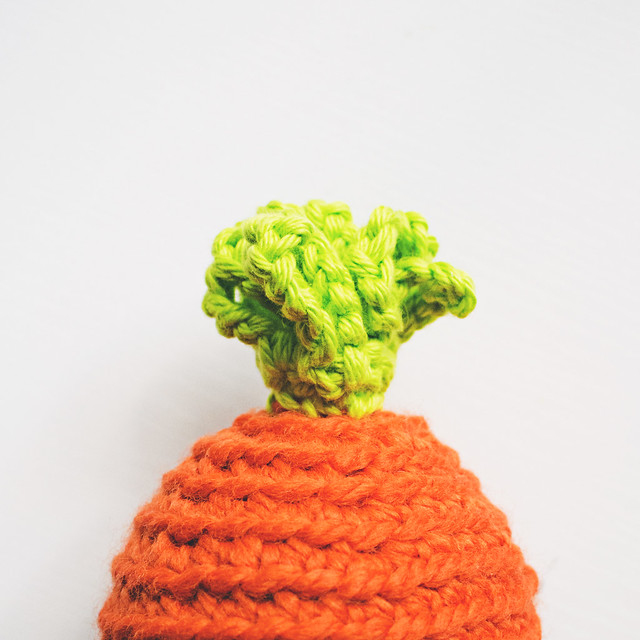
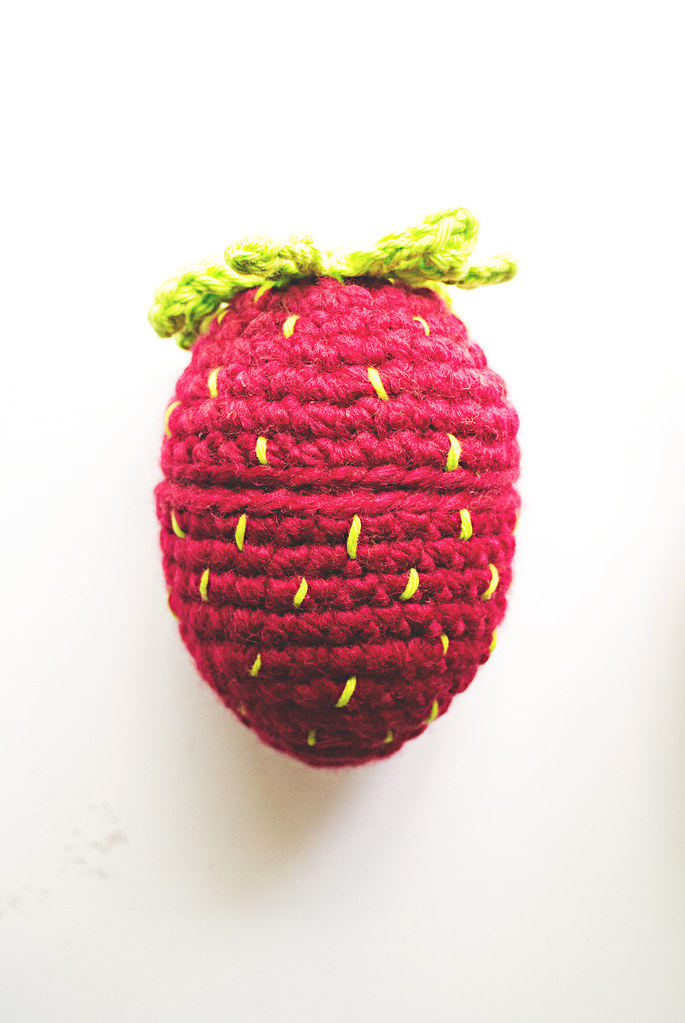
Last Easter, I made a fluffle of amigurumi bunny eggs for my favorite kiddos. This year, I’m branching out into bunny food–carrots and strawberries! They’re little amigurumi crocheted and glued onto Easter eggs. You can fill them with whatever treats your tiny humans might want.
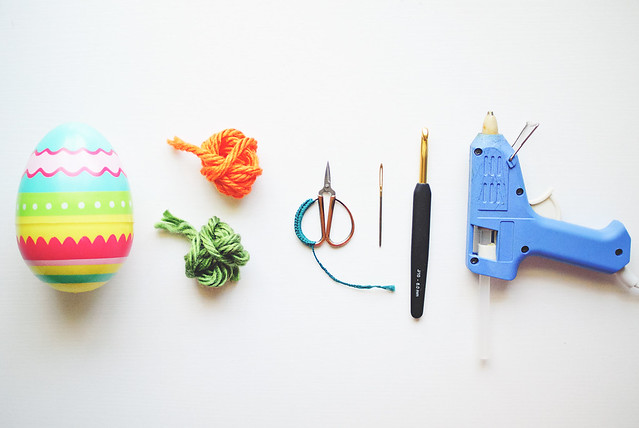
The perfect eggs for these amigurumi are from Target. The plastic feels a little thicker, so I feel like they’ll last longer, and they’re a great size! They’re large Spritz brand eggs and come in a pack of three. I may have a bag full of them under my desk, right now.
My favorite orange for carrots are bulky yarns from Lion Brand, specifically Hometown USA in “Syracuse Orange” and Wool-Ease Thick & Quick in “pumpkin”. For the strawberry, I used Wool-Ease T&Q in “cranberry”. My hook for both was a 6 mm (US J). The green tops on both is worsted weight cotton held double. Use your favorite shade!
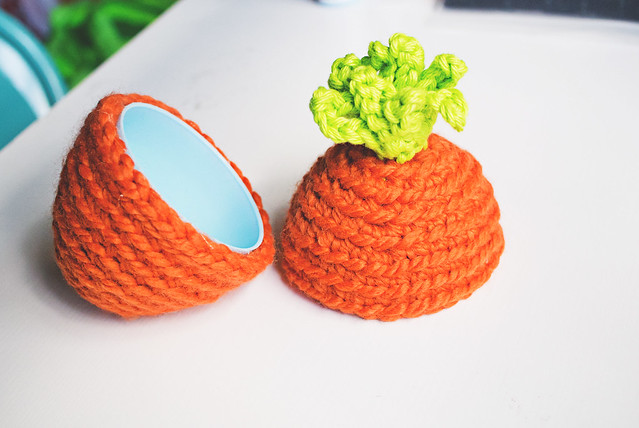
The “body” of the egg for both is pretty much the same. Start with a magic loop and do NOT connect at the end of the rounds. Place the cover on the egg part as you go, to ensure the fit. Add a stitch or two, if it’s too small. If it’s too big, skip an increase. Remember you will be gluing, at the end, so it doesn’t have to be perfect, but it should be able to cover the egg with minimal stretch or scrunch. Here’s the pattern I use:
Work in the back loops only for the carrot.
Egg Top
Round 1: 6 SC into ring
Round 2: 2 SC into each st (12 SC)
Round 3: [SC into 3, 2 SC into next] 3 times (15 SC)
Round 4: [SC into 2, 2 SC into next] 5 times (20 SC)
Round 5: [SC into 4, 2 SC into next] 4 times (24 SC)
Round 6: [SC into 3, 2 SC into next] 6 times (30 SC)
Round 7-9: SC into each st (30 SC)
Round 10: slst into each st (30 slst)
Fasten off.
If working the strawberry, you may need to make round 10 SC instead of slst.
Egg Bottom
Round 1: 6 SC into ring
Round 2: 2 SC into each st (12 SC)
Round 3: [SC into next, 2 SC into next] 6 times (18 SC)
Round 4: SC into each st (18 SC)
Round 5: [SC into 2, 2 SC into next] 6 times (24 SC)
Round 6: [SC into 3, 2 SC into next] 6 times (30 SC)
Round 7-8: SC into each st (30 SC)
Fruit tops
Using 2 strands of worsted, or a single of bulky
Round 1: Ch 1, 8 HDC into ring, slst to top of first HDC
Round 2: [Ch 8, slst into third ch from hook, Ch 4, slst into same HDC], *slst into next HDC, rep from [ to ]; repeat from * for 8 chain loops total, slst to first st. Fasten off, leaving long tail for sewing.
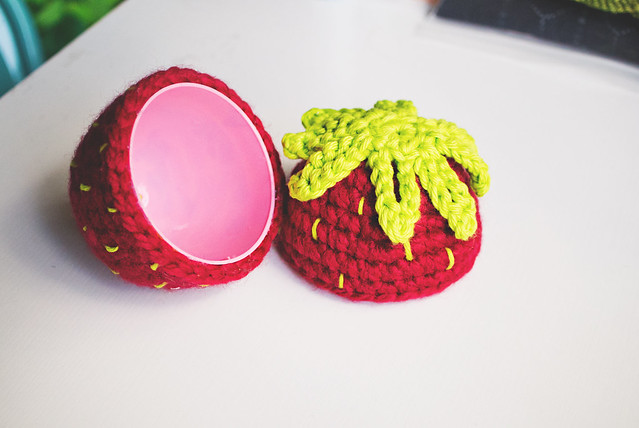
If making a carrot top, weave tail through the loops, and cinch it together, so the loops stand up. Sew onto egg bottom. For strawberry, sew the solid hdc circle onto egg bottom, leaving leaves free.
Use the green yarn to embroider strawberry seeds all over, before gluing.
Use hot glue to attach your pieces to your eggs. Start with the tips and work your way around and down. Be careful and don’t sacrifice any finger tips for perfection!
Fill eggs to your heart’s desire.

If you want to make a bunny with this thicker yarn, use the same pattern for the strawberry body and then add some ears. Mine were super simple, start with 5 SC in a ring, increase to 10, then to 15 and work for however long you like. Fasten off, leaving a longish tail to sew onto your egg top. Sew the ears and embroider the face before you glue! Let me know if you make any!
Pin It
By Lisa Gutierrez on 01/27/2015 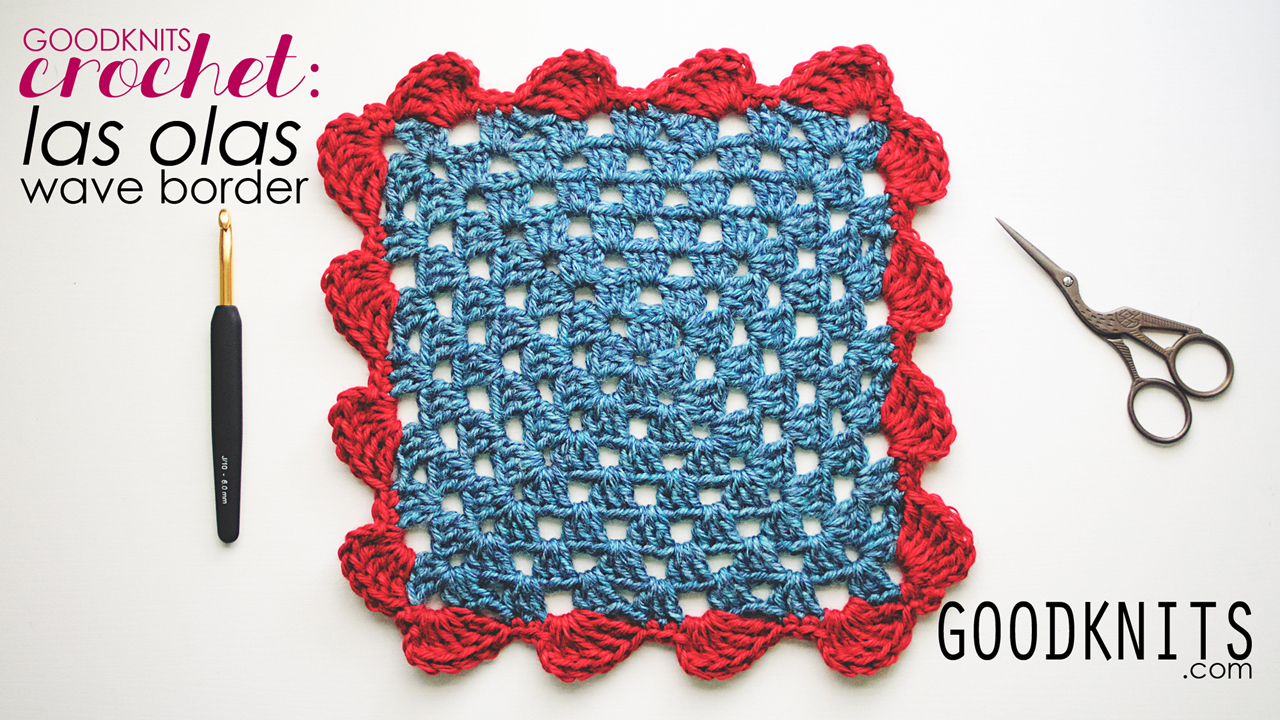
I mentioned on Instagram, a few weeks ago, that my uncle passed away. I made this blanket for my aunt. My uncle’s sister, who made the long road trip in from Mexico, started the border for me when I told her I didn’t know what to do. The blanket is a 40-round granny square, so I made a simple single crochet border that she worked over. Essentially, she crocheted into my last granny square round.
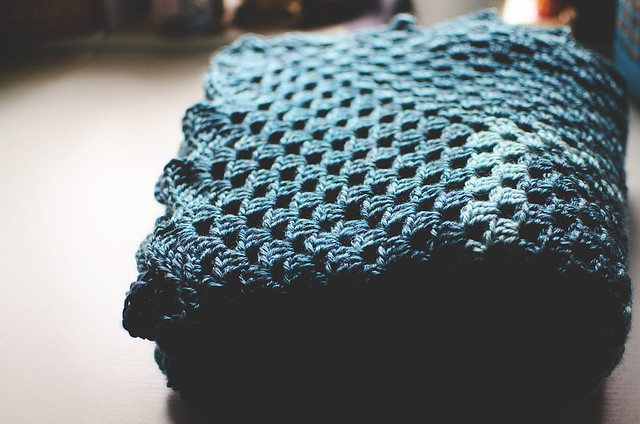
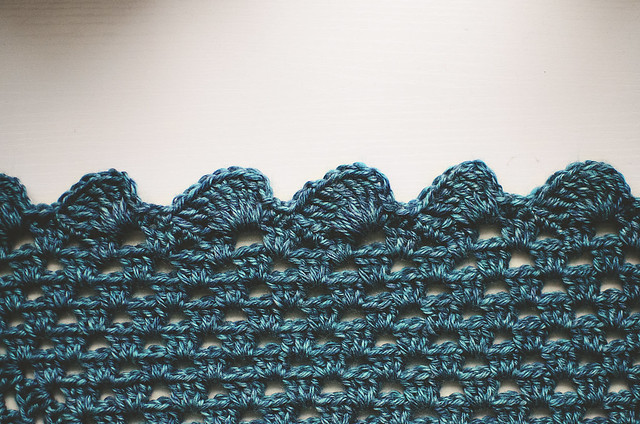
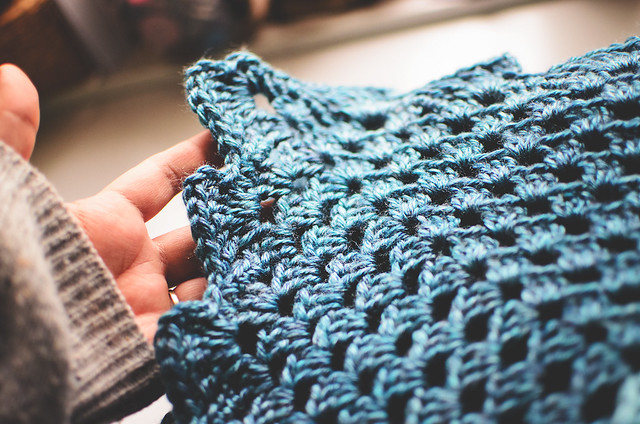
What resulted were these beautiful olas, or waves. I loved it and my aunt thought it was pretty, so when we ran out of yarn, I promised to finish it. I thought I would share the instructions, since I had never seen a border like this. It resembles a scallop, but they lean to the side, so it’s more wavy.
I made a video, which I’ve embedded below, but I want to put out the written instructions first.
US terminology is used throughout.
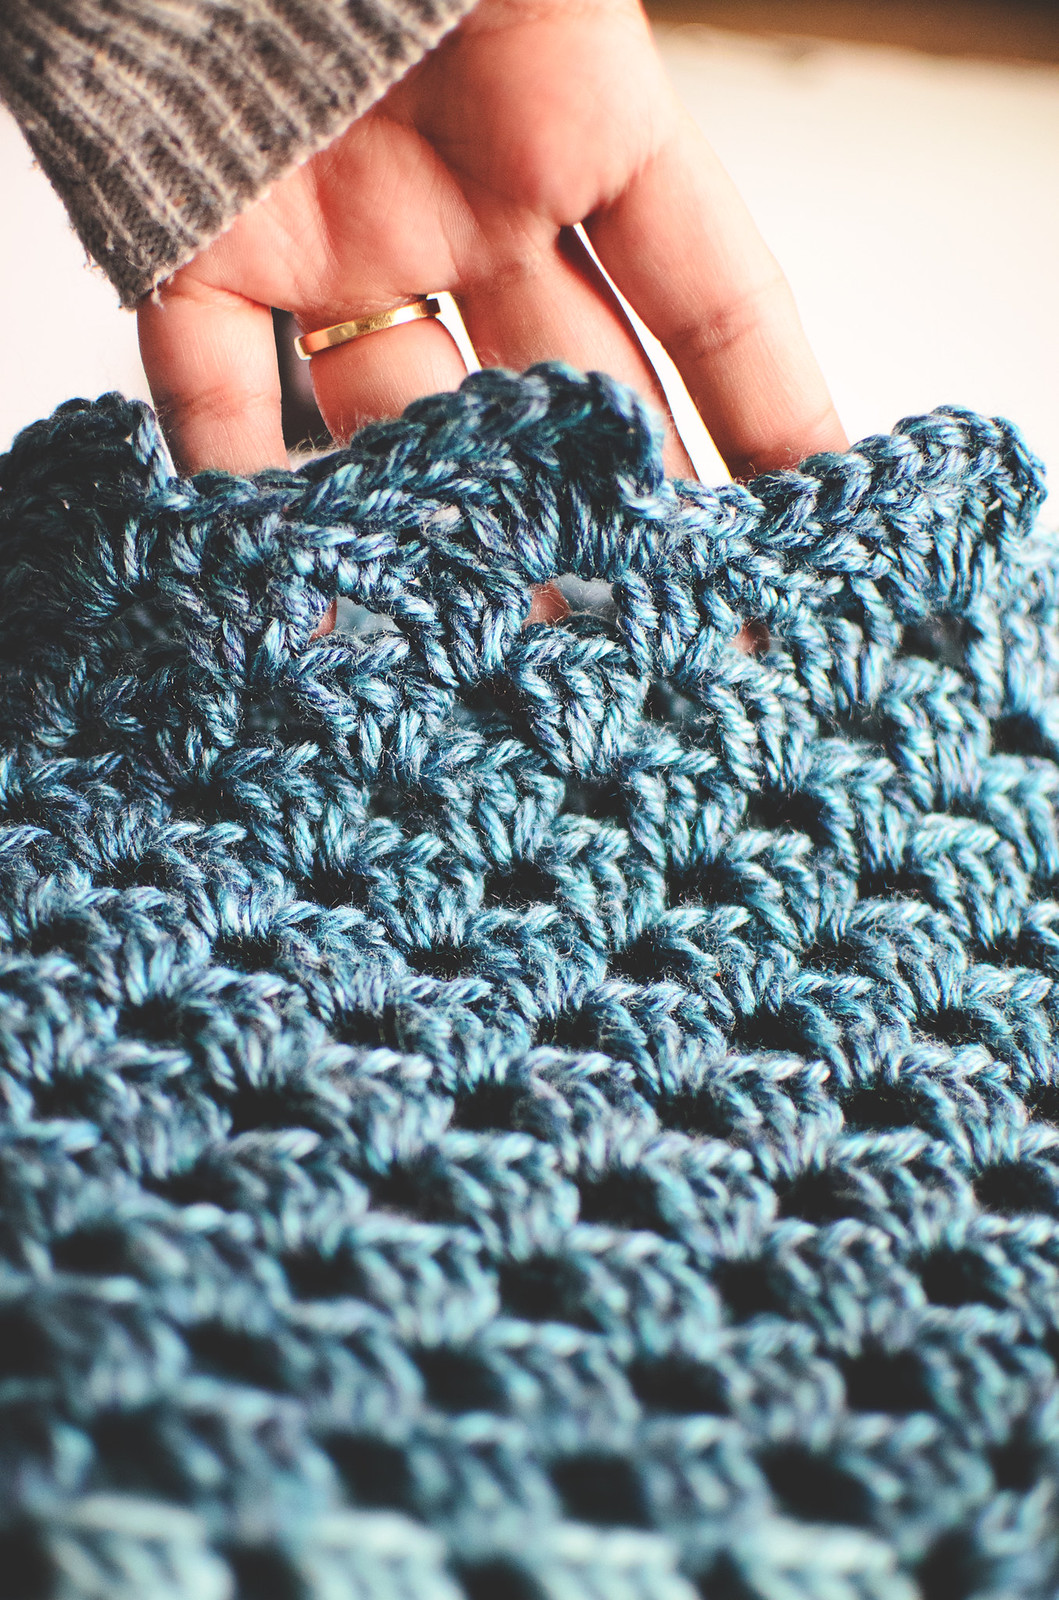
You should know: chain (CH), single crochet (SC), and treble/triple crochet (TR). This is the pattern for working around a granny square. You should have an uneven number of rounds, so there is an even number of chain spaces (ch-sp) between the corner spaces.
Attach your yarn in a corner and chain 1.
[SC in same space, Ch 2, 5 TR in same space. *Skip next cluster of stitches and space, SC in center of next cluster, SC in next stitch, SC in next space, 5 TR in same space; Repeat from * to last ch-space of this side of the square, skip last cluster of stitches and SC in corner space, Ch 2] Repeat between [ ] for 4 sides, slst into first SC. Fasten off and weave in ends.
To work this as an edge for other blanket patterns, start with a round of single crochet. There should be a multiple of 8 plus 3 between each corner space (I suggest working a [sc, ch 2, sc] into each corner).
Attach the yarn in the corner space (the chain 2), then work the first wave: ch 1, SC in same space, Ch 2, 5 TR in same space. [Skip 5 stitches, SC in each of next two stitches, work a wave in the next stitch: SC, Ch 2, 5 TR in same space.] Repeat between [ ] to the corner. Skip last 3 stitches and SC into corner, ch 3, SC in same space. Work the next edge the same way. Start with a wave in the corner, then skip 5 stitches, work 2 SC, and a wave…continue until you have worked all the way around the blanket. Slip stitch into the first SC.
Affiliate links help keep my blog running. If you are interested in any of the supplies used in this video, follow the links below:
Lion Brand Heartland yarn in “Glacier Blue”- http://amzn.to/1EpcgQc (You would need 6 skeins for a 40 round blanket and border)
Lion Brand Heartland yarn in “Redwood”- http://amzn.to/18r3iF2
Knitter’s Pride crochet hooks- http://amzn.to/1yLQi6I
There ya go. What do you think of videos? I get requests for videos, especially for the Mary Jane slipper tutorial, but they are tough to make! At least for me. I suppose it’s a learning curve and if I made more, things would feel more natural. I’m also getting over a cold, so I feel like I sound…weird. Anyway. Do they help? How’s the quality?
Pin It
By Lisa Gutierrez on 01/14/2014 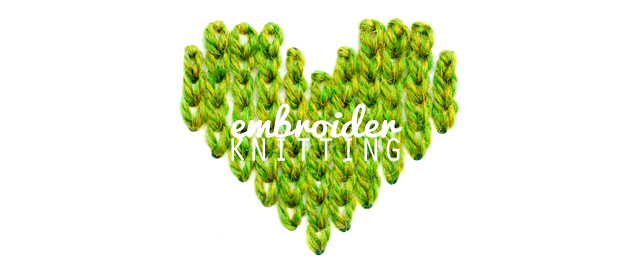
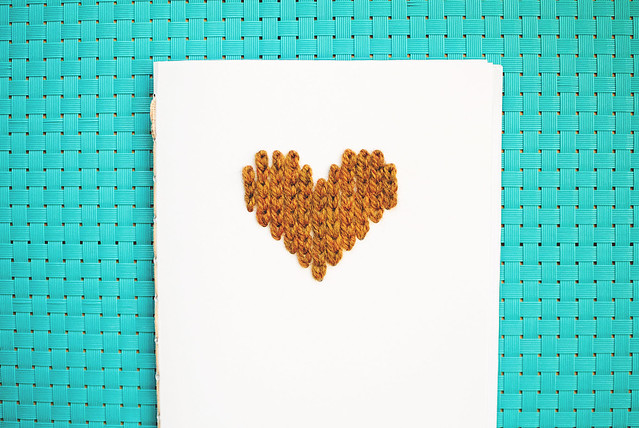
I wanted a design for the front of a knitting notebook and after doodling a few different ideas, I came up with this sweet heart. The embroidered chain stitch resembles knitting when they’re put right next to each other, so it was the obvious choice for a knitting notebook. Here are some instructions for making your own little heart!
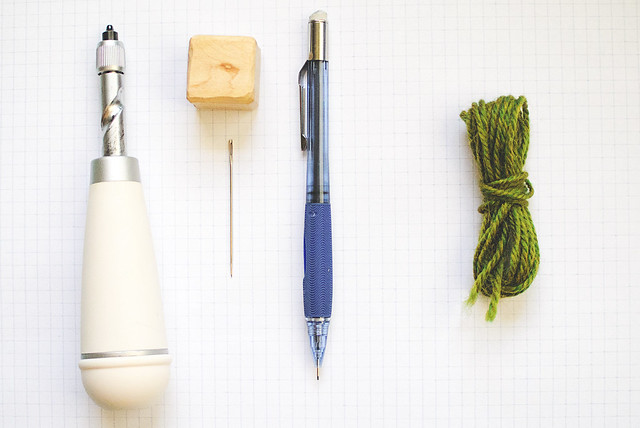
Materials
-a tool to make small holes in paper; I use this Martha Stewart Screw Punch (affiliate link), but you could use a sharp needle + something to “hammer” it or an awl (affiliate link), but you could use a sharp needle + something to “hammer” it or an awl
-pencil
-about 3 yards of worsted weight yarn
-yarn needle that will fit through the holes you make
-graph paper (the paper I used is 5 squares per inch)
-card stock or whatever you want to embroider your design on
The Design
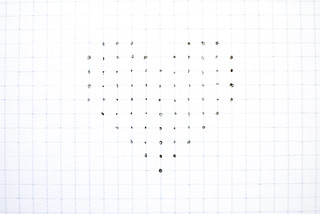 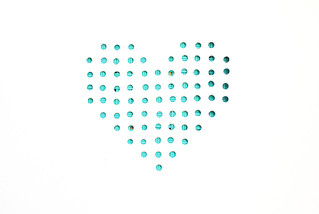
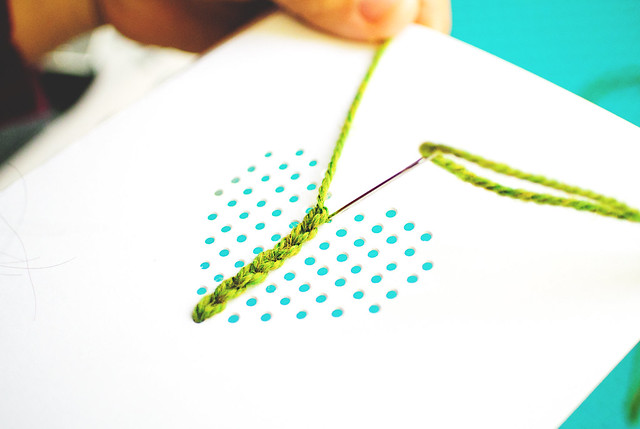
I used graph paper to plot out my design evenly. Place the graph paper with your design on the card stock where you want to place your stitches. Use the screw punch or awl to punch holes (you’ll want to put a self-healing cutting mat, or other board you don’t care about indenting, under your paper). The holes will aid you in keeping the chain stitches straight. If you are already an embroidery master, you can probably freehand them!
On the other hand, if you have never embroidered the chain stitch, I have outlined the steps below:
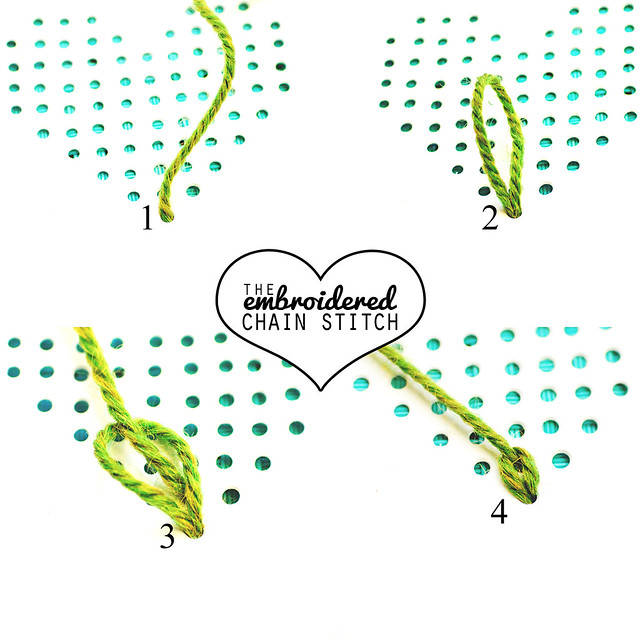
1. Bring about half of the yarn through the bottom center hole from back to front.
2. Go back through from front to back in the same space, but do not pull the yarn all the way through.
3. Come back up through the next hole up AND through the first loop you made.
4. Pull the yarn all the way through, tightening the first loop/stitch.
Repeat steps 2-4 for the embroidered chain stitch. I got into a habit of making two loops and using the second loop to tighten the first, like this:

At the end of the column (and the rest of the columns), finish the stitch by going down into the same hole, over the last loop, instead of through it, like this:
To make the next column, weave the yarn through the back of the stitches toward the bottom:
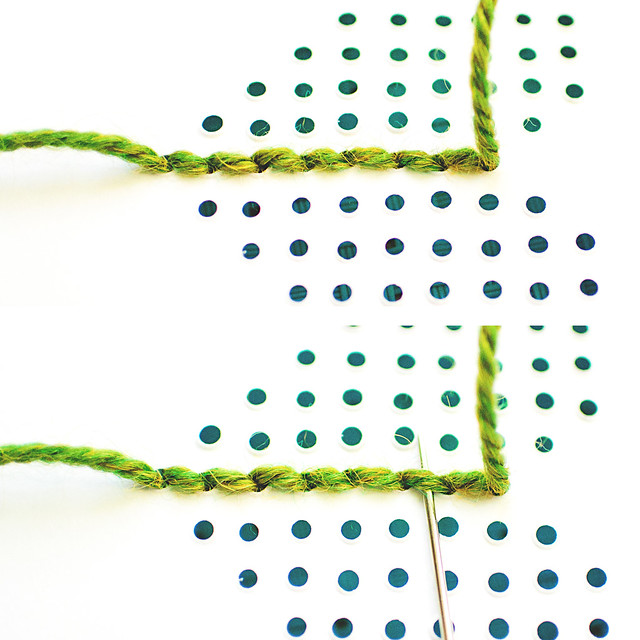
Work the next column and continue until all columns on this half of the heart are complete.
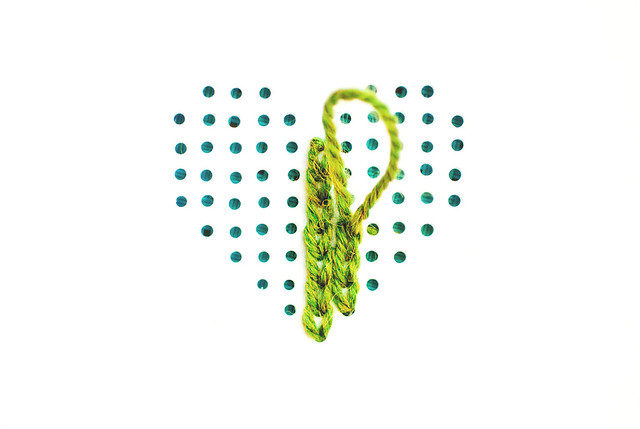
Weave in this end of the yarn through the back of the stitches:

Use the other half of the yarn to work the second half of the heart. Weave in your yarn when you’re done and that’s it!
Here is my [handmade] notebook:
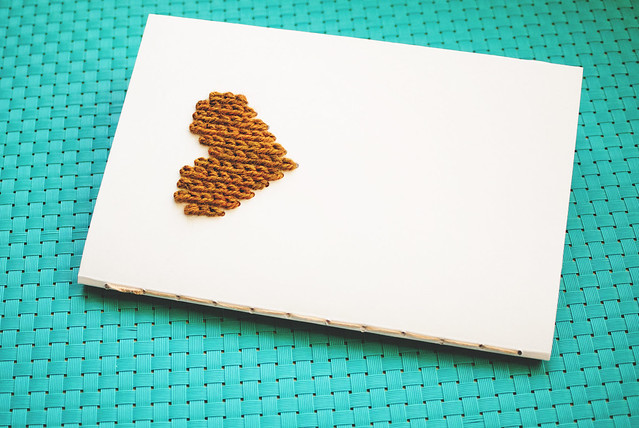
I filled it with knitter’s graph paper and stitched it up by hand. That screw punch I linked above REALLY comes in handy for projects like this!
You could use this tutorial to make a lovely Valentine’s Day card! You can make other designs, as well, just be sure to have at least two dots per column when you are plotting it out on graph paper. I want to do a set of scissors! If I can come up with a few designs, I’ll make another post to share!
 Pin It
By Lisa Gutierrez on 10/01/2013 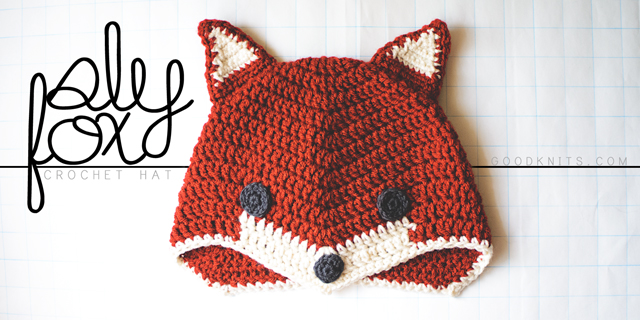
October is here! I love October because it means that MAYBE cool weather is on its way to Houston. Probably not, but a girl can dream, right? October also means it’s costume time! Last year, I composed two sweet costumes for my boys’ book character parade ( see here) at school.
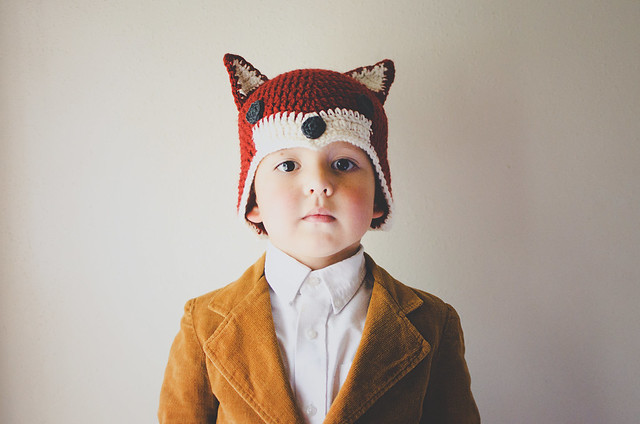
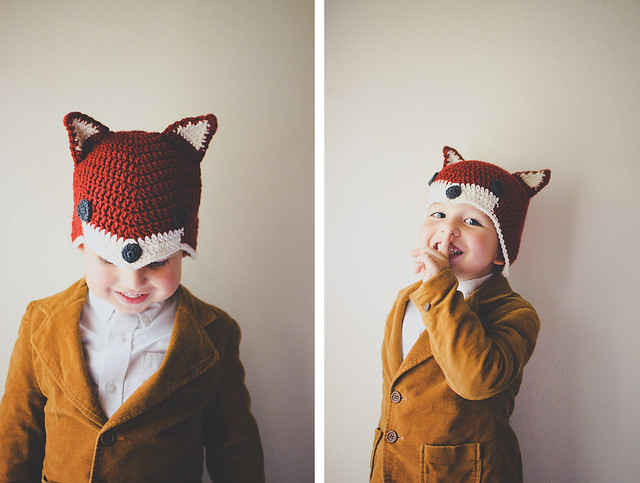
Combine cool weather and costumes and you get…animal hat! Specifically, a sly little fox hat.
It features some interesting shaping to create the point at the front and long sides to cover the ears. It is definitely inspired by Ganomy, which, if you’ve been reading long, is my favorite knit hat pattern. This crochet hat is worked from the top down, though, and, like I said, has a point at the front. Instead of two sets of increases and decreases, there eventually are three. I hope you guys like it! I’ll put some notes at the END with suggestions for changing the size. Please read through before asking questions! Have fun!
Materials
1 skein Vanna’s Choice in brick or other worsted weight yarn in a foxy color
Small amount of white and dark gray yarn in same weight
5 mm (US H) crochet hook
4 mm (US G) crochet hook
yarn needle
NOTES
Abbreviations (U.S. terminology)
Ch: chain
DC: double crochet
slst: slip stitch
sp: space
rep: repeat
DC2tog: DC 2 together
SC: single crochet
SC2tog: SC 2 together
Gauge
About 3.5 DC and 1.5 rounds per inch with larger hook.
Each beginning ch-3 counts as 1 stitch.
Pattern
HAT
With large hook, Ch 3, 11 DC into a magic circle. Cinch circle shut. Slst into top of beginning (beg) ch-3. (12)
Round 2: Ch 3, 1 DC in same sp, 2 DC in each st, slst to top of beg ch-3. (24)
Round 3: Ch 3, 2 DC in next st, *1 DC in next st, 2 DC in next st; Rep from * around, slst to top of beg ch-3. (36)
Round 4: Ch 3, 1 DC in next st, 2 DC in next st, *1 DC in next 2 sts, 2 DC in next st; Rep from * around, slst to top of beg ch-3. (48)
Round 5: Ch 3, DC in next 7 sts, [3 DC in next st, DC in next 15 sts] twice, 3 DC in next st, DC in last 7 sts, slst to top of beg ch-3. (54)
Round 6: Ch 3, DC in next 8 sts, [3 DC in next st, DC in next 17 sts] twice, 3 DC in next st, DC in last 8 sts, slst to top of beg ch-3. (60)
Round 7: Ch 3, DC in next 9 sts, [3 DC in next st, DC in next 19 sts] twice, 3 DC in next st, DC in last 9 sts, slst to top of beg ch-3. (66)
Round 8: Ch 3, DC in next 10 sts, [3 DC in next st, DC in next 21 sts] twice, 3 DC in next st, DC in last 10 sts, slst to top of beg ch-3. (72)
Round 9: Ch 3, DC2tog, DC in next 9 sts, [3 DC in next st, DC in next 9 sts, DC2tog, DC in next st, DC2tog, DC in next 9 sts] twice, 3 DC in next st, DC in next 9 sts, DC2tog, slst to top of beg ch-3. (72)
Rounds 10-11: Repeat Round 9. (72)
Round 12-13: Repeat Round 9, but switch to white after the third decrease and work with that yarn, carrying the MC, to the stitch before the next decrease. You will have to attach the new color every round. Finish the round in the main color, attach white at the end.
Round 14: SC around in white, making [1 SC, ch 2, 1 SC] in the center DC of the increases of the previous round, slst to first SC. Fasten off. Weave in ends.
————————–
Ears
Note: the ears are made up of two pieces each– a solid piece in the MC of the hat and a piece that is white + the MC.
Make 2 solid pieces for the back of the ears
Ch 10
Row 1: SC in second chain from hook and each of the rest. Ch 1, turn. (9)
Row 2: SC2tog, SC 5, SC2tog. Ch 1, turn. (7)
Row 3: SC in each st. Ch 1, turn. (7)
Row 4: SC2tog, SC 3, SC2tog. Ch 1, turn. (5)
Row 5: SC in each st. Ch 1, turn. (5)
Row 6: SC2tog, SC in next st, SC2tog. Ch 1, turn. (3)
Row 7: SC in each st. Ch 1, turn. (3)
Row 8: SC2tog, SC in next st. Ch 1, turn. (2)
Row 9: SC2tog. (1)
Ch 1, SC 9 down the side of the triangle. At bottom corner, ch 3, then turn triangle clockwise to work across the beginning chain, SC 9 to next corner, Ch 3, then SC 9 back to top of the triangle. SC in the sc2tog stitch from last row, ch 3, SC in same st, slst to first of the SC you made down the side of the triangle. Fasten off.
Make 2 pieces for the front of the ears.
Work pattern as above, but switch to white for Rows 2-9. Switch back to main color after last SC2tog and work border in MC. Leave a long tail at the end of these pieces.
Stitch a front and back together, then sew in place on your hat.
————————–
Eyes & Nose
With smaller hook, make 6 SC into a magic loop. Cinch loop shut. Slst to first SC.
Round 2: Ch 1, 2 SC into same space and each stitch, slst to first SC. Fasten off, leaving a 12-18″ tail for attaching. (12)
For Eyes only
Slst into each st.
Sew eyes and nose in place with tail yarn.


Notes on size
As-is, the pattern fits a child size heads. My son is 5, but his head is about the same size as his 8 year old brother. For a larger hat, I increased my hook to a 5.5 mm (US I) and added some more repeats of Round 9 before making the last 3 rounds. It would be possible to make some more complicated increases, but I can’t give any specific advice on that. Try working the pattern through once, so you can see where the increases are placed and then work it again, adding an increase round after Round 4 (increase to 60) and then some round(s) after 8 (remember–Rounds 5-8 are increasing stitch count by 6 DC each round). The last 5 rounds are the same, so you would just need to figure out where to put the decreases that balance out the increases. Good luck!


[Download the printer-friendly version.]
Sly Fox Hat Pattern is ©2013 Lisa Gutierrez | goodknits.com
For personal use only.
Pin It
By Lisa Gutierrez on 07/31/2013 
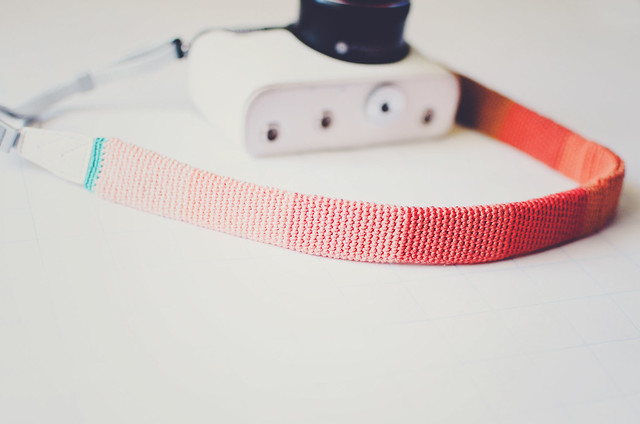
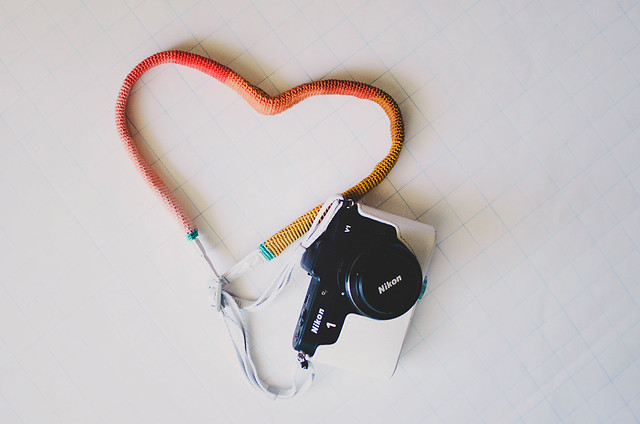
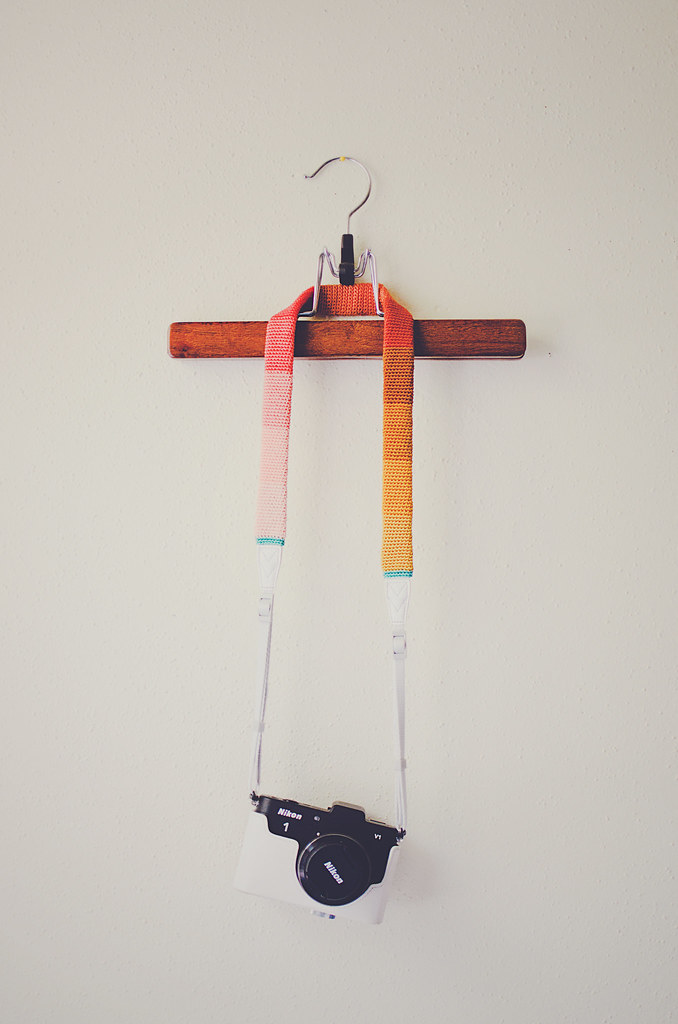
So, I’ve had my Nikon 1 for over 6 months and this is the first slipcover I’ve made for its strap. I have made slipcovers for my DSLR’s strap (see here), but the thought of having to turn a tiny, less-than-one-inch-wide, tube inside out was just not appealing. for over 6 months and this is the first slipcover I’ve made for its strap. I have made slipcovers for my DSLR’s strap (see here), but the thought of having to turn a tiny, less-than-one-inch-wide, tube inside out was just not appealing.
I’ve been doing a lot of knitting and crochet the past couple weeks for other people and yesterday I decided I needed to make something for myself. I started to feel a little run down and uninspired, so I went to Michael’s and just stared at the yarn for a while. Eventually, I was standing in front of the embroidery floss and I don’t know why, but I thought of my camera. Maybe I wished I had it with me to take a photo of the floss? I don’t know, but I started grabbing colors and I knew I was going to make a cover for my camera strap. I knew I was going to crochet one.
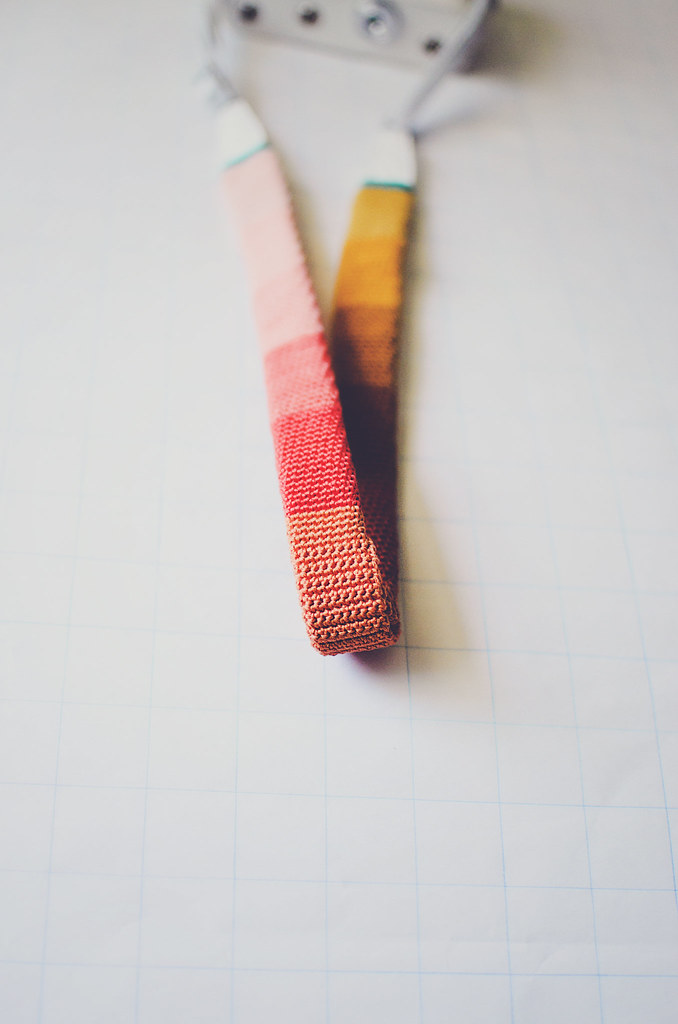
Here’s the thing– I would never crochet a camera strap. I just don’t think it would be strong enough to carry the camera’s (even my tiny V1’s) weight. I want something durable to hold my precious baby, so I trust what my camera came with. The good news is slipcovers don’t hold any weight! You can use whatever stitches you like. Heck, you could make a lace slipcover! I took a simpler approach, as I wanted the colors to shine. I made the entire thing in single crochet.
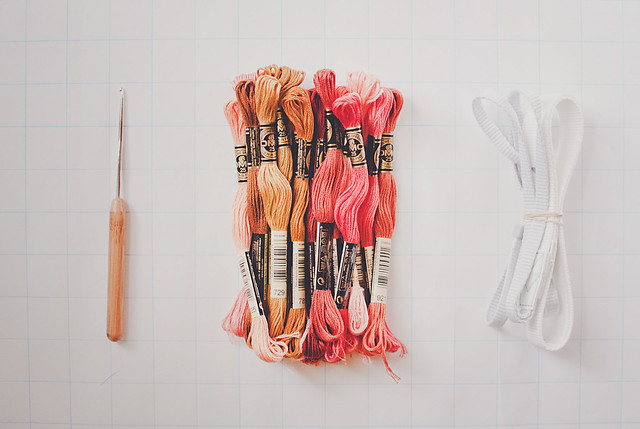
2.35mm (US 1) hook, 13 skeins of embroidery floss, and my camera strap
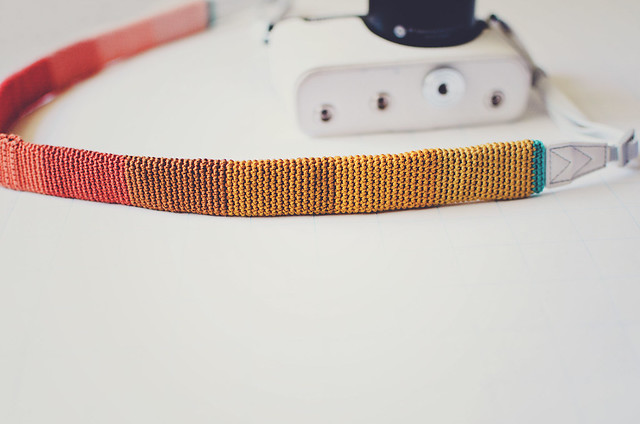

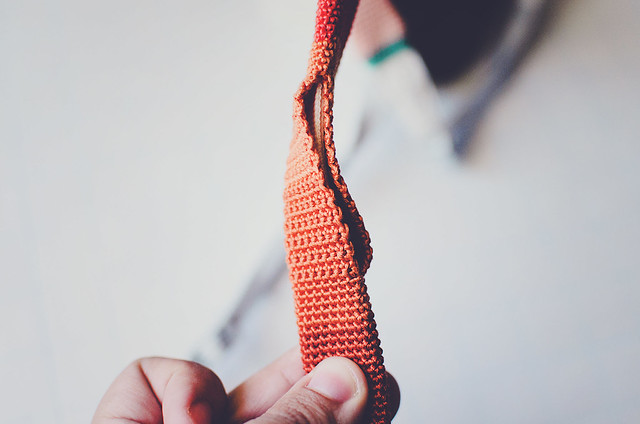
For the most part, I worked in a spiral. When I was about 1-1.5″ from the center, I started working in rows. I wanted a gap at the center to thread my strap through, so I wouldn’t have to thread it the entire length of the slipcover.
If you are making a slipcover for a Nikon 1 strap, I found 18-stitch rounds to be perfect. To figure out how many stitch you will need for a different size strap, I actually suggest swatching. I know it seems tedious, but you only need a few rows.
Work a chain to go around your strap plus a few more, then crochet 3 rows. Wrap it around your strap and then mark where it fits snugly, but still enough to move. When you have that magical stitch number, you can start your slipcover.
I chained 18, worked one ROW SC and at the end of it, I simply made my next SC into the first SC, starting my spiral (don’t join with a slst at the end of each round).
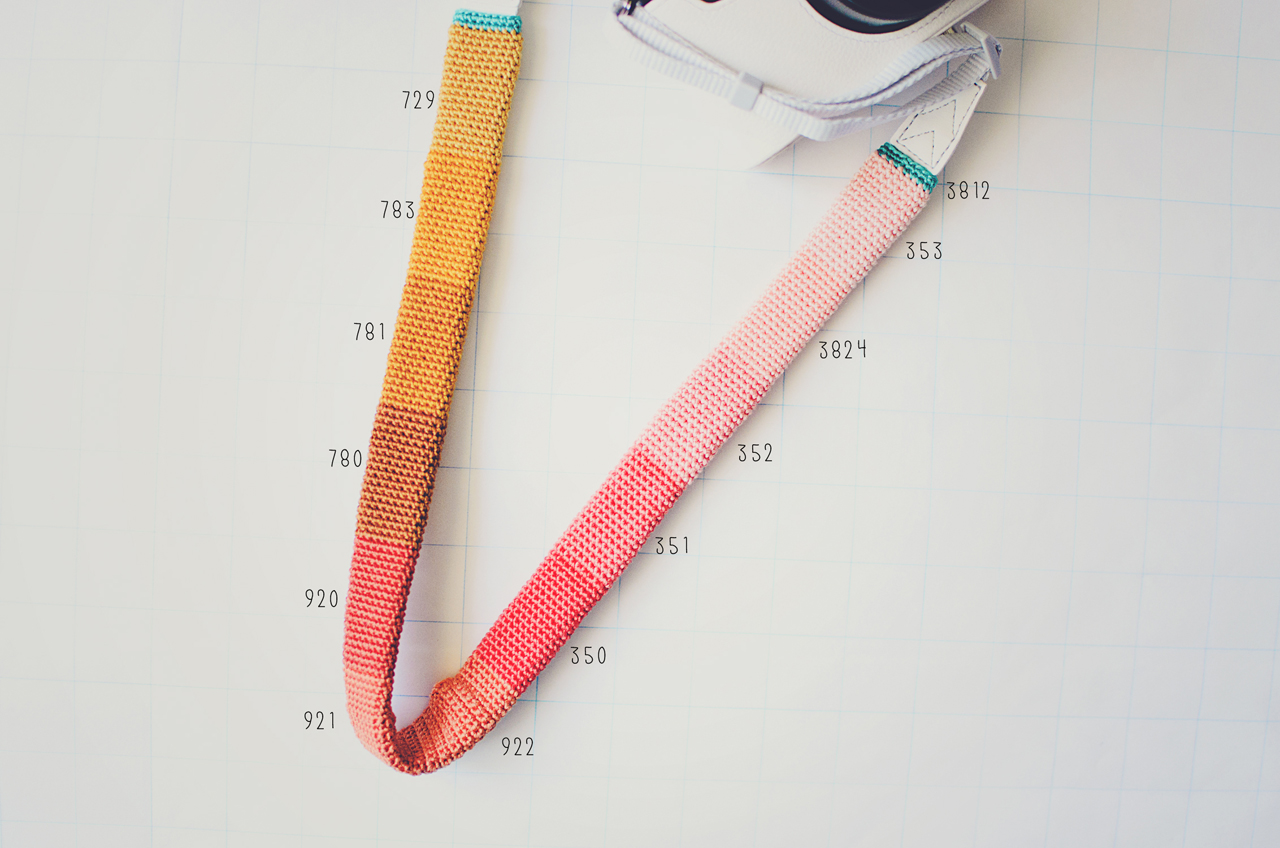
I worked each color until I ran out (I only had one of each), then I joined the next. I didn’t work to the very last inches of the color, instead I switched colors on the edge of the strap–I would lay the piece flat, pick a stitch on the edge, then work to that stitch, completing it with the new color. Working in a spiral means you won’t be changing colors in the same stitch. I crocheted over the new colors and didn’t have any ends to weave in at the end, except for the beginning and end colors. I worked 2 rows of SC in a contrasting color on each end.
If you’re interested in what colors I used, here are the DMC (25) numbers:
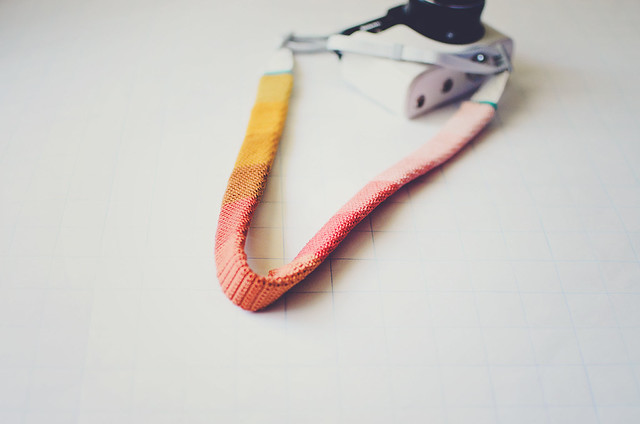
Have you made or bought any pretty camera straps or slipcovers recently?
Pin It
|
Disclosure You may find affiliate links and banners throughout my blog. I earn a small commission from purchases made through these links. It helps pay for keeping this blog running! All reviews and products are items I have personally used and loved. |


