By Lisa Gutierrez on 02/07/2015 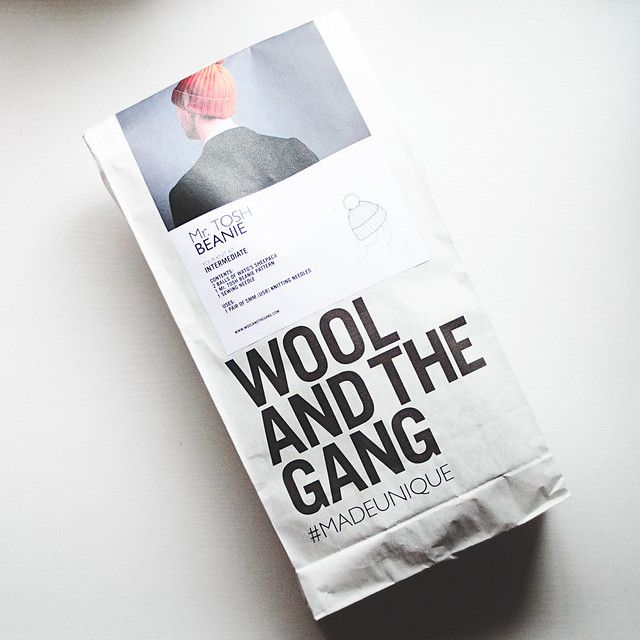
Happy Saturday, folks! For the first time in several weeks–probably since before Christmas–I have NO commitments, today. It’s so exciting to be doing nothing, so I’m here blogging. I really wanted to tell you guys about this sweet sweet kit Wool and the Gang sent me to review.
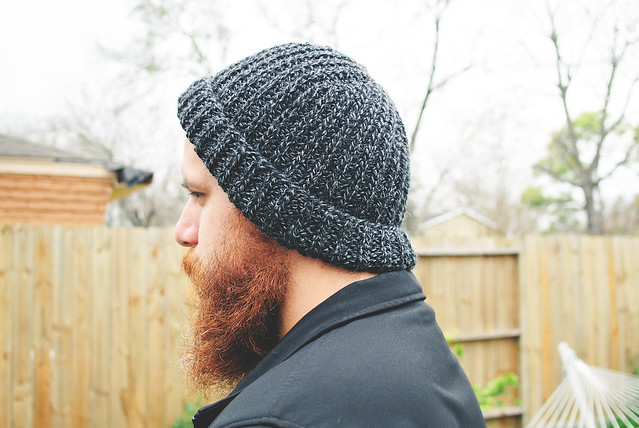
They contacted me to knit something for my Valentine. I checked out their selection of Men’s Accessories and chose the Mr. Tosh beanie and the “Shacklewell Grey” colorway. I knew the gray would be what my husband preferred. Tip: know your love’s accessory preference!
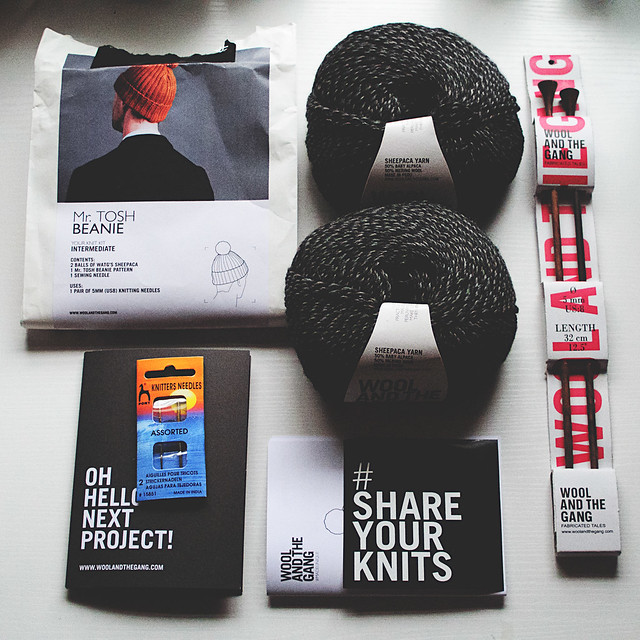
The kit came with all the amazing things you see above: yarn, pattern booklet (it contains tips for things like casting on and seaming!), knitting AND finishing needles, and a nice #shareyourknits sticker.
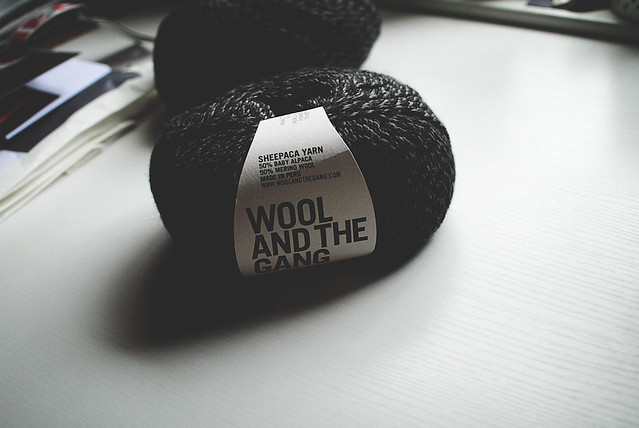
The Sheepaca yarn is 50% alpaca and 50% merino wool, so it is crazy soft! I kind of wished I were knitting a cowl, but my husband doesn’t wear cowls. I’ll probably offer to cuddle carry his hat when we go out. You can snag some Sheepaca alone, too. Check out the colors available here.
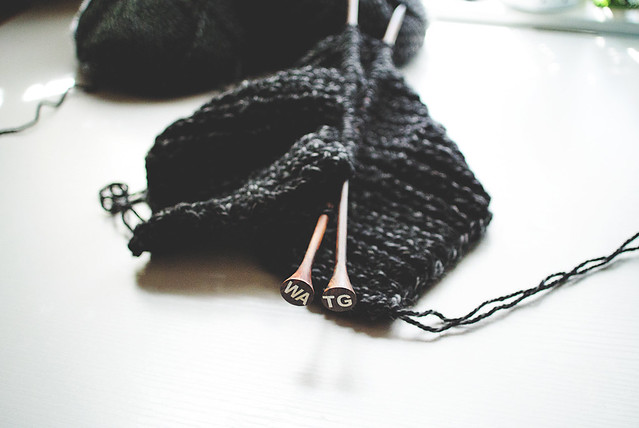
The pattern calls for straight knitting. I was a little hesitant to cast on the straight needles, but I really wanted to try out the rosewood needles. I am SO glad I did! These are so unlike the aluminum or bamboo needles I learned to knit on (and had such a hard time with!). They’re hefty, but not too heavy. The wood is smooth and my stitches glided effortlessly. It was a treat to knit with them. I didn’t once wish I had cast on a circular needle. Seaming at the end wasn’t bad, either! It’s always nice to freshen up a skill you hardly use and I was actually quite proud of my seam (see below)!

The pattern itself was very easy to follow. The booklet was helpful and I think new knitters would really like it. There are instructions for casting on (they suggest longtail, my favorite!), beginning, the stitch pattern, finishing, seaming, etc. It’s detailed, but not overwhelming.


My seam is directly to the right of the heart in the last photo. You can hardly see it! I was so proud. Tip: try out your old skills on something new, every once in a while!
The hat fit great. It matches my husband’s black jacket well and he got to wear it when the temps dropped (again), last week. Yes, I gave it to him early for the sake of the blog. Plus, he’s leaving to Vegas on the 15th, so I wanted to SEE him wear it a bit.
I’m pretty much in love with Wool and the Gang, now. The sweaters, the cowl, the purses…ah! Why don’t you knit something for your sweetie, this Valentine’s Day?
 Disclaimer: Wool and the Gang sent me the knitting kit to review. No other compensation was provided. All opinions are my own.
Pin It
Disclaimer: Wool and the Gang sent me the knitting kit to review. No other compensation was provided. All opinions are my own.
Pin It
By Lisa Gutierrez on 02/04/2013 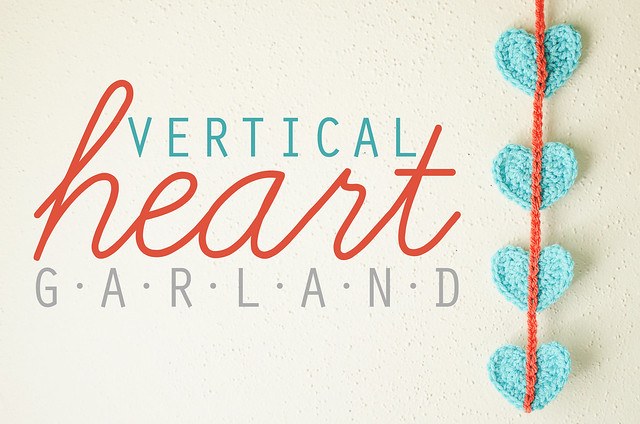
Last year, I guest-posted this tutorial on a blog that no longer seems to be active. I thought I’d re-post it here for you guys. It utilizes the 5-minute crochet heart pattern I posted HERE, but you could sub any heart. This is just a simple Valentine’s Day decoration idea. I hope you like it!

First, the “anatomy” of the 5-minute heart. The spaces at points a-d will be where you will be inserting your hook for the garland.
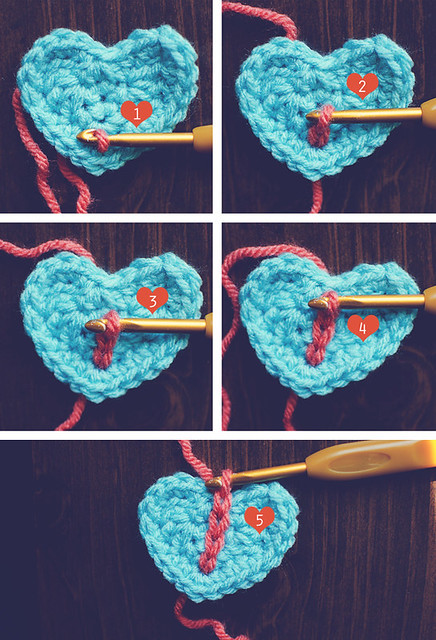
Step 1: Inset your hook into space a and pull a loop through.
Step 2: Insert your hook into space b and pull a loop through the heart and the loop on your hook.
Step 3: Insert your hook into space c and pull a loop through the heart and the loop on your hook.
Step 4: Insert your hook into the stitch at point d and pull a loop through the heart and the loop on your hook.
Step 5: Chain 1, over the top of your heart.

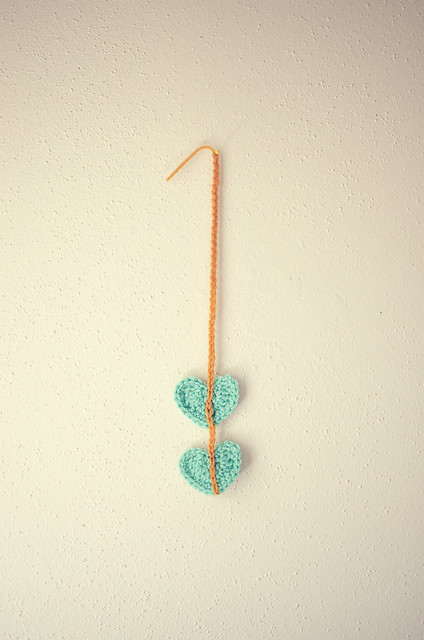
Chain 5 (or however long you would like the spaces between your hearts) and then insert your hook into space a on your next heart and pull a loop through. Repeat the steps for this heart and each subsequent heart on your garland. Mine is only 4 hearts, but you can certainly make a longer one! I’ve even used a single heart with a long chain to wrap a gift. It was SUPER sweet.

This was hung in an open window. The cool breeze had it swaying. Whatever you decide to do, have fun with it!
Pin It
By Lisa Gutierrez on 01/31/2013 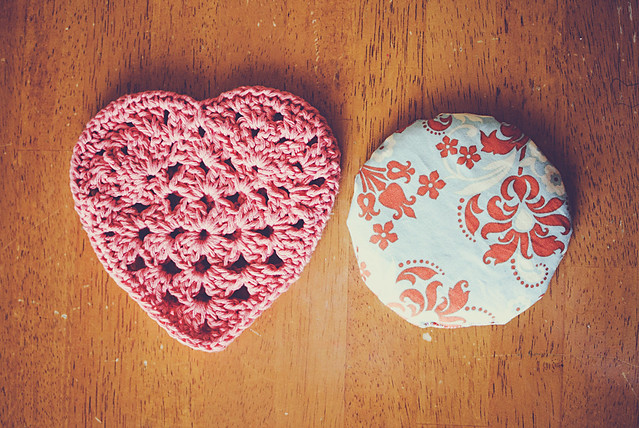
When thinking of a little something-something for my kids to gift to their teachers on Valentine’s Day, I only knew I wanted to incorporate a granny square in there. I don’t know why, I guess they were on my mind!
I scoured Ravelry for a granny square HEART (there are a lot, by the way) and fell in love with THIS pattern. It’s super easy and I made 2 in less than half an hour. I used Sugar & Cream cotton and a 6mm (J) hook. I omitted the picot edge and instead made a solid crochet round. I whip-stitched two hearts together from about the third DC-group from the corner to the exact spot on the opposite side. You’re leaving a space to put the rice pack in.
I waited until I got the hearts sewn to make the rice packs. I found something circular that was about the right size (a CD?) to use as my pattern and then I just traced it on the back of some pretty fabric. Sew two layers together, leaving an inch open, funnel in some rice, then whip-stitch the hole.
I’m going to include a little card with some general rice pack instructions.
Are you getting your Valentine craft on? It’s one of my favorite times to be crafty. I love hearts!
Pin It
By Lisa Gutierrez on 02/07/2012 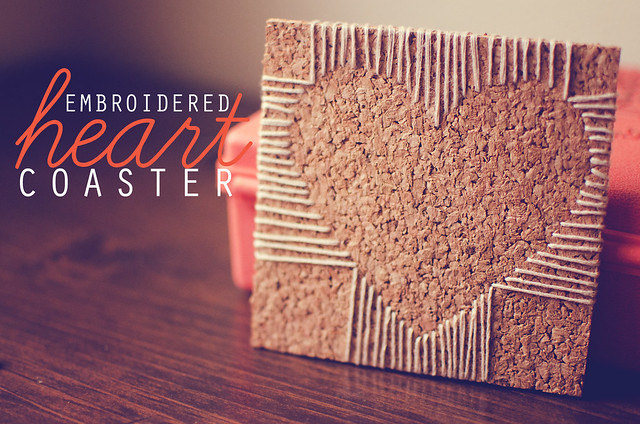
I made heart shaped coasters, but you could switch out the shape with whatever you like. You could give THESE away as Valentines! They’re fairly quick to complete and easy peasy.
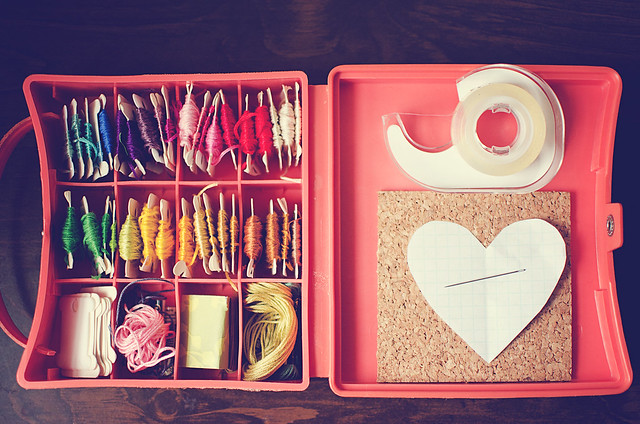
Materials
embroidery floss
a needle
double-sided tape
4″ x 4″ cork coaster (I bought 12″ x 12″ tiles and cut them up. 9 per tile!) and cut them up. 9 per tile!)
heart shape to fit your tile
not shown:
ruler, pencil

1. Adhere your heart to your coaster with a small piece of tape. Mark the “corners” of the heart by placing a ruler across the tile diagonally and making small marks on the edges.
2. Working with a LONG piece of floss (leave the non-working tail connected to the rest of your floss), insert the needle at the bottom tip of the heart, from front to back.
3. Bring the floss back over and insert about 1/8″ from first spot. Continue bringing the floss to the front and stitching at evenly-spaced (as even as you can muster) intervals along the edge of your heart.

4. When you get to a corner, stitch in the spot, then come up along the adjacent edge and stitch into the same space.
5. Continue stitching along this side until you get to the next corner. Stitch into that space, bring the floss back over along the adjacent edge and stitch into the same spot. Continue stitching until you run out of floss. If you get back to the beginning, stitch into the first spot, then knot the ends together and weave them under the stitches on the back. You’re done!
If you run out of floss, follow steps 6-7:
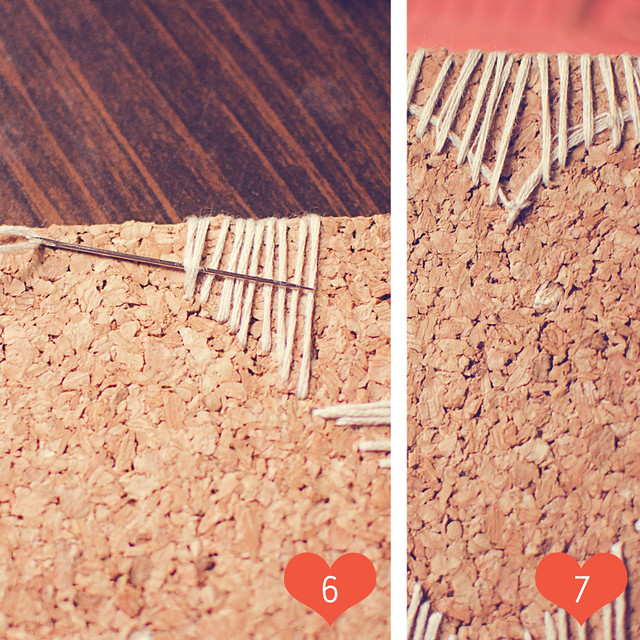
6. Cut a long piece of floss from your non-working end and re-thread your needle with it. ON THE BACK of the coaster, bring the now working thread through the first two or so stitches, then start embroidering up the side, the same way you did the first half of the coaster.
7. When you get to your original thread, knot the ends together and weave them under the stitches on the back. Now, you’re done!
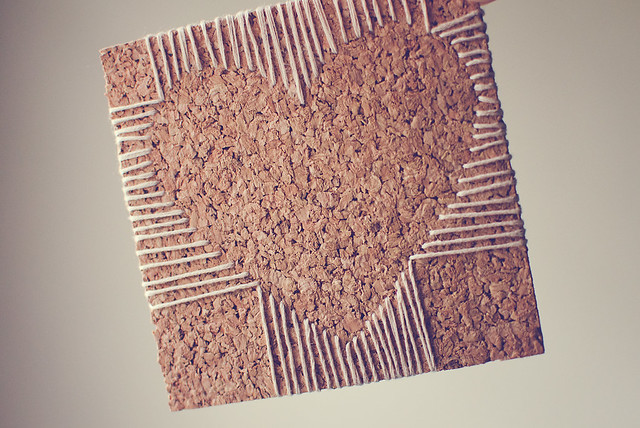
Like I said above, use them as coasters or little pieces of art! You could use this same method to embroider on cardstock to make a lovely Valentine’s Day card. I’m going to make some for my boys!
Pin It
By Lisa Gutierrez on 01/18/2012 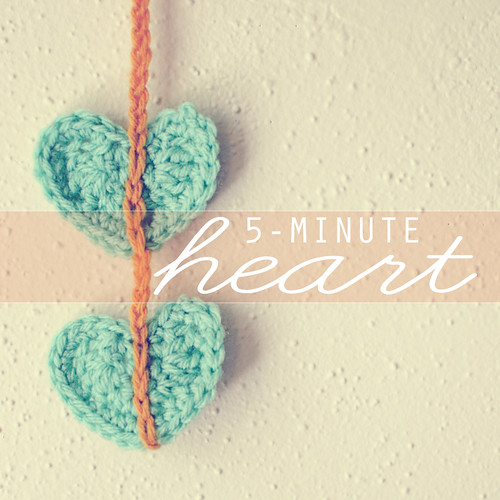
Valentine’s Day is a few weeks away, so why not start adorning your house (self, bags, books, etc) with hearts? This is a super quick 3 row pattern that you can probably complete in under 5 minutes. String them up garland-style, or add a safety pin to the back and have yourself a brooch. I chain stitched some together to make a vertical garland. Love!
Materials
worsted weight yarn
5mm (H) hook
Abbreviations (U.S. terms)
Ch- chain
SC- single crochet
DC – double crochet
slst- slip stitch
sk- skip
st- stitch
Pattern
Ch 4
Row 1: 1 SC in second ch from hook, 3 SC in next ch, 1 SC in last ch. Ch 3, turn.
Row 2: 3 DC in first st, 1 SC in next st, 3 SC in next st, 1 SC in next st, 4 DC in last st. Ch 1, DO NOT TURN.
Edge: 2 SC in first half of the side of last DC, 1 SC in next half, SC the first and last ch of the beginning chain together, 1 SC in the first ch of beg ch-3 of Row 2, 2 SC in next ch, 2 SC in last ch, 2 SC in first DC, 1 SC in each of the next 4 stitches, 3 SC in the “corner stitch”, 1 SC in each of the next 4 stitches, 2 SC in last DC. Slst to top of first SC. Fasten off.
The edge can seem a little confusing, so I made this video–
Crochet Heart Edge from Lisa Gutierrez on Vimeo.
This is the very first time I’ve made a crochet video. To be completely honest…I LOVED IT. It was awkward at first and pretty difficult to get focus, but I think I might make more for future projects. I found the music on Vimeo and it’s called “Instrumental salad” by Marlo Eggplant (www.myspace.com/marloeggplantmusic).
I used Windows Movie Maker to create this video. Any tips for newbies? I didn’t realize there were black edges on the sides until after. I expected the bars on top, but not the sides. I’ll have to figure out what those are next time.
Let me know what you think about goodknits videos!

 Pin It
|
Disclosure You may find affiliate links and banners throughout my blog. I earn a small commission from purchases made through these links. It helps pay for keeping this blog running! All reviews and products are items I have personally used and loved. |


