
October is here! I love October because it means that MAYBE cool weather is on its way to Houston. Probably not, but a girl can dream, right? October also means it’s costume time! Last year, I composed two sweet costumes for my boys’ book character parade (see here) at school.
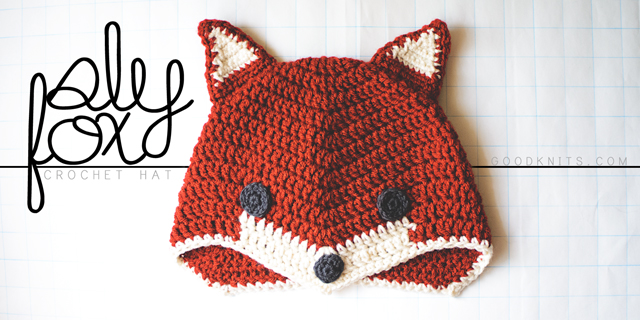
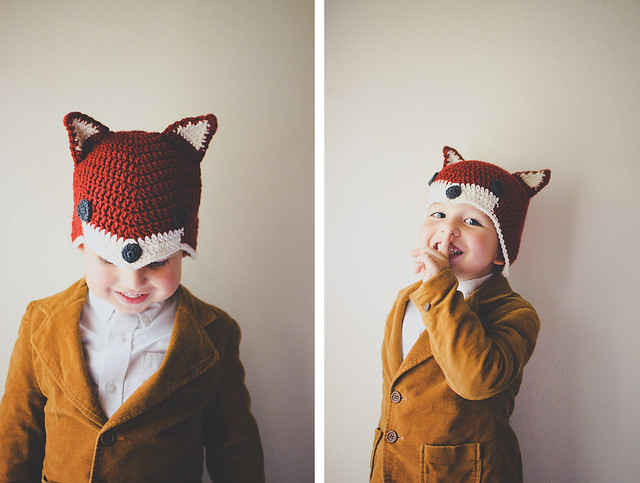
Combine cool weather and costumes and you get…animal hat! Specifically, a sly little fox hat.
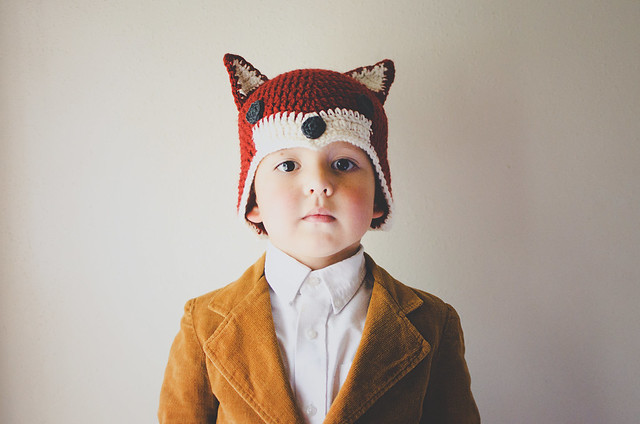
It features some interesting shaping to create the point at the front and long sides to cover the ears. It is definitely inspired by Ganomy, which, if you’ve been reading long, is my favorite knit hat pattern. This crochet hat is worked from the top down, though, and, like I said, has a point at the front. Instead of two sets of increases and decreases, there eventually are three. I hope you guys like it! I’ll put some notes at the END with suggestions for changing the size. Please read through before asking questions! Have fun!
Materials
1 skein Vanna’s Choice in brick or other worsted weight yarn in a foxy color
Small amount of white and dark gray yarn in same weight
5 mm (US H) crochet hook
4 mm (US G) crochet hook
yarn needle
NOTES
Abbreviations (U.S. terminology)
Ch: chain
DC: double crochet
slst: slip stitch
sp: space
rep: repeat
DC2tog: DC 2 together
SC: single crochet
SC2tog: SC 2 together
Gauge
About 3.5 DC and 1.5 rounds per inch with larger hook.
Each beginning ch-3 counts as 1 stitch.
Pattern
HAT
With large hook, Ch 3, 11 DC into a magic circle. Cinch circle shut. Slst into top of beginning (beg) ch-3. (12)
Round 2: Ch 3, 1 DC in same sp, 2 DC in each st, slst to top of beg ch-3. (24)
Round 3: Ch 3, 2 DC in next st, *1 DC in next st, 2 DC in next st; Rep from * around, slst to top of beg ch-3. (36)
Round 4: Ch 3, 1 DC in next st, 2 DC in next st, *1 DC in next 2 sts, 2 DC in next st; Rep from * around, slst to top of beg ch-3. (48)
Round 5: Ch 3, DC in next 7 sts, [3 DC in next st, DC in next 15 sts] twice, 3 DC in next st, DC in last 7 sts, slst to top of beg ch-3. (54)
Round 6: Ch 3, DC in next 8 sts, [3 DC in next st, DC in next 17 sts] twice, 3 DC in next st, DC in last 8 sts, slst to top of beg ch-3. (60)
Round 7: Ch 3, DC in next 9 sts, [3 DC in next st, DC in next 19 sts] twice, 3 DC in next st, DC in last 9 sts, slst to top of beg ch-3. (66)
Round 8: Ch 3, DC in next 10 sts, [3 DC in next st, DC in next 21 sts] twice, 3 DC in next st, DC in last 10 sts, slst to top of beg ch-3. (72)
Round 9: Ch 3, DC2tog, DC in next 9 sts, [3 DC in next st, DC in next 9 sts, DC2tog, DC in next st, DC2tog, DC in next 9 sts] twice, 3 DC in next st, DC in next 9 sts, DC2tog, slst to top of beg ch-3. (72)
Rounds 10-11: Repeat Round 9. (72)
Round 12-13: Repeat Round 9, but switch to white after the third decrease and work with that yarn, carrying the MC, to the stitch before the next decrease. You will have to attach the new color every round. Finish the round in the main color, attach white at the end.
Round 14: SC around in white, making [1 SC, ch 2, 1 SC] in the center DC of the increases of the previous round, slst to first SC. Fasten off. Weave in ends.
————————–
Ears
Note: the ears are made up of two pieces each– a solid piece in the MC of the hat and a piece that is white + the MC.
Make 2 solid pieces for the back of the ears
Ch 10
Row 1: SC in second chain from hook and each of the rest. Ch 1, turn. (9)
Row 2: SC2tog, SC 5, SC2tog. Ch 1, turn. (7)
Row 3: SC in each st. Ch 1, turn. (7)
Row 4: SC2tog, SC 3, SC2tog. Ch 1, turn. (5)
Row 5: SC in each st. Ch 1, turn. (5)
Row 6: SC2tog, SC in next st, SC2tog. Ch 1, turn. (3)
Row 7: SC in each st. Ch 1, turn. (3)
Row 8: SC2tog, SC in next st. Ch 1, turn. (2)
Row 9: SC2tog. (1)
Ch 1, SC 9 down the side of the triangle. At bottom corner, ch 3, then turn triangle clockwise to work across the beginning chain, SC 9 to next corner, Ch 3, then SC 9 back to top of the triangle. SC in the sc2tog stitch from last row, ch 3, SC in same st, slst to first of the SC you made down the side of the triangle. Fasten off.
Make 2 pieces for the front of the ears.
Work pattern as above, but switch to white for Rows 2-9. Switch back to main color after last SC2tog and work border in MC. Leave a long tail at the end of these pieces.
Stitch a front and back together, then sew in place on your hat.
————————–
Eyes & Nose
With smaller hook, make 6 SC into a magic loop. Cinch loop shut. Slst to first SC.
Round 2: Ch 1, 2 SC into same space and each stitch, slst to first SC. Fasten off, leaving a 12-18″ tail for attaching. (12)
For Eyes only
Slst into each st.
Sew eyes and nose in place with tail yarn.


Notes on size
As-is, the pattern fits a child size heads. My son is 5, but his head is about the same size as his 8 year old brother. For a larger hat, I increased my hook to a 5.5 mm (US I) and added some more repeats of Round 9 before making the last 3 rounds. It would be possible to make some more complicated increases, but I can’t give any specific advice on that. Try working the pattern through once, so you can see where the increases are placed and then work it again, adding an increase round after Round 4 (increase to 60) and then some round(s) after 8 (remember–Rounds 5-8 are increasing stitch count by 6 DC each round). The last 5 rounds are the same, so you would just need to figure out where to put the decreases that balance out the increases. Good luck!


[Download the printer-friendly version.]
Sly Fox Hat Pattern is ©2013 Lisa Gutierrez | goodknits.com
For personal use only.


