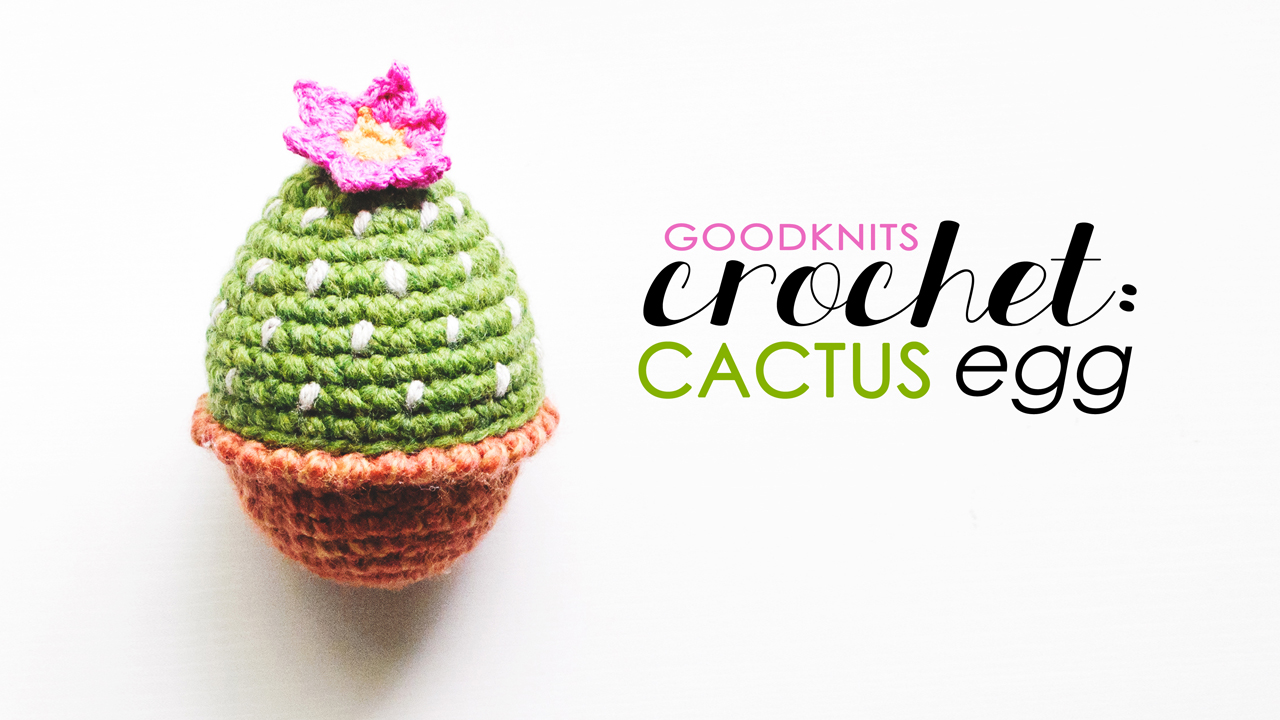
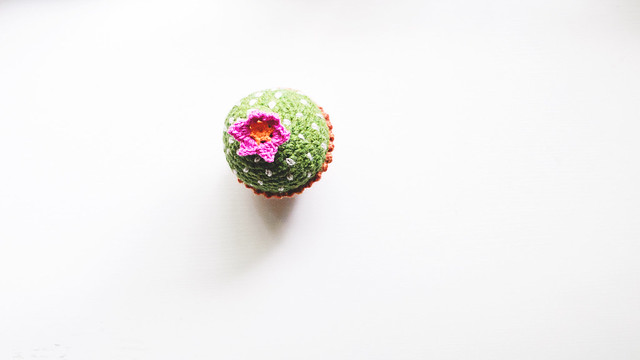
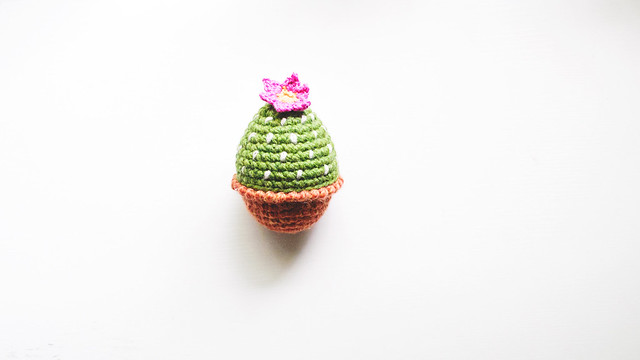
It isn’t a secret that I love crocheting these eggs. It also isn’t a secret that I love succulents and cacti! A few weeks ago, when the eggs started appearing at my local Target, I thought–why not combine the these two loves of mine? What resulted was this adorable cactus egg! I added a little flower to the top because those are my favorites. As always, you are able to fill these with treats for your little (or big) Easter egg hunters.
Do you wanna make one? There’s only a few days left til Easter, but I bet you can grow a little cactus egg collection by then!
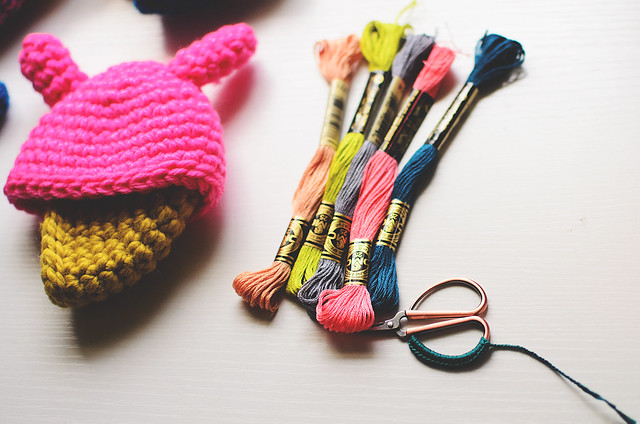
Check out the pattern VIDEO I made, below. I learned how to make a stop motion video for this! Huzzah!
Stitch abbreviations & skills used
SC – single crochet
DC – double crochet
slst – slip stitch
ch- chain
st- stitch
magic loop
working in the round with and without joining rounds
picot – chain 2 size
The pattern is almost identical to the Bunny Food eggs pattern I shared, last year. The only difference is I did not work into the back loops only, so I had to adjust the height. The baby saguaro that makes an appearance at the end is made with two strands of worsted weight yarn and the pattern was adjusted accordingly. I added his little arms by working tubes that ended with some short rows, so they pointed upward when sewn on. I had to break out my Dremel to make holes in my egg for the plastic safety eyes. Labor of love, for sure!
Things to remember:
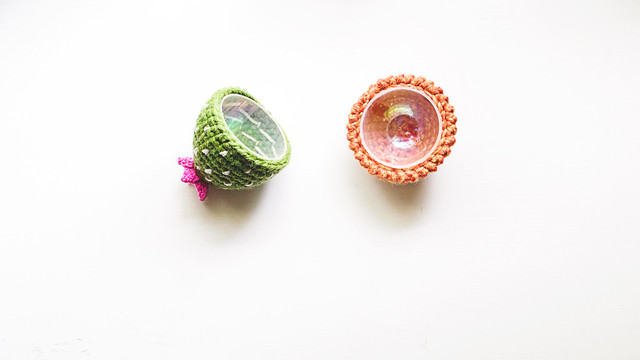
-Sew all pieces on before gluing!
-The crochet fabric is attached after with hot glue. I suggest starting at the top, then working slowly as you go down, stretching the fabric over the egg, until it completely (and evenly!) covered.
-When gluing, try not to let any fabric get stuck over the edge of the egg. If you have a glue mishap, let it cool, then pick it off with a needle.
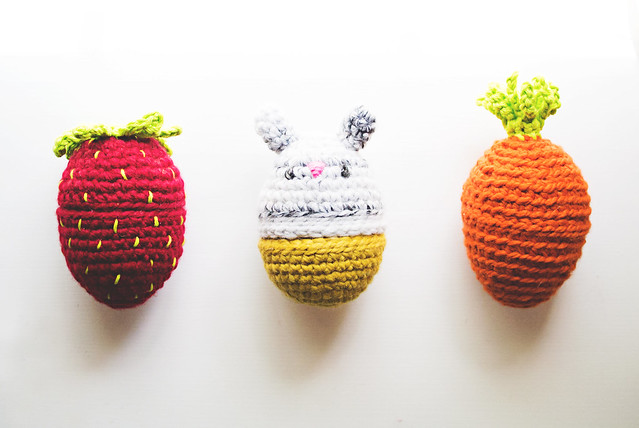
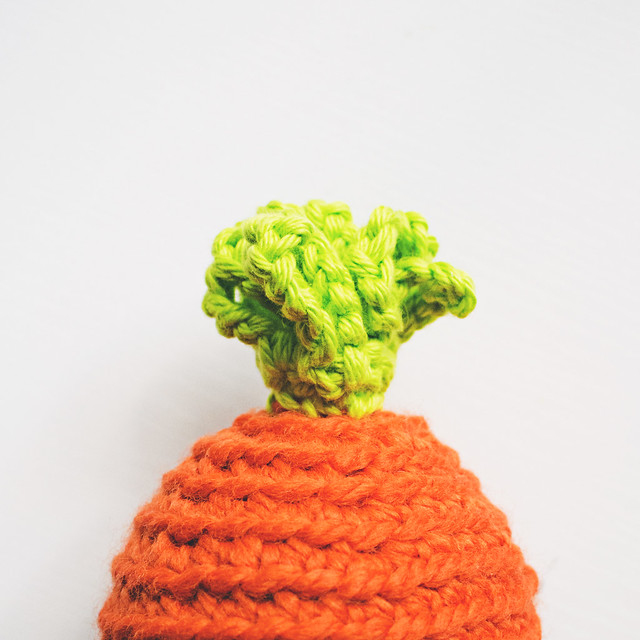
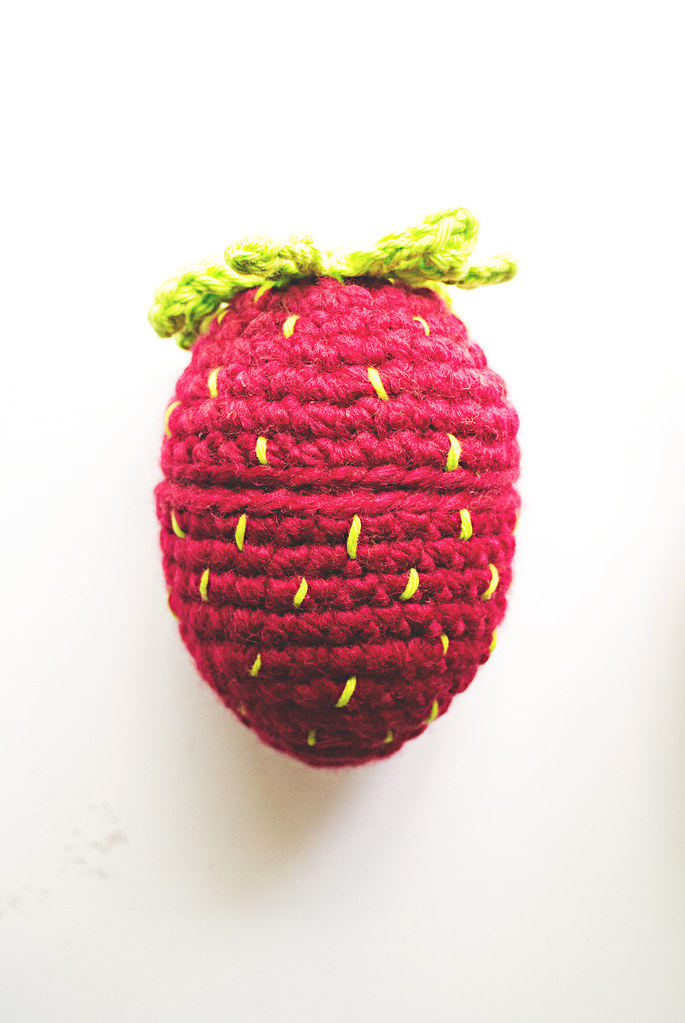
Last Easter, I made a fluffle of amigurumi bunny eggs for my favorite kiddos. This year, I’m branching out into bunny food–carrots and strawberries! They’re little amigurumi crocheted and glued onto Easter eggs. You can fill them with whatever treats your tiny humans might want.
The perfect eggs for these amigurumi are from Target. The plastic feels a little thicker, so I feel like they’ll last longer, and they’re a great size! They’re large Spritz brand eggs and come in a pack of three. I may have a bag full of them under my desk, right now.
My favorite orange for carrots are bulky yarns from Lion Brand, specifically Hometown USA in “Syracuse Orange” and Wool-Ease Thick & Quick in “pumpkin”. For the strawberry, I used Wool-Ease T&Q in “cranberry”. My hook for both was a 6 mm (US J). The green tops on both is worsted weight cotton held double. Use your favorite shade!
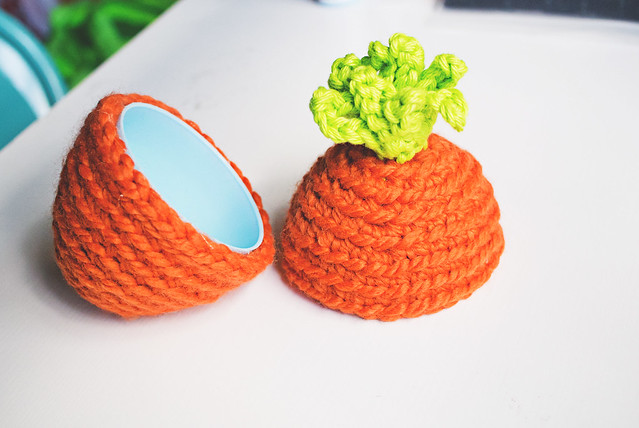
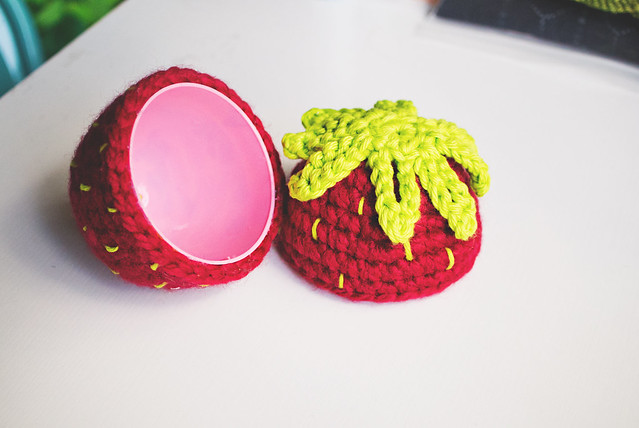
The “body” of the egg for both is pretty much the same. Start with a magic loop and do NOT connect at the end of the rounds. Place the cover on the egg part as you go, to ensure the fit. Add a stitch or two, if it’s too small. If it’s too big, skip an increase. Remember you will be gluing, at the end, so it doesn’t have to be perfect, but it should be able to cover the egg with minimal stretch or scrunch. Here’s the pattern I use:
Work in the back loops only for the carrot. Egg Top Round 1: 6 SC into ring Round 2: 2 SC into each st (12 SC) Round 3: [SC into 3, 2 SC into next] 3 times (15 SC) Round 4: [SC into 2, 2 SC into next] 5 times (20 SC) Round 5: [SC into 4, 2 SC into next] 4 times (24 SC) Round 6: [SC into 3, 2 SC into next] 6 times (30 SC) Round 7-9: SC into each st (30 SC) Round 10: slst into each st (30 slst)
Fasten off. If working the strawberry, you may need to make round 10 SC instead of slst.
Egg Bottom Round 1: 6 SC into ring Round 2: 2 SC into each st (12 SC) Round 3: [SC into next, 2 SC into next] 6 times (18 SC) Round 4: SC into each st (18 SC) Round 5: [SC into 2, 2 SC into next] 6 times (24 SC) Round 6: [SC into 3, 2 SC into next] 6 times (30 SC) Round 7-8: SC into each st (30 SC)
Fruit tops
Using 2 strands of worsted, or a single of bulky Round 1: Ch 1, 8 HDC into ring, slst to top of first HDC Round 2: [Ch 8, slst into third ch from hook, Ch 4, slst into same HDC], *slst into next HDC, rep from [ to ]; repeat from * for 8 chain loops total, slst to first st. Fasten off, leaving long tail for sewing.
If making a carrot top, weave tail through the loops, and cinch it together, so the loops stand up. Sew onto egg bottom. For strawberry, sew the solid hdc circle onto egg bottom, leaving leaves free.
Use the green yarn to embroider strawberry seeds all over, before gluing.
Use hot glue to attach your pieces to your eggs. Start with the tips and work your way around and down. Be careful and don’t sacrifice any finger tips for perfection!
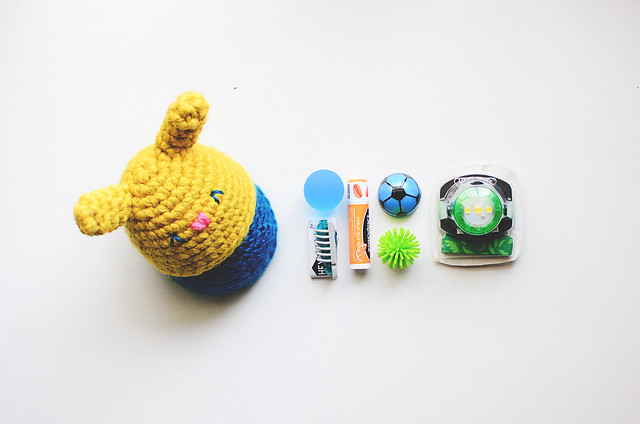
Fill eggs to your heart’s desire.
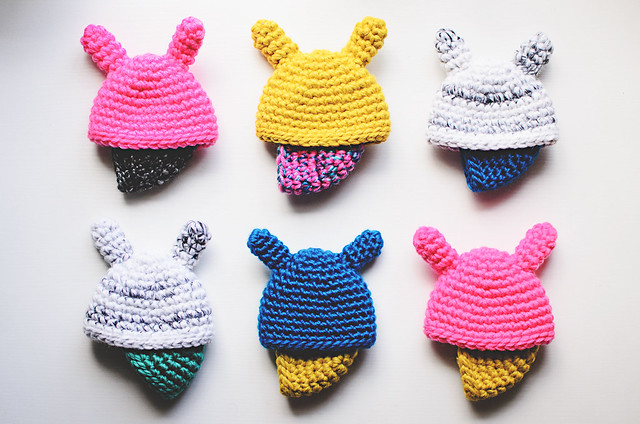
If you want to make a bunny with this thicker yarn, use the same pattern for the strawberry body and then add some ears. Mine were super simple, start with 5 SC in a ring, increase to 10, then to 15 and work for however long you like. Fasten off, leaving a longish tail to sew onto your egg top. Sew the ears and embroider the face before you glue! Let me know if you make any!
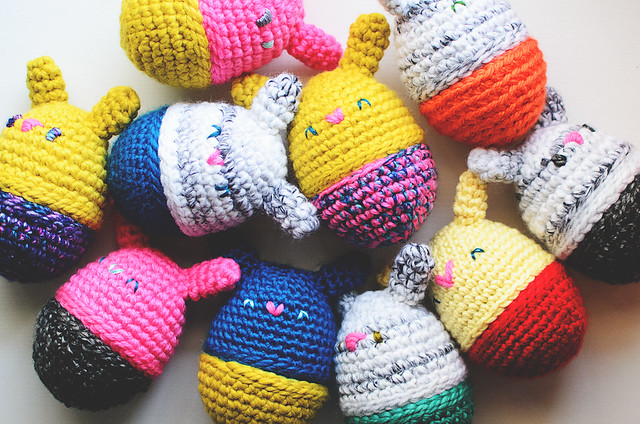
I realize it’s been a few weeks since Easter, but I couldn’t let the month of April finish without sharing my crochet bunny egg photos.
I made these using various shaded of Lion Brand’s Wool-Ease Thick & Quick, Homespun, and combinations of worsted weight scraps. I found the perfect 3.5″ Easter egg, which is a little bit bigger than the normal jumbo eggs, but smaller than the mega eggs. I was able to fit quite a bit of loot in each one. I made 10 different ones for my kids and my cousin’s kids. Pretty much all of the kids I saw on Easter got a bunny egg.
Hey there! I got locked out of my own darn dashboard and had to wait til my IT guy (aka husband) got around to resolving some server issues. All is well, so I’m here today to share my favorite (okay, ONLY) amigurumi of 2015.
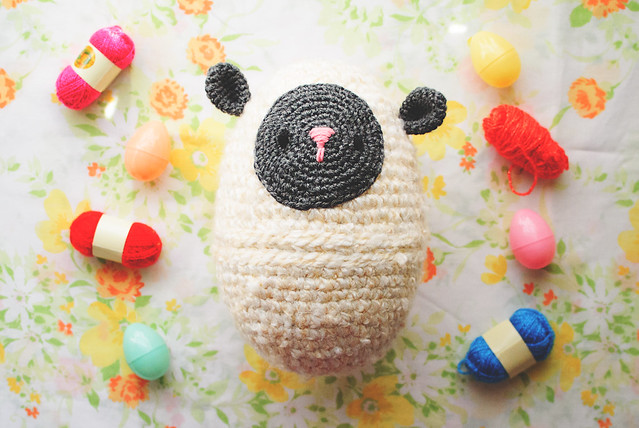
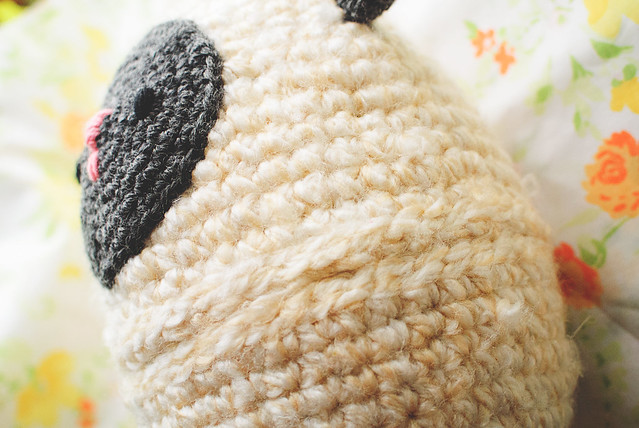
He’s a variation of the Bunny Egg Amigurumi I shared a few years ago. Those were cute as heck, but I saw MEGA Easter eggs at the store and KNEW I needed to crochet them into adorable little animals. A few days later, I had my first egg of lamb.
First off, I used thicker yarn and a larger hook. I suggest something more textured, like Lion Brand’s Homespun Thick & Quick, or what I used: Loops & Threads Country Loom (“warm white” from Michael’s). I used a 6 mm (US 10/J) hook. It’s bigger than we normally use for amigurumi, but smaller than what is called for these yarns. You still want tighter stitches for the amigurumis! Less than one skein of Country Loom made the little lamb.
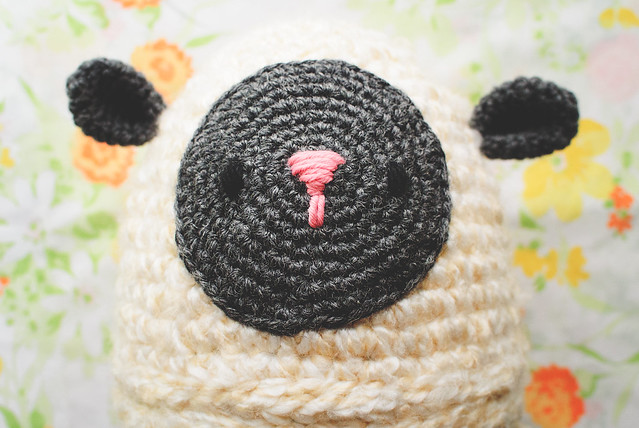
For the face and ears, I used a 4.5 mm (US 6/G) hook and worsted weight yarn from my scrap bucket, so I’m not sure the brand.
My egg is 8″ in diameter, so there were some adjustments to the pattern. Below, I have listed my stitch counts per round. My increases were made evenly, without joining, using a stitch marker to keep track. I suggest starting each piece with a magic loop.
EGG BOTTOM
Round 1: 6 SC
R 2: 12
R 3: 18
R 4: 24
R 5: 30
R 6: 30
R 7: 36
R 8: 42
R 9-12: 42
R 13: 48
R 14: 48
R 15: slst 48, fasten off and weave in ends.
EGG TOP
Round 1: 6 SC
R 2: 12
R 3: 18
R 4: 24
R 5: 24
R 6: 30
R 7-8: 30
R 9: 36
R 10: 42
R 11-13: 42
R 14: 48
R 15-16: 48
R 17: slst 48, fasten off and weave in ends.
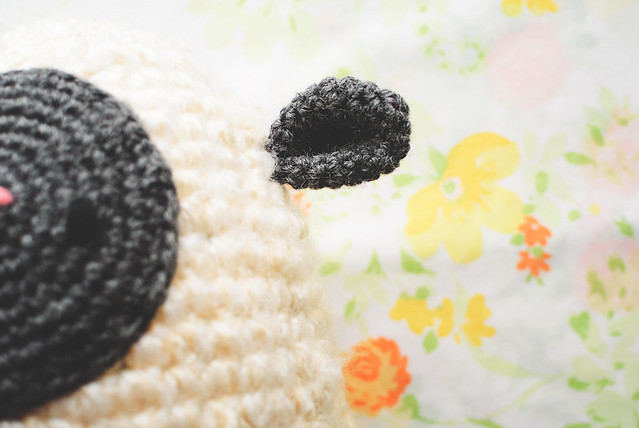
LAMB EARS (make 2)
Round 1: 5 SC
R 2: 10
R 3: 15
R 4-9: 15, fasten off, leaving at least 18″ of tail. Flatten ear and fold bottom in half when sewing in place.
LAMB FACE
His little face is a simple circle made to 54 stitches. I started with 6 in a magic loop and increased by 6 for 9 rounds. I moved the increases around a bit, so it was more circular instead of a hexagon.
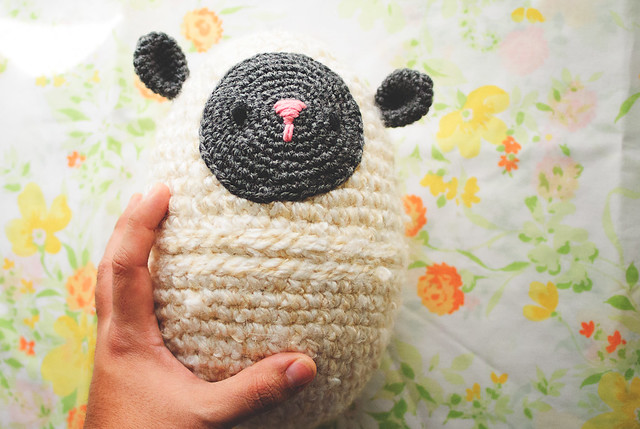
I stitched the face onto the circle, then sewed the circle and his ears onto the top piece before hot gluing it onto my egg. I lined up the top of my crochet piece with the top of the egg and glued it first. I then slowly added bits of glue down to the edge and firmly attached the crochet. Keep the egg pieces separate while gluing, so you don’t accidentally glue them together! You wanna fill it with goodies, right?
You can fill your egg with yarn! Give it to a fellow yarny friend. You can also fit WHOLE candy bars into it, if that’s your style. What would you put in yours??
P.S. The MEGA eggs come in three sizes, 8″, 12″, and 16″. I was curious to see what the 16″ looked like, so I made a mama:
It’s cute, but it’s difficult to open and close, so…pretty much useless. It works as a wonderful decoration, though! You could fit a lot of yarn in there, hmm?
I got the urge to make something cute, the other day. I remembered I put away a big box of Easter eggs and what’s cuter than amigurumi? Let’s make some bunny eggs! But wait…where did I pack them up? Apparently NOT where I thought. After looking for the box for about an hour, I had them in my hands.
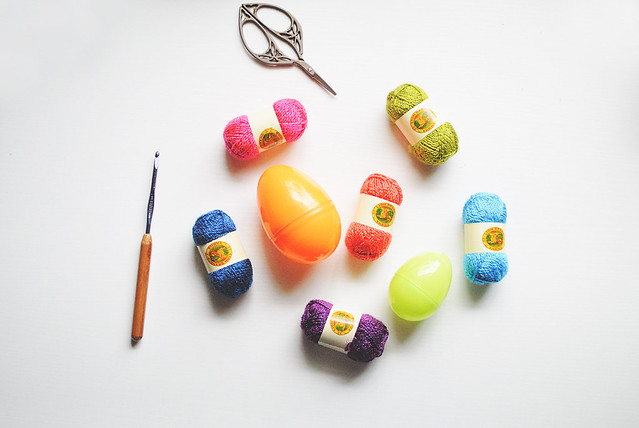
Last year, I posted the Amigurumi Bunny Egg pattern. It’s made with worsted weight yarn and a 3.75mm (US F) hook. I wanted to make a smaller egg, so I used some Lion Brand Bonbons (affiliate link) and adjusted my hook size down to a 2.75mm (US C). I had to add at least 2 rounds to each part, but the rest of the pattern worked well with these changes!
How cute is that mini egg? My kiddo already claimed it. As you can see, I’m STILL trying to figure out how to embroider the face nicely. All my bunnies look different!
I love that these eggs are fill-able. I can put candy in them and hide them during out egg hunt!
Are you crafting for Easter? Tell me about your projects! Links to blogs, if ya have ’em. I want to browse, this weekend!
You may find affiliate links and banners throughout my blog. I earn a small commission from purchases made through these links. It helps pay for keeping this blog running! All reviews and products are items I have personally used and loved.


