Crochet & Leather: in the shop!

little purse

Say hello to the newest items in the shop. I am so in love with these tiny frames and the little crochet & leather bits. I’m dreaming up some new color combinations and planning my next trip to the leather store because their scrap bin is pretty sweet. For now, there are only four little purses available. Enjoy 15% off your order with the coupon code GOODSUMMER.

chomp

p2

purses

Pin It

Tutorial: Crochet + Leather

cnl

This is a quick tutorial showing the steps I took to crochet on to leather. If you use felt or other fabric, you can skip steps 1 & 2, because those are preparing the leather for stitching. I tried making this with just a needle and hammer and it killed my fingertips.

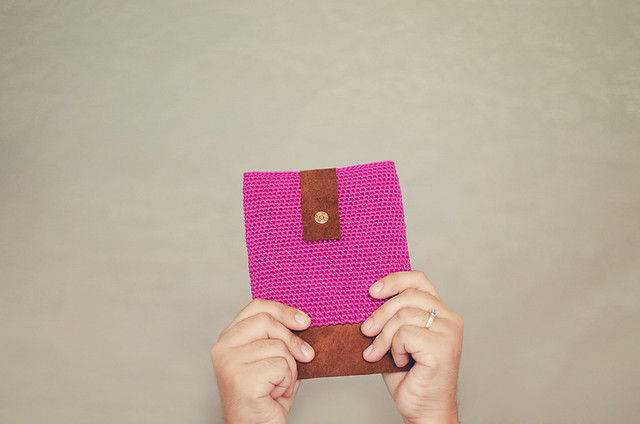
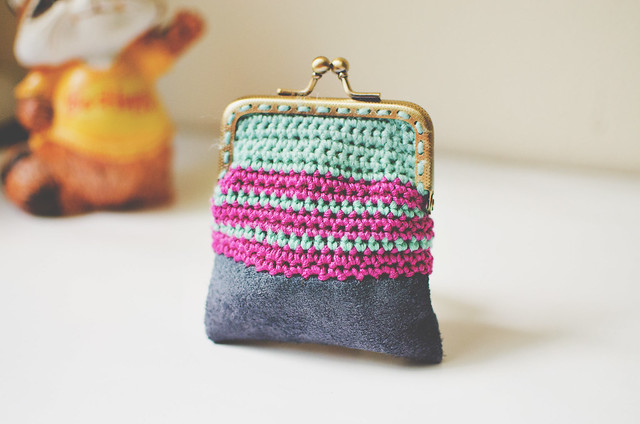
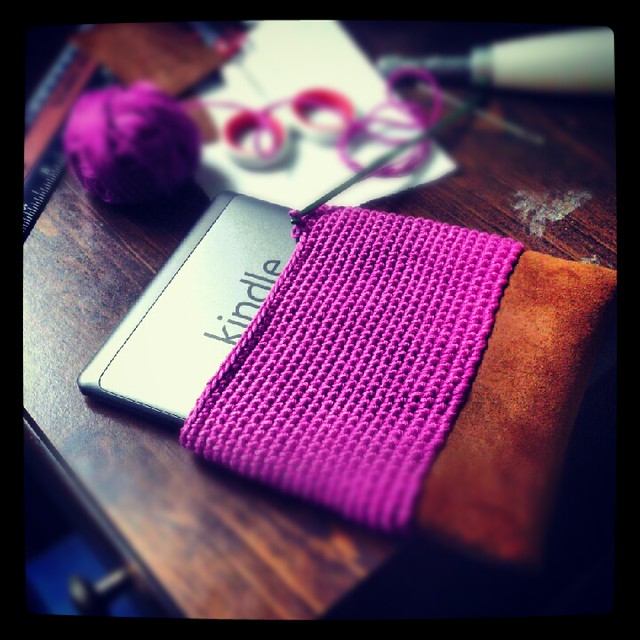
You can use this tutorial for general projects that you want to add some leather to the bottom. Perhaps a wallet or clutch or go big and make a sleeve for your tablet. For brevity’s sake, I’m going to use my Kindle as a guide.

The Kindle is about 4.5″ wide and 6.5″ tall with about a .5″ thickness. My case is 5.5″ wide and 7″ tall, measured flat. I used a piece of leather that was 4″ x 6″.

PREPARING LEATHER FOR STITCHES

steps1-2

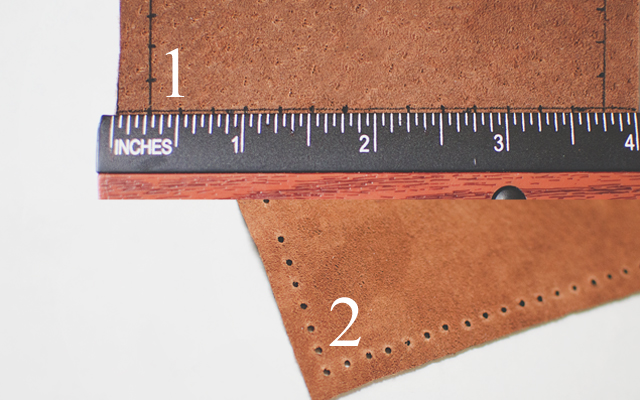
1. Using a fine tip Sharpie and a ruler, mark your stitch line straight across each side 1/4″ in from the edge. Make your stitch marks 1/4″ from each other, as well. On the short side, omit the very center mark (notice that the 2 on the ruler does not have a notch marked).
2. Make your stitch holes. My husband said when he worked with leather in the past, they would use a hammer + nail to make the holes. I tried using a thick needle and it made my fingertips raw. I looked up leather punches and almost purchased one online when I remembered this rarely used* tool in my crafty arsenal–my Martha Stewart screw punch! I used the 1/8″ tip and punched my holes in just a few minutes.

SEW SIDE SEAMS

steps3-4

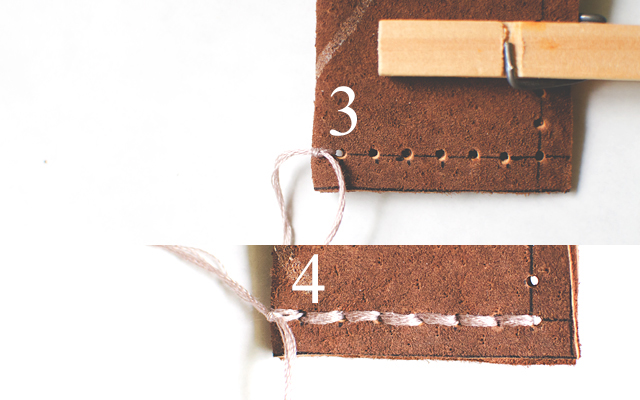
3. Fold your leather in half, right sides together. Attach some embroidery floss (or thread of choice) by pulling it through the hole closest to the fold. Leave a 2″ tail and tie a [tight] knot.
4. Sew up the small seam, making sure to pull tight. Don’t pull tight enough to warp the fabric, but you also don’t want your stitches to be THAT visible when you turn it right side out. I stitched up and then back down to the beginning and tied another knot with the beginning tail. Seam up the other short side.

PREPARE EDGE FOR CROCHET

steps5-7

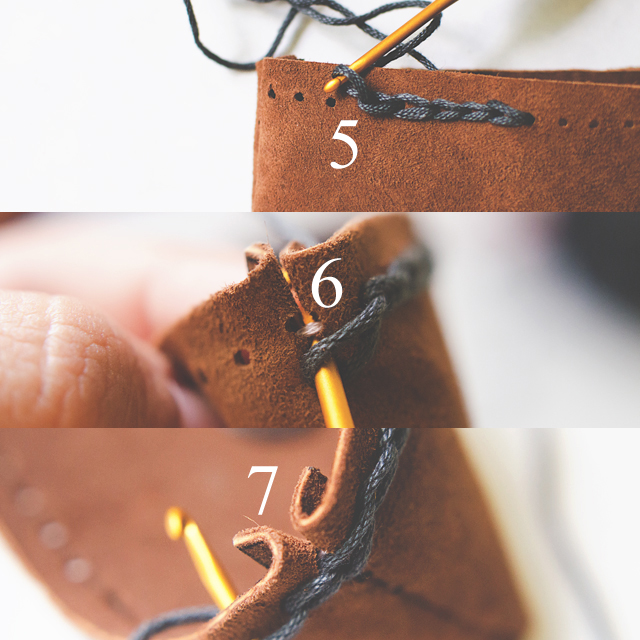
5. Using a 2.5mm hook (or smaller, if you’ve got it) and the yarn you plan to make the top out of (I used Sinfonia– a sport weight cotton), pull a loop through a hole along the long edge, leaving a 6″ tail. Slip-stitch around. Try to keep your stitches loose, so you don’t warp the fabric.
6. When you get to the first edge, make a slip stitch into the seam UNDER the first seam-stitch. Fold your seam flat as you work.
7. Keep going across to the other edge and do the same. When you get back to the very last hole, cut your yarn leaving about 6″ and pull it through. Using a yarn needle, make the last chain stitch through the first, then go back through the last hole again. Tie a knot with beginning tail.

Now your leather base is ready for stitches! Notice how the slip-stitches look like the tops of regular crochet stitches? Well, crochet into them!

I used a 3.5mm (US E-4) hook and my sport weight cotton to single crochet around. There were 44 slip-stitches, but my stitch count was 66 (*SC in first, 2 SC in next* around). I didn’t join at the end, instead I spiraled up for 35 rounds. For round 36, I slip-stitched around and then fastened off.

01

04

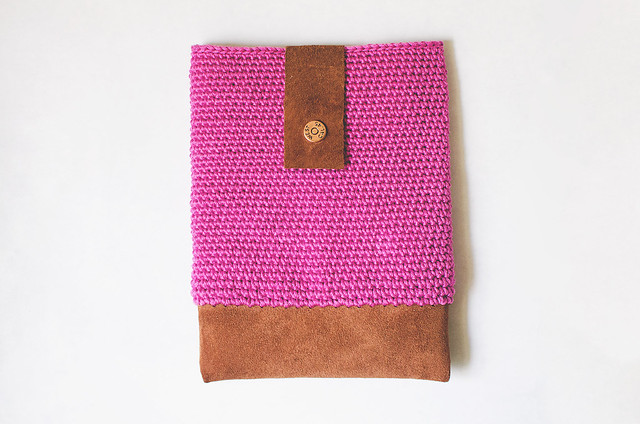
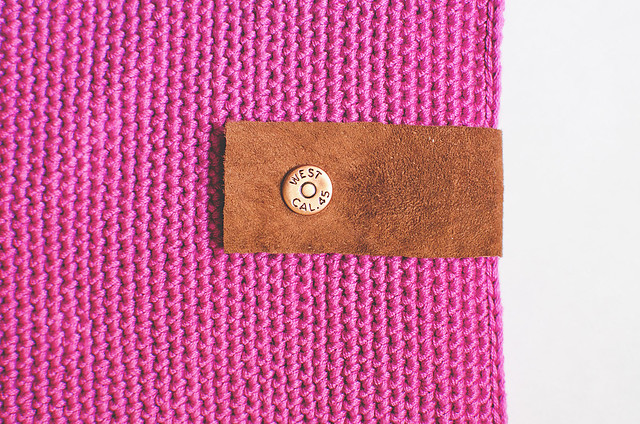
For the closure, I used a 4.75″ x 1.25″ piece of leather with a brass snap attached to the front. I was also thinking I could use a zipper instead. Maybe next time!

kindled

* I originally bought it to make notepads for myself and my kid who loves to doodle in my notebooks, but I used it a few times and put it away.

Pin It

Kindled

01

My boys determined I was hogging the tablet (an Android device we’ve had since Christmas), reading book after book checked out from the library, so they got me a Kindle! It’s not the fancypants Kindle Fire but it’s just what I needed.

I’m a big fan of just throwing things into my bag when I’m getting ready to go. I usually toss in my camera, wrapped in a Zing neoprene case, my wallet, a snack, and a notepad. The only thing that stays in my bag indefinitely are a plethora of pens, crayons, markers, and gum. THAT SAID, my Kindle needed some padding if it were going to be tossed in with all the rest.

I had this piece of leather hanging around and so I decided to incorporate it into my little cozy. I kind of love the result. I am using a 3.5mm (E!) hook and cotton for the crochet part. Let me just say it–ooooow! Tight stitches! I’m not sure how I’m going to finish it. I may add a zipper at the top but my crochet subconscious is thinking buckles. Like mini-satchel style. I guess we’ll see in a few days!

Have you ever crocheted (or knit!) on leather?

Pin It

Crochet: doily brooch

title

Cordi was always an after-thought pattern of Lace Love. It was more like a bonus. Since Mother’s Day is this weekend, I thought it would be a nice to time to share the pattern with everyone. They’re lovely little brooches that you can make to adorn gifts or cards.

There are two mistakes in the original pattern, but I’ve changed them, so this should be smooth sailing!

You need: approximately 8 yards of crochet thread (I use DMC Perle Cotton 8), 1.75mm crochet hook, and a needle to weave in your ends.

Finished size is approximately 2” in diameter. The piece should be about 0.75” after round 2.

Special Stitches:
Beg-POP (beginning popcorn): Ch 3, work 3 DC into the same stitch. Drop the loop from your hook and insert it from front to back into the top
of the beg Ch-3. Grab the dropped loop with your hook and pull it through the stitch to complete.

POP (popcorn): Work 4 DC into the same stitch. Drop the loop from your hook and insert it from front to back into the first DC of the group. Grab the dropped loop with your hook and pull it through the stitch to complete.

PATTERN (US terminology)
Ch 5, slst to first ch to make ring.

Round 1: Ch 1, 8 SC into ring, slst to first sc. (8 SC)

Round 2: Beg-POP into first SC, Ch 3, *POP into next st, Ch 3; Rep from * around. Slst into top of Beg-POP. (8 POP + 8 ch-3 sp)

Round 3: Ch 1, SC into first ch-3 sp, Ch 3, SC into same sp, *SC into next ch-3 sp, Ch 3, SC into same sp; rep from * around, slst into first SC.

Round 4: Slst into first ch-3 sp, ch 4, DC in same sp, [Ch 1, DC, in same sp] 3 times, *DC in next sp, [Ch 1, DC in same sp] 4 times; Repeat from * around, slst into third ch of beg ch-4.

Round 5: Ch 1, SC in first ch-1 sp, [Ch 3, SC in next ch-1 sp] 3 times, *SC in next ch-1 sp, [Ch 3, SC in next ch-1 sp] 3 times; Rep from * around, slst into first sc.

Fasten off. Weave in ends and attach pin in center back.

Enjoy!

birthday adornments

classic doily pins

special-mint

stack-backs

If you make any, be sure to add them to the Ravelry page!

If you can’t crochet, but would still like a doily brooch, see my shop!

Pin It

the Glory details

(see what I did there? :))

teal05

teal01

teal04

teal03

teal02

I got a custom request for a teal Glory. This is actually the same color I used for the Willow I made for my husband’s grandmother. She’s a crocheter so I knew she would appreciate the work it takes to make a doily. She loved it and I hope the person who receives this teal Glory loves this one just as well.

I have a few Glory blankets available in the shop, right now. If you would like to request a custom color, send me an email (lisa@goodknits.com) and I will do my darndest to find the perfect color for you. If you crochet and want to make your own, see the pattern details HERE.

Pin It