Bake it: thumbprint cookies

I’m here with my favorite, tried and true, thumbprint cookie recipe. Above is a dark chocolate ganache thumbprint cookie that totally hit the spot when I was craving some chocolatey cookie goodness. For Christmas, however, I usually make them with raspberry jam. There’s something especially delicious about raspberry and almond together.

Ingredients:
1 cup of butter (2 sticks, softened)
2/3 cup of sugar
1/2 teaspoon almond extract
2 cups of flour

filling of your choice (raspberry jam is good, as is chocolate ganache)

Pre-heat your oven to 350F and line a cookie sheet with parchment paper.

tpc-steps

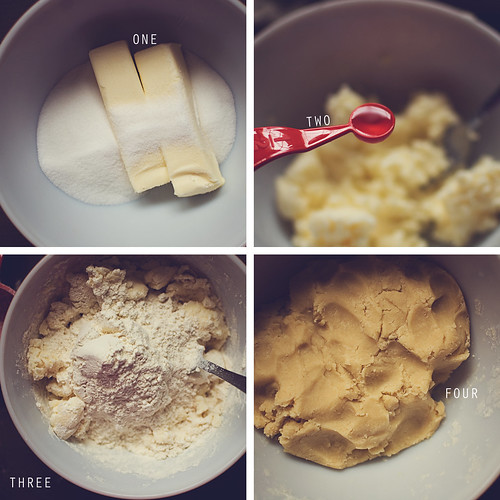
one: cream the butter & sugar together.
two: add in the almond extract.
three: add in the flour.
four: mix until it comes together into a dough.

thumbprintcookies

Use a cookie scoop for consistent cookie sizes. Drop a scoopful on your lined cookie sheet. Using your thumb, make a small indentation in the center for your filling. Fill with a small amount of jam or chocolate.

Bake for 15 minutes or until the edges turn a light golden brown. Let them cool on the cookie sheet for a minute, then transfer to a wire rack to cool completely.

Enjoy!

Bake it: Pan de Polvo (Mexican cookies!)

Good evening, lovelies! How are your Christmas preparations coming along? TEN DAYS LEFT! Ah! I can hardly believe it. We actually JUST got our tree up the other day and I’ve only wrapped one gift. We’ve been buying a lot online and so it comes to us in a box and…well, there hasn’t been a reason for us to wrap those, you know? I’ll eventually make them pretty, but right now my boys can’t see what they’re getting so it’s ok.

ANYWAY, I am here with a recipe! I’ll share a few with you over the next week or so. My aunt is hosting a cookie exchange this weekend, so I’m trying some recipes out. Three or so. I hope you enjoy this first one, as it took a while to get down.

Let me start at the beginning? Another aunt of mine always makes the best pan de polvo cookies. They’re a Mexican tradition around Christmas time and at weddings. I asked for the recipe and she struck me DOWN, guys. Apparently her’s is a secret. I don’t mess with that, so I moved on. I checked online and there are so many variations, I didn’t know how to narrow it down.

Fast forward to this past weekend and my GRANDPA shares this one he uses. He knew it by memory! I changed it only slightly to add in some extra spice, but yah…here it is! They pretty scrumptious.

NOTE: This recipe yield A LOT. Like, over 10 dozen in the size I made, more if you roll out your dough and make smaller cookies. You could halve it or even third it and still get a substantial amount. I made the whole thing, split my dough in thirds and refrigerated it for another day. We have a lot of Christmas parties to go to, so I’m SURE it will be used up. Sharing is caring.
pdp1

Ingredients
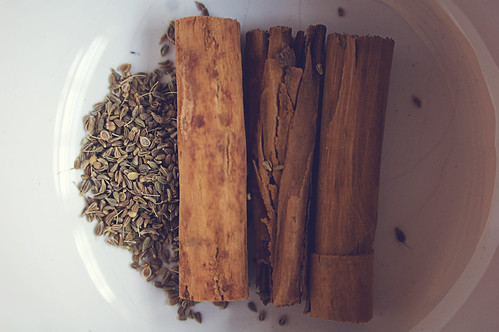
1 teaspoon anise seed
3 cinnamon sticks

3 cups of sugar, separated (2c + 1c)
3 lbs vegetable shortening
5 lbs all purpose flour
1 teaspoon ground cinnamon plus 1 tablespoon, separated
1 teaspoon salt

Pre-heat your oven to 375F.

Place the cinnamon sticks and anise into 1.5 cups of water in a small saucepan and bring to a boil. Reduce heat and simmer for 5 minutes. Remove from heat and strain. Set aside to cool.
pdp2

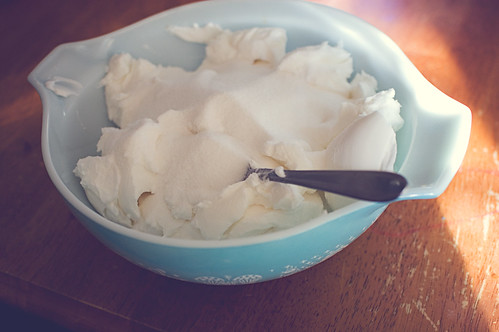
Combine 2 cups of sugar and the shortening. Mix well.


pdp3

In a separate bowl, mix flour, salt and cinnamon. Add the flour mixture to your sugar mixture 1-2 cups at a time. This makes A LOT of dough and you may need to put it into a bigger bowl. It will slightly resemble pie crust dough.

Slowly add in the cinnamon anise tea (up to 1 cup). Mix it very well, getting the tea to permeate the entire dough.

Divide the dough into 3 equal parts. You can wrap two and put them in the fridge for later, or the next day. I’m also told you can freeze it, but I haven’t tried.

pdp4

Form into balls, using a cookie scoop to measure the size.

pdp5

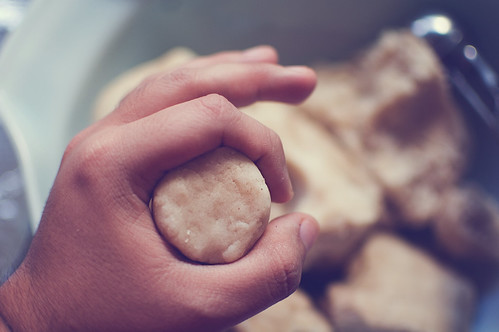
I like to roll it and press it into a disk about 1.5″ wide and half an inch thick.

pdp6

pdp7

Evenly space them on a cookie sheet (I could fit 15 on mine) and bake them for about 20 minutes or until they turn light brown on the edges. WATCH THEM!

pdp8

While the cookies are baking, make a cinnamon-sugar mixture. My ratio is 1.5 tablespoon of cinnamon for every cup. You can add more/less cinnamon if you like. It’s up to you!

pdp10

While the cookies are still warm, gently toss them in the sugar mixture.

pdp11

Place them on a rack to finish cooling. They taste best the next morning. It’s a crumbly delightful cookie. Great with a hot cup of coffee or perhaps some Mexican hot chocolate?

Enjoy!

Ingredients
1 teaspoon anise seed
3 cinnamon sticks

3 cups of sugar, separated (2c + 1c)
3 lbs vegetable shortening
5 lbs all purpose flour
1 teaspoon ground cinnamon plus 1 tablespoon, separated
1 teaspoon salt

Pre-heat your oven to 375F.

Directions
Place the cinnamon sticks and anise into 1.5 cups of water in a small saucepan and bring to a boil. Reduce heat and simmer for 5 minutes. Remove from heat and strain. Set aside to cool.

Combine 2 cups of sugar and the shortening. Mix well.
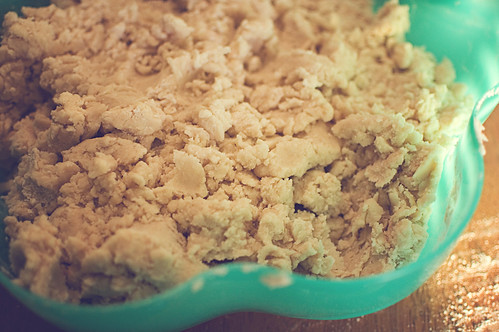
In a separate bowl, mix flour, salt and cinnamon.

Add the flour mixture to your sugar mixture 1-2 cups at a time. [This makes A LOT of dough and you may need to put it into a bigger bowl.] It will slightly resemble pie crust dough.

Slowly add in the cinnamon anise tea (up to 1 cup). Mix it very well, getting the tea to permeate the entire dough.

Divide the dough into 3 equal parts. You can wrap two and put them in the fridge for later, or the next day. I’m also told you can freeze it, but I haven’t tried.
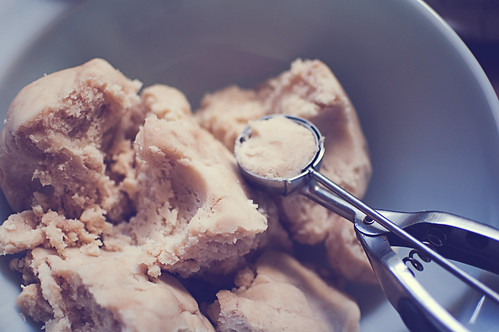
Form into balls, using a cookie scoop to measure the size. I like to roll it and press it into a disk about 1.5″ wide and half an inch thick.
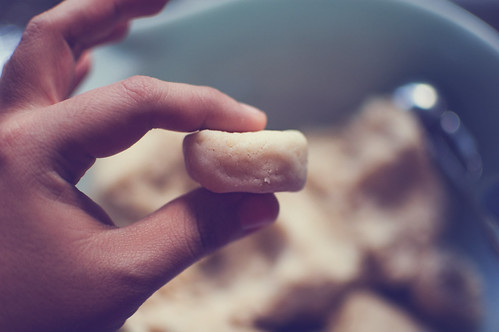
Evenly space them on a cookie sheet (I could fit 15 on mine) and bake them for about 20 minutes or until they turn light brown on the edges. WATCH THEM!
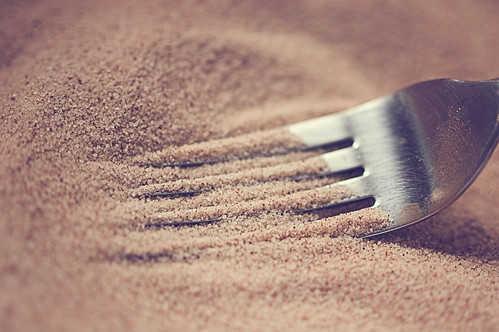
While the cookies are baking, make a cinnamon-sugar mixture. My ratio is 1.5 tablespoon of cinnamon for every cup. You can add more/less cinnamon if you like. It’s up to you! While the cookies are still warm, gently toss them in the sugar mixture.

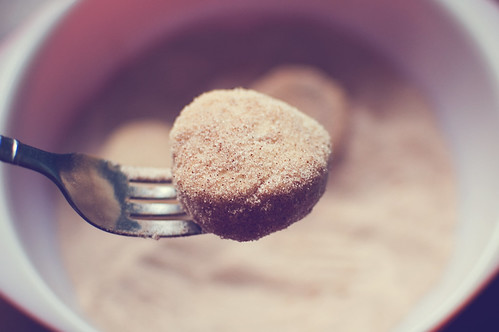
Place them on a rack to finish cooling.

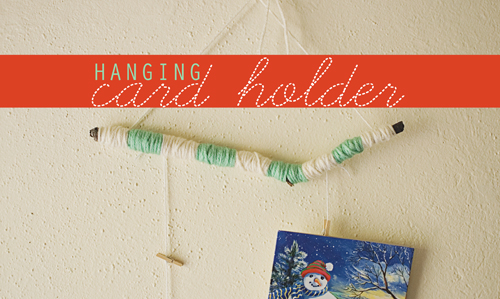
Make it: Hanging Card (& photo) Holder

00-title

Are you receiving Christmas cards yet? We got our first a few days ago and it’s been hanging out on my shelf since then. This morning, I decided it needed a new home. I wanted something small, but still cute. ALSO, I wanted something I could hang on to past Christmas. Perhaps something to hang my Instax photos from? Mmmhmmm!

00-mats

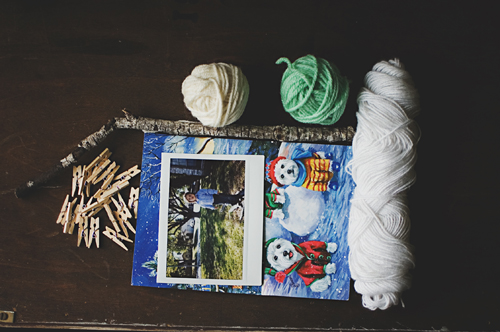
Supplies:
random thin tree branch (this one is about 11″ long)
yarn (I used regular worsted weight for stick-wrapping and some fine weight cotton for hanging)
tiny clothespins
cards! and/or photos!
other: scissors, pin or nail to hang the holder from

01

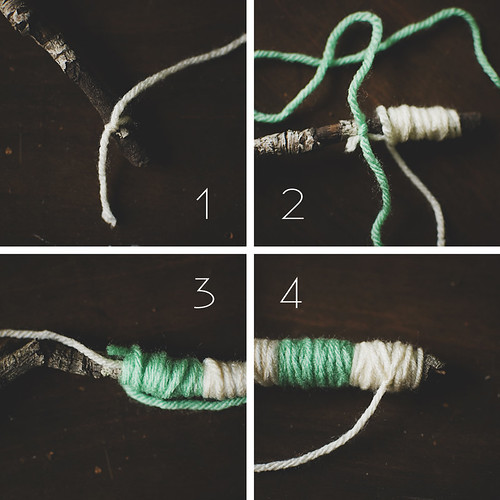
1. Tie a knot and start wrapping up your branch.
2. After about an inch or so, tie on your second color and start wrapping.
3. Wrap the second color around your branch AND the first color’s tail.
4. Keep wrapping, alternating colors (OR keep it solid OR add more colors). When you get to the end, cut off about 2 feet of your last color and tie a knot on the branch.

02

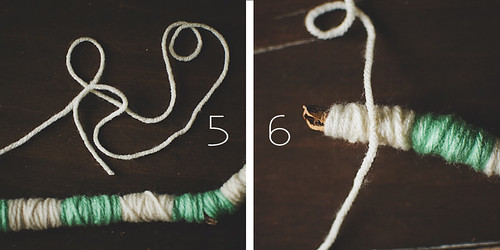
5. Your excess yarn should be able to reach across to the other side of the stick. 2 feet is what I used for my 11″ branch.
6. Tie your yarn around the other end of the branch. Trim any excess.

03

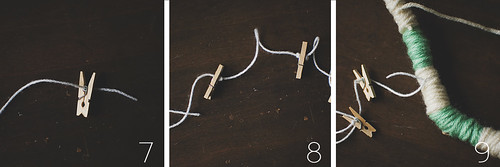
7. Grab your finer weight yarn and cut a piece about 18″ long. Tie a knot an inch from the end. Thread the yarn through the spring of your clothespin.
8. Tie another knot (large enough to not slip through the spring) and thread more pins. Leave about 4-5″ between each pin.
9. When you have about 4″ left, tie your string of pins around the branch.

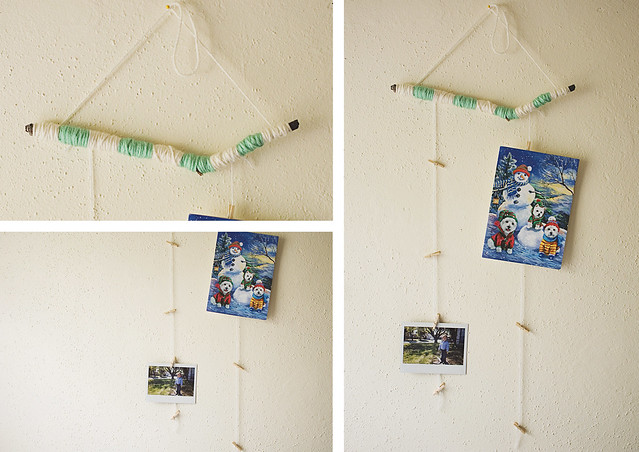
Make another string of clothespins and tie around your branch as well. Hang and enjoy!

col

Patch up your woollies!

patchingwool

Please tell me I am not the only one who has passed up wool sweaters, hats, etc. at the thrift store because of tiny little moth-eaten holes. I have done it on a few occasions and now I completely regret it. Last year, I found this big comfy grandpa-ish cardigan at one of my favorite thrift spots. It had the tiniest little hole, but it felt so warm I HAD to buy it. Fast forward to me bringing it out of the closet this year and finding at least 4 other tiny holes.

Booooo! After wearing it a few times and always fidgeting with the small hole near my wrist, I decided I needed to mend my poor sweater. the gauge was too small for me to actually darn any holes, so I found an alternative: FELT it! If you’ve never done any needle felting, don’t worry. This was my first time too! The supplies are very inexpensive (under $10 including shipping, inexpensive) and it’s SO quick!

supplies-

Supplies:
Felting needle [I purchased mine from hi-fiber kits for $1 a piece]
Small amount of wool roving [I also purchased some from hi-fiber kits and they sent me a little bonus in two diff colors! woo!]
Little piece of foam [THIS came with my needles! Perfect!]
your woolly sweater

Put the piece of foam under the hole and place your bit of wool over it. Stab it with the needle to felt it into place. Yes, STAB! Stab it with the needle to attach it. I was surprised at how gratifying this was. You can make those tiny patches into cute hearts following the steps below:

steps

1. Grab a sliver of wool and stab the center bit right under your hole. You only need to stab a tiny bit to attach it.
2. Shape half of the heart and stab it into place.
3. Shape the other half. Stab, stab, stab all over to secure it completely.

Done. Peel off your foam and wear your adorable patchy sweater with pride.

04

This patch was made by felting a rectangular piece and then shaping a heart over the top.

Have fun and relieve some stress by stabbing your holey sweaters. You could also grab a bigger piece of wool and felt some elbow patches on them! How cute would heart elbow patches be?

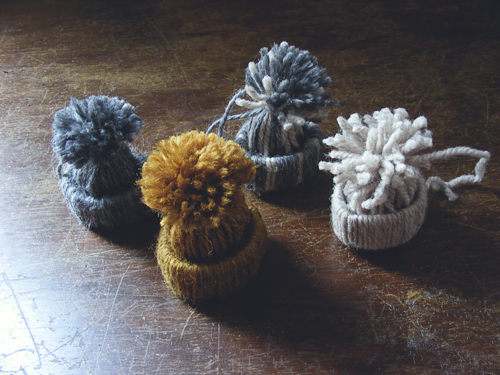
Make it: Winter Hat Ornaments

Another November sponsor is here with a SUPER adorable DIY! My son is on Thanksgiving break and I think we’ll be making a few of these this week!
——————————

Hello, Goodknits readers!

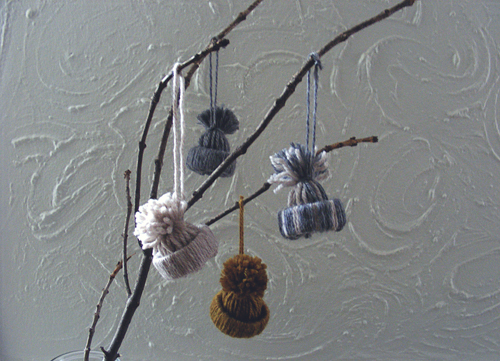
I’m Kate from, Otillie’s Closet and I’m thrilled to be posting on one of my favorite knitting blogs. Lisa is such an inspiration by balancing an active knitting and crochet life all while keeping track of her two adorable boys. Because of that, I thought her readers (you!) might enjoy a fun holiday DIY that involves yarn and is kid-friendly. I remember making these as a kid and in fact I still have a few hidden away in a box that I put on my tree every year. These simple Winter Hat Ornaments are perfect to make while digesting your Thanksgiving turkey.


You might have even made these as a kid as well! In case you don’t quite remember this tutorial is for you! Let’s get started by gathering a few supplies…


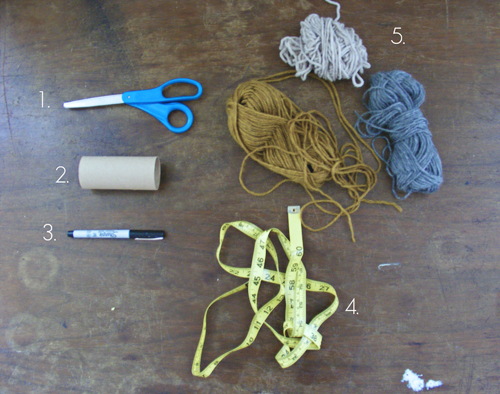
1. Scissors
2. Toilet paper or paper towel tube
3. Sharpie
4. Measuring tape or ruler
5. Scraps of yarn! Grab any size and any colors you have in your stash.


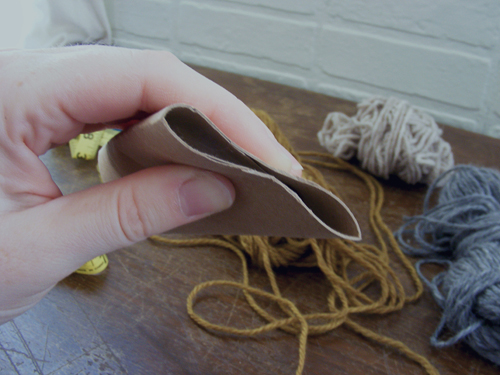
Flatten your paper tube. Don’t worry about bending it.


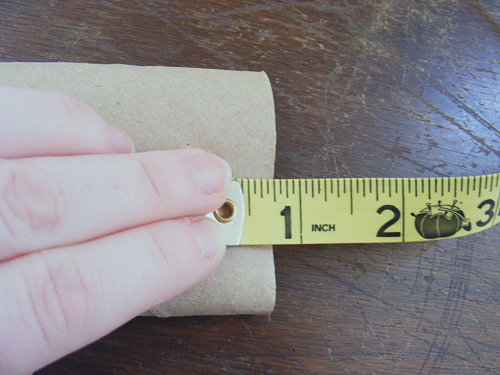
Measure sections that are 3/4 of an inch wide. Use your sharpie to mark and then cut.


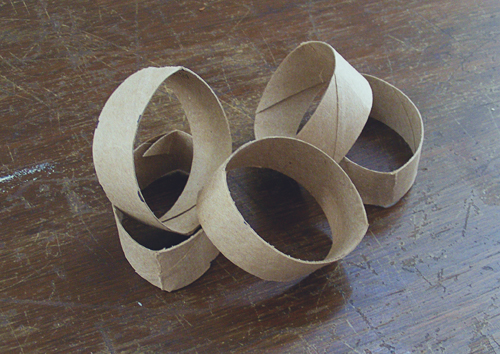
With a regular toilet paper tube I got five rings.


Cut yarn strands roughly 14 inches long. Don’t worry about being too exact! Fold each piece in half and cut as many as you possibly can.


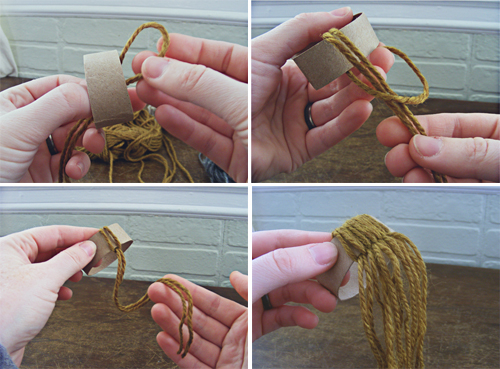
Slip the loop from one strand of yarn through a paper tube. Loop it around the two ends and pull tight.


Keep going all the way around the tube. Make sure you have enough strands to cover the paper but don’t squash the yarn too closely together.


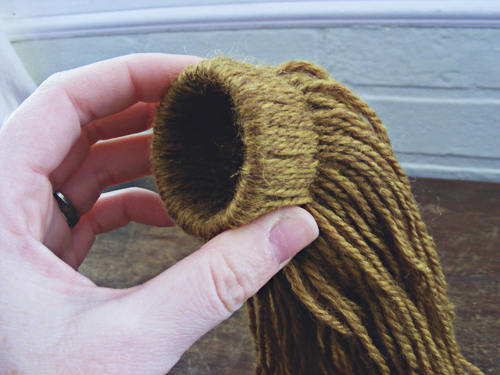
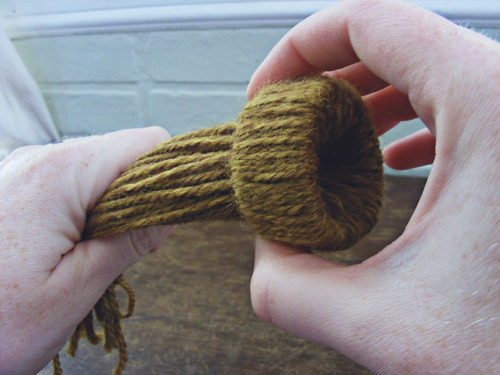
Now squish all those strands through the tube….you’ve just formed the brim of the hat!


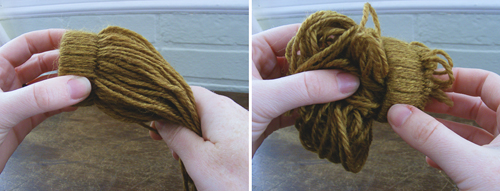
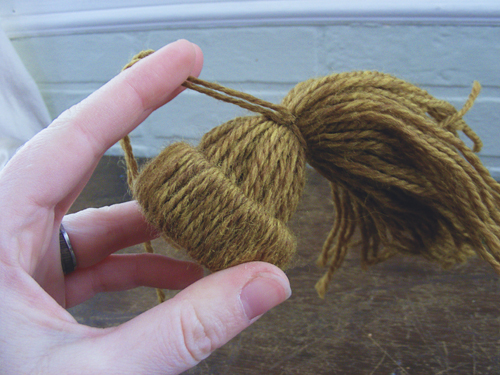
Using one of your spare strands of yarn tie a double knot about an inch from the brim. I also used this strand to tie a little loop which I will use to hang the ornaments.


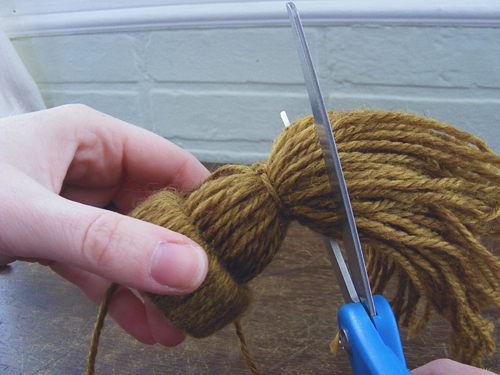
Trim the loose strands to form a puffball. Make it as fluffy or as short as you want!


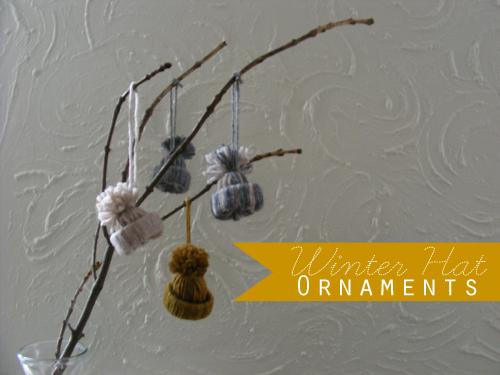
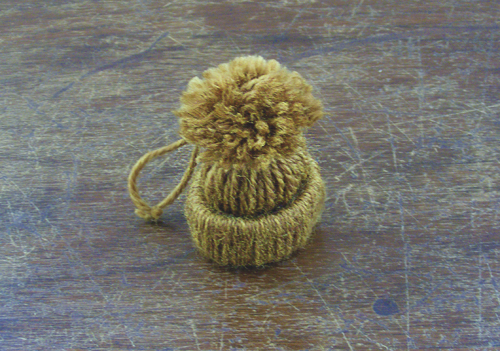
And there you have it! Pretty cute, right? It’s pretty fun to get creative with different colors and fibers. I used two worsted weight yarns and one bulky. Little fingers might have more success with bulky yarn.


I hope you have fun with these little guys…they are kind of addicting to make! Thanks to Lisa for letting me do this post – it made me feel like a kid again. If you make any of your own stop on by my blog and let me know!
——————————

Aren’t these the cutest??! I want to grab my whole jar of scraps and start making a bunch. I may have to pass this DIY on to my kiddo’s teach for them to make before Christmas vacation. Go visit Kate’s blog and tell her how awesome she is!

Pin It