By Lisa Gutierrez on 11/30/2012 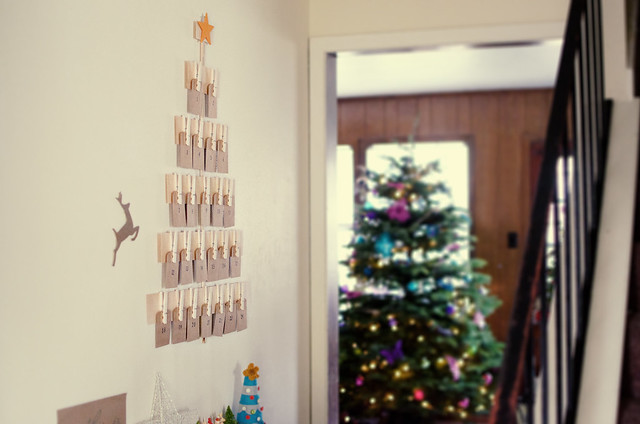
Or advent calendar. Whatever you want to call it, it’s hanging on my foyer wall.
I spent the past week browsing Pinterest and just becoming so overwhelmed with advent calendar ideas. I kept complaining, “we neeeeed a calendar. we neeeeed a countdown. blah, blah, blaaaaaaah.” Finally, yesterday, I stopped complaining and went to Hobby Lobby for supplies. While taking Andrew to the bathroom (OF COURSE), I noticed the shelf with wood sheets and my mind flashed to the few scrap wood trees I’d seen in my Pinterest perusing. Bingo!
I loved the look of the scrap trees, but I wanted something really quick and easy. You can see the exact materials I used, below:

I stamped the numbers using a set my MIL gave me a few years ago. Everything is hot glued together and it hangs with a small piece of yarn. I’m going to fill the tiny envelopes with activity prompts and/or chocolates (I’m thinking Andes!) for both boys. I’m glad I got it done on time. They are super excited for tomorrow! I’m just a little terrified that 2012 is already so close to being over. How’d it go by so quickly?!
Pin It
By Lisa Gutierrez on 11/01/2012 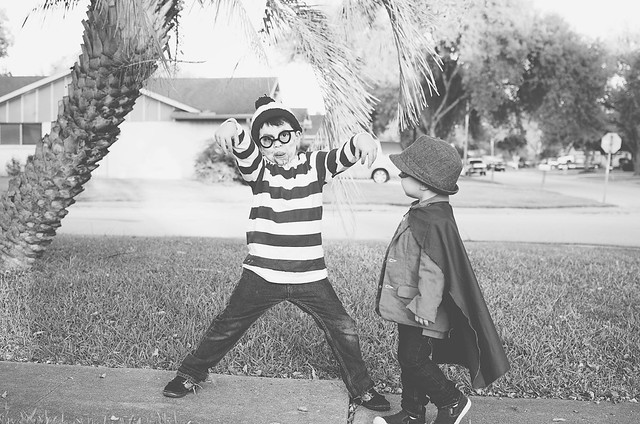
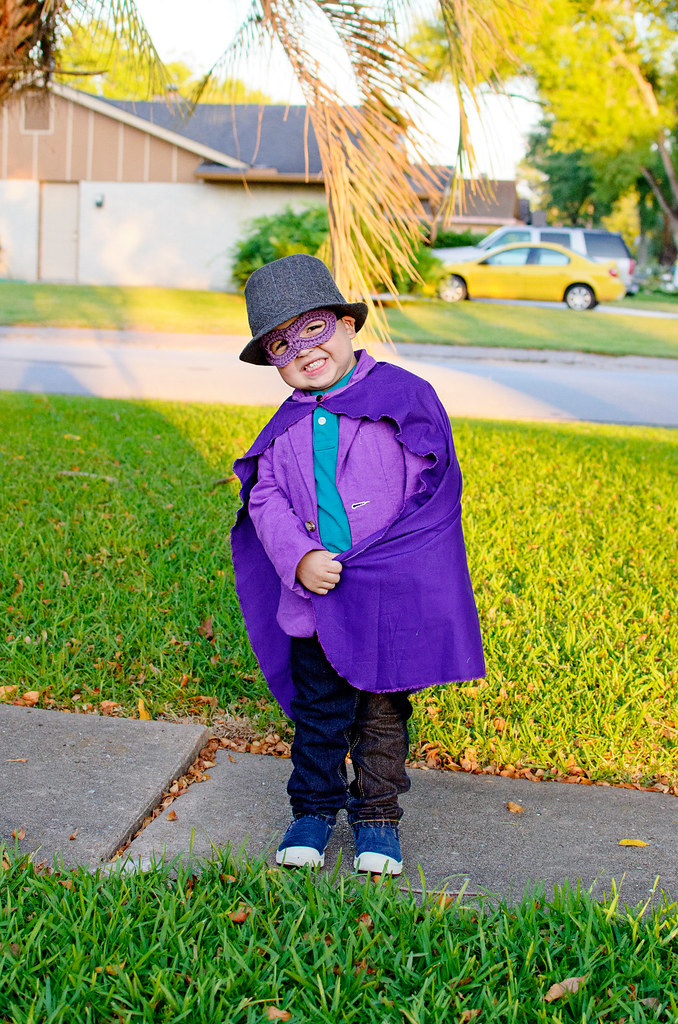
The book character parade was all sorts of adorable. My kids looked like THIS before school. My heart went all mushy for my baby in overalls. I wish he could wear them all the time. For trick or treating, Waldo turned into some sort of zombie thing and the little mouse transformed into Darkwing Andrew. I didn’t get around to finding a duck bill, so we sort of nixed the duck part. He still looked pretty darn cute.

[You can see past Halloween photos HERE]
While they went trick or treating, I sat around and handed out candy. I got only a handful of trick or treaters before 7:30. The big groups started coming after 8, which is when I went in to get the boys ready for bed. Jason handed out the rest of the bucket and that was that.
Helloooo, November.
By Lisa Gutierrez on 10/23/2012
By Lisa Gutierrez on 10/11/2012 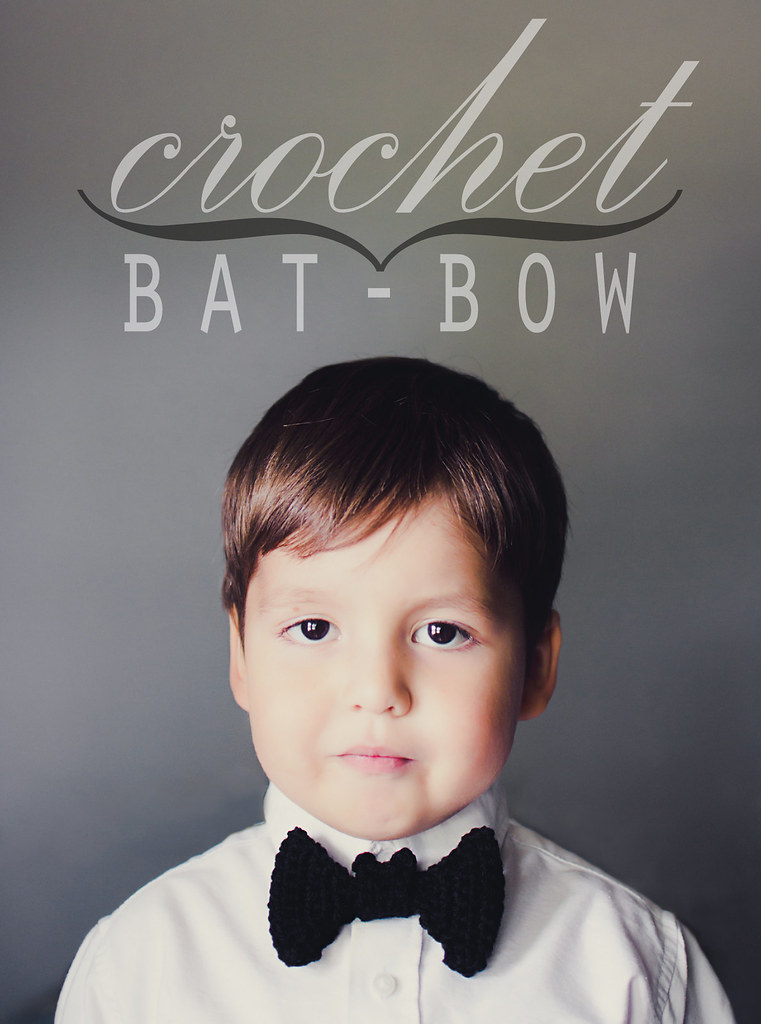
Pretty self-explanatory. A bow that looks like a bat. I’m sure you have seen some variation of it around the web, but here’s my take! It’s really simple to crochet and I’ve provided a few photos for assembly. I really just wanted to make this post to share photos of my adorable son. He looks like he’s about to take my order.

Using some worsted weight acrylic and a 5mm (H) hook, start crocheting!
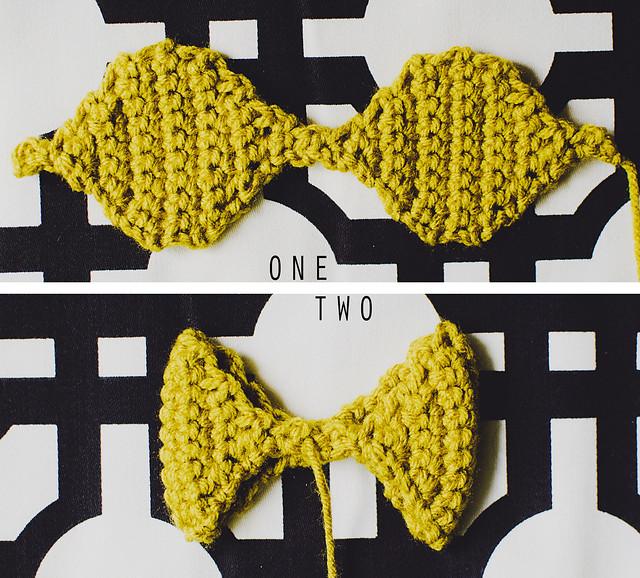
One: Make the wings.
Row 1: Ch 2, SC in second ch from hook, Ch 1, turn.
Row 2: SC in st, Ch 1, turn.
Row 3: 2 SC in st, Ch 1, turn. (2 sts)
Row 4: 2 SC in each st, Ch 1, turn. (4 sts)
Row 5: 2 SC in first st, SC in next 2 sts, 2 SC in last st, Ch 1, turn. (6 sts)
Row 6: 2 SC in first st, SC in next 4 sts, 2 SC in last st, Ch 1, turn. (8 sts)
Row 7: 2 SC in first st, SC in next 6 sts, 2 SC in last st, Ch 1, turn. (10 sts)
Rows 8-10: SC across, Ch 1, turn. (10)
Row 11: SC2tog, SC in next 6 sts, SC2tog, Ch 1, turn. (8 sts)
Row 12: SC2tog, SC in next 4 sts, SC2tog, Ch 1, turn. (6 sts)
Row 13: SC2tog, SC in next 2 sts, SC2tog, Ch 1, turn. (4 sts)
Row 14: SC2tog twice, Ch 1, turn. (2 sts)
Row 15: SC across, Ch 1, turn. (2)
Row 16: SC2tog, Ch 1, turn. (1 st)
Rows 17-18: SC, Ch 1, turn. (1)
Row 19: 2 SC in st, Ch 1, turn. (2 sts)
Row 20: SC across, Ch 1, turn. (2)
Rows 21-31: Repeat Rows 4-14.
Row 32: SC2tog, Ch 1, turn. (1 st)
Row 33: SC. Finish off, leaving about 8″ tail.
Two:
Weave in one end and with the second (the 8″ tail), stitch the beginning and end together. Lay the wings flat with the seam sitting in the middle. You can also make a few stitches in the center to keep it together. Weave in that end.
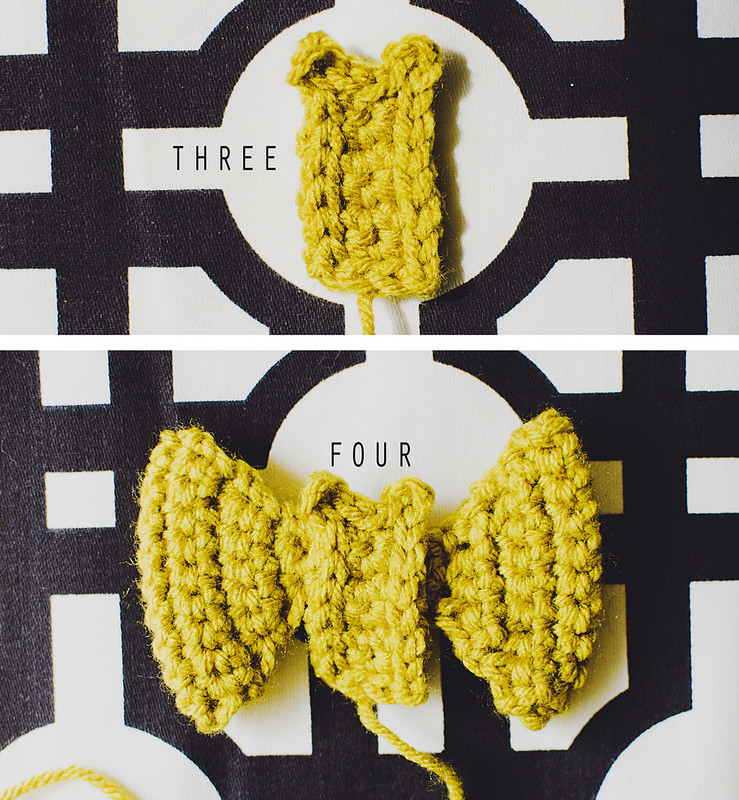
Three: Make the bat body.
Row 1: Ch 4, SC in 2nd chain from hook, SC in next 2 ch, Ch 1, turn. (3 sts)
Row 2-6: SC in each st, Ch 1, turn.
On Row 6, do not ch 1 & turn. Instead, slst down along the edge of the rectangle (6 slst along the side). When you get to the next corner, Ch 3, then slst back into the same st, slst in next 2 sts (you should be at the next corner), Ch 3, slst back into same st, then slst back down the other long rectangle edge, slst across last short edge. Finish off, leaving about 10″ tail.
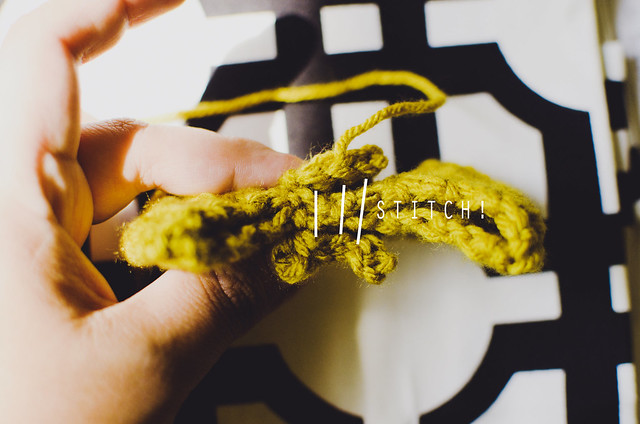
Four: Attach body to wings.
Weave in your beginning tail, then position the head/body over the center of the wings. Using your 10″ tail, whip-stitch the beginning chain and the last row together over the wings. It’ll be a snug fit, but you should still be able to rotate the body around, as you won’t be sewing into the wings.
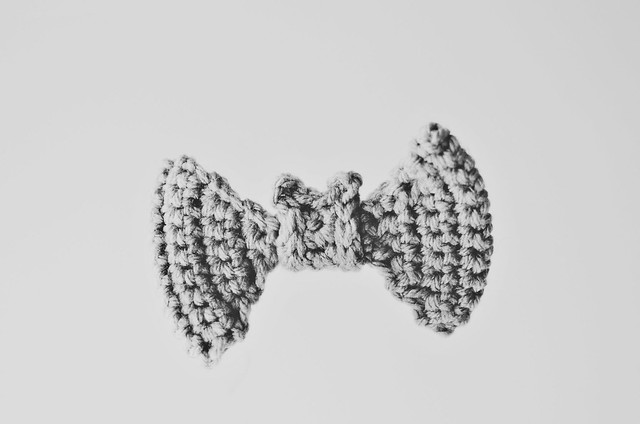
There are a few ways to use your little bat bow. In the photos of my son, I just have it pinned right next to his button with a safety pin. You could glue it to a headband or even thread some elastic through the back. Whatever you’d like!


I hope you have some time to make a bunch of little bows! I think it would look really adorable as part of a vampire costume!

Click here for a text only version of this pattern!
Pin It
By Lisa Gutierrez on 10/08/2012 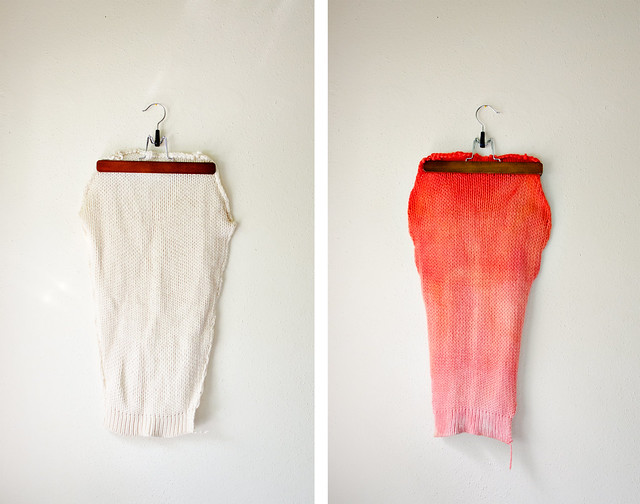
Last month, I got the urge to dye yarn. I didn’t have any bare skeins hanging around, but I did remember I had pieces of a white wool sweater in my closet. Waaay back in 2010, I thrifted a large white wool sweater. It had the perfect seams to unraveling, so I took it apart almost immediately. …Then we bought a house and moved. It got trapped in a box of random crafty shit and I just forgot about it for a year. Last year, I dyed one of the sleeves and then last month I finally dyed the other.
I like sleeve dyeing because it makes me feel like I have more control over where the dye goes. Last year, I used these directions from craftystylish, but this time I wanted to try something different.
I wanted a gradient/ombre look, so I thought about how people get that with shirts by putting small parts of the fabric in at a time. Would it work? YES! I probably made it a little more difficult than it needed to be, but I was working with what I had–2 packs of pineapple Kool-Aid and 1 pack of cherry.
I started by putting my sleeve in a bowl of water with a splash of vinegar. I made sure it was completely saturated, then I put it in the microwave for a minute to temper it. While it was heating up, I mixed the 2 packs of pineapple with 1 cup of vinegar and 1 cup of water and put it in a pot to heat up. I pulled my bowl out of the microwave and lifted the sleeve out (over the bowl, because it was dripping), gently squeezing a bit of the excess water out. I was able to handle it with my bare hands, but use caution if it feels too hot to you.
I started by dipping about 6-8 inches, counting to ten and dipping another 6 inches. I could see a lot of the dye getting absorbed pretty quickly and by the time I got to the last bit, there was hardly any yellow coming off my liquid. I quickly mixed the pack of cherry and 2 cups of water and then lifted my sleeve over the pot, mixed in the cherry and started dipping again. by the time I got to the top, the water was pink. Yay!
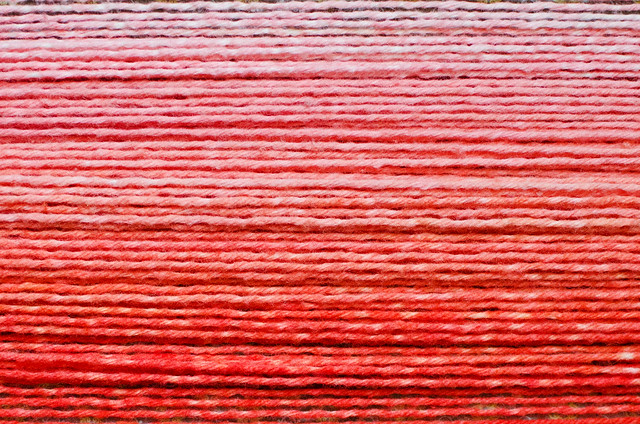
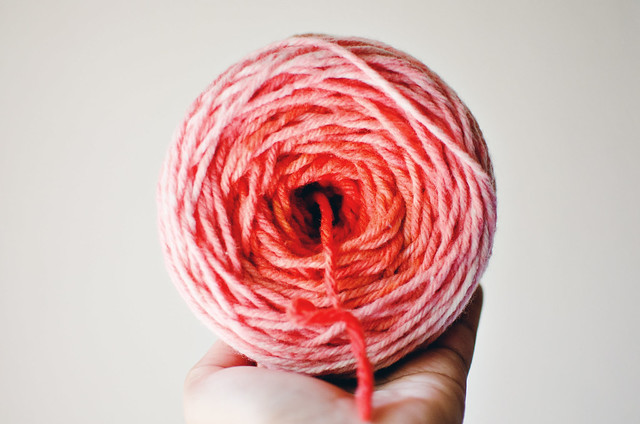
I let it sit in the warming water for a few quick minutes (no boiling!) and then I rinsed it with hot water, slowly getting the temperature down. When I could handle it, I put a dash of baby shampoo in to get any excess dye out. After it was done, I rolled it up in a towel and squeezed out most of the water, then let it hang in front of a fan for a few hours. Once dry, I went about the arduous task of unraveling and getting this yarn into a skein, which entailed ANOTHER bath (once unraveled). It was all worth it, as it looked so pretty wound into a ball.

I had various shades of coral and pink throughout. I was afraid the mix would be too orange, but it came out so lovely!
It took another week or two for me to finally knit something out of it, but here it is! A basic knit hat. The yarn was pretty chunky, so I was able to make a 60-st hat in a day.

It was big enough for me to tuck my hair into.
Do you like to dye your own yarn? Have you ever tried dyeing a sweater sleeve then re-purposing the yarn into something else? I’ve dyed with Kool-Aid before, but this is the first time I’ve actually tried to get the colors to look a certain way.
Pin It
|
Disclosure You may find affiliate links and banners throughout my blog. I earn a small commission from purchases made through these links. It helps pay for keeping this blog running! All reviews and products are items I have personally used and loved. |


